- Add and delete slides Video
- Apply or change a slide layout Video
- Apply Themes to presentations Video
- Get design ideas for slides Video
- Change slide masters Video
- Change the page orientation Video
- Add a watermark to your slides Video
- Organize slides into sections Video
- Add a logo to your slides Video


Change the page orientation

Change the page orientation in your PowerPoint presentation to landscape or portrait layout.
Select Design .
Select Slide Size > Custom Slide Size .
Select Portrait > OK .
In the next dialog box, you can:
Select Maximize to take full advantage of the space available.
Select Ensure Fit to make sure your content fits on the vertical page.
Change the page orientation in PowerPoint between landscape and portrait

Need more help?
Want more options.
Explore subscription benefits, browse training courses, learn how to secure your device, and more.

Microsoft 365 subscription benefits

Microsoft 365 training

Microsoft security

Accessibility center
Communities help you ask and answer questions, give feedback, and hear from experts with rich knowledge.

Ask the Microsoft Community

Microsoft Tech Community

Windows Insiders
Microsoft 365 Insiders
Was this information helpful?
Thank you for your feedback.
- I Tried Both: Apple Watch 9 vs Fitbit Charge 6
- Best Places to Print Photos Online
How to Change PowerPoint Slide Orientation
Change orientation first so elements don't drop off the slide
- Brock University
:max_bytes(150000):strip_icc():format(webp)/image-5e6611aebe974bb7886a24b5070c834f.jpg "how to make slides presentation vertical")
What To Know
- In Windows: In Normal view, press Design > Slide Size > Custom Slide Size . Under Orientation , select Vertical, and set the Height and Width .
- On the web: Design > Slide Size > Custom Slide Size > Portrait > OK . Then choose how slides fit the screen.
- On a Mac: File > Page Setup . Select Portrait , adjust the size as needed, and press OK .
This article explains how to change the orientation of PowerPoint slides between portrait and landscape. Instructions in this article apply to PowerPoint for Microsoft 365, PowerPoint 2019, PowerPoint 2016, PowerPoint 2013, PowerPoint 2010, PowerPoint 2007, PowerPoint for Mac, and PowerPoint Online.
Change Slide Orientation in PowerPoint for Windows
The steps used to change the page orientation between landscape and portrait are the same in all versions of PowerPoint 2013 for Windows and newer.
In the Normal view, click the Design tab.
Select Slide Size .
Select Custom Slide Size .
Use the buttons in the Orientation section to select a vertical orientation or enter dimensions in the Width and Height fields.
Select OK to apply the changes.
Change Slide Orientation in PowerPoint 2010 and 2007 for Windows
Follow these steps to change from landscape to portrait slide orientation in older versions of PowerPoint for Windows.
Select the Design tab, and in the Page Setup group, click Slide Orientation .
Choose Portrait .
Press OK to save your changes.
Change Slide Orientation in PowerPoint for Mac
To change the page orientation from landscape to portrait in PowerPoint for Mac 2011.
Select the File menu and choose Page Setup .
In the Page Setup dialog box, across from Slides , select the Portrait orientation. As an alternative, select custom dimensions in the Size section, making the height greater than the width.
Choose OK to apply the changes.
Change Slide Orientation in PowerPoint Online
For a long time, PowerPoint Online didn't offer a portrait orientation slide, but that has changed.
Select the Design tab.
Select Slide Size , then choose Custom Slide Size .
Select the Portrait orientation image.
You have the choice to either choose Maximize , which maximizes the use of the available slide space, or click Ensure fit , which makes sure that the slide content fits on the vertical portrait orientation.
Landscape and Portrait Slides in the Same Presentation
There is no simple way to combine landscape slides and portrait slides in the same presentation. If you've worked with slide presentations, you know that this is a basic feature. Without it, some slides won't present the material effectively, such as with a lengthy vertical list, for example. There is a workaround if you must have this capability.
Get the Latest Tech News Delivered Every Day
- How to Make a Poster in PowerPoint
- How to Add Page Numbers in PowerPoint
- How to Use Portrait and Landscape Slides in the Same Presentation
- How to Make a Word Cloud in PowerPoint
- How to Avoid Picture Distortion on Portrait Slides in Powerpoint
- How to Print PowerPoint Slides
- How to Make Google Slides Portrait
- Add, Delete or Change the Order of PowerPoint Slides
- Show Your PowerPoint Presentation in Widescreen Format
- Add Hyperlinks to PowerPoint Presentations
- The 10 Most Common PowerPoint Terms
- Slide Layouts in PowerPoint
- Dim Text in PowerPoint Presentations
- Loop a PowerPoint Slide Show
- How to Use Speaker Notes in PowerPoint
- Create Pictures From PowerPoint Slides
How to Make a Slide Vertical in PowerPoint

PowerPoint is a powerful tool that can help you create engaging presentations for various purposes. However, if you’re looking to make your presentation unique and interesting, you might want to make your slides vertical instead of the traditional horizontal layout. In this article, we’ll explore why you might want to use vertical slides, the basics of slide orientation, and a step-by-step guide on how to make a vertical slide in PowerPoint.
Table of Contents
Why You Might Want to Make a Vertical Slide in PowerPoint
Vertical slides offer a fresh perspective for your presentation by breaking the monotony of the traditional horizontal layout. It can also help you make a big impact by using the height of the screen to display important information.
In some cases, vertical slides may be more suitable for certain types of presentations, such as the ones that involve displaying content in a vertical format, such as high skyscrapers or trees. It can also be perfect for showcasing timelines or processes that have a vertical structure, such as the growth of a plant or the stages of a waterfall.
Understanding the Basics of Slide Orientation in PowerPoint
Slide orientation refers to the position of your content on the slide. By default, PowerPoint slides are horizontal, meaning they are wider than they are tall. However, you can change the orientation of your slides to either vertical or horizontal.
The orientation of your slides can affect the way your content is presented and perceived by your audience. Horizontal slides tend to be more common and traditional, while vertical slides are more unique and engaging.
It’s important to consider the type of content you will be presenting when choosing the orientation of your slides. For example, if you have a lot of text or data to present, a horizontal orientation may be more suitable as it allows for more space to display the information. On the other hand, if you have a lot of visual content such as images or videos, a vertical orientation may be more effective in showcasing your content in a more dynamic and engaging way.
Step-by-Step Guide to Making a Slide Vertical in PowerPoint
Creating a vertical slide in PowerPoint can be quite easy if you know the steps. Here’s a simple guide on how to do it:
- Open your PowerPoint presentation and select the slide you want to make vertical.
- Click on the “Design” tab on the top menu bar.
- Click on the “Slide Size” dropdown menu.
- Select “Custom Slide Size” from the list.
- In the “Slide Size” dialog box that appears, change the orientation from “landscape” to “portrait.”
- Click “OK” to apply the changes.
- Your slide is now vertical! You can add content as you normally would, and it will appear vertically on your slide.
It’s important to note that when you change the orientation of a slide from landscape to portrait, the dimensions of the slide will also change. This means that you may need to adjust the size and placement of any images or text boxes on the slide to ensure they fit properly. Additionally, keep in mind that a vertical slide may not be suitable for all types of presentations, so consider your audience and the content of your presentation before making this change.
Tips and Tricks for Designing Effective Vertical Slides in PowerPoint
Designing effective vertical slides requires thoughtful planning and execution. Here are some tips and tricks you can use to make your vertical slides stand out:
- Use larger fonts and bolder colors to help your content stand out on a taller screen.
- Use images and graphics that fit the vertical layout and provide context to your content.
- Consider using animations and transitions to make your content more engaging.
- Keep your content concise and to the point, but don’t be afraid to use more than one slide if needed.
Another important aspect to consider when designing vertical slides is the use of white space. Vertical slides tend to have more empty space on the sides, which can be used to create a clean and uncluttered design. Use white space strategically to draw attention to important elements and create a sense of balance on the slide. Additionally, make sure to test your vertical slides on different screen sizes and resolutions to ensure that your design looks good on all devices.
Creating Customized Templates for Vertical Slides in PowerPoint
If you plan on using vertical slides frequently in your presentations, it’s a good idea to create a customized template that you can use to save time. Here’s how you can create your own customized templates:
- Open a new PowerPoint presentation.
- Select the “Design” tab, then click on “Slide Size.”
- Select “Custom Slide Size” and set the dimensions for a vertical slide.
- Add any design elements or placeholders you want to include in your template.
- Select “File” and then “Save As.”
- Select “PowerPoint Template” from the dropdown menu.
- Name and save your template.
Using a customized template for vertical slides not only saves time, but it also ensures consistency in your presentations. By having a set design and layout, your audience can focus on the content of your presentation rather than being distracted by inconsistent slide designs. Additionally, having a customized template can help to establish your brand identity and make your presentations more professional.
How to Add Animations and Transitions to Vertical Slides in PowerPoint
Animations and transitions can add a lot of visual interest to your vertical slides and help keep your audience engaged. Here’s how you can add animations and transitions:
- Select the object you want to animate or transition.
- Click on the “Animations” tab and select the animation or transition you want to use.
- Select “Effect Options” to customize the animation or transition.
- Preview the animation or transition to ensure it looks the way you want it to.
- Continue adding animations and transitions as needed.
It’s important to use animations and transitions sparingly, as too many can be distracting and take away from the content of your presentation. Choose animations and transitions that enhance your message and help to emphasize key points. Additionally, be sure to practice your presentation with the animations and transitions to ensure that they flow smoothly and don’t cause any technical issues.
Using Images and Graphics on Vertical Slides in PowerPoint
Images and graphics can help enhance your vertical slides and make them more appealing to your audience. Here are some tips for using images and graphics:
- Use high-quality images and graphics that fit the vertical format.
- Consider using infographics or timelines to display information vertically.
- Try to balance visuals and text to create a visually appealing slide.
Another important consideration when using images and graphics on vertical slides is to ensure that they are relevant to the content being presented. Avoid using images or graphics that are distracting or do not add value to the message you are trying to convey. Additionally, make sure that any text or labels on the images are clear and easy to read, especially if they are being viewed from a distance. By following these tips, you can effectively use images and graphics to enhance your vertical slides and engage your audience.
Best Practices for Presenting Vertical Slides in PowerPoint
Presenting vertical slides requires a different approach than horizontal slides. Here are some best practices for presenting vertical slides:
- Ensure that your audience can see the slide clearly and that the text is visible.
- Use a pointer or highlighter to draw attention to specific areas of your slide.
- Practice your timing and transitions to ensure a smooth presentation.
- Be mindful of the pace of your presentation to avoid overwhelming your audience.
Another important aspect to consider when presenting vertical slides is the use of images. Vertical slides provide a great opportunity to showcase tall images that may not fit well on horizontal slides. However, it is important to ensure that the images are high quality and relevant to the content being presented.
Additionally, it is important to keep in mind that vertical slides may not be suitable for all types of presentations. For example, if you are presenting data or charts, horizontal slides may be more appropriate as they allow for a wider view of the information. It is important to choose the slide orientation that best suits the content being presented.
Troubleshooting Common Issues When Making Vertical Slides in PowerPoint
While making vertical slides in PowerPoint can be straightforward, there may be some issues that arise. Here are some common issues you may encounter and how to troubleshoot them:
- Text or images may appear stretched or distorted. To fix this, adjust the size and position of your content to fit the vertical space.
- Animations and transitions may not appear as intended. Make sure to preview them before your presentation to ensure they work correctly.
- Some PowerPoint features may not be available or may not work seamlessly with vertical slides. Be prepared to adapt your content or use alternatives if needed.
Alternatives to Making a Vertical Slide in PowerPoint
While vertical slides can be useful in certain situations, they may not be suitable for every presentation. Here are some alternatives to consider:
- Using horizontal slides with a widescreen aspect ratio.
- Using an interactive whiteboard or touchscreen display to showcase your content.
- Creating a video or animation that simulates a vertical view.
Examples of Effective Vertical Slides for Inspiration
Here are some examples of effective vertical slides that you can use for inspiration:

How to Convert Horizontal Slides into Vertical Ones in PowerPoint
If you already have a horizontal slide that you want to convert into a vertical one, you can do so easily in PowerPoint:
- Select the slide you want to convert.
- Click on the “Design” tab and select “Slide Size.”
- Select “Custom Slide Size” and change the orientation from “landscape” to “portrait.”
- Click “OK” to apply the changes, and your horizontal slide will now be vertical.
Collaboration and Sharing Features for Vertical Slides in PowerPoint
PowerPoint offers a variety of collaboration and sharing features that allow you to work with others on your vertical slides. Here are some of the key features to know:
- Co-authoring: Allows multiple users to work on the same slide or presentation simultaneously.
- Sharing: Lets you share your presentation with others, either through a link or an email invitation.
- Version history: Keeps track of changes made to your presentation, allowing you to revert to earlier versions if needed.
- OneDrive integration: Enables you to access your presentation from any device with an internet connection.
Integrating Multimedia Content into Your Vertical Slides with PowerPoint
Adding multimedia content can make your vertical slides more engaging and interactive. Here are some tips for integrating multimedia into your presentation:
- Use video or audio clips that fit your presentation’s theme and message.
- Consider using interactive elements like quizzes or polls to engage your audience.
- Use animations and transitions to tie in your multimedia content seamlessly with your vertical slides.
By following these tips and tricks, you can create engaging and effective vertical slides for your next PowerPoint presentation.
By humans, for humans - Best rated articles:
Excel report templates: build better reports faster, top 9 power bi dashboard examples, excel waterfall charts: how to create one that doesn't suck, beyond ai - discover our handpicked bi resources.
Explore Zebra BI's expert-selected resources combining technology and insight for practical, in-depth BI strategies.

We’ve been experimenting with AI-generated content, and sometimes it gets carried away. Give us a feedback and help us learn and improve! 🤍
Note: This is an experimental AI-generated article. Your help is welcome. Share your feedback with us and help us improve.

How to Do Vertical & Horizontal Slides in PowerPoint: A Step-by-Step Guide
PowerPoint presentations are a staple in the corporate world, and knowing how to do vertical and horizontal slides can make your presentation stand out. In a nutshell, vertical slides are typically used for the main points or topics, while horizontal slides are used for sub-points or details. With the right tools and techniques, you can create a dynamic and visually appealing presentation that engages your audience.
Step by Step Tutorial on Vertical & Horizontal Slides in PowerPoint
Creating vertical and horizontal slides in PowerPoint is a straightforward process that can greatly enhance the flow and engagement of your presentation. Here’s a step-by-step guide on how to accomplish this.
Step 1: Open PowerPoint and select your desired slide layout
Begin by opening PowerPoint and selecting the slide layout that best fits your presentation’s theme and content.
When choosing a slide layout, consider the amount of content you’ll be including and how you want it organized. PowerPoint offers a variety of layouts that cater to different types of information, so take a moment to explore your options.
Step 2: Insert a new slide
Insert a new slide by clicking on the “New Slide” button in the toolbar or using the “Ctrl + M” keyboard shortcut.
Adding a new slide is the starting point to building your presentation’s structure. Think about the order of your content and how you can use vertical and horizontal slides to guide your audience through your key points.
Step 3: Adjust the slide orientation
Adjust the orientation of your slide to vertical or horizontal by going to the “Design” tab, selecting “Slide Size,” and then choosing “Custom Slide Size.”
In the “Slide Size” dialog box, you’ll have the option to select either “Portrait” (vertical) or “Landscape” (horizontal) orientation. Decide which orientation best suits the content of your slide and make the change.
Step 4: Customize your slide
Customize your slide by adding text, images, charts, and other elements to convey your message effectively.
Once you’ve set the orientation, it’s time to add content to your slide. Use the various tools in PowerPoint to insert and format your elements, making sure they’re visually appealing and easy to understand.
Step 5: Add transitions and animations
Enhance your slides by adding transitions between slides and animations to your elements to create a more dynamic presentation.
Transitions and animations can add a professional touch to your slides, making the flow from one slide to the next smoother and keeping your audience engaged. Experiment with different options to find the best fit for your presentation.
After completing these steps, you’ll have a PowerPoint presentation that incorporates both vertical and horizontal slides, offering a more organized and captivating viewing experience for your audience.
Tips for Vertical & Horizontal Slides in PowerPoint
- Keep your slides consistent by using the same fonts, colors, and styles throughout your presentation.
- Use high-quality images and graphics to enhance your message and make your slides more visually appealing.
- Avoid overcrowding your slides with too much text or too many elements; keep it simple and focused.
- Practice your presentation with the slides to ensure a smooth delivery and to familiarize yourself with the transitions and animations.
- Always save and back up your presentation to avoid losing any progress or changes you’ve made.
Frequently Asked Questions About Vertical & Horizontal Slides in PowerPoint
What is the difference between vertical and horizontal slides in powerpoint.
Vertical slides typically represent the main points or topics of your presentation, while horizontal slides delve into the details or sub-points related to each vertical slide.
Can I mix vertical and horizontal slides in the same presentation?
Absolutely! Mixing vertical and horizontal slides can provide a clear structure and make it easier for your audience to follow along.
How do I switch between vertical and horizontal slides during a presentation?
You can switch between slide orientations by adjusting the slide size under the “Design” tab before adding content to that slide.
Is there a limit to how many vertical or horizontal slides I can have in my presentation?
There is no set limit to the number of slides you can have; it’s more important to focus on the quality and relevance of your content.
Will changing the orientation of my slides affect the quality of my images or text?
Changing the slide orientation should not affect the quality of your content, but you may need to adjust the layout or size of your elements to fit the new orientation.
- Open PowerPoint and select a slide layout.
- Insert a new slide.
- Adjust the slide orientation to vertical or horizontal.
- Customize your slide with content.
- Add transitions and animations.
Mastering vertical and horizontal slides in PowerPoint can take your presentations to the next level, allowing for a more structured and engaging experience for your audience. By following the steps outlined in this article, you’ll be well-equipped to create dynamic and visually appealing slides that effectively communicate your message.
Remember to keep your content focused, use high-quality visuals, and practice your delivery to ensure a seamless presentation. Whether you’re presenting to colleagues, clients, or at a conference, your newfound skills in PowerPoint will undoubtedly make a lasting impression. Happy presenting!

Matthew Burleigh has been writing tech tutorials since 2008. His writing has appeared on dozens of different websites and been read over 50 million times.
After receiving his Bachelor’s and Master’s degrees in Computer Science he spent several years working in IT management for small businesses. However, he now works full time writing content online and creating websites.
His main writing topics include iPhones, Microsoft Office, Google Apps, Android, and Photoshop, but he has also written about many other tech topics as well.
Read his full bio here.
Share this:
Join our free newsletter.
Featured guides and deals
You may opt out at any time. Read our Privacy Policy
Related posts:
- How to Set Time for Slides in Powerpoint
- How to Make a Powerpoint Slide Vertical in Powerpoint 2013
- How to Save Powerpoint as PDF with Notes
- How to Remove Animations From PowerPoint: A Step-by-Step Guide
- How to Rotate a Slide in PowerPoint: A Step-by-Step Guide
- How to Drag Slides From One PowerPoint to Another: A Step-by-Step Guide
- Can I Convert My Powerpoint to Google Slides?
- How to Add Page Numbers in Powerpoint 2010
- How to Unhide a Slide in Powerpoint 2013
- How to Loop a Slideshow on Powerpoint 2013
- How to Delete a Slide in Powerpoint 2010
- Setting All PowerPoint Slides to Switch After 10 Seconds: A Step-by-Step Guide
- How to Change the Font on All Slides in Google Slides
- How to Hide a Slide in Powerpoint 2010
- How to Add Bullet Points in Google Slides
- How to Delete Multiple Slides in Google Slides
- How to Take Off the Timing on a PowerPoint Slide: A Step-by-Step Guide
- What Are Benefits of PowerPoint? A Comprehensive Guide
- How to End Powerpoint on Last Slide in Powerpoint 2010
- How to Insert Slides from Another Presentation in Powerpoint 2010
How to Create Vertical Presentations in Google Slides
Want to create a vertical presentation in Google Slides that can be viewed on your phone's screen or in portrait orientation? Here's how to do it!
Google Slides presentations are primarily intended to be displayed on horizontal landscape displays. But what if you want to create a presentation for mobile phones or maybe a big vertical screen?
If you project a typical slideshow on your phone's screen in portrait mode, you'll notice big black bars on the top and bottom of the slides. This way, Google Slides never uses all of your phone's screen. Creating a vertical slideshow optimizes the screen size and produces phone-friendly presentations that are viewable in portrait mode.
How to Make a Vertical Slides in Google Slides
Changing your slides from horizontal to vertical is a matter of dimensions. Fortunately, Google Slides allows you to fully customize the slideshow dimensions to your preference. To create vertical or portrait slides, all you need to do is to ensure that the height exceeds the width.
When creating a presentation for mobile devices, it's important to consider that the majority of new phones have screens with a resolution of 1080x1920 pixels. With these in mind, let's make a vertical presentation in Google Slides.
- Create a new presentation in Google Slides.
- Go to the File menu.
- Click on Page setup .
- Click on Widescreen 16:9 and then select Custom . Two text boxes and a drop-down menu will appear.
- Change inches to the unit you'd like. We're going to use pixels.
- In the first text box from the left, enter the width of your page. That'll be 1080 in our case.
- In the second text box, enter the height of your page. That'll be 1920 in this example.
- Click on Apply .
Now your slides are all vertical. If you modify the page setup in an existing presentation, the presentation will change to the vertical form. However, the elements in the slide may be displaced, so you'll need to do some clean-up on that behalf.
All the themes in Google Slides are compatible with vertical resolutions as well. If the default themes aren't up to your standards, you can download Google Slides themes from other sources.
From Landscape to Portrait in Google Slides
While most presentations are designed for horizontal screens, vertical slides can take advantage of the full size of vertical screens like mobile phones or outdoor displays.
The default setting in Google Slides is horizontal, but you can always switch to portrait orientation. Google Slides lets you change the size of the slides to anything you like, and now you know how to do that.
How to Make Google Slides Vertical (5 Quick Steps)
The steps in this guide are going to show you how to make Google Slides vertical.
- Switching to portrait mode from the landscape orientation in Google Slides requires you to change a setting on the Page Setup menu and adjust the slide size.
- Google Slides doesn’t let you change the orientation of individual slides. If you have one portrait slide then the entire slide show needs to be in the portrait orientation.
- You can download a copy of your Google Slides presentation in the Microsoft Powerpoint file format, or as a PDF. This article will show you how.
While you may have already discovered how to rotate a picture in a Google slideshow , Google Slides doesn’t have a page orientation setting as you might find in other Google Apps such as Google Sheets or Google Docs. In fact, if you’ve tried to change a landscape slide to a portrait slide before, then you probably only found things like Widescreen 16:9 as options.
Microsoft Powerpoint users are likely familiar with how to change the orientation of their Powerpoint slides if they have ever tried to print their presentations before, as the option to do so can be found on the Slide Size menu of the Design tab in that application. However, the Google Slides version of that menu is lacking a similar choice.
Luckily you can switch from horizontal slides to vertical slides in Google Slides by taking advantage of the Custom Slide Size option. Our guide below will show you how.
How to Make a Slide Vertical in Google Slides
- Open your slideshow.
- Click the File tab.
- Select Page setup .
- Choose the Custom option.
- Enter the desired portrait dimensions, then click Apply .
Our guide continues below with additional information on changing Google Slides to portrait, including pictures of these steps.
Note that once you have completed this guide on how to make Google Slides vertical you are likely going to need to scroll through all of your slides and fix everything that Google Slides couldn’t adjust automatically.
This flip image in Google Docs guide will show you many of the image editing tools that are available when working with documents in Google Docs.
How to Make Google Slides Portrait (Guide with Pictures)
The steps in this article were performed in the desktop version of the Google Chrome Web browser. If you are using the Google Slides app on an iPhone or Android device, then you won’t be able to adjust the slide orientation on those devices.
Step 1: Sign in to your Google Drive at https://drive.google.com and open an existing Slides file or create a new presentation.
Step 2: select the file tab at the top of the window..
 1")
Step 3: Choose the Page setup option.
 2")
Step 4: Click the drop down menu and select the Custom option.
 3")
Step 5: Enter 8.5 into the Width field and 11 into the Height field, then click Apply .
 4")
Note that any existing content in your slide show will likely be re-positioned due to the change in the slide orientation.
If this doesn’t help with what you need, then you can always learn how to insert a link in Google Slides and point it to a document or PDF in Google Drive.
If you have Microsoft Powerpoint then you can always convert between Powerpoint and Slides to use whichever application offers the better tools for your current task.
Our tutorial continues below with additional discussion on changing orientation in Google Slides.
More Information on How to Make a Slide Vertical in Google Slides
This workaround for making Google Slides portrait assumes that you are creating slides meant for letter sized paper. If you are using a different size paper then you will need to adjust the custom slide size dimensions accordingly.
Note that Google Slides only allows you to set the slide dimensions for the entire presentation. You won’t be able to make one slide portrait and the rest of them landscape, for example.
If you need to do this then you will need to create multiple presentations and combine them when you print or switch between them when giving the presentation.
If your presentation allows for it then you may be better off using Google Docs, where you are now able to change the orientation of individual pages in a document. You can make one page portrait in Google Docs by selecting the content to rotate, then clicking the Format tab, choosing Page orientation, then selecting the Portrait option under Orientation.
While this article has focused on how to adjust to the portrait layout in Google Slides presentations, you can often make your slides vertical by just adjusting the layout of the content on the slides. By putting your content in the vertical position on a slide and leaving the sides blank you might not even need to worry about switching landscape to portrait or messing around with custom dimensions.
While we focus on how to make Google Slides vertical in this article so that you can print on standard sized paper a bit more easily, you can always make these dimensions anything that you want.
For example, you might be making a slideshow where you are planning to download each of the slides as images that will be used in another document, so you may want specific pixel dimensions for the length and width instead.
Find out how to make a landscape document in Google Docs if there are other files in Google Drive for which you need to change the orientation.

Matt Jacobs has been working as an IT consultant for small businesses since receiving his Master’s degree in 2003. While he still does some consulting work, his primary focus now is on creating technology support content for SupportYourTech.com.
His work can be found on many websites and focuses on topics such as Microsoft Office, Apple devices, Android devices, Photoshop, and more.
Share this:
- Click to share on Twitter (Opens in new window)
- Click to share on Facebook (Opens in new window)
Related Posts
- How to Make Text Vertical in Google Docs
- How to Rotate a Powerpoint Slide Presentation
- How to Change Paper Size in Google Docs Quickly [5 Steps + Infographic]
- How to Change Margins in Google Docs (A Quick 4 Step Guide)
- How to Set Google Docs Background Image
- How to Flip an Image in Google Docs
- How to Do a Powerpoint Google Slides Presentation Conversion
- How to Remove Background Color in Google Docs
- How to Add a Hyperlink on Google Slides
- How to Change Slide Size in Powerpoint 2016
- Can You Print a Google Slide?
- Can You Download Google Slides Files?
- How to Change Google Docs Language
- How to Make Google Docs Landscape
- How to Show Vertical Ruler in Google Docs
- How to Bring an Image to the Front in Google Slides
- How to Use Google Docs Dark Mode
- How to Make a New Page in Google Docs
- How to Mirror Image in PPT Files (An Easy 6 Step Guide)
- How to Add a Link to a Picture in Google Docs
Get Our Free Newsletter
How-to guides and tech deals
You may opt out at any time. Read our Privacy Policy
How to Make Google Slides Orientation (to Vertical and Back)
For mobile phones or to make it pop
If you want to create a slideshow that displays nicely on a mobile phone screen or simply go outside the norm, you can change the slide orientation. We’ll show you how to make Google Slides vertical instead of the default horizontal view.
Standard Portrait Page Sizes
Before you begin, you should have an idea of the size you want to use for your vertical slides. Unlike Microsoft PowerPoint, you won’t see a list of portrait orientation options.
Here are some common paper sizes you might consider.
- Letter or Standard : 8.5 by 11 inches
- Legal : 8.5 by 14 inches
- Tabloid or Ledger : 11 by 17 inches
Common A-Series Paper Sizes
Note that you can round up the following A-series paper sizes if you like.
- A3 : 11.69 by 16.54 inches
- A4 : 8.26 by 11.69 inches
- A5 : 5.83 by 8.26 inches
How to Make Google Slides Vertical
You can change the orientation for your presentation easily in Google Slides on the web. As of this writing, you don’t have this ability in the Google Slides mobile app.
Additionally, when you adjust the orientation, this changes all slides in the presentation by default. You cannot use different orientations for individual slides.
- Visit Google Slides , open your presentation, open the File menu, and pick Page setup .

- In the drop-down menu, choose Custom .

- Enter the dimensions you want to use for the slide size and pick the measurement to the right. You can choose Inches, Centimeters, Points, or Pixels. Again, you can use the paper sizes listed above or your custom sizes.

- Select Apply .

You’ll then see the slides in your presentation displayed vertically instead of horizontally. If you already have content on the slides, you may need to adjust your items to accommodate the vertical layout.

How to Make Google Slides Horizontal Again
If after you change the orientation in Google Slides, you decide that landscape slides would work better, you can revert it just as easily.
Select File > Page setup from the menu. In the drop-down box, choose one of the standard horizontal sizes or use the Custom option to enter your dimensions. Then, select Apply .

Like changing the orientation to vertical, you may then want to adjust your elements for the horizontal slide view.

Which View Is Good for You?
Whether you’re creating a Google Slides presentation for a newsletter, poster, infographic, or one that looks good on mobile devices, you can change the orientation in just a few steps.
Now that you know how to make Google Slides vertical, take a look at our tutorial for how to hide and unhide slides too.
Related Posts
- How to Convert PDF to Google Slides Presentations
- How to Check Word Count in Google Slides Presentations
- How to Add Audio to Google Slides
- How to Hide and Unhide a Slide in Google Slides
- Where To Find Themes For Google Slides

Sandy Writtenhouse is a freelance technology writer and former Project, Department, and Program Manager. She turned her education, job experience, and love of technology into a full-time writing career. With all sorts of gadgets in her home and her hands, she seeks to help others make life easier through technology. Read Sandy's Full Bio
How to Make Google Slides Vertical and Change the Perspective?
- Share on Facebook
- Share on Twitter
By Nikolay Kaloyanov
in How-To Tutorials
2 years ago
Viewed 930 times
Spread the word about this article:

Google Slides offers plenty of options to customize your slides – you can add audio and video, insert transitions, change the theme colors, and many other options. In this article, we will see how to make Google Slides vertical and why.
Article overview: 1. Why would you need to make Google Slides vertical? 2. How to make Google Slides vertical? 3. Common presentation formats
Why would you need to make Google Slides vertical?
As we’ve already said, Google’s presentation software allows for many changes to be made. But you have to find a good reason to change the position of your slides. Let’s see some of the cases when vertical slides make more sense than standard, landscape slides:
💡 You have an original concept – if you have an original idea, you can garner it with some exciting layout change. Making Google Slides vertical will be a step in the right direction, and it will be considered a fresh move, making an impression on your audience.
🖨️ Printing a presentation? Why not . – people choose the print their presentations for many reasons. Some would also like to give their listeners a chance to read the content at home afterward. If there are some important details, the author wants to create a more lasting impression, or “warm” some leads, printing a presentation before the speech and giving the audience sheets might be a clever idea.
📱 Mobile-first approach – almost 84% of the world’s population owns a smartphone. It means you have to adapt presentations for mobile users sooner or later. Obviously, it’s more valid for corporate presentations, as business people are often on the road and most of their communication happens by phone, which will add extra convenience. Teachers would also be able to impress their students, especially those who have tablets.
How to make Google Slides vertical?
By default, all Google Slides presentations are horizontal, and turning them into vertical happens in a couple of quick steps.
Step 1. Open the presentation you wish to modify
Open a presentation of your choice. You can either create a new presentation or edit the layout of an existing one. In most cases, it’s better to decide to go vertical at the start of the presentation, as changing the settings after the beginning could result in misplaced shapes and designs.
Step 2. Open the page settings
It’s time to open the page settings. Click on File , and then select Page Setup.

Step 3. Select a custom size
Once you open the menu, you will see four options available to you: Standard (4:3) , Widescreen (16:9) , Widescreen (16:10) , and Custom . To achieve a vertical view, you should pick Custom , as currently, Google Slides doesn’t support vertical slides as default options. For slides to appear in portrait mode (vertical), the height should be a bigger value than the width.

Step 4. Pick your measurement unit
During step 5, you should select how to calculate screen size. You have to choose between 4 options: Pixels , Cm , In , and Points . Then press Apply .

Recommendation : If you aim to make your presentation suitable for mobile devices, you will better select pixels since mobile resolutions are measured in pixels. You won’t have to convert the sizes. On the other hand, if you want to print your Google Slides presentation, Cm/In are more popular options.
3. Common presentation dimensions
If you would like to play with your Google Slides presentation, you will have to be aware of common industry standards before changing things. This way, you can show professionalism and avoid silly mistakes that can cost you dearly.
A presentation has to bring long-term benefits for those who listen to it. However, it’s doubtful that lecturers could say what they want to say and get understood instantly. That is why it is crucial to make your Google Slides presentation more accessible – and this is achieved by making it vertical. This way, you can grab the attention of your audience post-factum when they can either read the slides on their mobile phones or have them printed on A4 paper sheets.
If this tutorial was useful for you, you can also check some other Google Slides guides:
- 20 Great Google Slides tutorials to master the software
- How to do a Hanging Indent in Google Slides?
- How to Draw on Google Slides?
- How to Add Fonts to Google Slides?

Add some character to your visuals
Cartoon Characters, Design Bundles, Illustrations, Backgrounds and more...
Like us on Facebook
Subscribe to our newsletter
Be the first to know what’s new in the world of graphic design and illustrations.
- [email protected]
Browse High Quality Vector Graphics
E.g.: businessman, lion, girl…
Related Articles
25+ wonderful cartoon character design tutorials, how to write a killer blog post in 10 easy steps, how to add fonts to google slides [quick guide], how to create a custom business card like a professional [tutorials], character animator tutorials part 6: behaviors 2, 500+ free and paid infographic templates compatible with google slides:, enjoyed this article.
Don’t forget to share!
- Comments (0)
Nikolay Kaloyanov
Nikolay is a copywriter with vast experience in Technology, Marketing, and Design. When he isn't playing with words and crafting texts, he watches sports and asks questions. He is a funny person...until you put him on a diet.

Thousands of vector graphics for your projects.
Hey! You made it all the way to the bottom!
Here are some other articles we think you may like:

How-To Tutorials
How to create adobe character animator puppet in photoshop.
by Iveta Pavlova

by Bilyana Nikolaeva
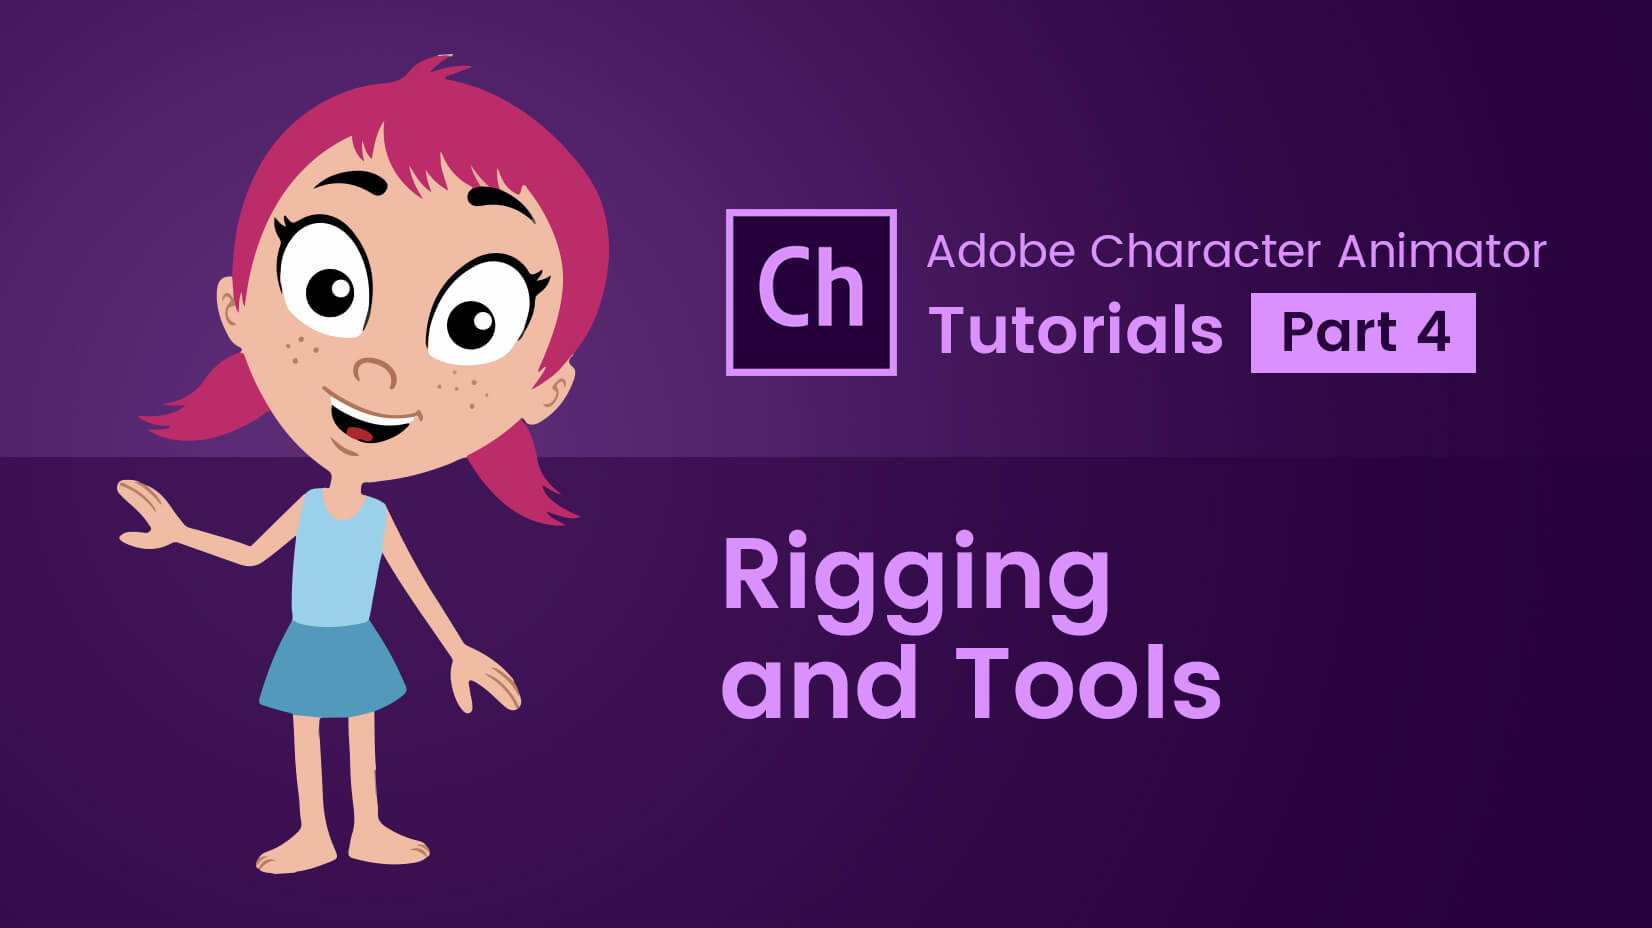
Character Animator Tutorials Part 4: Rigging and tools
by Slavena Simeonova
Looking for Design Bundles or Cartoon Characters?
A source of high-quality vector graphics offering a huge variety of premade character designs, graphic design bundles, Adobe Character Animator puppets, and more.
Flipping the Script: the Essential Guide to Vertical Presentations
Close your eyes and think of a PowerPoint presentation (not the most exciting image, I know). What’s the format that pops up — portrait or landscape? I’m willing to bet that it was likely the latter. And that would be fair — for the most part, presentations that we see in our work lives are, indeed, in landscape. Vertical presentations, however, remain a mystery – even to many professional graphic designers.
As some of you may know, we recently did some digging into the most common mistakes in presentation design (and in case you missed it: you can check out our research here ). When writing it, something curious occurred to us: there are barely any guides online that even mention vertical presentations, much less go into detail about them.
But there’s a case to be made for putting more time into studying vertical presentations. After all, the world is increasingly going mobile. Last year, mobile devices (excluding tablets) accounted for 58.67% of mobile website traffic, and growing. And, well, vertical presentations are tailor-made for modern smartphone screens, which only seem to be getting bigger with each passing update cycle.
Why Go Vertical?
The main reason for choosing the vertical format over the more traditional horizontal one is simple: smartphone screens are used in portrait mode, so if you’re building a presentation to be viewed primarily on mobile devices, the vertical format seems an obvious choice. Not all presentations can be shared in-person, using a big screen or a projector — in the current fast-paced business environment, and especially with the growing prevalence of remote work, consuming presentations on the go is becoming a much more common practice than before.
Let’s say you’re sending a pitch to a client in the form of a vertical presentation. They might look at it during lunch, on their way to the office, or right before boarding a flight – and providing them a native mobile viewing experience is, at the very least, a nice gesture of professional courtesy. At the most, it could be the difference between landing that client or getting left in the dust. Details matter.
There are other advantages to the vertical format, like enhanced storytelling potential. The vertical orientation lends itself well to storytelling, allowing presenters to guide audiences through a narrative journey literally from top to bottom. It also encourages a more linear flow of information, enabling you to build compelling narratives and convey complex ideas with ease and clarity.
Another big reason to go with the vertical layout is social media compatibility. With the largest social media platforms, like Instagram and TikTok, heavily favoring portrait content formats, vertical presentations offer a natural fit for sharing and promotion. This allows you to repurpose your slides for social media, maximizing visibility and engagement across various channels.
Making a Vertical Presentation
Now, let’s take a closer look at each element of a typical presentation, and learn how we can adapt it to take full advantage of the vertical format.
Employing the vertical layout doesn’t mean that your title has to look smaller and less impactful. A common design practice is actually making your title vertical by simply flipping it, as shown in the illustration below. Always strive to make your title page as visually appealing as possible – it will go a long way in engaging your potential audience.

Text & images
While using too much text is a common mistake when designing presentations, the vertical orientation lends itself well to increasing your slide’s text capacity. Reading in portrait is simply more intuitive, so don’t hesitate to take full advantage of that. However, keep in mind: using too much text on one slide is almost never a good thing, regardless of orientation. Try to keep things lean, if possible.

As for images and other visual elements, try using square or vertical formats as much as possible — that will ensure less empty space on your slides. While negative space can be useful, generally you want to keep vertical presentations as visually rich and engaging as possible.
Using background images on slides is a hot topic among graphic designers – some are generally OK with it, while some call it a cardinal sin. Regardless, if you plan on using background images (at least on the title page), make sure they’re always in portrait. To make the text more easily legible, choose bold, contrasting colors. You can also place a visual element, like a shape, underneath the text, but in front of the background, to make the text pop even more.

Subheadings & lists
Similar to long bits of text, the vertical layout is ideal for longer lists, be it numbered lists or bullets. However, try to keep your points short and sweet, as you will now be more limited in terms of horizontal space. Concise, yet impactful bullets are the name of the game when it comes to vertical presentations.

Graphs & Data
Due to the aforementioned horizontal space limitations, charts, graphs and tables can be quite tricky to get right. You can rectify that by placing two charts that would normally be on two separate slides on a single slide. As we see in the example below, no important information was lost.

Bonus tip: vertical connections
Take further advantage of the vertical format with this clever design trick. Align the graphic elements on consecutive slides in such a way that they seamlessly morph into each other. Even something as simple as a thin line running through multiple slides will add visual cohesiveness and flair to your presentation.

Final Thoughts
Before we conclude this short guide, there’s one more thing to keep in mind: while vertical presentations have some key differences that set them apart from traditional presentations — by and large, they are the same. Therefore, most principles that apply to landscape will also apply to portrait, and vice versa.
So, if you still haven’t, make sure to check out our comprehensive, data-driven guide to crafting more effective slides . It will take your presentation game to the next level, regardless of format.
And if this guide was of any help to you, feel free to share it with your friends or colleagues – they might find it helpful too! And don’t forget stay tuned for more cool and useful guides coming your way.
How to use Google Slides, Google's free slideshow presentation maker
- Google Slides is Google's slideshow presentation program that allows real time collaboration.
- Google Slides is part of the Google Workspace suite, which also includes Google Docs and Gmail.
- Google Slides differs from Microsoft PowerPoint in its simplicity and collaboration options.
Google Slides is a presentation program that's part of Google Workspace, a group of productivity apps that also includes Gmail, Google Sheets, Goole Docs, Google Meet , and more. Workspace has more than 3 billion users worldwide.
With Google Slides, users can create, present, and collaborate via online presentations from various devices. You can present during Google Meet calls directly from Slides and embed charts from Google Sheets. You can also add YouTube videos to Slides presentations.
Google recently announced plans to add artificial intelligence features like its Gemini AI tool to its Workspace programs, which include Slides. Users will be able to use Gemini to create images or written content for slides, or even reference other files in their Drives or emails in their Gmail accounts.
What is Google Slides?
Google Slides is a cloud-based presentation program that's part of the Google Workspace. Google Slides can be used to create and deliver presentations online.
Several different themes are available in Slides for designing presentations. Users can customize Slides presentations in a variety of colors and styles. You can add photos, videos from YouTube, charts from Google Sheets , and information from many other sources. Different members of a team can contribute and collaborate on the presentation in real time.
There's no specific limit on how many slides you can add to your Google Slides presentation, but there is a 100 MB file size limit.
How to download Google Slides
To access Google Slides, visit slides.google.com .
Related stories
You can also open Slides while Gmail or Google Chrome is open by clicking on the Google Apps icon in the upper-right corner (shown as three rows of dots) and selecting Slides.
Another option is to download the Google Slides app for your Apple or Android device. Search for Google Slides in the Apple App Store or Google Play Store.
What templates are available?
Dozens of Google Slides templates are available, depending on your needs. For instance, there are general presentation templates, photography portfolios, pitch decks, case studies, science fair projects, and more.
To browse the templates available, open Google Slides. Then, click Template Gallery in the upper-right corner. Scroll through the options, choose the one that meets your needs, and start creating a presentation.
What's the difference between Google Slides and PowerPoint?
Both Google Slides and PowerPoint are presentation programs. Google Slides is a program within Google Workspace, and PowerPoint is a Microsoft program. PowerPoint is an offline program, while Slides is online which allows for real time collaboration.
The programs share many features that allow for presentation creation and delivery, but PowerPoint may offer more advanced design features.
You can convert Google Slides into PowerPoint presentations, and vice versa. From the top menu in Slides, click File, Download, and choose Microsoft PowerPoint.
How to learn to use Google Slides
Through Google Workspace, you can access several quick-start guides, cheat sheets, and troubleshooting resources to help you learn to use Google Slides. There are also many YouTube videos with tutorials for using Slides.
On February 28, Axel Springer, Business Insider's parent company, joined 31 other media groups and filed a $2.3 billion suit against Google in Dutch court, alleging losses suffered due to the company's advertising practices.
- Main content
Home Blog PowerPoint Tutorials PowerPoint Slide Size: What is the Best Size for a Presentation
PowerPoint Slide Size: What is the Best Size for a Presentation

Whether you’re a business professional, educator, or public speaker, understanding what are the optimal slide dimensions can enhance the impact of your presentation. This guide will walk you through everything you need to know about the size of your PowerPoint presentation, from the basics to advanced tips.
What is the PowerPoint Slide Size?
PowerPoint slide size refers to the dimensions of the slides within your PowerPoint presentation. These dimensions determine how your content is displayed in a monitor or projector, and can significantly affect the overall look and feel of your presentation.
The most common slide sizes in PowerPoint are 16:9 (widescreen) and 4:3 (standard).
Choosing the right slide size is essential as it impacts how your content is perceived and ensures compatibility with various display devices. Once you define the optimal slide size for your next presentation, you can change the slide dimensions in PowerPoint following the steps described in our article.

It is important to understand the differences between Aspect Ratio and Pixel Dimensions.
The specific pixel dimensions for a standard 16:9 slide are 1920 pixels in width by 1080 pixels in height.
Understanding Aspect Ratio vs. Pixel Dimensions
Aspect ratio vs. pixel dimensions: what’s the difference.
When defining the optimal slide size for your presentation, it’s important to understand the difference between aspect ratio and pixel dimensions, as these terms often cause confusion but are critical for creating well-designed presentations.
Aspect Ratio
The aspect ratio refers to the proportional relationship between the width and height of your slide. It’s expressed as two numbers separated by a colon, such as 4:3 or 16:9. The aspect ratio defines the shape of your slide and how it will appear on different screens.
Pixel Dimensions:
Pixel dimensions, on the other hand, specify the total number of pixels in the width and height of your slide. This measurement determines the resolution and quality of your images and text in your PowerPoint slide size. For example:
- 1920 x 1080 pixels: This is a common dimension for a 16:9 aspect ratio, known as Full HD. It provides high clarity and detail, making it suitable for large screens and high-resolution displays.
- 1024 x 768 pixels: This dimension matches a 4:3 aspect ratio and is often used for smaller screens or lower resolution displays. It’s less detailed than 1920 x 1080 but can be effective for standard printouts or older projectors.
Why both slide size definitions matter? Understanding both aspect ratio and pixel dimensions is important because they impact how your PowerPoint slide size is viewed across different devices and formats. Here’s why:
- Consistency Across Devices: Ensuring your aspect ratio is compatible with the display device prevents issues like black bars on the sides (letterboxing) or content being cut off (cropping).
- Clarity and Detail: Choosing appropriate pixel dimensions ensures that your images and text appear sharp and clear, avoiding pixelation or blurriness.
- Professional Appearance: Matching the right aspect ratio and pixel dimensions helps maintain a polished and professional look, whether you’re presenting on a large screen, sharing a PDF handout (as we will see later), or displaying your slides online.
The Impact of Slide Size on Different Industries
Different industries have unique needs when it comes to presentation slide sizes. For instance:
- Business: Corporate presentations often require widescreen formats (16:9 slide size) to showcase detailed charts and data on modern projectors and screens. However, in some environments there are still projectors using the traditional 4:3 aspect ratio format for slide sizes.
- Education: Lectures and workshops benefit from both 16:9 and 4:3 formats, depending on the teaching aids and screen setups used.
- Design: Creative professionals need to create visually appealing slides that may require custom dimensions to stand out and effectively communicate their ideas.
Best Practices for Choosing a Proper Slide Size for your Presentation
When selecting an optimal PowerPoint slide size, consider the following:
- Audience and Venue: Tailor your slide size to the screen size and setup of your presentation venue. Widescreen (16:9) is typically best for large screens, while standard (4:3) works well for print distributions.
- Presentation Type: Webinars and online presentations held via Zoom or Teams , for example, often benefit from widescreen formats, while in-person meetings might require flexibility.
- Aesthetics vs. Functionality: Balance visual appeal with readability and content integrity.
When creating PDF handouts from your PowerPoint presentation, it’s also important to choose a convenient slide size that ensures readability and clarity in print.
The 4:3 aspect ratio is generally preferred for printed handouts as it aligns well with standard paper sizes such as A4 or Letter. This format ensures that your content fits neatly onto the page without excessive margins or cropping.
Additionally, using 4:3 for print ensures that text and graphics are appropriately scaled, maintaining the legibility and professional appearance of your handouts. This consideration is essential for creating effective printed materials that complement your live presentations.
Overcoming Challenges with Slide Size
Adapting content for different slide sizes.
Resizing images and adjusting layouts can be challenging. Here are some tips:
- Resizing Images: Ensure that images maintain their aspect ratio to avoid distortion.
- Text Adjustments: Modify font sizes and text boxes to fit the new slide dimensions without compromising readability.
- Consistency: Keep a consistent layout throughout your presentation to maintain a professional look.
Dealing with Mixed Slide Sizes in a Presentation
Sometimes, you may need to integrate slides with different dimensions. Here’s how:
- Transition Techniques: Use smooth transitions to blend slides of varying sizes seamlessly.
- Tools and Add-Ins: You can use PowerPoint add-ins that help manage and standardize slide sizes across your presentation.
Advanced Tips for Custom Slide Sizes
When it is time to innovate, the PowerPoint slide size can also play an important role. If you are considering to create a presentation for digital signage, or non traditional devices, choosing a custom PowerPoint slide size can help to achieve this. Here are some ideas and ways you can innovate by choosing a different slide size:
- Unique Dimensions: Create custom slide sizes for branding or special events.
- Custom Branding: Use non-standard slide sizes to align with your brand identity and marketing materials.
- Innovative Uses: Experiment with different dimensions to create unique visual experiences.
For example, to create high-quality digital signage content, you’d need to set the PowerPoint slides to a 1920×1080 resolution in vertical (portrait) or horizontal (landscape) mode, which are the typical digital sign screen sizes.
Understanding what is the optimal slide size and how to configure it is essential for creating effective and engaging presentations. By optimizing your slides, and overcoming common challenges, you can ensure your visual aids are impactful and professional. Keep experimenting with different sizes and formats to find what works best for your needs. Remember, the key to a successful presentation lies in the details—choosing the right slide size is one of them.

Like this article? Please share
Presentation Tips Filed under PowerPoint Tutorials
Related Articles

Filed under Google Slides Tutorials • May 17th, 2024
How to Import Google Slides Themes
Importing Google Slides Themes is an easy task that can bring life into your presentations. Learn how to reuse old slides to create new cool themes here.

Filed under PowerPoint Tutorials • May 17th, 2024
How to Edit Background Graphics in PowerPoint
You don’t have to stick with template designs that don’t appeal to your intended message. Learn how to edit background graphics in PowerPoint to become a master user.

How to Make Google Slides Vertical
Power up your presentation skills by learning how to make google slides go vertical. Step-by-step instructions with examples.
Leave a Reply
How-To Geek
6 ways to create more interactive powerpoint presentations.
Engage your audience with cool, actionable features.
Quick Links
- Add a QR code
- Embed Microsoft Forms (Education or Business Only)
- Embed a Live Web Page
- Add Links and Menus
- Add Clickable Images to Give More Info
- Add a Countdown Timer
We've all been to a presentation where the speaker bores you to death with a mundane PowerPoint presentation. Actually, the speaker could have kept you much more engaged by adding some interactive features to their slideshow. Let's look into some of these options.
1. Add a QR code
Adding a QR code can be particularly useful if you want to direct your audience to an online form, website, or video.
Some websites have in-built ways to create a QR code. For example, on Microsoft Forms , when you click "Collect Responses," you'll see the QR code option via the icon highlighted in the screenshot below. You can either right-click the QR code to copy and paste it into your presentation, or click "Download" to add it to your device gallery to insert the QR code as a picture.
In fact, you can easily add a QR code to take your viewer to any website. On Microsoft Edge, right-click anywhere on a web page where there isn't already a link, and left-click "Create QR Code For This Page."
You can also create QR codes in other browsers, such as Chrome.
You can then copy or download the QR code to use wherever you like in your presentation.
2. Embed Microsoft Forms (Education or Business Only)
If you plan to send your PPT presentation to others—for example, if you're a trainer sending step-by-step instruction presentation, a teacher sending an independent learning task to your students, or a campaigner for your local councilor sending a persuasive PPT to constituents—you might want to embed a quiz, questionnaire, pole, or feedback survey in your presentation.
In PowerPoint, open the "Insert" tab on the ribbon, and in the Forms group, click "Forms". If you cannot see this option, you can add new buttons to the ribbon .
As at April 2024, this feature is only available for those using their work or school account. We're using a Microsoft 365 Personal account in the screenshot below, which is why the Forms icon is grayed out.
Then, a sidebar will appear on the right-hand side of your screen, where you can either choose a form you have already created or opt to craft a new form.
Now, you can share your PPT presentation with others , who can click the fields and submit their responses when they view the presentation.
3. Embed a Live Web Page
You could always screenshot a web page and paste that into your PPT, but that's not a very interactive addition to your presentation. Instead, you can embed a live web page into your PPT so that people with access to your presentation can interact actively with its contents.
To do this, we will need to add an add-in to our PPT account .
Add-ins are not always reliable or secure. Before installing an add-in to your Microsoft account, check that the author is a reputable company, and type the add-in's name into a search engine to read reviews and other users' experiences.
To embed a web page, add the Web Viewer add-in ( this is an add-in created by Microsoft ).
Go to the relevant slide and open the Web Viewer add-in. Then, copy and paste the secure URL into the field box, and remove https:// from the start of the address. In our example, we will add a selector wheel to our slide. Click "Preview" to see a sample of the web page's appearance in your presentation.
This is how ours will look.
When you or someone with access to your presentation views the slideshow, this web page will be live and interactive.
4. Add Links and Menus
As well as moving from one slide to the next through a keyboard action or mouse click, you can create links within your presentation to direct the audience to specific locations.
To create a link, right-click the outline of the clickable object, and click "Link."
In the Insert Hyperlink dialog box, click "Place In This Document," choose the landing destination, and click "OK."
What's more, to make it clear that an object is clickable, you can use action buttons. Open the "Insert" tab on the ribbon, click "Shape," and then choose an appropriate action button. Usefully, PPT will automatically prompt you to add a link to these shapes.
You might also want a menu that displays on every slide. Once you have created the menu, add the links using the method outlined above. Then, select all the items, press Ctrl+C (copy), and then use Ctrl+V to paste them in your other slides.
5. Add Clickable Images to Give More Info
Through PowerPoint's animations, you can give your viewer the power to choose what they see and when they see it. This works nicely whether you're planning to send your presentation to others to run through independently or whether you're presenting in front of a group and want your audience to decide which action they want to take.
Start by creating the objects that will be clickable (trigger) and the items that will appear (pop-up).
Then, select all the pop-ups together. When you click "Animations" on the ribbon and choose an appropriate animation for the effect you want to achieve, this will be applied to all objects you have selected.
The next step is to rename the triggers in your presentation. To do this, open the "Home" tab, and in the Editing group, click "Select", and then "Selection Pane."
With the Selection Pane open, select each trigger on your slide individually, and rename them in the Selection Pane, so that they can be easily linked to in the next step.
Finally, go back to the first pop-up. Open the "Animations" tab, and in the Advanced Animation group, click the "Trigger" drop-down arrow. Then, you can set the item to appear when a trigger is clicked in your presentation.
If you want your item to disappear when the trigger is clicked again, select the pop-up, click "Add Animation" in the Advanced Animation group, choose an Exit animation, and follow the same step to link that animation to the trigger button.
6. Add a Countdown Timer
A great way to get your audience to engage with your PPT presentation is to keep them on edge by adding a countdown timer. Whether you're leading a presentation and want to let your audience stop to discuss a topic, or running an online quiz with time-limit questions, having a countdown timer means your audience will keep their eye on your slide throughout.
To do this, you need to animate text boxes or shapes containing your countdown numbers. Choose and format a shape and type the highest number that your countdown clock will need. In our case, we're creating a 10-second timer.
Now, with your shape selected, open the "Animations" tab on the ribbon and click the animation drop-down arrow. Then, in the Exit menu, click "Disappear."
Open the Animation Pane, and click the drop-down arrow next to the animation you've just added. From there, choose "Timing."
Make sure "On Click" is selected in the Start menu, and change the Delay option to "1 second," before clicking "OK."
Then, with this shape still selected, press Ctrl+C (copy), and then Ctrl+V (paste). In the second box, type 9 . With the Animation Pane still open and this second shape selected, click the drop-down arrow and choose "Timing" again. Change the Start option to "After Previous," and make sure the Delay option is 1 second. Then, click "OK."
We can now use this second shape as our template, as when we copy and paste it again, the animations will also duplicate. With this second shape selected, press Ctrl+C and Ctrl+V, type 8 into the box, and continue to do the same until you get to 0 .
Next, remove the animations from the "0" box, as you don't want this to disappear. To do this, click the shape, and in the Animation Pane drop-down, click "Remove."
You now need to layer them in order. Right-click the box containing number 1, and click "Bring To Front." You will now see that box on the top. Do the same with the other numbers in ascending order.
Finally, you need to align the objects together. Click anywhere on your slide and press Ctrl+A. Then, in the Home tab on the ribbon, click "Arrange." First click "Align Center," and then bring the menu up again, so that you can click "Align Middle."
Press Ctrl+A again to select your timer, and you can then move your timer or copy and paste it elsewhere.
Press F5 to see the presentation in action, and when you get to the slide containing the timer, click anywhere on the slide to see your countdown timer in action!
Now that your PPT presentation is more interactive, make sure you've avoided these eight common presentational mistakes before you present your slides.
Got any suggestions?
We want to hear from you! Send us a message and help improve Slidesgo
Top searches
Trending searches

memorial day
12 templates

66 templates

american history
75 templates

music video
21 templates

150 templates

The best Google Slides and Powerpoint presentation templates
Here's a selection of the best free & premium google slides themes and powerpoint presentation templates from the previous month. these designs were the most popular among our users, so download them now, the best presentations from may.

It seems that you like this template!
Minimalist business slides.
Minimalism is an art style that frees the canvas and that lets the content stand out for itself. It’s a way of conveying modernism, simplicity and elegance and can be your best ally in your next presentation. With this new design from Slidesgo, your business presentations will be as professional...

Premium template
Unlock this template and gain unlimited access
Sunset Beach Agency
Do you imagine yourself surfing the waves under a beautiful sunset? Perhaps this cool image is what you'd like to project to your clients or audience. Present your agency with this editable template for Google Slides and PowerPoint! Maybe you operate in the field of travels and trips, or perhaps...

Minimalist Korean Aesthetic Pitch Deck
Templates based on a minimalist style are usually very useful in business presentations, as they make the audience focus on the content and not on the ornaments of the design. This minimalist style template that we propose here is perfect for a pitch deck to present your product or your...

Happy Pastel Summer
Soak up the sunny vibes of summer with the hottest Google Slides and PowerPoint template! This sunshine-infused masterpiece is your passport to organization and fun in the sun. Picture this: palm trees swaying, colorful cocktails clinking, and the soft sand beneath your feet as you effortlessly plan your days and...

Minimal Charm
Are you looking for a monochromatic theme that is interesting at the same time? How about using a simple and clean theme, along with black-and-white pictures, to convey business or corporate content in a professional way?

Papyrus History Lesson
History lessons tend to be boring for students, since they need to remember dates and a bunch of information. Make it entertaining by editing our free presentation template, whose backgrounds based on ancient papyrus rolls take it to the next level.

School Assignments
Design some school assignments for your students so they can learn while they are having fun. Download this cool template now and make use of its resources. It looks like a sheet of a notebook and we have added drawings of stationery. Get your pencil!

Elegant Bachelor Thesis
Present your Bachelor Thesis in style with this elegant presentation template. It's simple, minimalist design makes it perfect for any kind of academic presentation. With an array of features such as section dividers, images, infographics and more, you can easily create a professional and creative presentation that stands out from...

Futuristic Background
When you need to impress everybody and stay relevant, you must look ahead and aim to be the first. Take a peek into the future with this new template Slidesgo has just designed. It’s free and perfect for techie topics or just for giving your presentation a futuristic vibe!

Generation of '27
Generation of '27 is a group of avant-garde poets and artists who began to publish their work in the 20s of the 20th century. To help you explain this interesting part of Spanish literature to your students, we propose you this old-style brown template, with different illustrations of books, pens,...

Welcome to Middle School Class
Welcome, everyone! This is our middle school class, take a look! Our students, our teachers, our subjects, our schedules… We have written everything about it in this presentation! The cool waves of color flow amazingly with this design. Everything is super creative and colorful! Prepare for the back to school...

Summer Cottagecore Theme
When it's summer, you feel like going to the beach or the pool, eating watermelon, or maybe going to the countryside and enjoy nature. The cottagecore aesthetics make you feel comfy, and that was the purpose of this editable template. Thanks to the nice touch that watercolor always provides, you'll...

AI Tech Agency
It’s amazing how robots and computers are able to perform tasks that we thought only humans could do. If your agency is specialized in artificial intelligence, this free marketing presentation template can help you get your points across easily!

Notebook Lesson
These are the last days before the Summer break! We know that there are some pending lessons that you need to prepare for your students. As they may be thinking about their friends and their holidays, catch their attention with this cool template!

Hawaiian Lei Day
Aloha, do you know about Lei Day? It is a Hawaiian celebration that started in the late 1920's. It takes place on May 1st and lasts until the next day. On each island they hold different activities, which you can promote with the help of this fun blue and cream...

Language Arts Subject for Middle School - 6th Grade: Vocabulary Skills
Language is the way humans have to communicate with each other. Teach your middle school students interesting concepts about language. To do so, you can use this new template, so that you have a presentation ready for class! The slides have a slightly floral design due to the illustrations and...

Minimalist Aesthetic Slideshow
When you combine a minimalist design with abstract shapes and a palette composed of pastel colors, you get a successful result. This template has all of the aforementioned, plus an elegant typography and some icons of plants. It's quite unique and works for any topic, so give it a try!

Summer Woods Minitheme
Escape to the serene summer woods with this minimalist theme for your templates. Its design is simple yet alluring, with illustrations and soft colors that will mesmerize you. Enjoy a peaceful landscape of trees and animals while you speak about any kind of subject, with a subtle background pattern of...
- Page 1 of 1372
Great presentations, faster
Slidesgo for Google Slides :
The easy way to wow

Register for free and start editing online
IMAGES
VIDEO
COMMENTS
First, open your PowerPoint presentation. In the "Customize" group of the "Design" tab, select "Slide Size." Click "Custom Slide Size" ("Page Setup" on Mac) in the drop-down menu. The "Slide Size" dialog box appears. In the "Slides" group of the "Orientation" section, select the radio button next to Portrait or Landscape, and then click "OK."
PowerPoint slides are automatically set up in landscape (horizontal) layout , but you can change the slide orientation to portrait (vertical) layout . Windows macOS Web. Select the Design tab: Near the right end, select Slide Size, and then click Custom Slide Size. In the Slide Size dialog box, select Portrait, then select OK. In the next ...
To make Google Slides vertical, go to the File menu and scroll down to Page Setup. This will open a menu where you can choose between Standard 4:3, Widescreen 16:9 or 16:10, and Custom orientation. The menu also provides options to change the layout by inches, centimeters, points, and pixels. Add the desired size for your slide and click Apply.
Try it! Change the page orientation in your PowerPoint presentation to landscape or portrait layout. Select Design. Select Slide Size > Custom Slide Size. Select Portrait > OK. In the next dialog box, you can: Select Maximize to take full advantage of the space available. Select Ensure Fit to make sure your content fits on the vertical page.
Vertical slides are great for presentations that require more depth than width, such as mobile app designs or social media stories. Following these steps will help you create a vertical slide layout in your Google Slides presentation. Step 1: Open your Google Slides presentation. Open the presentation you want to edit or create a new one.
Go to the Design tab. On the far right of the ribbon, click Slide Size > Custom Slide Size. Choose Portrait next to Slide Orientation and optionally make any other changes as you wish. Click OK ...
Try it! Change the page orientation in your PowerPoint presentation to landscape or portrait layout. Select Design. Select Slide Size > Custom Slide Size. Select Portrait > OK. In the next dialog box, you can: Select Maximize to take full advantage of the space available. Select Ensure Fit to make sure your content fits on the vertical page.
To make a PowerPoint slide vertical in PowerPoint 2013, go to the Design tab, select Slide Size, and choose Custom Slide Size. Change the orientation to Portrait and click OK. Your slide will now be vertical, ready for content that fits better in that format. After changing the slide orientation to vertical, you will have a portrait-oriented ...
What To Know. In Windows: In Normal view, press Design > Slide Size > Custom Slide Size. Under Orientation, select Vertical, and set the Height and Width. On the web: Design > Slide Size > Custom Slide Size > Portrait > OK. Then choose how slides fit the screen. On a Mac: File > Page Setup. Select Portrait, adjust the size as needed, and press OK.
Understanding the Need for Vertical Slides in PowerPoint Presentations. Step-by-Step Guide to Changing Slide Orientation in PowerPoint. Step 1: Step 2: Step 3: Step 4: Step 5: Customizing Slide Layouts for Vertical Presentations. Best Practices for Designing Vertical Slides in PowerPoint.
Open your PowerPoint presentation and select the slide you want to make vertical. Click on the "Design" tab on the top menu bar. Click on the "Slide Size" dropdown menu. Select "Custom Slide Size" from the list. In the "Slide Size" dialog box that appears, change the orientation from "landscape" to "portrait.". Click ...
Step 3: Adjust the slide orientation. Adjust the orientation of your slide to vertical or horizontal by going to the "Design" tab, selecting "Slide Size," and then choosing "Custom Slide Size.". In the "Slide Size" dialog box, you'll have the option to select either "Portrait" (vertical) or "Landscape" (horizontal ...
Step 2: Browse through the list of premade templates. Choose one that best matches your desired presentation style and click it to open. Step 3: Once you've chosen a template, follow the same steps above to make Google Slides vertical. Simply go to "File," then "Page Setup," and "Custom" to modify the width and height.
Google Slides usually comes in horizontal layout. If you want to change the format and have vertical slides, you only need to follow three simple steps : Go to File → Page Setup. Here, you can change the format, but Google Slides does not have a premade vertical option. Click on Custom and you will be able to change the actual size of the canvas.
With these in mind, let's make a vertical presentation in Google Slides. Create a new presentation in Google Slides. Go to the File menu. Click on Page setup . Click on Widescreen 16:9 and then select Custom. Two text boxes and a drop-down menu will appear.
To use Google Slides portrait mode, go to File > Page setup. To open the Page setup menu in Google Slides, go to the File drop-down. You'll find it in the upper left corner of the screen. Click on File, and from the listed options, select Page setup. 2. Select and Apply a Custom Orientation to Make Slides Vertical.
How to Make a Slide Vertical in Google Slides. Open your slideshow. Click the File tab. Select Page setup. Choose the Custom option. Enter the desired portrait dimensions, then click Apply. Our guide continues below with additional information on changing Google Slides to portrait, including pictures of these steps.
You cannot use different orientations for individual slides. Visit Google Slides, open your presentation, open the File menu, and pick Page setup . In the drop-down menu, choose Custom . Enter the dimensions you want to use for the slide size and pick the measurement to the right. You can choose Inches, Centimeters, Points, or Pixels.
Discover how to create vertical Google Slides presentations with this comprehensive guide. Follow step-by-step instructions to adjust slide orientation, cust...
How to make Google Slides vertical? By default, all Google Slides presentations are horizontal, and turning them into vertical happens in a couple of quick steps. Step 1. Open the presentation you wish to modify. Open a presentation of your choice. You can either create a new presentation or edit the layout of an existing one.
How to Make Google Slides Vertical. Step 1: Open Google Slides. Step 2: Navigate to File. Step 3: Select Page Setup. Step 4: Choose Custom Aspect Ratio. Step 5: Set Custom Dimensions. Step 6: Apply Changes. Tips & Tricks.
Always strive to make your title page as visually appealing as possible - it will go a long way in engaging your potential audience. Text & images. While using too much text is a common mistake when designing presentations, the vertical orientation lends itself well to increasing your slide's text capacity.
Vertical Presentation templates How do I differentiate vertical from horizontal? Slidesgo comes to help you! We'll give you two clues: the first is the definition, vertical is the orientation of something that rises directly from the ground or a reference point and it is also the format of this entire collection of Google Slides themes and PowerPoint templates.
To browse the templates available, open Google Slides. Then, click Template Gallery in the upper-right corner. Scroll through the options, choose the one that meets your needs, and start creating ...
2 Be Minimal. Using a minimal design composition is one of the unique presentation ideas. The trick is to have just enough information and visual details for the viewer to feel comfortable seeing the slides. A minimal design can instill calm and awe in your audience when done right.
The most common slide sizes in PowerPoint are 16:9 (widescreen) and 4:3 (standard). Choosing the right slide size is essential as it impacts how your content is perceived and ensures compatibility with various display devices. Once you define the optimal slide size for your next presentation, you can change the slide dimensions in PowerPoint ...
Click anywhere on your slide and press Ctrl+A. Then, in the Home tab on the ribbon, click "Arrange." First click "Align Center," and then bring the menu up again, so that you can click "Align Middle." Press Ctrl+A again to select your timer, and you can then move your timer or copy and paste it elsewhere.
Minimalist Aesthetic Slideshow. When you combine a minimalist design with abstract shapes and a palette composed of pastel colors, you get a successful result. This template has all of the aforementioned, plus an elegant typography and some icons of plants. It's quite unique and works for any topic, so give it a try!