Critical PowerPoint Shortcuts – Claim Your FREE Training Module and Get Your Time Back!

How to Make a PowerPoint Presentation (Step-by-Step)
- PowerPoint Tutorials
- Presentation Design
- January 22, 2024
In this beginner’s guide, you will learn step-by-step how to make a PowerPoint presentation from scratch.
While PowerPoint is designed to be intuitive and accessible, it can be overwhelming if you’ve never gotten any training on it before. As you progress through this guide, you’ll will learn how to move from blank slides to PowerPoint slides that look like these.

Table of Contents
Additionally, as you create your presentation, you’ll also learn tricks for working more efficiently in PowerPoint, including how to:
- Change the slide order
- Reset your layout
- Change the slide dimensions
- Use PowerPoint Designer
- Format text
- Format objects
- Play a presentation (slide show)
With this knowledge under your belt, you’ll be ready to start creating PowerPoint presentations. Moreover, you’ll have taken your skills from beginner to proficient in no time at all. I will also include links to more advanced PowerPoint topics.
Ready to start learning how to make a PowerPoint presentation?
Take your PPT skills to the next level
Start with a blank presentation.
Note: Before you open PowerPoint and start creating your presentation, make sure you’ve collected your thoughts. If you’re going to make your slides compelling, you need to spend some time brainstorming.
For help with this, see our article with tips for nailing your business presentation here .
The first thing you’ll need to do is to open PowerPoint. When you do, you are shown the Start Menu , with the Home tab open.
This is where you can choose either a blank theme (1) or a pre-built theme (2). You can also choose to open an existing presentation (3).
For now, go ahead and click on the Blank Presentation (1) thumbnail.

Doing so launches a brand new and blank presentation for you to work with. Before you start adding content to your presentation, let’s first familiarize ourselves with the PowerPoint interface.
The PowerPoint interface

Here is how the program is laid out:
- The Application Header
- The Ribbon (including the Ribbon tabs)
- The Quick Access Toolbar (either above or below the Ribbon)
- The Slides Pane (slide thumbnails)
The Slide Area
The notes pane.
- The Status Bar (including the View Buttons)
Each one of these areas has options for viewing certain parts of the PowerPoint environment and formatting your presentation.
Below are the important things to know about certain elements of the PowerPoint interface.
The PowerPoint Ribbon

The Ribbon is contextual. That means that it will adapt to what you’re doing in the program.
For example, the Font, Paragraph and Drawing options are greyed out until you select something that has text in it, as in the example below (A).

Furthermore, if you start manipulating certain objects, the Ribbon will display additional tabs, as seen above (B), with more commands and features to help you work with those objects. The following objects have their own additional tabs in the Ribbon which are hidden until you select them:
- Online Pictures
- Screenshots
- Screen Recording
The Slides Pane

This is where you can preview and rearrange all the slides in your presentation.
Right-clicking on a slide in the pane gives you additional options on the slide level that you won’t find on the Ribbon, such as Duplicate Slide , Delete Slide , and Hide Slide .

In addition, you can add sections to your presentation by right-clicking anywhere in this Pane and selecting Add Section . Sections are extremely helpful in large presentations, as they allow you to organize your slides into chunks that you can then rearrange, print or display differently from other slides.

The Slide Area (A) is where you will build out your slides. Anything within the bounds of this area will be visible when you present or print your presentation.
Anything outside of this area (B) will be hidden from view. This means that you can place things here, such as instructions for each slide, without worrying about them being shown to your audience.

The Notes Pane is the space beneath the Slide Area where you can type in the speaker notes for each slide. It’s designed as a fast way to add and edit your slides’ talking points.
To expand your knowledge and learn more about adding, printing, and exporting your PowerPoint speaker notes, read our guide here .
Your speaker notes are visible when you print your slides using the Notes Pages option and when you use the Presenter View . To expand your knowledge and learn the ins and outs of using the Presenter View , read our guide here .

You can resize the Notes Pane by clicking on its edge and dragging it up or down (A). You can also minimize or reopen it by clicking on the Notes button in the Status Bar (B).
Note: Not all text formatting displays in the Notes Pane, even though it will show up when printing your speaker notes. To learn more about printing PowerPoint with notes, read our guide here .
Now that you have a basic grasp of the PowerPoint interface at your disposal, it’s time to make your presentation.
Adding Content to Your PowerPoint Presentation
Notice that in the Slide Area , there are two rectangles with dotted outlines. These are called Placeholders and they’re set on the template in the Slide Master View .
To expand your knowledge and learn how to create a PowerPoint template of your own (which is no small task), read our guide here .

As the prompt text suggests, you can click into each placeholder and start typing text. These types of placeholder prompts are customizable too. That means that if you are using a company template, it might say something different, but the functionality is the same.

Note: For the purposes of this example, I will create a presentation based on the content in the Starbucks 2018 Global Social Impact Report, which is available to the public on their website.
If you type in more text than there is room for, PowerPoint will automatically reduce its font size. You can stop this behavior by clicking on the Autofit Options icon to the left of the placeholder and selecting Stop Fitting Text to this Placeholder .
Next, you can make formatting adjustments to your text by selecting the commands in the Font area and the Paragraph area of the Home tab of the Ribbon.

The Reset Command: If you make any changes to your title and decide you want to go back to how it was originally, you can use the Reset button up in the Home tab .

Insert More Slides into Your Presentation
Now that you have your title slide filled in, it’s time to add more slides. To do that, simply go up to the Home tab and click on New Slide . This inserts a new slide in your presentation right after the one you were on.

You can alternatively hit Ctrl+M on your keyboard to insert a new blank slide in PowerPoint. To learn more about this shortcut, see my guide on using Ctrl+M in PowerPoint .
Instead of clicking the New Slide command, you can also open the New Slide dropdown to see all the slide layouts in your PowerPoint template. Depending on who created your template, your layouts in this dropdown can be radically different.

If you insert a layout and later want to change it to a different layout, you can use the Layout dropdown instead of the New Slide dropdown.
After inserting a few different slide layouts, your presentation might look like the following picture. Don’t worry that it looks blank, next we will start adding content to your presentation.

If you want to follow along exactly with me, your five slides should be as follows:
- Title Slide
- Title and Content
- Section Header
- Two Content
- Picture with Caption
Adding Content to Your Slides
Now let’s go into each slide and start adding our content. You’ll notice some new types of placeholders.

On slide 2 we have a Content Placeholder , which allows you to add any kind of content. That includes:
- A SmartArt graphic,
- A 3D object,
- A picture from the web,
- Or an icon.
To insert text, simply type it in or hit Ctrl+C to Copy and Ctrl+V to Paste from elsewhere. To insert any of the other objects, click on the appropriate icon and follow the steps to insert it.
For my example, I’ll simply type in some text as you can see in the picture below.

Slides 3 and 4 only have text placeholders, so I’ll go ahead and add in my text into each one.

On slide 5 we have a Picture Placeholder . That means that the only elements that can go into it are:
- A picture from the web

To insert a picture into the picture placeholder, simply:
- Click on the Picture icon
- Find a picture on your computer and select it
- Click on Insert
Alternatively, if you already have a picture open somewhere else, you can select the placeholder and paste in (shortcut: Ctrl+V ) the picture. You can also drag the picture in from a file explorer window.

If you do not like the background of the picture you inserted onto your slide, you can remove the background here in PowerPoint. To see how to do this, read my guide here .
Placeholders aren’t the only way to add content to your slides. At any point, you can use the Insert tab to add elements to your slides.
You can use either the Title Only or the Blank slide layout to create slides for content that’s different. For example, a three-layout content slide, or a single picture divider slide, as shown below.

In the first example above, I’ve inserted 6 text boxes, 3 icons, and 3 circles to create this layout. In the second example, I’ve inserted a full-sized picture and then 2 shapes and 2 text boxes.
The Reset Command: Because these slides are built with shapes and text boxes (and not placeholders), hitting the Reset button up in the Home tab won’t do anything.
That is a good thing if you don’t want your layouts to adjust. However, it does mean that it falls on you to make sure everything is aligned and positioned correctly.
For more on how to add and manipulate the different objects in PowerPoint, check out our step-by-step articles here:
- Using graphics in PowerPoint
- Inserting icons onto slides
- Adding pictures to your PowerPoint
- How to embed a video in PowerPoint
- How to add music to your presentation
Using Designer to generate more layouts ideas
If you have Office 365, your version of PowerPoint comes with a new feature called Designer (or Design Ideas). This is a feature that generates slide layout ideas for you. The coolest thing about this feature is that it uses the content you already have.
To use Designer , simply navigate to the Design tab in your Ribbon, and click on Design Ideas .

NOTE: If the PowerPoint Designer is not working for you (it is grey out), see my troubleshooting guide for Designer .
Change the Overall Design (optional)
When you make a PowerPoint presentation, you’ll want to think about the overall design. Now that you have some content in your presentation, you can use the Design tab to change the look and feel of your slides.
For additional help thinking through the design of your presentation, read my guide here .
A. Picking your PowerPoint slide size
If you have PowerPoint 2013 or later, when you create a blank document in PowerPoint, you automatically start with a widescreen layout with a 16:9 ratio. These dimensions are suitable for most presentations as they match the screens of most computers and projectors.
However, you do have the option to change the dimensions.
For example, your presentation might not be presented, but instead converted into a PDF or printed and distributed. In that case, you can easily switch to the standard dimensions with a 4:3 ratio by selecting from the dropdown (A).
You can also choose a custom slide size or change the slide orientation from landscape to portrait in the Custom Slide Size dialog box (B).

To learn all about the different PowerPoint slide sizes, and some of the issues you will face when changing the slide size of a non-blank presentation, read my guide here .
B. Selecting a PowerPoint theme
The next thing you can do is change the theme of your presentation to a pre-built one. For a detailed explanation of what a PowerPoint theme is, and how to best use it, read my article here .
In the beginning of this tutorial, we started with a blank presentation, which uses the default Office theme as you can see in the picture below.

That gives you the most flexibility because it has a blank background and quite simple layouts that work for most presentations. However, it also means that it’s your responsibility to enhance the design.
If you’re comfortable with this, you can stay with the default theme or create your own custom theme ( read my guide here ). But if you would rather not have to think about design, then you can choose a pre-designed theme.
Microsoft provides 46 other pre-built themes, which include slide layouts, color variants and palettes, and fonts. Each one varies quite significantly, so make sure you look through them carefully.
To select a different theme, go to the Design tab in the Ribbon, and click on the dropdown arrow in the Themes section .

For this tutorial, let’s select the Frame theme and then choose the third Variant in the theme. Doing so changes the layout, colors, and fonts of your presentation.

Note: The theme dropdown area is also where you can import or save custom themes. To see my favorite places to find professional PowerPoint templates and themes (and recommendations for why I like them), read my guide here .
C. How to change a slide background in PowerPoint
The next thing to decide is how you want your background to look for the entire presentation. In the Variants area, you can see four background options.

For this example, we want our presentation to have a dark background, so let’s select Style 3. When you do so, you’ll notice that:
- The background color automatically changes across all slides
- The color of the text on most of the slides automatically changes to white so that it’s visible on the dark background
- The colors of the objects on slides #6 and #7 also adjust, in a way we may not want (we’ll likely have to make some manual adjustments to these slides)

Note: If you want to change the slide background for just that one slide, don’t left-click the style. Instead, right-click it and select Apply to Selected Slides .
After you change the background for your entire presentation, you can easily adjust the background for an individual slide.

Inside the Format Background pane, you can see you have the following options:
- Gradient fill
- Picture or texture fill
- Pattern fill
- Hide background
You can explore these options to find the PowerPoint background that best fits your presentation.
D. How to change your color palette in PowerPoint
Another thing you may want to adjust in your presentation, is the color scheme. In the picture below you can see the Theme Colors we are currently using for this presentation.

Each PowerPoint theme comes with its own color palette. By default, the Office theme includes the Office color palette. This affects the colors you are presented with when you format any element within your presentation (text, shapes, SmartArt, etc.).

The good news is that the colors here are easy to change. To switch color palettes, simply:
- Go to the Design tab in the Ribbon
- In the Variants area, click on the dropdown arrow and select Colors
- Select the color palette (or theme colors) you want
You can choose among the pre-built color palettes from Office, or you can customize them to create your own.
As you build your presentation, make sure you use the colors from your theme to format objects. That way, changing the color palette adjusts all the colors in your presentation automatically.
E. How to change your fonts in PowerPoint
Just as we changed the color palette, you can do the same for the fonts.

Each PowerPoint theme comes with its own font combination. By default, the Office theme includes the Office font pairing. This affects the fonts that are automatically assigned to all text in your presentation.

The good news is that the font pairings are easy to change. To switch your Theme Fonts, simply:
- Go to the Design tab in the Ribbon
- Click on the dropdown arrow in the Variants area
- Select Fonts
- Select the font pairing you want
You can choose among the pre-built fonts from Office, or you can customize them to create your own.
If you are working with PowerPoint presentations on both Mac and PC computers, make sure you choose a safe PowerPoint font. To see a list of the safest PowerPoint fonts, read our guide here .
If you receive a PowerPoint presentation and the wrong fonts were used, you can use the Replace Fonts dialog box to change the fonts across your entire presentation. For details, read our guide here .
Adding Animations & Transitions (optional)
The final step to make a PowerPoint presentation compelling, is to consider using animations and transitions. These are by no means necessary to a good presentation, but they may be helpful in your situation.
A. Adding PowerPoint animations
PowerPoint has an incredibly robust animations engine designed to power your creativity. That being said, it’s also easy to get started with basic animations.
Animations are movements that you can apply to individual objects on your slide.

To add a PowerPoint animation to an element of your slide, simply:
- Select the element
- Go to the Animations tab in the Ribbon
- Click on the dropdown arrow to view your options
- Select the animation you want
You can add animations to multiple objects at one time by selecting them all first and then applying the animation.
B. How to preview a PowerPoint animation

There are three ways to preview a PowerPoint animation:
- Click on the Preview button in the Animations tab
- Click on the little star next to the slide
- Play the slide in Slide Show Mode
To learn other ways to run your slide show, see our guide on presenting a PowerPoint slide show with shortcuts .
To adjust the settings of your animations, explore the options in the Effect Options , Advanced Animation and the Timing areas of the Animation tab .

Note: To see how to make objects appear and disappear in your slides by clicking a button, read our guide here .
C. How to manage your animations in PowerPoint

The best way to manage lots of animations on your slide is with the Animation Pane . To open it, simply:
- Navigate to the Animations tab
- Select the Animation Pane
Inside the Animation Pane, you’ll see all of the different animations that have been applied to objects on your slide, with their numbers marked as pictured above.
Note: To see examples of PowerPoint animations that can use in PowerPoint, see our list of PowerPoint animation tutorials here .
D. How to add transitions to your PowerPoint presentation
PowerPoint has an incredibly robust transition engine so that you can dictate how your slides change from one to the other. It is also extremely easy to add transitions to your slides.
In PowerPoint, transitions are the movements (or effects) you see as you move between two slides.

To add a transition to a PowerPoint slide, simply:
- Select the slide
- Go to the Transitions tab in the Ribbon
- In the Transitions to This Slide area, click on the dropdown arrow to view your options
- Select the transition you want
To adjust the settings of the transition, explore the options in the Timing area of the Transitions tab.
You can also add the same transition to multiple slides. To do that, select them in the Slides Pane and apply the transition.
E. How to preview a transition in PowerPoint

There are three ways to preview your PowerPoint transitions (just like your animations):
- Click on the Preview button in the Transitions tab
- Click on the little star beneath the slide number in the thumbnail view
Note: In 2016, PowerPoint added a cool new transition, called Morph. It operates a bit differently from other transitions. For a detailed tutorial on how to use the cool Morph transition, see our step-by-step article here .
Save Your PowerPoint Presentation
After you’ve built your presentation and made all the adjustments to your slides, you’ll want to save your presentation. YOu can do this several different ways.

To save a PowerPoint presentation using your Ribbon, simply:
- Navigate to the File tab
- Select Save As on the left
- Choose where you want to save your presentation
- Name your presentation and/or adjust your file type settings
- Click Save
You can alternatively use the Ctrl+S keyboard shortcut to save your presentation. I recommend using this shortcut frequently as you build your presentation to make sure you don’t lose any of your work.

This is the standard way to save a presentation. However, there may be a situation where you want to save your presentation as a different file type.
To learn how to save your presentation as a PDF, see our guide on converting PowerPoint to a PDF .
How to save your PowerPoint presentation as a template
Once you’ve created a presentation that you like, you may want to turn it into a template. The easiest – but not technically correct – way, is to simply create a copy of your current presentation and then change the content.
But be careful! A PowerPoint template is a special type of document and it has its own parameters and behaviors.
If you’re interested in learning about how to create your own PowerPoint template from scratch, see our guide on how to create a PowerPoint template .
Printing Your PowerPoint Presentation
After finishing your PowerPoint presentation, you may want to print it out on paper. Printing your slides is relatively easy.

To open the Print dialog box, you can either:
- Hit Ctrl+P on your keyboard
- Or go to the Ribbon and click on File and then Print

Inside the Print dialog box, you can choose from the various printing settings:
- Printer: Select a printer to use (or print to PDF or OneNote)
- Slides: Choose which slides you want to print
- Layout: Determine how many slides you want per page (this is where you can print the notes, outline, and handouts)
- Collated or uncollated (learn what collated printing means here )
- Color: Choose to print in color, grayscale or black & white
There are many more options for printing your PowerPoint presentations. Here are links to more in-depth articles:
- How to print multiple slides per page
- How to print your speaker notes in PowerPoint
- How to save PowerPoint as a picture presentation
So that’s how to create a PowerPoint presentation if you are brand new to it. We’ve also included a ton of links to helpful resources to boost your PowerPoint skills further.
When you are creating your presentation, it is critical to first focus on the content (what you are trying to say) before getting lost inserting and playing with elements. The clearer you are on what you want to present, the easier it will be to build it out in PowerPoint.
If you enjoyed this article, you can learn more about our PowerPoint training courses and other presentation resources by visiting us here .
🔒 Unlock the PowerPoint Shortcuts Trusted by Industry Leaders KKR, American Express, HSBC, and More!
Join over 114,880 professionals from diverse fields including consulting, investment banking, advertising, marketing, sales, and business development who have supercharged their PowerPoint game with our proven methods.
✅ Customize compelling presentations effortlessly.
✅ Master time-saving techniques for faster deck creation.
✅ Boost your career prospects with top-notch PowerPoint skills.
Get FREE access to the Critical PowerPoint Shortcuts module of our premium training course by entering your name and email below.
DISCLAIMER: PC Users Only!
We respect your privacy and will keep your info safe and confidential.
About The Author

Popular Tutorials
- How to Strikethrough Text (l̶i̶k̶e̶ ̶t̶h̶i̶s̶) in Word, Excel & PowerPoint
- How to Make Animated Fireworks in PowerPoint (Step-by-Step)
- Strikethrough Shortcut (l̶i̶k̶e̶ ̶t̶h̶i̶s̶) for Word, Excel & PowerPoint
- How to Create a Flash Card Memory Game in PowerPoint (Like Jeopardy)
- Keyboard Shortcuts Not Working: Solved
PowerPoint Tutorial Categories
- Strategies & Opinions
- Shortcuts & Hacks
- Pictures, Icons, Videos, Etc.
- New Features
- Miscellaneous
- Charts & Data Viz
We help busy professionals save hours and gain peace of mind, with corporate workshops, self-paced courses and tutorials for PowerPoint and Word.
Work With Us
- Corporate Training
- Presentation & Template Design
- Courses & Downloads
- PowerPoint Articles
- Word Articles
- Productivity Resources
Find a Tutorial
- Free Training
- For Businesses
We help busy office workers save hours and gain peace of mind, with tips, training and tutorials for Microsoft PowerPoint and Word.
Master Critical PowerPoint Shortcuts – Secure Your FREE Training Module and Save Valuable Time!
⌛ Master time-saving expert techniques.
🔥 Create powerful presentations.
🚀 Propel your career to new heights.
We value your privacy – we keep your info safe.
Discover PowerPoint Hacks Loved by Industry Giants - KKR, AmEx, HSBC!
Over 114,880 professionals in finance, marketing and sales have revolutionized their PPT skills with our proven methods.
Gain FREE access to a full module of our premium PowerPoint training program – Get started today!
We hate spam too and promise to keep your information safe.
You are currently viewing a placeholder content from Facebook . To access the actual content, click the button below. Please note that doing so will share data with third-party providers.

- Certifications
Inserting YouTube Videos into PowerPoint: A Step-by-Step Guide
- December 27, 2022
As you know, YouTube is one of the most popular video sites in the world. Millions of people watch videos on YouTube every day. And with so many people watching videos on YouTube, it’s no surprise that now you can also easily insert a YouTube video into PowerPoint presentations. By incorporating YouTube into your presentations , you can give your audience something new and exciting to look at while they listen to what you have to say.
Videos are also great for illustrating key points and providing visual examples. So how can you incorporate a YouTube video in your PowerPoint presentation? Let’s take a look…
Create a new presentation in PowerPoint
Before you start editing your PowerPoint presentation to include a YouTube video, make sure you have a new presentation created.
You can create a new presentation from within PowerPoint by going to File > New > Presentation, or you can create a new presentation by using the charting tool. If you are using the charting tool to create a new presentation, ensure you select Standard chart type. You should also ensure that the charting tool is set to Excel data. Now that you have a new presentation created, you are ready to add a YouTube video.
Add a YouTube video to your presentation
To add a YouTube video to your PowerPoint presentation , you will first have to find the video you want to include. You can easily find the right video by using the YouTube search bar and entering the name of the video you are looking for.
For example, to find the best videos for learning about taxes, you would enter tax videos in the YouTube search bar. Once you find the video you want to include in your PowerPoint presentation, simply drag and drop it into your presentation. You can also copy and paste the video link into your presentation.
Next, you will have to add the YouTube video to the presentation. To do this, select the presentation’s tab on the left and then click on the down arrow located next to the Start button. You will now see the Library button appear. Click on the Library button and then select the Media button. You will now see all your PowerPoint presentations in the Media library.
Select the presentation you want to add the video in and click on the arrow located next to the Library button. Now click on the arrow located next to the Media button and select the Media button. You will now see all the videos in your PowerPoint presentations , select your video and click on the arrow located next to the Insert button. You will now see a dropdown menu, select PowerPoint.
Choose which YouTube video to include
With a YouTube video inserted into your PowerPoint presentation, it is time to choose which video to include. There are many ways you can choose which YouTube video you will include in your PowerPoint presentation, such as: – Pick the best video from the list of available videos. – Pick a video that matches the topic of your presentation, such as a video that relates to your presentation’s main topic. – Pick a video that is relevant to your audience, such as a video that is related to your target audience.
For example, if you have a presentation on marketing, you can choose a video on marketing that will interest your audience. Or, if you are planning a presentation on health and wellness and choose a video on travel, you might be missing out on the big picture. You can also choose a video about a specific topic, such as taxes. This way, your PowerPoint presentation becomes more relevant to your audience.
Change the appearance of your video
With your YouTube video in your PowerPoint presentation, you can change the appearance of your video. Changing the appearance of your YouTube video will help you to personalize your YouTube video and make it more relevant to your audience. You can change the appearance of your YouTube video by going to the YouTube video you added to your PowerPoint presentation and then going to the Video Settings menu.
With the YouTube video in the YouTube video settings menu, you can change the appearance of your video, such as the size, colour, and transparency. You can also change your video’s title and description so that your audience knows more about the video.
Combine HTML and JavaScript
If you have a PowerPoint presentation that you created with a YouTube video and you want to make the experience even more engaging, you can add HTML and JavaScript to your PowerPoint presentation. With HTML and JavaScript, you can make your video more engaging and interactive.
You can add HTML and JavaScript to the YouTube video you added to your PowerPoint presentation by going to the YouTube video settings menu, and then doing the following: – Click on the Advanced Option. – Now select the Enable HTML5 Video and JavaScript options.
Add a YouTube Player Button
If you want your PowerPoint presentation to feel more engaging and interactive, you can add a YouTube player button to your PowerPoint presentation. With a YouTube player button, your PowerPoint presentation will feel more engaging and interactive. You can add a YouTube player button to your PowerPoint presentation by going to the YouTube settings menu, and then selecting the Add a YouTube player button option.
With a YouTube player button, your PowerPoint presentation will feel more engaging and interactive. With a YouTube player button, the video play button will turn into a full-screen button, so your audience will have to click on it to exit full-screen mode. Now that your PowerPoint presentation is more engaging and interactive, you can now engage your audience with your video.
How to Customize the YouTube Video in PowerPoint?
With your YouTube video in your PowerPoint presentation, you can customize the video in a number of different ways. By customizing your video you can change the play button color, change the color of the play button, and change the way the video plays. To customize the video in your PowerPoint presentation , go to your YouTube video settings menu, and then do the following: – Click on the Customize button. – Select the color, size, and placement options for your play button. – Click Save and then click Close.
Bottom line
With a YouTube video added to your PowerPoint presentation, you can now easily communicate your message to your audience and help them learn new things. You can also add a YouTube video to your PowerPoint presentation to create a more engaging experience for your audience and make your presentation more engaging and interactive.
Now that you know how to incorporate a YouTube video into your PowerPoint presentation, you can easily use it to help educate your audience while they are listening to what you have to say.
Share This Post:
3 thoughts on “inserting youtube videos into powerpoint: a step-by-step guide”.
Wow, amazing blog layout! How long have you ever been blogging for? you made running a blog glance easy. The total glance of your site is magnificent, let alone the content! You can see similar here ecommerce
Wow, awesome weblog layout! How long have you been blogging for? you made running a blog glance easy. The overall glance of your web site is great, as neatly as the content! You can see similar here e-commerce
Very informative article.Really looking forward to read more. Really Cool.
Add a Comment Cancel reply
Save my name, email, and website in this browser for the next time I comment.
Get A 5X Raise In Salary

Reset Password
Insert/edit link.
Enter the destination URL
Or link to existing content
How-To Geek
How to embed a youtube video in powerpoint.
During a presentation, a mix of media always performs best.
Quick Links
Finding a youtube video’s embed code, embedding a youtube video in powerpoint, searching the youtube video in powerpoint.
During a presentation, a mix of media always performs best. Using images, graphs, charts, and videos not only makes your presentation more informative but also more engaging for the audience. If you have a YouTube video you’d like to use during your presentation, it’s as simple as embedding it in a slide. Here’s how.
Rather than linking to a YouTube video in your presentation, embedding it in the slide is usually the better option. It gives your presentation a more professional look because you won't be leaving your slide to pop open the YouTube website. Keep in mind, though, that even with the video embedded in your presentation, you’ll still need to be connected to the internet to play the video.
First, head over to YouTube and find the video you want to embed. Once you’re there, select the “Share” option, which you'll find in the video description.
A window will appear, giving you a few different vehicles for sharing the video. Go ahead and click the “Embed” option in the “Share a link” section.
Another window will appear, providing the embed code along with a few other options. If you wanting to start the video at a particular time, select the “Start at” box and enter the time when you’d like the video to start. Additionally, you can select whether you’d like to player controls to appear and if you want to enable privacy-enhanced mode.
Note: Privacy-enhanced mode keeps YouTube from storing information about visitors that visit your website that the video is embedded on unless they play the video. Since we will be using the embed code in a PowerPoint presentation, this option is not necessary.
Select “Copy” at the bottom right of the window to copy the embed code to your clipboard. Alternatively, select the code and use the Ctrl+C shortcut.
We’re finished with YouTube, for now, so head on over to PowerPoint and open your presentation.
Select the slide where you want to embed the YouTube video. On the “Insert” tab, click the “Video” button.
On the drop-down menu, select the “Online Video” option.
The Insert Video window that appears lets you search YouTube for a video or paste in that embed code you copied from the YouTube website. Paste the embed code and click the arrow to complete the action.
Your video will now appear in the presentation. To resize the video, click and drag the corners.
Note that at first, the video will appear as a black rectangle. Don’t worry---this is normal. Simply right-click the video and then select “Preview.”
This will give you a quick preview of how the video will look during your presentation.
You can also search for a YouTube video from that Insert Video window in PowerPoint. Type in your search terms and then click the search icon.
Several options will appear---888,341 in the case of the Rick Astley’s Never Gonna Give You Up video for which we searched. Select the one you want to use.
Then select “Insert” at the bottom-right of the window.
That’s all there is to it. Generally, we recommend searching the actual YouTube website and using the embed code the way we described earlier---mostly because the site is much easier to search and you can watch the videos before selecting the one you want. Still, if you know exactly what you're after, this method might work fine for you.
Blog > How to add a YouTube Video in PowerPoint
How to add a YouTube Video in PowerPoint
07.08.20 • #powerpointtips.
Sometimes, you want to show your audience a YouTube video during a presentation. Some people do so by opening the browser, going to YouTube and then typing the video title into the search bar, when in fact there is a much easier and more convenient way. In the this post, you'll learn how you can directly insert a YouTube Video into PowerPoint that plays automatically on your slide. Also, we have got some great suggestions about videos you could show your audience.
You can watch our video (which is by the way inserted from YouTube as well) down below and learn how to add a video to your slides in just one minute! If you don't feel like watching the video, you can also follow the step-by-step guide down below.
Step-by-Step Tutorial
- Go to Insert in the PowerPoint task line on the top.
- Click on Video on the top right corner. Then choose the option Online Video .

- A window will open which will ask you to insert the video’s URL.

- Open the YouTube video you would like to embed in your browser. You can simply right click on the address bar in the browser and copy the URL. Alternatively, perform a right mouse click on the video, and then click on Copy Video URL .

- Go back to PowerPoint and insert the URL by either pressing CTRL+V or right click and then Paste . Then click on Insert .

- Your video will then be inserted on your current slide. Just like any element, you can change its size or move it around now.
- To start the video (either while editing or in presentation mode), simply click on the play button.

YouTube video with offline playback
With the previously described option, it is necessary to have a stable internet connection while presenting. As that can not always be guaranteed, there is also a way of inserting YouTube videos that work offline. Follow these steps:
- Open the YouTube Video in your Browser. Copy the URL by clicking the address bar and then Right Click > Copy.
- Open the website y2mate.com . Paste your copied URL into the text field, then click Start .

- Choose one of the options for download (and click the Download button. We recommend 1080p or 720p.

- A window will open, and your video will convert. When it's ready, click Download .mp4" .
- After your file has downloaded, you should see it in your Downloads folder in the browser. By clicking "Show in folder", you'll see where it's saved on your device.

- Right click on the file in your folder and click Copy .
- Go to the PowerPoint slide where you want your video to be placed. Right click and Paste . Your video should now appear and play if you click on it.

What kinds of videos can I use in a presentation?
Videos are an amazing way to liven up your presentation. Especially when you're talking for a long time, the audience tends to get tired. That's where a variation of multimedia elements, such as videos, can be helpful. We recommend putting videos in the main part of a presentation, but of course you may also start or finish by presenting a video to your audience. There is no limit for the type of video, the only guideline you should follow is relevance. Before mindlessly pasting a video to your slide, ask yourself: "What purpose does this video fulfill within my presentation?" Is it supposed to inform and teach the audience, is it something you really want everybody to see, or is it just a funny little clip to lighten the mood? All of those purposes are fine. With this tip, you're one step closer to a wonderful presentation! If you want to learn more about successful presentations and Audience Engagement, check out our blogpost Top 10 Tools for increasing Audience Engagement .

Set the start of your video
After you've added a video from YouTube, it starts to play by default when you click anywhere on the slide during the presentation. That's usually fine, but can sometimes be annoying, e.g. when you have more than one video on one slide. In that case, it is helpful to set the Start to When clicked on . The video then won't start until you click directly on it. You can do that by first clicking on your video, going to the Playback tab on the right and then select When clicked on in the Start-selection. By choosing Automatically here, your video will start automatically, without having to click on it.
Add a video from your device
If you want to add a video that is saved on your computer, you can do so by following the tutorial in our article Insert a local Video .
Useful Keyboard Shortcuts
How can I insert a YouTube video to PowerPoint?
Go to Insert > Video > Online Video. Copy the video URL from the address bar and paste it to the window that opens. Click Insert and your video should appear instantly.
Can I play a video directly on my PowerPoint slides?
Yes. You can insert a video from YouTube by using the URL, and it will be played directly on your slide. In our tutorial , you'll learn how to do so.
Can I play an offline video from YouTube in PowerPoint?
Yes, it is possible to play an offline YouTube video on your PowerPoint slides. We show you how it is done in our tutorial .
Related articles
About the author.

Pia Lehner-Mittermaier
Pia works in Marketing as a graphic designer and writer at SlideLizard. She uses her vivid imagination and creativity to produce good content.

Get 1 Month for free!
Do you want to make your presentations more interactive.
With SlideLizard you can engage your audience with live polls, questions and feedback . Directly within your PowerPoint Presentation. Learn more
Top blog articles More posts

Create advanced Chart Animations in PowerPoint

Create Venn diagram + free PowerPoint template

Get started with Live Polls, Q&A and slides
for your PowerPoint Presentations
The big SlideLizard presentation glossary
.odp file extension.
.odp files are similar to .ppt files. It's a presentation which was created with Impress and contains slides with images, texts, effects and media.
Learning Chunk
Learning Chunk means, like Microlearning, learning in small quantities. The learning content is really small and can be absorbed quickly.
B2C means Business to Customer. A B2C event is hosted by a company for its customers. It's important for gaining new customers and for satisfieing regular clients.
Distributed Audience
A Distributed Audience means that the audience you are trying to reach is spread over long distances.
Be the first to know!
The latest SlideLizard news, articles, and resources, sent straight to your inbox.
- or follow us on -
We use cookies to personalize content and analyze traffic to our website. You can choose to accept only cookies that are necessary for the website to function or to also allow tracking cookies. For more information, please see our privacy policy .
Cookie Settings
Necessary cookies are required for the proper functioning of the website. These cookies ensure basic functionalities and security features of the website.
Analytical cookies are used to understand how visitors interact with the website. These cookies help provide information about the number of visitors, etc.

Cloud Storage

Custom Business Email

Video and voice conferencing

Shared Calendars

Word Processing

Spreadsheets
Presentation Builder

Survey builder

Google Workspace
An integrated suit of secure, cloud-native collaboration and productivity apps powered by Google AI.
Tell impactful stories, with Google Slides
Create, present, and collaborate on online presentations in real-time and from any device.
- For my personal use
- For work or my business

Jeffery Clark
T h i s c h a r t h e l p s b r i d g i n g t h e s t o r y !

E s t i m a t e d b u d g e t

Make beautiful presentations, together
Stay in sync in your slides, with easy sharing and real-time editing. Use comments and assign action items to build your ideas together.

Present slideshows with confidence
With easy-to-use presenter view, speaker notes, and live captions, Slides makes presenting your ideas a breeze. You can even present to Google Meet video calls directly from Slides.

Seamlessly connect to your other Google apps
Slides is thoughtfully connected to other Google apps you love, saving you time. Embed charts from Google Sheets or reply to comments directly from Gmail. You can even search the web and Google Drive for relevant content and images directly from Slides.

Extend collaboration and intelligence to PowerPoint files
Easily edit Microsoft PowerPoint presentations online without converting them, and layer on Slides’ enhanced collaborative and assistive features like comments, action items, and Smart Compose.

Work on fresh content
With Slides, everyone’s working on the latest version of a presentation. And with edits automatically saved in version history, it’s easy to track or undo changes.

Make slides faster, with built-in intelligence
Assistive features like Smart Compose and autocorrect help you build slides faster with fewer errors.

Stay productive, even offline
You can access, create, and edit Slides even without an internet connection, helping you stay productive from anywhere.
Security, compliance, and privacy

Secure by default
We use industry-leading security measures to keep your data safe, including advanced malware protections. Slides is also cloud-native, eliminating the need for local files and minimizing risk to your devices.
Encryption in transit and at rest
All files uploaded to Google Drive or created in Slides are encrypted in transit and at rest.
Compliance to support regulatory requirements
Our products, including Slides, regularly undergo independent verification of their security, privacy, and compliance controls .
Private by design
Slides adheres to the same robust privacy commitments and data protections as the rest of Google Cloud’s enterprise services .

You control your data.
We never use your slides content for ad purposes., we never sell your personal information to third parties., find the plan that’s right for you, google slides is a part of google workspace.
Every plan includes

Collaborate from anywhere, on any device
Access, create, and edit your presentations wherever you are — from any mobile device, tablet, or computer — even when offline.

Get a head start with templates
Choose from a variety of presentations, reports, and other professionally-designed templates to kick things off quickly..

Photo Album

Book Report

Visit the Slides Template Gallery for more.
Ready to get started?

- Search Search Search …
YouTube Channel interactive template.
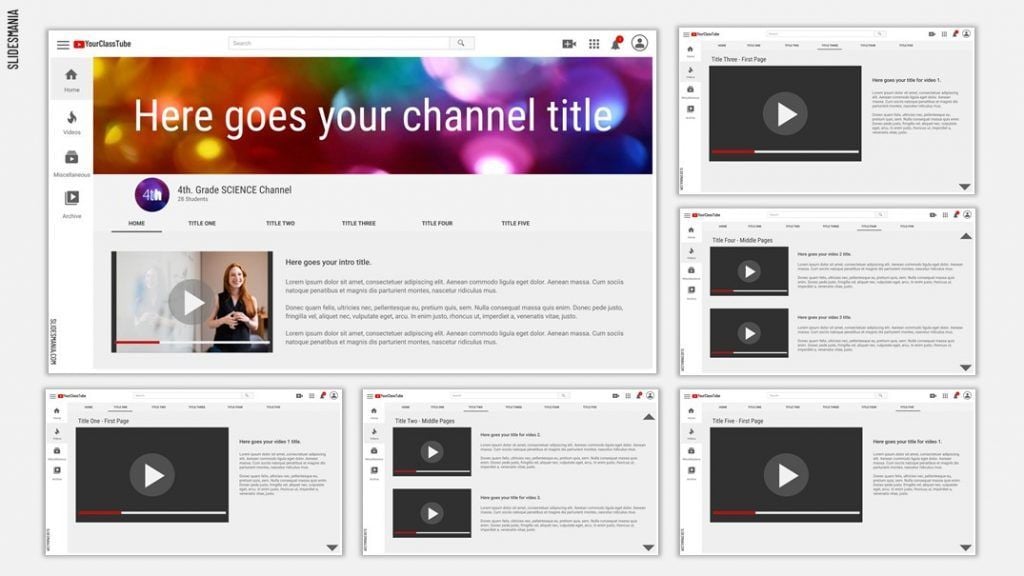
Free PowerPoint template and Google Slides theme.
Free template to create video playlists, your class channel or video lessons..
Since YouTube doesn’t allow playlists to be made from videos that are intended for kids, with this template you can create your playlists in Google Slides and keep the YouTube esthetics.
You can also use this template to insert your video lessons or to create a channel for your class, where your students can ‘upload’ their creations.
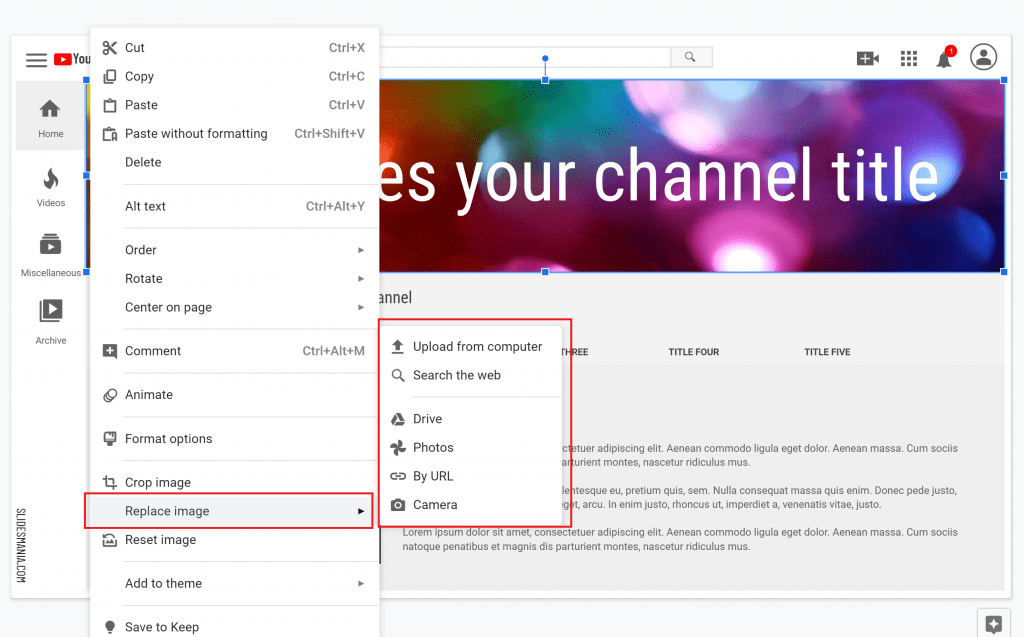
As usual, to change any text that’s locked in the master (Such as: YourClassTube, Home, Title One to Five, Miscellaneous and Archive) click on Edit > Find and Replace
Find: Title One
Replace with: Week One
You can even use this template as a weekly planner to deliver lessons and activities to your students by replacing the titles with the days of the week.
To change the cover image, right click on it and select Replace image:
This time I’m not using theme colors.
I’ve added First pages, middle pages and Last pages for every “TITLE”. If you only need one, delete the one in the middle and the last one and remove the navigation arrow on the first one.
If you only need two pages, remove the middle one. And if you need more than 3 pages, duplicate the middle one as many times you need. This way you don’t have to place the navigation arrows and their links.
You may also like

Monet Free Template for Google Slides or PowerPoint Presentations
Free Template for PowerPoint and Google Slides Presentations Monet Monet free presentation template is, of course, perfect for presentations about art! Even though […]
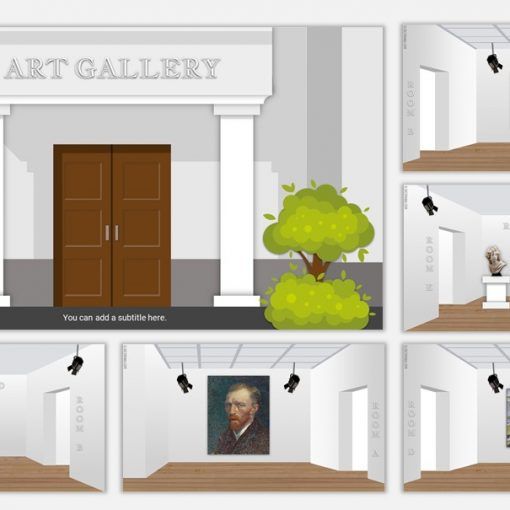
Virtual Art Gallery, interactive template.
Free PowerPoint template and Google Slides theme. Free virtual art gallery to showcase students’ work or to create an interactive lesson. Another […]
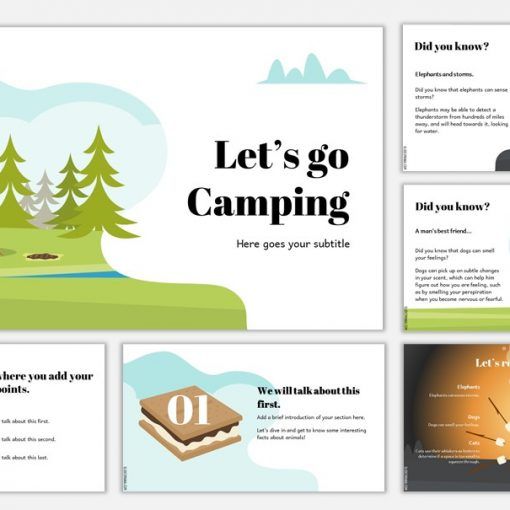
Let’s Go Camping! Outdoors slides theme.
Free PowerPoint template and Google Slides theme. Free template for outdoor activities. Ready for a trip? Let’s go camping with this fun […]
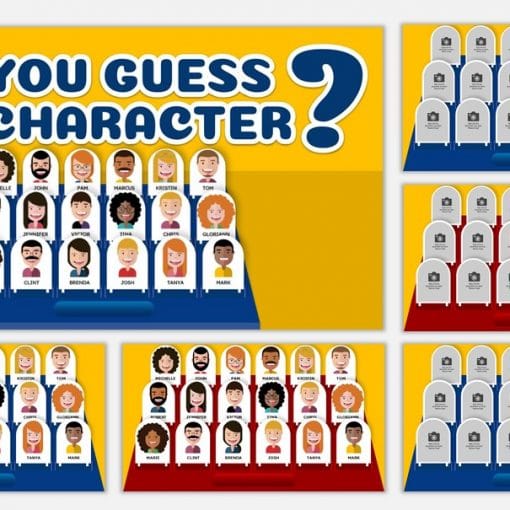
Can you guess the character? Game and template!
Free game template for Google Slides and PowerPoint. Have you ever played the ‘Guess who?’ game? Well, with this template you can […]

How to Upload a PowerPoint to YouTube: Step-by-Step Guide

Have you ever wondered how to upload a PowerPoint to YouTube? That’s a fairly common question among many Microsoft PowerPoint users.
After creating a PowerPoint presentation, you may want to share it on YouTube to reach a greater audience.
Unfortunately, YouTube can only accept video files. A PowerPoint presentation may have video and audio elements embedded in it, but it is still not a video file.
You need to convert your presentation to a video file to upload it to YouTube. This tutorial will show you exactly how to do that.

Step 1: Create Your PowerPoint Presentation
Create your PowerPoint presentation as you normally would. However, keep in mind that you won’t be doing a live presentation, so try to include everything you need to make a great video, including audio clips.
Your audio could be music, sound bites, a narration (your voice recordings), or a combination of all these. Make sure to use them meaningfully.
Here is how to add audio to your presentation:
1. Click the Insert tab on the ribbon
2. Click Audio from my PC
Browse through the audio files on your computer and select the one you want to add to your presentation.
3. Click the Insert button to add the file
Step 2: Convert Your Presentation to a Video
This next step on how to upload a PowerPoint to YouTube is crucial because you can’t share your file on the widely accessible video platform without converting it to a video format.
Here’s how to convert your presentation to a video.
1. Click the File tab on the PowerPoint (2010 version or later)

2. Click the Export tab
3. Click Create a Video from the list of options

You can tweak some of the settings, including slide durations, video resolution, and narrations.
You can leave the resolution to full HD if you don’t know what to select. Simply let YouTube handle the file compression.
You can simply set how long you want each slide to display, especially if your presentation doesn’t have recorded narrations and timings. For example, you can set individual slides to show for 15 seconds.
4. Next, click the Create Video box below the settings
5. Click Save on the next dialog box to export your presentation in video format
Your PowerPoint presentation is now ready for YouTube.
Step 3: Upload to YouTube
Now that you’ve converted your presentation to a video, it’s time to upload it to YouTube. Here’s how to do that:
1. Sign in to your YouTube account or click the app on your mobile device
2. Click the Create icon on the top right corner of the window
3. Click Upload video

On a mobile device, tap the circled plus sign at the center bottom of the screen and tap Upload a video .
4. Locate the PowerPoint video file and click Open
You may be asked to create a YouTube channel if you don’t already have one. You can rename the file, write a description, set the privacy, and apply other settings when the upload is complete.
Tips to Make Your Video Better
Although your presentation will be viewed on YouTube, you still need to remember a few simple tips for a great video.
- Keep the visuals as simple as they can be; presentations generally work best that way. You don’t want to clutter the entire screen. Instead, allow a few empty spaces on each slide for improved readability
- Highlight only the most essential facts. Your audience should not have to endure a long list of bullet points. Remember that you are presenting, not writing a book
- Make use of themes or templates to give your presentation a uniform feel. You might mar an otherwise good presentation unless you are an expert with lots of experience creating eye-catching yet appealing presentations
- Use audios, effects, and transitions in meaningful ways. You want to engage your audience, but at the same time, you don’t want to appear cheesy
Why You Should Share Your PowerPoint Presentation on YouTube
Learning how to upload a PowerPoint to YouTube gives you the advantage of reaching a wider audience, whether or not they have a presentation program on their computers.
While Microsoft PowerPoint is a fairly popular presentation program, not everyone has ready access to it. Some of your clients, co-workers, students, or friends may not have the software on their computers. Others may have it (or some other similar application) but don’t know how to use it.
However, just about anyone can access YouTube from a computer, smartphone, or other mobile devices. It’s as simple as searching for your video on the platform and clicking play – no downloads or any other technical know-how required.
Closely related to this is that users don’t even need a computer to view your presentation. Not many mobile devices have a PowerPoint program, but they can all play videos, whether it’s an iPod, iPhone, or mobile phone.
Also, you don’t have to worry about specific PowerPoint versions. Usually, presentations in one version of PowerPoint might not work too well on another. A video eliminates all that worry. Users can even view the presentation on a DVD player by downloading it to disk.
You can easily embed the video in your blog or on any web page. Video files have better web support than presentation formats.
In a nutshell, more people can access your PowerPoint presentation if you share it on YouTube. You can copy and share the link to your video to make it easy for people to watch it.
Wrapping Up
Hopefully, you now know how to upload a PowerPoint to YouTube. Don’t worry if your video presentation doesn’t come out as you expected at first. You can also tweak things around until you get exactly what you want. The key is to experiment with the settings during the conversion process.
You can reach more people you can ever imagine with a YouTube presentation. Remember to set proper metadata (or description) so that people can easily find your video on YouTube.

Jamie Keet is a Technology Instructional Coach with a deep-rooted passion for educational technology. With a background that combines a marketing diploma, a degree in management, and a master's in educational technology, Jamie has spent the last 25 years in education, working across all grades and adult learning. His experience in the classroom has shaped his approach to tech education, focusing on making technology accessible and engaging for everyone.
Jamie's goal is simple: to help users feel confident and successful with technology, encouraging them to explore and learn on their own. He believes in breaking down the barriers that prevent people from getting started with technology, whether they're students in a classroom or individuals looking to improve their tech skills.
Outside of his professional work, Jamie enjoys keeping up with the latest tech trends and finding new ways to incorporate them into his teaching. His approach is all about simplicity, clarity, and making technology fun and accessible for all.
Further reading

Boosting Classroom Collaboration with Microsoft Teams

Streamlining Classroom Workflow with Microsoft To Do

Unlocking the Potential of My Day with the Outlook Calendar Update

New Microsoft Outlook Features: Revolutionizing Professional Communication

Discovering Bing Chat: The New Wave of Interactive Browsing

How to Insert Microsoft Excel Data into Microsoft Word and PowerPoint
- Latest Posts
- Microsoft Excel Tutorial
- Microsoft Word Tutorial
- Microsoft PowerPoint Tutorial
- Microsoft OneNote Tutorial
- Microsoft Outlook Tutorial
- Augmented Reality
- Education Technology
- General Tech
- Google Apps Tutorials
- Graphic Design
- Microsoft OneNote
- Microsoft Sway
- Microsoft Teams
- Microsoft Tutorials
- Online Teaching
- Productivity Apps
- Remote Learning
- Teaching Apps
- Video Editing Help
- Virtual Reality
- YouTube Help
- Add, change, or remove transitions between slides Article
- Animate text or objects Article
- Use the Morph transition in PowerPoint Article
- Insert a video from YouTube or another site Article
- Add or delete audio in your PowerPoint presentation Article
- Record your screen in PowerPoint Article

Insert a video from YouTube or another site

In PowerPoint for Microsoft 365, PowerPoint 2021, or PowerPoint 2019, you can insert an online video from YouTube or Vimeo on a slide.
In PowerPoint for Microsoft 365, version 1907 or later, you can also insert an online video from Microsoft Stream, a video service for enterprises—people in an organization can upload, view, and share videos with one another.
The video plays directly from the website, and it has the site's controls for playing, pausing, volume, and so on. The PowerPoint playback features (Fade, Bookmark, Trim, and so on) don't apply to online videos .
Because the video is stored on a web site, rather than in your presentation, you must be connected to the internet in order for the video to play successfully.
Insert a web video
In your web browser, locate the video you want.
Copy the URL of the web page from the Address bar of your browser.
Switch back to PowerPoint and select the slide where you want to place the video.
On the Insert tab of the ribbon, select Video > Online Video .
In the Online Video dialog box, paste the URL you copied in step 2.
Select Insert .
Play the video
If a video is inserted successfully, you can play it either in Normal view or Slide Show.
A Play button appears on the video in Normal view.
In Slide Show, you can interact with videos just as you would in a web browser.
By default, videos from YouTube and Vimeo play in "click sequence." You can play the video without having to click the Play button. Just tap the spacebar to advance to the next step in your click sequence.
Troubleshooting
Not all online videos from these sites are allowed to be embedded. You should check on the video site to find out if a certain video can be embedded.
Internet Explorer 11 is required on your computer
Note: Microsoft 365 apps and services will not support Internet Explorer 11 starting August 17, 2021. Learn more . Please note that Internet Explorer 11 will remain a supported browser. Internet Explorer 11 is a component of the Windows operating system and follows the Lifecycle Policy for the product on which it is installed.
For the purpose of playing videos in PowerPoint, Internet Explorer 11 is required to be on your computer. You don't have to use it to browse the web; you simply have to have it installed, because under the covers, PowerPoint needs its technology to play videos on Windows.
If your operating system is Windows 10, then you already have Internet Explorer 11 installed. If you have an older version of Windows, you can go to this Internet Explorer Downloads page for instructions.
Want to insert a video from your computer instead?
See Insert and play a video file from your computer for all the details.
Terms of Use and Privacy policies
Terms of Use
Privacy Policy
Microsoft Stream:
SlideShare.net:
In PowerPoint 2016, you can insert an online video with an embed code or search for a video by name. Then you can play it during your presentation.
The video plays directly from the website, and it has the site's controls for playing, pausing, volume, and so on. The PowerPoint playback features (Fade, Bookmark, Trim, and so on) don't apply to online videos.
Insert the online video with an "embed" code
On YouTube or Vimeo, find the video that you want to insert.
Below the video frame, click Share , and then click Embed . (If you neglect to click Embed , you'll end up copying the wrong code.)

Right-click the iFrame embed code, and click Copy .

If the highlighted text that you copy begins with "http", STOP. It's the wrong code to copy. Return to step 2 and click Embed :

In PowerPoint, click the slide that you want to add a video to.
On the Insert tab, click Video > Online Video .
In the From a Video Embed Code box, paste the embed code, and then click the arrow.

A video rectangle is placed on your slide, which you can move and resize as you like. To preview your video on your slide, right-click the video rectangle, select Preview , and then click the Play button on the video.
Note: If your video doesn’t embed correctly, double-check that you have installed the required Office updates.
Search for the YouTube video by name
Click the slide that you want to add a video to.

In the Search YouTube box, type the name of the video that you want to insert, and press Enter.
Select the video from the search results, and click Insert .
Note: If your video doesn’t insert correctly, double-check that you have installed the required Office updates.
Preview the video
Once the video rectangle is on your slide, select it, right-click it and choose Preview .
A Play button appears on the video.
Click the video's Play button.
Because the video is on a web site, rather than actually in your presentation, you must be connected to the internet in order for the video to play successfully.
Embed content from Slideshare.net
On a slide in PowerPoint, you can embed content from Slideshare.net , a sharing web site for presentations, infographics, and documents.
On Slideshare.net, any content that can be embedded elsewhere has a Share button on it. That button opens a window where you can copy an embed code like an embed for a video.
On Slideshare.net , find the content you want to embed.
Select the Share button beneath the content frame.
Sharing codes appear in the video frame.
Select the box named Embed .
All the text in the box becomes selected when you do this.
Right-click the selected text and choose Copy .
The text you've copied contains more information than you need, so it needs to be trimmed and re-copied.
Paste the copied text into a text editor such as Word or Notepad.
Select the portion of the text that begins with <iframe src ... and ends with </iframe> . Copy that text.
That's the embed code you need for inserting the content into PowerPoint.
In PowerPoint, go to the slide where you want to insert the content.
On the toolbar ribbon, select the Insert tab, select Video , and then select Online Video .
The Insert Video dialog box opens.
Paste the embed code in the box named From a Video Embed Code , and then press Enter.
It takes a moment for PowerPoint to absorb the content. When it has done so, a black box appears on your slide.

Requirements
Your use of online videos is subject to each provider web site's Terms of Use and Privacy Policy.
SlideShare.net
In PowerPoint for the web, you can insert an online video from YouTube or Vimeo on a slide. (If you have a Microsoft 365 business or education subscription, you can also insert an online video from Microsoft Stream.)
Insert an online video
On a separate tab in your web browser, locate the video you want.
Copy the address of the web page from the Address bar of your browser.
Switch to PowerPoint for the web and select the slide where you want to place the video.
On the Insert tab of the ribbon, in the Media group, select Online Video .
In the Online Video dialog box, paste the address you copied in step 2.
The video is inserted on your slide. You can move the video by dragging with the mouse, and you can resize the video frame by selecting a corner and dragging.
To play the video, you must run Slide Show. On the ribbon, switch to the View tab, and in the Start Slide Show group, select From Current Slide .
(If you've turned off the Simplified Ribbon, you don't have a Slide Show tab; instead use the View tab to start the slide show.)
Slide Show opens, and then you can click the play button to begin.
For related information, see Play a video in PowerPoint for the web .
Trimming a video
PowerPoint for the web can't trim videos, and online videos can't be trimmed. If you have a video that you want to trim, you must save it to your computer, then insert it on your slide in a desktop version of PowerPoint.
Newer Mac versions
In PowerPoint for Microsoft 365 for Mac, PowerPoint 2021 for Mac, or PowerPoint 2019 for Mac, you can insert an online video from YouTube or Vimeo on a slide. Earlier versions of PowerPoint for macOS don't support inserting an online video.
In PowerPoint for Microsoft 365 for Mac, you can also insert an online video from Microsoft Stream, a video service for enterprises—people in an organization can upload, view, and share videos with one another. This feature requires PowerPoint for Microsoft 365 for Mac version 16.27 or later.
Switch to PowerPoint and select the slide where you want to place the video.
On the Insert tab of the ribbon, in the Media group at the right end, select Video . Then select Online Movie .
In the dialog box, paste the URL you copied in step 2.
Click Insert .
The video is added to the slide.
To preview the video, click the Play button that appears on top of video.
Inserting and playing an online video requires a recent version of macOS and PowerPoint for macOS:
PowerPoint version 16.15.18070902 or later
macOS 10.13.4 (High Sierra) or later
A Mac manufactured in 2012 or later
Why can’t I embed a video in PowerPoint?
Add audio to your presentation
Add text to a video
Video and audio file formats supported in PowerPoint
How to Make an Eye-catching YouTube Thumbnail
Create a video for YouTube with a template

Need more help?
Want more options.
Explore subscription benefits, browse training courses, learn how to secure your device, and more.

Microsoft 365 subscription benefits

Microsoft 365 training

Microsoft security

Accessibility center
Communities help you ask and answer questions, give feedback, and hear from experts with rich knowledge.

Ask the Microsoft Community

Microsoft Tech Community

Windows Insiders
Microsoft 365 Insiders
Was this information helpful?
Thank you for your feedback.
Home / Free Animated Templates for PowerPoint and Google Slides / Free Animated YouTube Template PowerPoint & Google Slides
Free Animated YouTube Template PowerPoint & Google Slides

About the Template
Features About the Template:
- Visually Engaging Design: Captivate your audience from the start of your presentation using a visually stunning presentation. The template features an eye-catching title slide, appealing backgrounds, and YouTube inspired color scheme to keep your viewers engaged throughout the presentation.
- Seamless Slide Transitions: Smooth and seamless slide transitions ensure a seamless flow of information, making your presentation feel polished and cohesive. These transitions help you maintain your audience’s focus on your message without distractions.
- YouTube-Inspired Elements: Embrace the familiar and user-friendly design elements of YouTube in your presentation. From play buttons to video timelines, these elements add a sense of familiarity and make your presentation feel modern and relevant.
- Customizable Layouts: Tailor your presentation to your content with customizable slide layouts. Whether you’re showcasing data, images, or text, the template’s flexibility allows you to arrange information in a clear and compelling manner.
- Interactive Multimedia Integration: Enhance your presentation by embedding videos, audio clips, and interactive elements. Bring your content to life and create a memorable experience that leaves a lasting impact on your audience.
Google Slide,PowerPoint
100% Fully Customizable
Free to use
Free Active Template Library
Free Pawer Poit Templates
Trending Topics

Free Area 51 Presentation Template for PowerPoint & Google Slides

Free Editable Netflix PowerPoint Presentation Template and Google Slides With Animations

Free Aesthetic Google Slides TikTok Template

Free Google Welcome Slide and PowerPoint Template

Free Spotify Google Slides Template PowerPoint
Are you looking for custom presentation template designs.
It is a long established fact that a reader will be distracted by the readable content of a page when or randomised words which don’t look even slightly believable
Adding Music to PowerPoint Presentations from YouTube on Windows 11: A Guide
Adding music to your PowerPoint presentation can make it more engaging and memorable for your audience. Here’s a quick rundown of how to do it: find your favorite tune on YouTube, download it, and then add it to your PowerPoint presentation on Windows 11. It’s a simple process that can have a big impact on your presentation’s success.
Step by Step Tutorial: Adding Music to PowerPoint Presentations from YouTube on Windows 11
Before we dive into the steps, let’s understand what we’re going to achieve. Adding music to your PowerPoint slides can set the mood, emphasize a point, or simply make your presentation more enjoyable. Let’s get started!
Step 1: Find the YouTube video with the music you want to use
The first step is locating the YouTube video that contains the music you want to add to your PowerPoint presentation.
Once you’ve found the right video, it’s important to make sure that the music is not copyrighted or that you have permission to use it. You might also want to consider the length of the track and whether it fits the duration of your slides.
Step 2: Download the music from YouTube
Next, you’ll need to download the music from YouTube.
There are various online tools and software that allow you to convert YouTube videos to MP3 format. Choose one that’s reliable and easy to use, and make sure to follow the instructions carefully to avoid downloading any unwanted software.
Step 3: Add the downloaded music to your PowerPoint presentation
Now it’s time to add the music file to your PowerPoint presentation.
Open your PowerPoint presentation, go to the insert tab, and select ‘Audio’ to add your downloaded music file. You can then adjust when the music starts and stops, whether it plays across multiple slides, and if it should loop. After completing these steps, your PowerPoint presentation will have a musical background that plays while you present your slides. The music can add a dynamic and engaging element to your presentation, keeping your audience’s attention and making your points more memorable.
Tips for Adding Music to PowerPoint Presentations from YouTube on Windows 11
- Make sure the music you choose is appropriate for your audience and presentation topic.
- Keep the volume of the music low enough so it doesn’t distract from your spoken words.
- Consider the mood you want to create with the music – is it upbeat and energetic or calm and soothing?
- Test your presentation with the music beforehand to ensure everything plays smoothly.
- Remember to give credit to the original artist if you are using copyrighted music.
Frequently Asked Questions
Can i add music to only one slide in my powerpoint presentation.
Yes, you can add music to just one slide. When inserting the audio file, choose “Play in Background” for it to play only on the selected slide.
Will the music play when I switch slides?
If you select “Play Across Slides” when adding your music, it will continue to play as you move through your presentation. Otherwise, it will stop when you change slides.
Can the music be set to start automatically when the slide appears?
Certainly! You can set the music to start automatically by choosing the “Automatically” option in the playback settings.
How can I make the music loop if my presentation is longer than the song?
You can make the music loop by selecting “Loop Until Stopped” in the playback settings, ensuring the music continues for the duration of your presentation.
What file format should the music be in to add it to PowerPoint?
The music should be in MP3 format to ensure compatibility with PowerPoint.
- Find the YouTube video with the music you want.
- Download the music from YouTube.
- Add the downloaded music to your PowerPoint presentation.
In conclusion, adding music to your PowerPoint presentations from YouTube on Windows 11 is a simple process that can greatly enhance the overall experience for your audience. By following the steps outlined above, you can easily find, download, and integrate your chosen track into your slides. Just always keep in mind the copyright rules and the mood you want to set with your music selection.
Remember, the key to a successful presentation is not just the information you provide but also how you deliver it. Music can play a crucial role in setting the tone, creating an emotional connection, and keeping your audience engaged. So go ahead, spice up your next PowerPoint presentation with some tunes and watch your audience’s interest soar!
Whether you’re presenting in a classroom, boardroom, or webinar, the added element of music can make your presentation stand out. So, why not give it a try? After all, who wouldn’t appreciate a little melody with their information?

Matt Jacobs has been working as an IT consultant for small businesses since receiving his Master’s degree in 2003. While he still does some consulting work, his primary focus now is on creating technology support content for SupportYourTech.com.
His work can be found on many websites and focuses on topics such as Microsoft Office, Apple devices, Android devices, Photoshop, and more.
Share this:
- Click to share on Twitter (Opens in new window)
- Click to share on Facebook (Opens in new window)
Related Posts
- How to Download a Google Slides Presentation as a Powerpoint File
- How to Rotate a Powerpoint Slide Presentation
- How to Do a Powerpoint Google Slides Presentation Conversion
- Can You Save a Powerpoint as a Video in Powerpoint 2013? Find Out Here!
- How to Loop a Slideshow on Powerpoint 2013: Step-by-Step Guide
- How to Put Embedded Youtube Video in Powerpoint 2010: A Step-by-Step Guide
- How to Embed a YouTube Video in Powerpoint 2013: A Step-by-Step Guide
- How to Make Google Slides Vertical (5 Quick Steps)
- How to Loop a Powerpoint Office 365 Slideshow
- How to End Powerpoint on Last Slide in Powerpoint 2010: A Step-by-Step Guide
- How to Add a New Slide in Google Slides: A Step-by-Step Guide
- How to Delete a Slide in Powerpoint 2010: Step-by-Step Guide
- How to Add a Hyperlink on Google Slides
- How to Convert Powerpoint to Google Slides: A Tech Solution
- How to Hide a Slide in Powerpoint 2010: A Step-by-Step Guide
- How to Make a Powerpoint Slide Vertical in Powerpoint 2013: A Step-by-Step Guide
- How to Insert Slides from Another Presentation: Powerpoint 2024 Guide
- How to Delete Multiple Slides in Google Slides: A Step-by-Step Guide
- How to Print 4 Slides Per Page in Google Slides: A Step-by-Step Guide
- How to Remove Slide Numbers in Powerpoint 2019: Easy Steps
Get Our Free Newsletter
How-to guides and tech deals
You may opt out at any time. Read our Privacy Policy
Contribute to the Microsoft 365 and Office forum! Click here to learn more 💡
April 9, 2024
Contribute to the Microsoft 365 and Office forum!
Click here to learn more 💡
PowerPoint Forum Top Contributors: Steve Rindsberg - John Korchok - Bob Jones AKA: CyberTaz ✅
May 10, 2024
PowerPoint Forum Top Contributors:
Steve Rindsberg - John Korchok - Bob Jones AKA: CyberTaz ✅
- Search the community and support articles
- Microsoft 365 and Office
- Search Community member
Ask a new question
I can't export my PowerPoint presentation to MP4 so that I can create a YouTube video. I keep getting "Error while exporting video
I can't export my PowerPoint presentation to MP4 so that I can create a YouTube video. I keep getting "Error while exporting video.
- Subscribe to RSS feed
Report abuse
Reported content has been submitted
Replies (3)
- Volunteer Moderator
Most likely this is due to a specific item with an incompatible content type for saving as a video.
However, we need to cover the basics. Be sure your install is up to date. Use the Menu Bar and choose PowerPoint > About Microsoft PowerPoint . The version should be 16.85 or higher. Is it?
If there is some unusual content type on a slide, try cutting that slide from the presentation and try exporting without the unusual content. If you can't think of anything unusual on a slide, then start by splitting your presentation file into two halfs. Try exporting them. If one exports OK and the other doesn't, then you know bad content is in the half that won't export. Keep cutting in half till you narrow it down to the slide (or slides) having bad content.
Was this reply helpful? Yes No
Sorry this didn't help.
Great! Thanks for your feedback.
How satisfied are you with this reply?
Thanks for your feedback, it helps us improve the site.
Thanks for your feedback.

Download a copy of the current version of AutoUpdate from this link, install and then run AutoUpdate to bring your installation to current update level, then restart your Mac. If the updater does not open automatically after download, double-click the downloaded .pkg file. Click this link to download the updater. The update is free.
https://go.microsoft.com/fwlink/p/?linkid=830196
Question Info
- For education
- Norsk Bokmål
- Ελληνικά
- Русский
- עברית
- العربية
- ไทย
- 한국어
- 中文(简体)
- 中文(繁體)
- 日本語
Governor Newsom Unveils Revised State Budget, Prioritizing Balanced Solutions for a Leaner, More Efficient Government
Published: May 10, 2024
The Budget Proposal — Covering Two Years — Cuts Spending, Makes Government Leaner, and Preserves Core Services Without New Taxes on Hardworking Californians
Watch Governor Newsom’s May Revise presentation here
WHAT YOU NEED TO KNOW: The Governor’s revised budget proposal closes both this year’s remaining $27.6 billion budget shortfall and next year’s projected $28.4 billion deficit while preserving many key services that Californians rely on — including education, housing, health care, and food assistance.
SACRAMENTO – Governor Gavin Newsom today released a May Revision proposal for the 2024-25 fiscal year that ensures the budget is balanced over the next two fiscal years by tightening the state’s belt and stabilizing spending following the tumultuous COVID-19 pandemic, all while preserving key ongoing investments.
Under the Governor’s proposal, the state is projected to achieve a positive operating reserve balance not only in this budget year but also in the next. This “budget year, plus one” proposal is designed to bring longer-term stability to state finances without delay and create an operating surplus in the 2025-26 budget year.
In the years leading up to this May Revision, the Newsom Administration recognized the threats of an uncertain stock market and federal tax deadline delays – setting aside $38 billion in reserves that could be utilized for shortfalls. That has put California in a strong position to maintain fiscal stability.
“Even when revenues were booming, we were preparing for possible downturns by investing in reserves and paying down debts – that’s put us in a position to close budget gaps while protecting core services that Californians depend on. Without raising taxes on Californians, we’re delivering a balanced budget over two years that continues the progress we’ve fought so hard to achieve, from getting folks off the streets to addressing the climate crisis to keeping our communities safe.” – Governor Gavin Newsom
Below are the key takeaways from Governor Newsom’s proposed budget:
A BALANCED BUDGET OVER TWO YEARS. The Governor is solving two years of budget problems in a single budget, tightening the state’s belt to get the budget back to normal after the tumultuous years of the COVID-19 pandemic. By addressing the shortfall for this budget year — and next year — the Governor is eliminating the 2024-25 deficit and eliminating a projected deficit for the 2025-26 budget year that is $27.6 billion (after taking an early budget action) and $28.4 billion respectively.
CUTTING SPENDING, MAKING GOVERNMENT LEANER. Governor Newsom’s revised balanced state budget cuts one-time spending by $19.1 billion and ongoing spending by $13.7 billion through 2025-26. This includes a nearly 8% cut to state operations and a targeted elimination of 10,000 unfilled state positions, improving government efficiency and reducing non-essential spending — without raising taxes on individuals or proposing state worker furloughs. The budget makes California government more efficient, leaner, and modern — saving costs by streamlining procurement, cutting bureaucratic red tape, and reducing redundancies.
PRESERVING CORE SERVICES & SAFETY NETS. The budget maintains service levels for key housing, food, health care, and other assistance programs that Californians rely on while addressing the deficit by pausing the expansion of certain programs and decreasing numerous recent one-time and ongoing investments.
NO NEW TAXES & MORE RAINY DAY SAVINGS. Governor Newsom is balancing the budget by getting state spending under control — cutting costs, not proposing new taxes on hardworking Californians and small businesses — and reducing the reliance on the state’s “Rainy Day” reserves this year.
HOW WE GOT HERE: California’s budget shortfall is rooted in two separate but related developments over the past two years.
- First, the state’s revenue, heavily reliant on personal income taxes including capital gains, surged in 2021 due to a robust stock market but plummeted in 2022 following a market downturn. While the market bounced back by late 2023, the state continued to collect less tax revenue than projected in part due to something called “capital loss carryover,” which allows losses from previous years to reduce how much an individual is taxed.
- Second, the IRS extended the tax filing deadline for most California taxpayers in 2023 following severe winter storms, delaying the revelation of reduced tax receipts. When these receipts were able to eventually be processed, they were 22% below expectations. Without the filing delay, the revenue drop would have been incorporated into last year’s budget and the shortfall this year would be significantly smaller.
CALIFORNIA’S ECONOMY REMAINS STRONG: The Governor’s revised balanced budget sets the state up for continued economic success. California’s economy remains the 5th largest economy in the world and for the first time in years, the state’s population is increasing and tourism spending recently experienced a record high. California is #1 in the nation for new business starts , #1 for access to venture capital funding , and the #1 state for manufacturing , high-tech , and agriculture .
Additional details on the May Revise proposal can be found in this fact sheet and at www.ebudget.ca.gov .
COMMENTS
Download HubSpot's PowerPoint Templates and learn how to make a good PowerPoint presentation [FREE TEMPLATES]: https://clickhubspot.com/Create-Beautiful-Powe...
In PowerPoint, you can create a presentation from scratch, or from a theme with built-in graphics, fonts, and placeholders for your text, images, and content...
Get started with PowerPoint for Beginners. Follow this 20-Minute step by step PowerPoint tutorial to start creating presentations smoothly.Contents of this v...
Learn everything you need to know to get started using Microsoft PowerPoint! You'll learn all the basics plus more, including: how to choose a design theme...
How to make a PowerPoint animation and a PowerPoint presentation with this 12-mins PowerPoint tutorial for beginners! Edit your presentation videos seamlessl...
In this video, you'll learn the basics of presenting your slide show in PowerPoint 2019, PowerPoint 2016, and Office 365. Visit https://edu.gcfglobal.org/en/...
About Press Copyright Contact us Creators Advertise Developers Terms Privacy Policy & Safety How YouTube works Test new features NFL Sunday Ticket Press Copyright ...
Microsoft PowerPoint is a presentation design software that is part of Microsoft 365. This software allows you to design presentations by combining text, images, graphics, video, and animation on slides in a simple and intuitive way. Over time, PowerPoint has evolved and improved its accessibility to users.
Here's another one of our top PPT tips: tap into Envato Elements' unlimited stock photo library. People are more likely to take you seriously if your presentation is visually appealing. Users view attractive design as more usable. Similarly, they'll view a more attractive PowerPoint as more effective. 11.
To do that, simply go up to the Home tab and click on New Slide. This inserts a new slide in your presentation right after the one you were on. You can alternatively hit Ctrl+M on your keyboard to insert a new blank slide in PowerPoint. To learn more about this shortcut, see my guide on using Ctrl+M in PowerPoint.
Get your main point into the presentation as early as possible (this avoids any risk of audience fatigue or attention span waning), then substantiate your point with facts, figures etc and then reiterate your point at the end in a 'Summary'. 2. Practice Makes Perfect. Also, don't forget to practice your presentation.
Create a new presentation in PowerPoint. Before you start editing your PowerPoint presentation to include a YouTube video, make sure you have a new presentation created. You can create a new presentation from within PowerPoint by going to File > New > Presentation, or you can create a new presentation by using the charting tool.
Select the slide where you want to embed the YouTube video. On the "Insert" tab, click the "Video" button. On the drop-down menu, select the "Online Video" option. The Insert Video window that appears lets you search YouTube for a video or paste in that embed code you copied from the YouTube website. Paste the embed code and click ...
If you want to learn more about successful presentations and Audience Engagement, check out our blogpost Top 10 Tools for increasing Audience Engagement. Set the start of your video. After you've added a video from YouTube, it starts to play by default when you click anywhere on the slide during the presentation.
Present slideshows with confidence. With easy-to-use presenter view, speaker notes, and live captions, Slides makes presenting your ideas a breeze. You can even present to Google Meet video calls ...
In fact, videos can help you raise awareness for your brand, engage with your target audience and drive sales. Get your presentation custom designed by us, starting at just $10 per slide. STEP 1. UPLOAD PRESENTATION. Share your presentation and design preferences via our easy-to-use order form. STEP 2.
Since YouTube doesn't allow playlists to be made from videos that are intended for kids, with this template you can create your playlists in Google Slides and keep the YouTube esthetics. ... Free Template for PowerPoint and Google Slides Presentations Weston Weston is a fun template. It features a cartoon like city skyline and the ever ...
Here's how to convert your presentation to a video. 1. Click the File tab on the PowerPoint (2010 version or later) 2. Click the Export tab. 3. Click Create a Video from the list of options. You can tweak some of the settings, including slide durations, video resolution, and narrations.
Copy the address of the web page from the Address bar of your browser. Switch to PowerPoint for the web and select the slide where you want to place the video. On the Insert tab of the ribbon, in the Media group, select Online Video. In the Online Video dialog box, paste the address you copied in step 2. Select Insert.
Vous voulez apprendre à utiliser Powerpoint pour créer une présentation powerpoint professionnelle avec Office ? C'est ce que je vous propose dans ce tuto su...
First, let's go over to the File tab in PowerPoint, and choose Export . Start by clicking on the File tab. Click on Create a Video to export your presentation as a video file. 2. Set How Long Each Slide Shows. In many cases you can let YouTube handle the compression. I'll leave this set to Full HD, and let YouTube handle the compression.
Bring your content to life and create a memorable experience that leaves a lasting impact on your audience. Take your storytelling to the next level by utilising the strength of YouTube-inspired presentation design. With our Free YouTube Theme Presentation Template, embrace innovation, creativity, and audience engagement right away!
Step 3: Add the downloaded music to your PowerPoint presentation. Now it's time to add the music file to your PowerPoint presentation. Open your PowerPoint presentation, go to the insert tab, and select 'Audio' to add your downloaded music file. You can then adjust when the music starts and stops, whether it plays across multiple slides ...
A video presentation is a presentation that can be shared and viewed as a video. Technically, for a presentation to be a video presentation, it must be an MP4 or MOV file type. A video presentation can be shared online on YouTube, Vimeo and other social media platforms. The best part of a video presentation with audio is that you can share it ...
Hi. Most likely this is due to a specific item with an incompatible content type for saving as a video. However, we need to cover the basics. Be sure your install is up to date. Use the Menu Bar and choose PowerPoint > About Microsoft PowerPoint. The version should be 16.85 or higher.
Watch Governor Newsom's May Revise presentation here WHAT YOU NEED TO KNOW: The Governor's revised budget proposal closes both this year's remaining $27.6 billion budget shortfall and next year's projected $28.4 billion deficit while preserving many key services that Californians rely on — including education, housing, health care ...