
How to Record a PowerPoint Presentation?

Are you looking to record a PowerPoint presentation for a class, work presentation, or personal project? Recording a PowerPoint presentation can be a useful tool for creating video content, sharing information with a wider audience, or reviewing material at a later date.
There are several ways to record a PowerPoint presentation, depending on your needs and resources. In this article, we'll explore the different options for recording a PowerPoint presentation, as well as some tips for creating a high-quality video. Whether you're a beginner or an experienced presenter, this guide will provide you with the knowledge and skills you need to record a professional-grade PowerPoint presentation.
How to Video Record Myself Presenting a PowerPoint?
How to record a ppt presentation with audio and video for free, tips for making better powerpoint presentation videos.
Slides from a PowerPoint presentation can arrange and distribute information. There are several customization choices available in Microsoft's PowerPoint software for Windows when making a presentation. If you want your presentation to appear polished and professional, there are various methods you can use to capture it and we shall explore one of the best ways with you today.
Here is how to record yourself on PowerPoint easily. Follow these steps to record a PowerPoint presentation with OBS Studio .
Note: Install and launch OBS Studio before you start the presentation and recording.
Step 1: Launch PowerPoint and start the presentation you wish to record.
Step 2: To add a source, open OBS Studio and choose the Plus (+) icon in Sources . Now, tap Display Capture to create a new source on the screen.
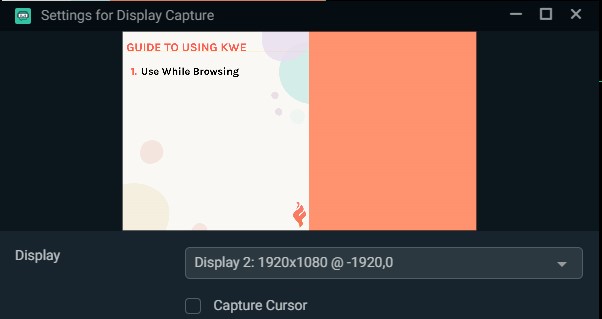
Tap the Properties option from the screen capture source and select the correct display you need.
Again, choose the Plus (+) icon and Video Capture Device to create a new source for your webcam.
Tap the Properties option once again and then Device from the menu. Like above, you can edit the dimensions you want to capture.
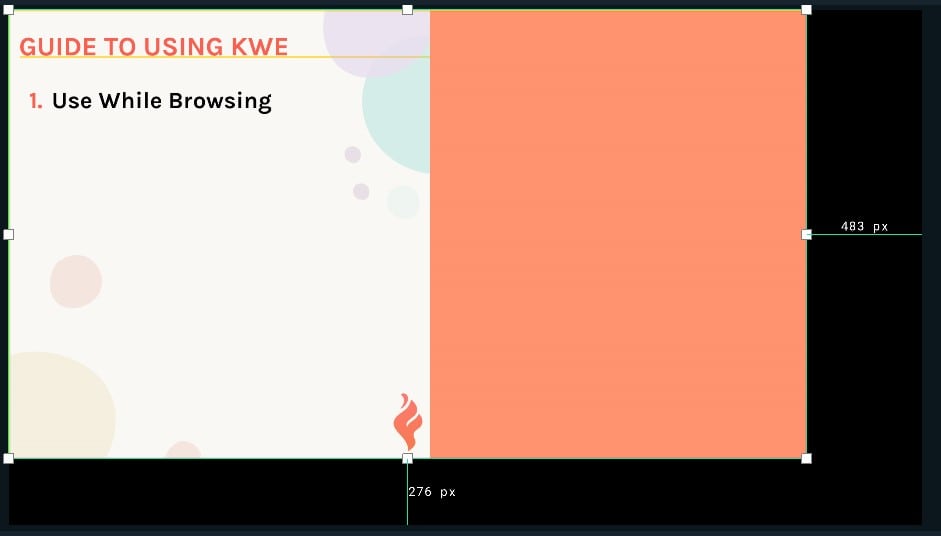
Step 3: The Preview window will show you both – the PPT presentation and webcam capturing. If you want to adjust the format, click the Transform and Filters option.
During the presentation, use the screen capture source to record your slides and the webcam source to record yourself live.
Step 4: Finally, click "Stop recording" in the Controls box once you finish. You will find your recorded PPT in the Output settings.
Bonus: The Best 4K PTZ Webcam for Recording a PowerPoint Presentation
Here we recommend the OBSBOT Tiny 2 webcam as the best choice for recording a slide show on PowerPoint. With features such as 4K UHD resolution, intelligent auto-framing & auto-tracking, and 4x digital zoom, the OBSBOT Tiny 2 webcam is a trustworthy webcam with various capabilities. Moreover, both its installation and operation are fairly simple. Tiny 2 is optimal if you do significant online work, such as live streaming, vlogging, or other equivalent tasks.
The OBSBOT Tiny 2 features a 4K resolution of 3840 by 2160 pixels and can record 4K video at 30 frames per second. You will have a field of vision of 86 degrees and a fourfold digital zoom. Regarding audio, the device contains a pair of omnidirectional microphones with noise reduction already included in its design. On paper, it's a terrific package, and even if you succeed, you will only be able to exceed it if you try.
AI-powered auto-tracking enables the camera to follow you around the room automatically. Even standing and not seated in front of your laptop, you can use hand gestures to control the camera's tracking and zoom capabilities. Since the Obsbot software handles all of this, you may utilize these capabilities with any video-calling program that meets your requirements. During our camera testing, we found that both the desk mode and upper body tracking features performed quite well. It can track your location and automatically follow your movements during a video chat.
You can capture voice, ink gestures, and live video presence while recording your PowerPoint presentation or a single slide. Once finished, it functions just like any other presentation. You may either download the presentation as a video clip or play it for your audience as a slide show. People will be able to view your presentation with the passion and personality you intended rather than merely "handing the deck" to someone.
Here is how to record a PowerPoint presentation with video for free.
Note: PowerPoint 2016, PowerPoint 2019, and PowerPoint 365 all provide the Record Slide Show capability. You may record audio and video presentations if you have either version of PowerPoint.
Step 1: Once the presentation is ready, you should go to the Slide Show page and select the Record Slide Show option. You should then go to the Presenter window's Settings drop-down menu and choose the mic and camera you want to record your presentation. A window displaying the camera feed will appear on the bottom right side of the display. You can locate the icon that allows you to disable the camera feed preview just below. However, don't disable this function since it helps you to see how you are when presenting.
Step 2: Click on the Record option in the top left of the window to begin recording a presentation. PowerPoint will then record the on-screen presentation and the video and audio captured by the attached microphone and camera. Below each slide, you will discover annotation tools that allow you to bring the audience's attention to a specific portion of the presentation. Use the arrows visible on the left and right of the presentation to navigate between slides and to change the color of the annotation tools. When you are through presenting, click the Stop button and return to PowerPoint's main window.
Step 3: All the slides you opened throughout the recording session will include the recorded videos. You may easily relocate the video window inside each slide by dragging and dropping it to a new location.
Step 4: To save the recorded presentation, choose Export to Video from the File menu and pick the Create a Video option. Click the Create Video button inside the Create a Video menu, and then choose the place on the hard drive where the file will be stored.
So, those were the best answers for how to record PowerPoint presentations. Now, let us learn how to make an efficient presentation.
It is essential to avoid clichés first and foremost. We are all familiar with the negative stereotypes of ineffective PowerPoint presentations, namely that they dull or overwhelm the audience. Your video will be successful if you can identify and eliminate these cliches throughout the design phase.
Here are tips for making compelling PowerPoint presentation videos:
- Utilize the slide master function to develop a consistent and straightforward design template. Modifying the material's format (bulleted list, two-column text, text plus picture, etc.) is OK, but you should consistently maintain the font, color, and background.
- Simplify and restrict the amount of text on each screen. Use just the most necessary terms and information.
- Limit punctuation and avoid using full capital letters for words. Space on the slide will improve its legibility.
- Use complementary colors for the text and the backdrop. The optimal combination is white writing on a dark stage. Backgrounds with patterns might hinder readability.
- Avoid transitions that are visually distracting, such as text fly-ins. These features may look spectacular initially, but they rapidly become distracting and tiresome.
- The excessive use of special effects such as animation and music might make your presentation seem "cutesy" and harm your trustworthiness.
- Utilize photos of high quality that support and enhance your message. Ensure that your image's impact and sharpness remain unchanged when projected on a broader screen.
- If you utilize builds (i.e., lines of text that emerge each time you click the mouse), ensure that the material appears consistently and straightforwardly from the top or left is optimal. Use the functionality sparingly since it may slow down your presentation because builds can be used only when essential.
- Reduce the number of slides. Presenters that repeatedly "flip" to the subsequent slide risk losing their audience. The recommended sliding rate is one per minute.
- Develop the ability to browse your presentation in a nonlinear manner. PowerPoint enables the presenter to go forwards or backward without having to scroll through all intermediate slides.
- Know how to go forward and backward inside your presentation and practice doing so. Frequently, audiences want to view an initial screen again.
- If feasible, see your slides on the presentation screen. Ensure that the slides are legible from the rear row. Text and visual pictures should be big enough to be easily readable but not so big that they look "loud".
- Have a plan b in case of technical issues. Remember that transparency and handouts do not include animation or other special effects.
- Practice your presentation with someone who has never seen it before—request direct input about the colors, the text, and any effects or visual pictures you included.
- Refrain from reading your slides aloud. The intended audience for your slides is the audience, not the presenter and numerous speakers face their slides rather than their audience.
- Do not provide any apologies in your presentation. Avoid using it if you suspect anything challenging to read or comprehend.
Thus, this article presents how to record yourself on PowerPoint with audio and video. There are various methods, but the most straightforward and apparent answer is to utilize just Microsoft PowerPoint. This program enables you to capture and export PowerPoint video recordings with audio. There may be better alternatives in certain instances, but it is still valid.

- OBSBOT Tail Air
- OBSBOT Tiny 2
- OBSBOT Tiny First Gen
- OBSBOT Meet Series
- Warranty & Refund
- Shipping Policy
- Payment Method
- Our Company
- Latest News
- Terms of Use
- Privacy Policy
- Intellectual Property Rights
- Official Online Store
- Online Retailers
- Find a Store
- Influencer Program
- Affiliate Program
- OBSBOT Tail Air Referral Campaign

DEV Community
Posted on May 10, 2020 • Updated on May 5, 2021 • Originally published at eheidi.dev
OBS Recording How to Use OBS Studio to Record or Stream Live Presentations
With quarantine measures and social distancing taking place all over the world, this is definitely the season for online conferences and virtual events. There's also a lot of folks getting into streaming these days, or at least trying to do so - for beginners, streaming can seem difficult, and some streaming tools can definitely look intimidating at a first sight.
OBS (Open Broadcaster Software) is a powerful open source video streaming and recording software, available for Linux, macOS and Windows. Even though OBS is one of the best alternatives for live streaming today, it might not look very intuitive for those who don't have a previous experience with video editing.
In this tutorial targeted at beginners, you'll learn how to set up OBS and use it for recording live presentations and / or streaming directly to Twitch and other platforms.
Getting Started with OBS

At the center of the screen, you'll se the live preview of your recording / stream. On the bottom left, you have the scenes and sources lists. The audio mixer goes in the middle and on the bottom right you'll see the transition settings and the control buttons for starting / stopping recording and streaming, and to access the settings page.
Configuring Scenes and Sources
A scene is a particular view / way to present: it can contain one or more sources . A source can be your webcam, an image, a video, a slideshow, a desktop window, your entire screen, among other things.
Before streaming or recording with OBS, you'll have to configure your scenes . You will be able to configure multiple scenes and switch between them while streaming. So, for instance, you might be showing your browser window, and then switch to a scene that is configured to show your terminal window.
You can also make composite scenes with your screen and your webcam, for instance, or multiple application windows. OBS is highly customizable, so you have loads of options to set up your scenes and show exactly what you want to show.
While streaming, you can switch between scenes by clicking on the scene you want to show next.
Just be aware that if you set up too many scenes, it might get overwhelming to manage while you are live streaming. It's good to set up a manageable number of scenes and practice a bit to make sure you select the right ones when you're live. The worst that might happen (and happened to me a few times) is forgetting to switch, say, from the browser window to the terminal window, when you want to show some live commands (only realizing your mistake several minutes afterwards). If you're using multiple displays, it's easier to manage the switch between scenes, since you can keep OBS's window visible at all times and thus keep track of what is being streamed.
Example Scene Setup

When streaming for DevOps & Chill, here's the scenes I have set up:
- Intro - this scene uses a slideshow source with two images: a cover image with the title / topic I'll be covering, and another image saying we'll be starting soon. I start the streaming a few minutes before with this slideshow, to give people time to join while making sure they know I'll be starting in a few minutes.
- Annotations - this scene uses a window source to show a text editor where I type explanations about what I'm doing - I don't talk in this stream, so I needed a way to include more details about what I'm doing.
- Browser Window - this scene is configured to show my browser window.
- Terminal Window - this scene is configured to show my Terminal Window.
- Stream Finished - I use this scene when the stream is finished. It uses an image source.
I don't use webcam or microphone in this stream. For live talks, however, I'm using a different set of scenes, which then includes a webcam scene and also browser + webcam.
You can create and switch between different scene settings within the menu "Scene Collection".
Audio and Soundtrack
OBS allows you to set up multiple audio tracks, so you can have for instance a music playback and audio input from your microphone. However, streaming music involves copyright concerns, and you don't want to get your video offline or muted due to copyright infringements. There are some royalty-free options you can use for streaming, thou.
Pretzel.rocks is a royalty-free music service that you can use with Twitch, Youtube and other services.
You can also download royalty-free music tracks and create a playlist to play while you're streaming.
In either case, there are two ways to configure audio output for your streaming / recording. You can set these at the profile level, which will make the audio sources available for all the scenes automatically in the current profile, or you can configure audio sources specifically per scene.
To configure audio at the profile level, go to the menu "Settings -> Audio" and then select the appropriate devices you want to enable, and disable the ones you don't need.
For my streams I use the default computer output as audio source, this is easier because anything you play will be streamed as audio - the only problem is that this will also include Google calendar reminders, slack notifications, and any alert sounds that might show up while you're streaming.
You can also set up an "Audio Output Capture" source for a specific scene:
Once you include audio sources, your "Audio mixer" window will exhibit a live view with the audio levels of all your active audio "tracks".
Recording Presentations with OBS
With OBS you can record your content without live streaming, which is a great way of preparing pre-recorded live presentations. Because you can also use a video as source, nothing prevents you from pre-recording your stream and then using the recorded video (edited if necessary) as source for a live stream. Most online conferences happening these days are choosing this model over live presentations, because then the speaker can join the live chat and interact / answer questions to the audience while the pre-recorded talk is being streamed.
Recordings are saved in the output directory set in OBS's configuration. This will be set to your home directory by default. To change this location, access the menu "Settings -> Output -> Recording path".
The controls to start / stop recording are located at the bottom right of the screen. Once you start recording, everything you see in the preview window will be recorded.
Live Streaming with OBS
In order to be able to stream via OBS, you'll first need to set up your personal streaming key/token in OBS's configuration. You can obtain this information in the streaming platform you'll be using (Twitch, YouTube, etc).
You can set up multiple streaming profiles, this way you can switch between streaming platforms easily.
Once you click the "Start streaming" button, OBS wil start broadcasting your scenes to your streaming service. Everything you see in your preview window will be streamed to your audience.
In your settings, you can configure OBS to start recording automatically when you start a new streaming. This is useful if you plan on editing and/or uploading the video stream to another platform later.
Bonus: Post Production Tips & Tricks with FFMPEG
Live streaming is fun and exciting, but being able to post the recorded video to your Youtube channel and other platforms is a valuable way to maximize your content reach. A tool like FFMPEG can help with some batch operations and simple editions that don't require a fully fledged video editor such as OpenShot (my personal favorite). Here's some tricks I've learned with ffmpeg that could be useful for you too:
Converting to MP4
Converting to different formats is quite straightforward with ffmpeg :
Speeding Up Videos
On DevOps & Chill, I don't talk, I only type. I guess it's not a big deal while it's happening live, but I find the resulting video just really slow, so I like to speed up the videos to 2x the original speed. This is how you do it with ffmpeg :
This will remove the audio from the video ( -an option). Removing the audio is necessary because when you speed up without changing the audio, the FPS won't match anymore, and this can cause trouble during playback. And you probably don't want to speed up the audio too ;) See the next tips for how to deal with audio.
To speed up all videos in a directory, you can use this one-liner shell script:
Extracting Audio from Video
This will extract the audio track from the video and save it to a .aac file.
The resulting .aac file can then be converted to .mp3 if you wish:
Generate a playlist with mp3 files
This will concatenate the listed .mp3 files into one audio file.
Include a new audio track in a video
This will insert the video_playlist.mp3 audio track in the video.
OBS Studio is a powerful, free and open source software for recording and streaming live presentations. Once you get familiarized with its interface and how to configure scenes with sources, you'll see it's not difficult to use it, and it will enable you to perform professional live streaming and video presentations using only your computer.
There are certainly many different ways to configure OBS to suit your needs, depending on what kind of content you want to present. Play around with different settings and experiment until you find the scenes that work best for you! I hope you'll now feel empowered to start that live streaming idea you've been postponing :) what time better than now?
Top comments (20)
Templates let you quickly answer FAQs or store snippets for re-use.
- Location Saguenay, Québec
- Education Computer Engineering Degree
- Work Software developper at TLM
- Joined Aug 23, 2018
Thank you for this wonderful post Erika! I always wanted to stream myself coding, study session and gaming on twitch. With this pandemic, I lost my summer intership so the timing is perfect to start this project. I found some valuable resources in your article, specially Pretezel. I've already done an overlay and some panel images. I can't wait to start.
- Location The Hague
- Work Developer Experience Engineer at Chainguard
- Joined May 2, 2019
This is awesome, thank you for sharing! I'm very happy this post helped you. Also, please share your Twitch profile so I can follow you there :)
My twitch profile is twitch.tv/bigj1m/ but for now it's mostly empty. I'm in a rush to make it more interesting. What is your profile? I might have missed the link in the post.
- Email [email protected]
- Location Virginia
- Education Masters of Information Technology
- Work Quality Engineer
- Joined Oct 30, 2018
I have been thinking about trying to stream, thank you for writing this!
I'm glad it was helpful to you, and hope you manage to make it happen - also, share your twitch / YouTube so I can follow! ☺️
I don't have it set up yet, but when I do, I will check back in. :)
- Joined Dec 29, 2020
Great! thanks for sharing this awesome post. you really help us a lot. I can try to use all of them later. Besides, I will recommend you to use an alternative screen recorder which is the Acethinker Free Online Screen Recorder, this is one of the simple yet effective screen recorder that will help you record all the activities on your computer screen with ease
- Location localhost
- Joined Dec 12, 2019
Thank you very much for sharing all this information. It is helping me a lot!
Thank you for your feedback! 🥰 I am glad this info is being useful for you!
- Joined May 11, 2020
Excellent tutorial!!!
thank you! :)
- Email [email protected]
- Location Singapore
- Education MSc in Advanced Software Engineering
- Work Senior Software Engineer at 99x
- Joined Jul 25, 2018
Great article, didn't know about Pretzel, thanks!
Thank you! ☺️
Thank you for sharing! I usually have a difficult time memorizing keyboard shortcuts, so I never tried those. But I am sure it's very useful for many people!
- Location Brazil
- Education Computer Science - Pontifical Catholic University Of Minas Gerais
- Work Software Engineer
- Joined Sep 13, 2020
Thank you for sharing! 😊
- Location Puerto Natales
- Education Universidad Mayor - Uniacc
- Work IT Managrt
- Joined May 10, 2020
@erikaheidi ! thanks! awesome and super complete !! very importan info to me!!!
- Joined Oct 7, 2020
Interesting, I've never used this application before
- Email [email protected]
- Location Time Vortex
- Pronouns he/him
- Work Director of Community at OWASP Foundation
- Joined Jan 31, 2017
I love OBS! Unfortunately, it doesn't interface with Zoom anymore...just a heads up to anyone presenting at a remote conference.
AFAIK there are some plugins you can use to set it up as a webcam, right? There's no support for MacOS yet thou, but I think they're working on it.
obsproject.com/forum/resources/obs...
Some comments may only be visible to logged-in visitors. Sign in to view all comments. Some comments have been hidden by the post's author - find out more
Are you sure you want to hide this comment? It will become hidden in your post, but will still be visible via the comment's permalink .
Hide child comments as well
For further actions, you may consider blocking this person and/or reporting abuse

Copy/Pasting output from the terminal
saransh kataria - May 15

How to create a multistep form with Tailwind CSS and JavaScript
Michael Andreuzza - May 16

Indie Hacker, faça você mesmo #1 - Use o Github Actions pra fazer os code reviews automaticamente
Danilo Machado - May 16

Protect Users with AI-powered Content Moderation 🛡️✨
Florian - May 16

We're a place where coders share, stay up-to-date and grow their careers.
How to record yourself Presenting a Presentation using OBS Studio
- October 10, 2021
- How-to , IT
OBS (Open Broadcast Software) Studio is an application to record.
Step-by-step procedure
1. prepare a powerpoint presentation.
Get ready a PowerPoint presentation or similar.
2. Download and install OBS Studio
You need to install OBS Studio, in case you have not do it before.
Download it from this link .
Double click on installer to proceed for installation process. Follow instructions in installation wizard.
3. Open OBS Studio
Run the application.
4. Add your webcam to OBS Studio
Right-click on the black screen, select “Add” > “Video Capture Device”.
In the following dialog, select radio button “Create new” and click OK.
In the “Properties for ‘Video capture device'”, you must see your own image from the webcam in preview. Click on “OK” if everything is fine.
Adjust the size and position of your webcam capture in the screen.
5. Add your display to OBS Studio
Right-click on the black screen, select “Add” > “Display capture”.
In the “Properties for ‘Display capture'” dialog, select a Capture Method that creates a Droste effect in the preview image. If the preview image is a black screen, the value selected in “Capture Method” is not correct.
In my case, I had to change default value “Automatic” in Capture Method to “Windows 10 (1903 and up)” to make it work.
Open your PowerPoint presentation, and show it in fullscreen mode.
6. Perform recording
Go back to OBS Studio and click on “Start recording”.
When you are finished, click on “Stop recording”.
7. Retrieve videofile
Recording is automatically saved in the folder that is set up in OBS Studio.
To find what is the current video folder, go to OBS Studio > Settings >> Output > Recording Path.
The default value in Windows is C:\Users\youruser\Videos
8. Crop video
You may want to crop the beginning and the end of the video where you start clicking on OBS Studio and prepare everything. Or maybe add some post-production.
If this is the case, use a video editor to crop and/or edit the video.
External references
- “ How to Record Yourself Presenting a Powerpoint Presentation ”; KenndyMann
Leave a Reply Cancel Reply
Your email address will not be published. Required fields are marked *
Name *
Email *
Add Comment *
Save my name, email, and website in this browser for the next time I comment.
Post Comment

How to Make Online Presentations Fun and Interactive with OBS Scenes
In my recent post about how I use OBS for training classes & webcasts , I mentioned that to keep things lively, you wanna have a variety of scenes that you can switch between to keep the viewer engaged. Imagine a TV show or sporting event that only used one camera angle and screen layout for 30-60 minutes on end: you’d be bored out of your gourd, and you’d tune out.

When I first started out, I used an off-the-shelf set of scenes. After streaming for a few weeks, I made notes of what I wanted in my scenes and what I didn’t, and watched a bunch of streams in the Science & Technology category for inspiration. Armed with that knowledge, I hired szvoreny from the Fiverr stream designers to make a custom set of scene overlays. He does awesome work and I’d recommend him highly, but be patient – lots of folks are hiring designers for custom streams right now, and good stuff takes time. Expect a 1-2 week turnaround despite Fiverr’s promise of 3-4 days.
Starting Scene
I start streaming with this scene about 5 minutes before I go live on camera. People get notifications when their followed streamers are going live, and I want them to have a few minutes to get the browser open and make some popcorn. This scene shows what’s about to start and when, plus feeds from cameras 2 & 3 – more on their placement in a minute:
I type in the “starting at the top of the hour” manually before I go live. At some point later, I’d like a little more automated solution that pulls stuff from a text file with my upcoming calendar, but baby steps.
When gamers stream, they have an overlay that shows their game in a window, plus their webcam in a window, plus their recent followers, subscribers, etc. I take a minimal approach instead: I just show my desktop, overlay my webcam on top of it, and that’s it for permanent stuff. Here’s what it looks like when I’m working in Github, for example:
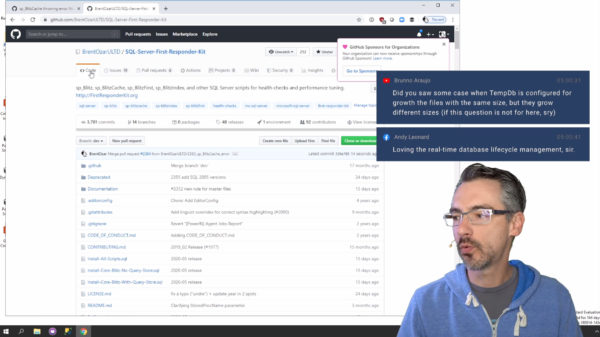
Comments automatically pop up above my head and disappear after 15 seconds. Note that you’re seeing live comments from multiple sources in that screenshot, both YouTube and Facebook. Like I mentioned in my OBS post , I use Restream to simultaneously stream to Twitch, YouTube, and Facebook, and Restream Chat centralizes all of the discussion. Everybody feels like they’re participating regardless of where they’re leaving comments, and all of the comments show up onscreen, live, in the same format.
I’m not actually sharing my whole desktop – I’m only showing a 1920×1080 portion of a 4K monitor. This means I can use the sides & bottom for things I need while I’m streaming. For example, when I streamed How to Think Like the Engine All-Demo Edition, I had my presentation notes on the left, and the Restream Chat window on the right so I can see what people are saying:

I run OBS on monitor 2 (the smaller right side 1080p one) so I can monitor what’s going out to the audience just in case something goes horribly awry.
When I want to show PowerPoint, I have a second Live Scene that shares monitor 2 instead, and also uses a bigger picture of me since I don’t need as much space for demos, and I often step to the side to point stuff out onscreen like some kind of weather-person, hahaha:
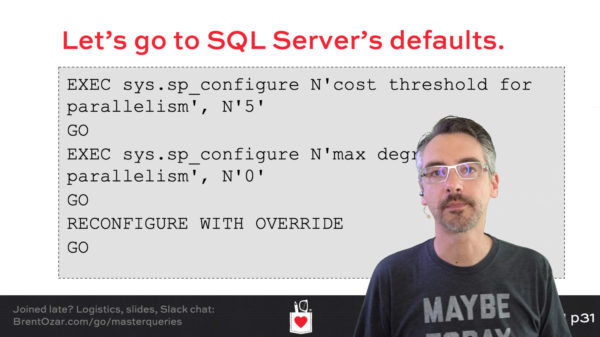
This lets me use Monitor 1 for my PowerPoint presenter view, so I can still see what slides are coming up next.
Camera 2 Chat Scene
From time to time, when I want to discuss something at length or when a particularly good question comes in, I switch to this scene showing the chat, most recent subscriber & follower, and my camera 2:
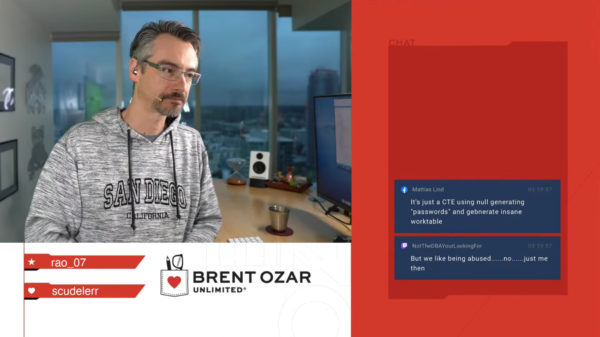
Or this scene, which shows my camera 2 fullscreen – and in this example, Marc Tomkinson just subscribed, so it’s showing a thank-you animation as soon as he subscribes, but then it disappears a few seconds later:
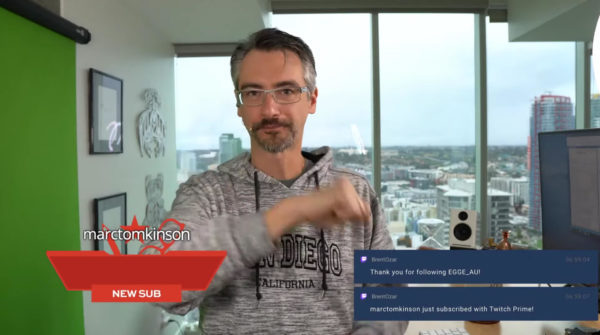
This camera-2 setup feels like a much more intimate atmosphere with the audience, just you and me, and it’s also more three dimensional since I’m not a floating character standing in front of the demos. It gives the audience a feel for what my office is like.
Camera 2 is another Sony A6100 on the side of my desk, plugged into my Blackmagic Design DeckLink Quad HDMI card :
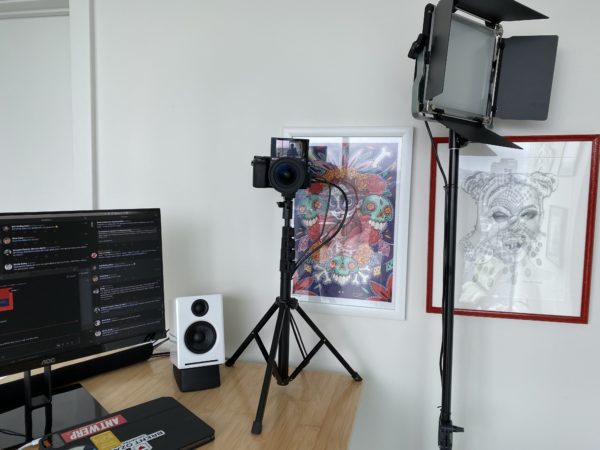
It looks tilted just because of where I’m standing. The camera is right in front of a @ChrissieZullo (Instagram – store ) print that a friend & client gave me that I really liked a lot. I switch out different prints & drawings here. I find that when I look at a piece of art I love, especially a smiling face, I light up more.
I wouldn’t recommend putting the camera on a tripod on your desk because it’ll vibrate whenever you lean on the desk or type. As I type this, a replacement floor-standing light stand is en route that will host both the light you see and the camera. Since they’ll be mounted to the floor, they won’t be susceptible to the vibrations. I should have done that from the get-go.
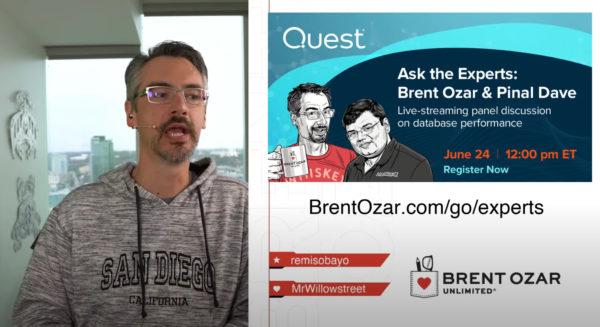
Sponsor Shout-Out Scene
On weeks when someone is sponsoring BrentOzar.com , I take a break every so often on the webcast, stop, and do a shout-out to the sponsor. I talk about what they’re trying to promote this week, and give folks a URL to learn more, like BrentOzar.com/go/experts to register for my free webcast with Pinal Dave:
Can I just stop here for a second and say that it’s utterly, ridiculously amazing that I get to do this for a living? You can too. I wrote Rock Stars, Normal People, and You ten years ago, and I still believe wholeheartedly in that today. The whole reason I’m writing this is to give you, dear reader, all the tools you need in order to make a living doing what you love. It’s all laid out here in front of you – you just gotta have the dedication to do it. Get ‘er done.
Pause Scene
Every 45-60 minutes, I take a bio break and fire up this scene with camera 3, and the attendees can also still see each other chatting on all the different stream services too:
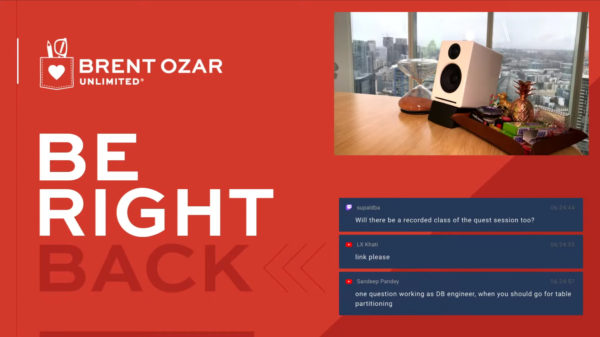
This camera’s really low-budget, though, since quality doesn’t matter much. Older iPhones show up from time to time on Woot , and I paid $140 for an iPhone 7. Using them as a camera is a little convoluted. When you plug an iPhone into an Apple, the screen of the iPhone (not the camera, mind, you but the screen) shows up as a camera source in most video apps. This was probably designed for app developers who want to record their apps for demos. However, when you use the app Full Screen Camera , the iPhone’s camera (either front or rear) takes up the whole display with no buttons, so you can use the camera as an input source.
Add a tiny tripod and a 10′ iPhone cable , and you’ve got a webcam with a built-in monitor for under $200. Is that crazy or what?
It’s kinda neat because they see the current daylight & weather in San Diego, plus they see me walking past as I leave the office to go get hydration. I move it around to different places – sometimes it shows the window, sometimes art on the wall, sometimes my desk.
When I trigger the Pause scene and I’m streaming to the public on Twitch, then 15 seconds after I trigger the Pause scene, my Elgato Stream Deck also triggers 90 seconds of ads. This lets me reset the Twitch ad clock for folks so they don’t see a pre-roll ad when they come into my channel.
Transitioning Between Scenes
I mentioned in my last streaming post about how I have keys set up on an Elgato Stream Deck for each scene, and when I hit a scene’s key, it switches over to it. It’s just a little bit more complicated than that.

- Switches the scene
- Turns on the right lights (and turns off the unneeded ones)
- Starts (or continues) recording in OBS
- Un-mutes my microphone
- Makes a marker in the Twitch recording (useful for folks who want to skip around to parts of the stream where things changed)
If my lights are already on, OBS is already recording, or my microphone is already unmuted, then the latter 3 actions have no effect. However, they save my bacon if I forgot to start recording or unmute my microphone before the webcast started.
The Pause scene basically does the opposite of all those actions: it opens Pretzel (podsafe music player) and hits Play, switches to the Pause scene, mutes my microphone, turns off all my lights, and stops the recording. OBS then puts the session recording in a folder on my computer. During my private training classes, the newly arrived file triggers the Vimeo app to automatically upload that module’s recording to Vimeo.com. After the day’s classes, I can then grab the URLs for each module’s videos, and update the students’ Instant Replay recordings in their training account.
If you wanna learn more about how I use the Stream Deck, I did a Twitter thread with info about each of my Stream Deck keys.
The end result is a lively, fun stream.
When you watch typical game streams on Twitch, the game itself provides a lot of visual variety and action. When you’re watching someone live code or give a presentation, it’s up to the presenter to bring a level of variety and interaction. Overlays and scenes are great tools for that goal.
Having a lively, fun stream is harder than a lively, fun in-person presentation. No doubt.
But I bet you’ll find the result totally worth it. Now that I’ve got the plumbing in place, I find this kind of online session just as fun as in-person ones because folks can be so interactive.
14 Comments . Leave new

I have a face for radio so I’ll skip the cameras and ring lights. 😀

Jeff – you’re beautiful on the inside. 😉

I appreciate you giving us a peek into how you use OBS for your presentations. The idea of OBS Studio is really interesting to me, both for recordings and possible presentation helps. I’ll have to read through this again to better absorb everything and probably while I’m playing around with the software. Not planning to go as far, but the window-in-window and quick scene switching are definitely interesting to me.
Glad you enjoyed it, Peter!

Nice writeup and setup Brent.. Amazing results!
Thanks Rob!

Hi Brent, you mentioned that the streams can be replayed on the various platforms they’re streamed to and that you set the max retention for each platform — with these live streams have you looked into a way to archive the recordings so that you own a physical copy of them or are you content to just rely on the various platforms keeping them around for you?
I really like your setup and it inspires me to want to produce some in-house training videos for my company that would be of the private variety; but I’d love to be able to record them and keep an archive of the physical recording somewhere.
Kinzleb – yeah, you can download your originals from YouTube if you want, but I’m fairly confident that YouTube will be around for a while. 😉 Plus, you can’t beat free hosting.

As someone that hops on your classes as much as I can and am working on building a consulting business, I would like to create a classes with the quality yours is. This is a long ways out for me. I like to hear about the equipment and how you use it. Thanks for sharing. Enjoying the latest updates you have made. Cool tech!
Joe – thanks sir!

Awesome write up, I’m trying OBS now. What do you use to remove the greenscreen so only your head/body appears in the video?
Thanks! It’s built into OBS – it’s called a chroma key filter.

Thank you for sharing the details of the system you have set up for your presentations. I was certain that you had put a lot of R&D into it, and I’m sure that it has evolved with you along the way.
Thanks for sharing so much with the community.
My pleasure!
Leave a Reply Cancel reply
Your email address will not be published. Required fields are marked *
Don't subscribe All new comments Replies to my comments Notify me of followup comments via e-mail. You can also subscribe without commenting.
Post Comment

Hi! I’m Brent Ozar.
I make Microsoft SQL Server go faster. I love teaching, travel, cars, and laughing. I’m based out of Las Vegas. He/him. I teach SQL Server training classes , or if you haven’t got time for the pain, I’m available for consulting too.
Want to advertise here and reach my savvy readers?
- Subscribe *
Our Anniversary Sale is on during May! Save 50% on my Fundamentals. Dismiss
Insert/edit link
Enter the destination URL
Or link to existing content
How to add your PowerPoint presentation to your camera with OBS
Published by
Jason St-Cyr

Have you ever wanted an “over the shoulder” feel to your video presentation? Like a broadcast news style, right in your web camera? You can add your PowerPoint presentation to your camera feed using OBS software and a few easy steps. You can watch the video to see how, or read about it below.
Why “over the shoulder”?
For some of my presentations, what is on my slides is actually very graphical, or not the important piece of the talk. It’s a supporting device that allows me to talk over it. For those types of talks, I don’t really want somebody staring at a picture of a Batman toy for 2 minutes. The focus should be on the speaker.
This is where I started playing with the idea of using a more “camera first” presentation style, with the slides embedded. What I needed was to figure out how, and learn some basics of OBS. So here’s what I learned!
What is OBS?
OBS (Open Broadcaster Software ) is software you run on your computer that has the capability of pulling in multiple sources/devices to create a combined video output. You can then use this as a virtual camera, instead of the physical video device or web camera you currently have, either for calls or for recording.
It’s free, and does a lot, way more than I know how to do right now, but recently I wanted to do a presentation with only my camera and some visual slides, so I started learning how to use OBS a little.
How to capture PowerPoint slides in OBS
After launching OBS, the first thing that I needed to do was to capture my full screen slide presentation with a new input source. Following these steps, you can capture your slides:
NOTE: These steps are for the Windows version of OBS
- In your ‘Sources’ pane, click on the ‘+’ button to add a new source
- Select “Window Capture” as the type of source.
- Create a new source by giving it a name (something like “PowerPoint”).
- Press “OK” to confirm the device creation and launch the Properties screen to set up your capture. NOTE : By default, it grabs a recently run application when the Properties screen pops up, which may or may not be PowerPoint.

- For “Capture Method”, change from Automatic to Windows Graphics Capture (Windows 10 1903 and up) . Your OBS display should now show the PowerPoint slide correctly.
- Press “OK” .
You now have a PowerPoint video source!

Combining PowerPoint and video sources
At this point, your slides are taking up the whole video output. You may want to keep this as a scene for when you want your slides to go full screen. However, I mentioned I was trying to do an “over the shoulder” look with the slides smaller and mostly camera. That means I need my camera as part of the scene. These steps will let you mix a video capture with your window capture:
- Like before, you’ll need to add a source, but this time do a Video Capture Device.
- Configure it to your camera and desired video settings. I usually leave this on the default configurations. At this point, you have two sources, both full-screen, and if you try it out you’ll only see the video camera, not your slides.
- In the sources pane, select the PowerPoint Window Capture source.
- Click on the “up” arrow to bring it to the top layer.
- Use your mouse to resize your PowerPoint Window Capture source so that your slides are not taking up the entire screen.
- Use your mouse to slide the Window Capture source to the position that gives you the mixed layout of video and slides that you want.
And you’re done! Happy streaming!
Share this:
Leave a comment cancel reply.
Create a website or blog at WordPress.com

- Already have a WordPress.com account? Log in now.
- Subscribe Subscribed
- Copy shortlink
- Report this content
- View post in Reader
- Manage subscriptions
- Collapse this bar
Corey Potter
Present a Slideshow with Streamlabs OBS
When recording a course lesson or presenting a live video, I often want to include a slideshow as part of my presentation.
I use Streamlabs OBS for recording my videos, so recently I did a deep dive on options for presenting slide presentations with OBS.
Note: The standard version of OBS should follow a very similar process.
There are 2 main ways to stream or record a slide presentation with Streamlabs OBS.
- Exporting images for each slide and using the “Image Slideshow” source in OBS.
- Using Google Slides, PowerPoint, or Keynote as a source with window or display capture.
There are pros and cons to each method, but I found that it was much easier for me to use the Image Slideshow feature right inside of SLOBS.
Pros to using the Image Slideshow:
- Everything is within OBS and you don’t need to worry about other windows
- Much easier to do if you only have one monitor
- Hotkeys make it easy to advance slides or hide the slideshow completely
- You can make the “slides” with any software (Canva, Photoshop, PowerPoint, etc.)
- Transparency is supported (with PNG images)
Cons to using the Image Slideshow:
- You can only do simple transitions of the entire slide (no object transitions)
- Slightly more complicated to set up at first
- May be buggy with large presentations
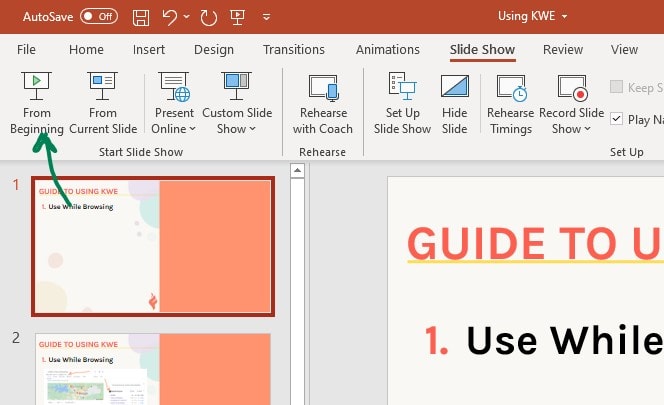
To use this option, you’ll need every slide exported as an image. With PowerPoint this is very easy, but with Google Slides it takes a little more effort since you need to save every slide individually.
How to use the Image Slideshow in Streamlabs OBS
1. save your images to a folder on your computer.
In most presentation software, you can save slides individually as images. OBS can support JPG and PNG images. JPG will have a smaller file size and PNG can preserve transparency if needed.
Make sure to save into a new folder and name your images sequentially in the order of the slideshow.
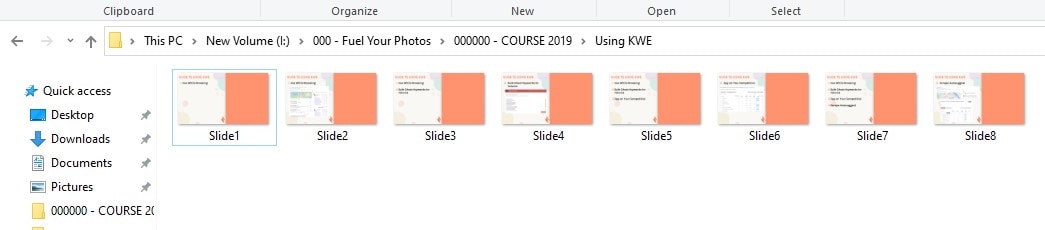
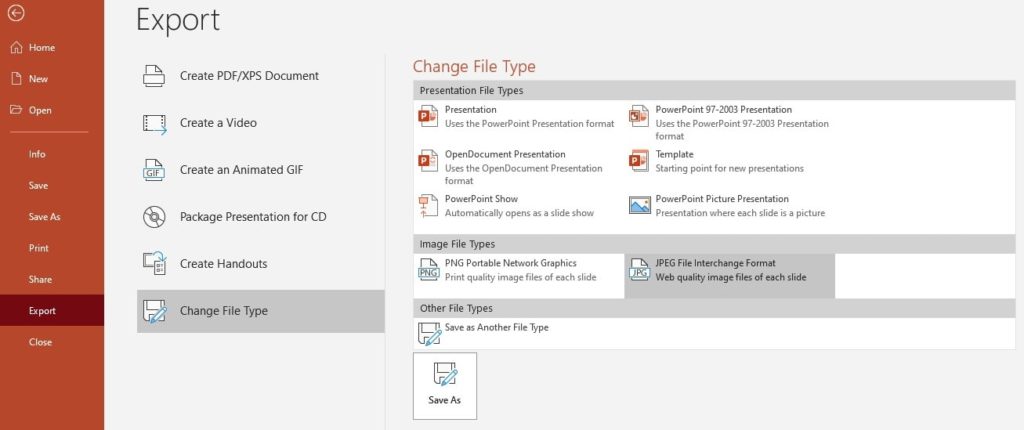
In PowerPoint, just go to File>Export, and choose from the Image File Types. When you click save it will ask if you want to save “All Slides” or “Just This One.” Choose All Slides and it will create a folder and automatically name the files sequentially for you.
If you are streaming or recording in 4k, be sure to check out “other lessons learned” below to learn how to increase the image quality from PowerPoint.
2. Create a scene and add the Image Slideshow source
Create a new scene in OBS called “Slide Presentation.”
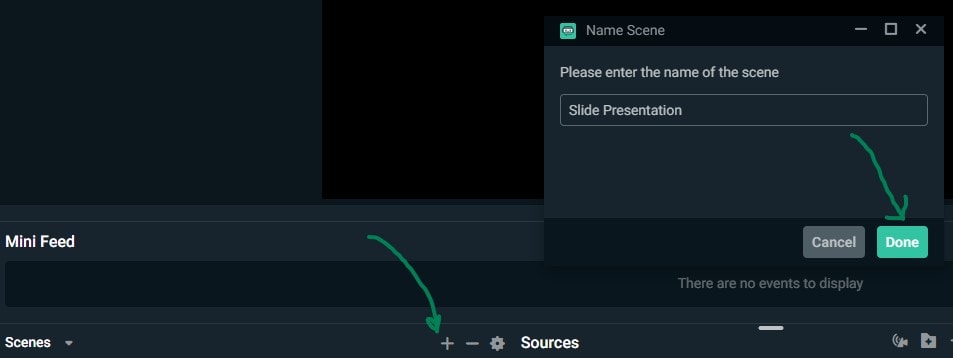
Click the “+” icon by sources to add a new source.
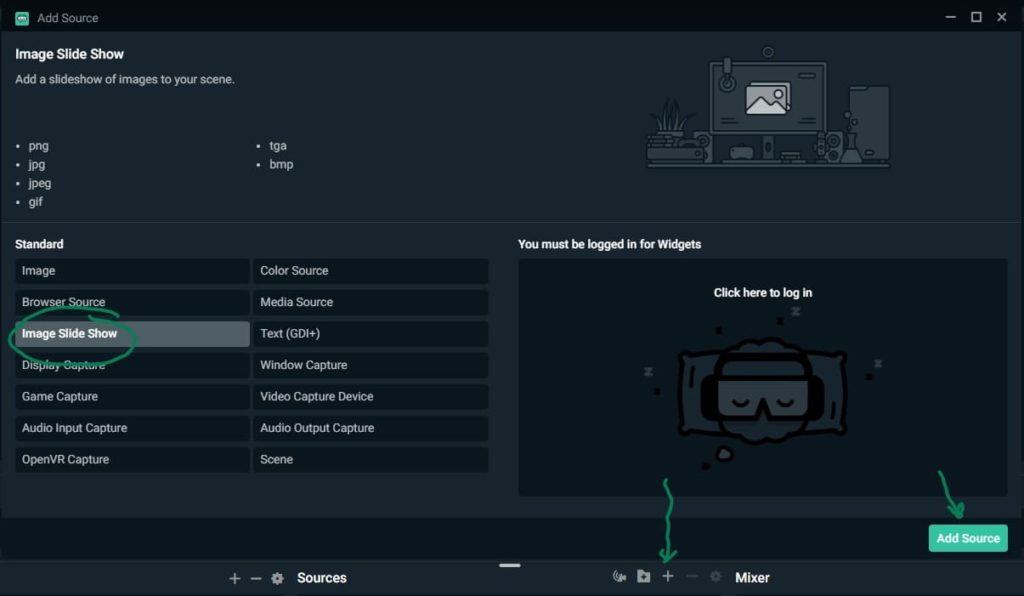
Choose the “Image Slide Show” option and click “Add Source.”
If you have created slideshows in other scenes, you can select them here, or select “Add a new source instead” to create a new slideshow.
3. Configure settings and select your folder of images
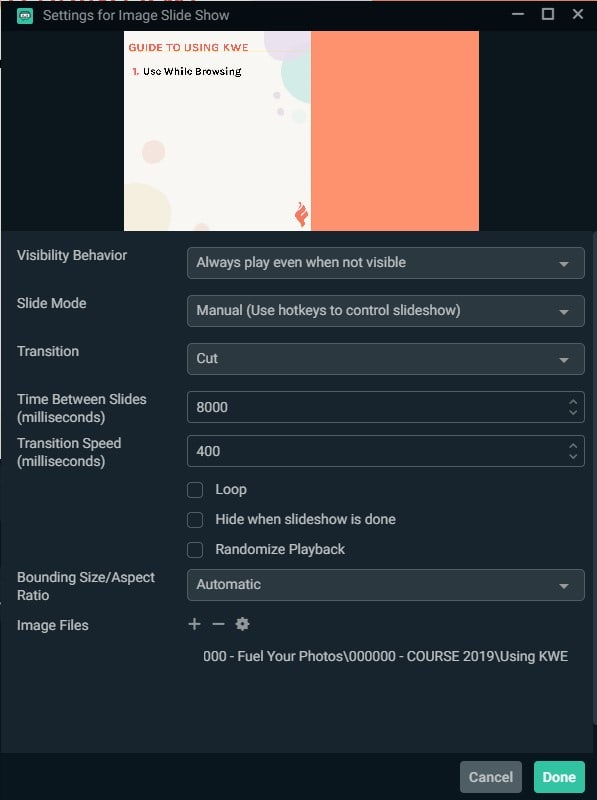
Leave the Visibility Behavior on “Always play even when not visible”.
Set the Slide Mode to “Manual (Use hotkeys to control slideshow)”.
Choose your transition (I like “Cut”).
Adjust transition speed if desired (I sometimes lower to 300-400ms).
With the manual slide mode, the other boxes can all remain unchecked.
Leave Bounding Size on Automatic.
Click the “+” next to “Image Files” and then select “Add directory”
Choose the folder where you saved your slides.
4. Set your hotkeys to advance slides
In Streamlabs OBS go to Settings (gear icon in bottom left) then “Hotkeys”.
Scroll all the way down to “Sources” and expand “Image Slide Show”.
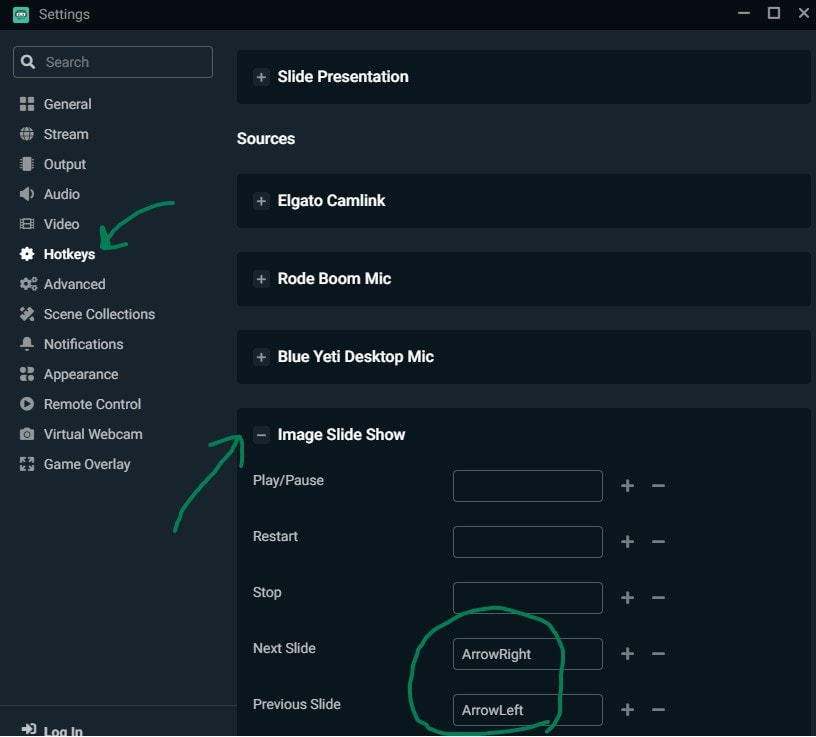
Click any field and then press a key that you want to use as the hotkey for that action.
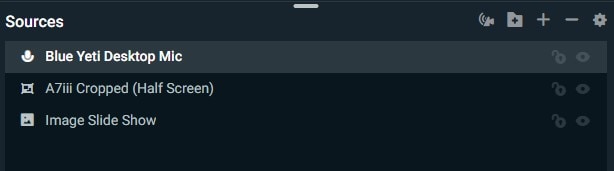
5. Add any other sources you need to your scene
If you want your camera to show up over the slides, or if you don’t have a default audio capture device, you’ll need to add those to your scene as well.
How to use Google Slides or Powerpoint as a source in OBS
1. create your presentation.
Use whichever presentation software you like to create your presentation. I typically use Google Slides or PowerPoint when I want to present with OBS. Streamlabs OBS is also available for Mac, so you can create your presentation with Keynote if you prefer.
2. Present on a second monitor
Use the presentation software to “present” your slideshow on a second display.
While it is possible to add a PowerPoint window with the “window capture” source, I have found that it is very unreliable, and also difficult to keep all presenter tools out of the presentation.
If you decide to go the window capture route, be sure to go to Slide Show>Set Up Slide Show>Show type in PowerPoint and choose “Browsed by an individual (window)”. Personally, I couldn’t get my slides to advance as expected in OBS using this method.
3. Create a scene and add the second monitor as a display input in OBS
Choose the “Display Capture” option and click “Add Source.”
If you’ve added a full window display capture before, you can choose it from the list, otherwise click “Add a new source instead” and select your monitor from the list.
Adjust the source size as needed to fit your workspace.
4. Add any additional sources to your scene
5. make sure the presentation window is active so you can advance slides.
When you are ready to go live, you’ll need to make sure to click on your presentation window to make sure it is active if you want to advance your slides with the arrow keys.
Tips for live streaming slide presentations with OBS
Use Streamlabs Deck on an iPad or phone to easily switch between your scenes on the fly. This makes it easier to keep the presentation window “active” so you can easily advance slides.
Other lessons learned
If you are recording or streaming in 4k, make sure to save your images in a higher resolution (at least 3840 x 2060px). In PowerPoint, you need to make this adjustment by adding an option manually in the Windows registry (tutorial) .
If you only have a few text based bullet points to make, you could just add them as Text sources in OBS.
If you want to have different crops on the same video capture, first add a scene with only the camera input, then in another scene you can select that scene as a source and crop the scene itself. In subsequent scenes after that you can copy that source and paste it into new scenes as a reference.
3 responses to “Present a Slideshow with Streamlabs OBS”
This is an excellent tutorial on how to add a slideshow. Thank you!
Did you find out how to adjust the sorting of the slides in OBS or adjusting how powerpoint names the sequential slides so that the order is preserved when you have a slide show that is over 10 slides?
If you rename your slides as 001, 002, …010, it will work just fine.
Leave a Reply Cancel reply
Your email address will not be published. Required fields are marked *
OBS Studio: How to record online presentations (Zoom, Teams, Webex, Meet, …)
Sometimes you want to record online presentations to maybe re-watch them later or share them with colleagues. It is not always possible to easily do this from within the tool which is used for the presentation. An easy alternative is to record such sessions using OBS Studio, a free and open source tool. In this blog post I’ll explain how you can do this.
Setting up OBS Studio
First download and install OBS Studio .
Within OBS Studio, you have Scenes which hold Sources. By adding and configuring the correct sources you can easily make recordings.
There are several things which are good to know when configuring your Sources;
- Be on time for a meeting. It allows you to setup OBS Studio correctly for the recording.
- Capture a Window, not a Screen. A reason for arriving on time is that you can select the correct Window in OBS Studio from the Window Capture drop-down (after you have added Window Capture as a Source). You can capture the screen, however in that case you must be careful what happens on that screen. Do not move other windows or the mouse in front of what you want to record for example. When you record the window, you won’t have this problem. Just don’t resize it. If you also want to capture a chat for example which has popped up in another window, you can choose to add 2 different Window Capture Sources.
- Select a working Capture Method. Sometimes for example Zoom meetings just show a white block when captured. ‘Automatic’ was the default setting for Capture Method on my system. This selected BitBlt which did not work for me. When I switched to Windows Graphics Capture (available in Windows 10, release 1903), it would capture my Zoom meetings.
- Check the capture area Once you’re setup, you should first check if your Window Capture is sized correctly. You should see what you want to record in the area what will be recorded in OBS Studio.
- Audio Output Capture for output sound (what you are listening to) Check you are using the correct device. You can check whether you are using the right one when you see the audio bar in the Audio Mixer. For me using the Default device worked out nicely.
- Audio Input Capture to capture the microphone when presenting yourself When you talk to your microphone, it will not end up as output but is input. You might also want to capture the output when presenting when you also want to also record questions people ask.
Recording and playback
After you have configured the input Windows and Audio, you can start recording. Once you clicked it, the button changes to Stop recording which you can use to stop the recording.
By clicking Settings, Output you can see where the recording will end up and you can open it and share it if you like.
Mind that in some countries it is not allowed (by law) to record others without explicit permission. Take this into account when considering to make a recording!
Share this:
Related posts, devoxx belgium 2023, multi source video in ms teams without an actual green screen, obs studio + snap camera: putting yourself in your presentation live for free, about the author.

Maarten Smeets
Maarten is a Software Architect at AMIS Conclusion. Over the past years he has worked for numerous customers in the Netherlands in developer, analyst and architect roles on topics like software delivery, performance, security and other integration related challenges. Maarten is passionate about his job and likes to share his knowledge through publications, frequent blogging and presentations.
Leave a Reply Cancel reply
This site uses Akismet to reduce spam. Learn how your comment data is processed .
- PRO Courses Guides New Tech Help Pro Expert Videos About wikiHow Pro Upgrade Sign In
- EDIT Edit this Article
- EXPLORE Tech Help Pro About Us Random Article Quizzes Request a New Article Community Dashboard This Or That Game Popular Categories Arts and Entertainment Artwork Books Movies Computers and Electronics Computers Phone Skills Technology Hacks Health Men's Health Mental Health Women's Health Relationships Dating Love Relationship Issues Hobbies and Crafts Crafts Drawing Games Education & Communication Communication Skills Personal Development Studying Personal Care and Style Fashion Hair Care Personal Hygiene Youth Personal Care School Stuff Dating All Categories Arts and Entertainment Finance and Business Home and Garden Relationship Quizzes Cars & Other Vehicles Food and Entertaining Personal Care and Style Sports and Fitness Computers and Electronics Health Pets and Animals Travel Education & Communication Hobbies and Crafts Philosophy and Religion Work World Family Life Holidays and Traditions Relationships Youth
- Browse Articles
- Learn Something New
- Quizzes Hot
- This Or That Game
- Train Your Brain
- Explore More
- Support wikiHow
- About wikiHow
- Log in / Sign up
- Computers and Electronics
- Operating Systems
How to Use OBS to Record on a PC or Mac
Last Updated: April 19, 2023
Recording your Screen
Recording a game.
This article was co-authored by wikiHow staff writer, Nicole Levine, MFA . Nicole Levine is a Technology Writer and Editor for wikiHow. She has more than 20 years of experience creating technical documentation and leading support teams at major web hosting and software companies. Nicole also holds an MFA in Creative Writing from Portland State University and teaches composition, fiction-writing, and zine-making at various institutions. This article has been viewed 156,934 times. Learn more...
This wikiHow article teaches you how to use OBS Studio to record your screen in Windows or macOS.
Things You Should Know
- Click + under “Sources" in OBS and then select Display Capture .
- Click OK within the display preview that pops up. This preview should show your desktop.
- Click Start Recording and then click Stop Recording when you are satisfied with your capture.

- If you want to record yourself playing a game, see this method .

- Desktop audio: This controls the sounds coming from your computer (apps and music) during the recording.
- Mic/Aux: This controls the microphone or an external input. If you’re using a mic to speak over your recording, make sure this slider is up. If not, just move the slider all the way to the left.

- The video file is saved in your Videos folder. To access this folder, press ⊞ Win + E to open the File Explorer, then click your Videos folder in the left column.
- To change the default saving location, click Settings at the bottom-right corner of OBS, click Browse… next to “Recording Path,” then select a different folder.
- You may then have to click on the Output tab on the left column.

- If you keep the default, know that switching away from the full-screen game (such as when you press Alt + Tab ↹ ) will black out the screen until you re-open it.
- To capture only the video game, click the “Mode” menu, select capture specific window , then select your game.

- Desktop audio: This controls the volume of the sound coming from the game, as well as any other open apps.

Community Q&A
You Might Also Like

- ↑ https://obsproject.com/wiki/Sources-Guide
About This Article

- Send fan mail to authors
Is this article up to date?

Featured Articles

Trending Articles

Watch Articles

- Terms of Use
- Privacy Policy
- Do Not Sell or Share My Info
- Not Selling Info
Keep up with the latest tech with wikiHow's free Tech Help Newsletter
Win $1000
Free Video Course
Mini AI Tools
Tella Screen Recorder
Try Tella for free
October 16, 2023
How to Record a PowerPoint Presentation (with Audio)

Elevate your PowerPoint presentations with this comprehensive guide on creating captivating, self-paced narrations, enhanced with transformative tools and the power of software like Tella.
Table of contents
Record with powerpoint's built-in features, record with obs, record with tella.
Other solutions
Things to do before you start recording
Tips for creating engaging powerpoint recordings.
Engaging virtual presentations are essential in today's world. This guide will walk you through recording a PowerPoint presentation with voiceover. Doing this makes your presentation more professional and polished for your audience. Let's begin.
Step 1: Open your PowerPoint presentation
First, open the presentation you'd like to record with voice-over. This guide will be for he 365 version of PowerPoint, but bear in mind you can still do this in PowerPoint versions all the way back to 2013. The settings are pretty much the same, just maybe in a slightly different place.
This doesn't work, however, on the Web version of PowerPoint.
Whatever version you're using, ensure all your slides and content are ready for narration. This will save time and provide a smoother recording experience. Far better than simply making it up as you go along.
Step 2: Prepare for recording
Navigate to the slide where you want to start your recording. If you're planning to record the entire presentation, start with the first slide.
Step 3: Start the recording

In the PowerPoint menu, select the Slide Show tab. From here, click on Record Slide Show. This will open the recording window with two options to choose from:

Record from Current Slide : This option allows you to start recording from your selected slide.
Record from Beginning : This option enables you to record the entire presentation starting from the first slide.
Click on your preferred option to proceed with the recording.
Step 4: Recording the narration and timings
When you're ready to start recording, click on the red Record button (round circle with a dot in the center). A three-second countdown will begin, and once it reaches zero, start speaking to record your voiceover.
Remember that the transition between slides isn't recorded, so pause your narration during slide transitions and resume speaking once the next slide appears.
Step 5: Manage your recording
During the recording, you have several tools at your disposal:
Pause: Use this button to pause your recording if needed.
Stop: Click this button to end your recording.
Replay: This allows you to review your recording.
Pen, Highlighter, or Eraser: Use these tools to mark up your slides during the recording, if desired.
Step 6: Edit or remove narration and timings
If you're not satisfied with your narration or timings, you can remove or edit them:
If you're still in recording mode, click on Clear.
Choose one of the following options:
Clear Recording on Current Slide: To delete the narration and timings on the current slide.
Clear Recording on All Slides: To delete the narration and timings from all slides at once.
Consider re-recording the sections that need improvement.
Step 7: Save and share your presentation

Once you're satisfied with your recording, save and share your presentation as either a PowerPoint file or a video:
Click on File and select an option like Save or Export.
Follow the on-screen instructions to save or export your presentation.
Now your voice-over presentation is ready for your audience. They'll be able to view and listen to your narration as they go through the slides.
We hope this step-by-step guide helps you create a polished PowerPoint presentation with a voice-over. Good luck, and happy presenting!

For added flexibility and features, you may want to swing by other recording software.
For instance, OBS Studio offers a good deal of control, allowing you to tweak all sorts of audio and visual settings. However, it may be a little complicated if you're new to the game. Here are the steps to do this.
Step 1: Install OBS Studio
If you haven't already, first download and install OBS Studio from the official website . The software is available for Windows, macOS, and Linux.
Step 2: Open OBS Studio
Open OBS Studio. You'll see a black screen; this is your canvas where you'll be recording your content.
Step 3: Setting Up Your Scene
Click the '+' button under 'Scenes', name your new scene. This allows you to create different recording settings for different types of needs.
Step 4: Setting Up Sources
Underneath 'Sources', click the '+' button. This allows you to add different sources to your scene. You'll want to add two sources:
Display Capture: This captures your entire screen. Name the source, click OK, then OK again.
Audio Input Capture: This captures your microphone. Again, name the source, select your microphone from the dropdown, and hit OK.

Step 5: Positioning Your Sources
You may see the 'Display Capture' source covering up everything. Click on 'Display Capture' source and drag it down the list until it's under your 'Audio Input Capture'. This ensures your voice is picked up over your presentation.
Step 6: Open PowerPoint Presentation
Open your PowerPoint presentation but don't start the slide show yet.
Step 7: Adjust OBS Studio Settings
Go back to OBS. Make sure your Display source is selected, then hover over the canvas. A red border will appear around your display source. You can resize and reposition this to only capture the portion of your screen that your PowerPoint presentation will take up.
Step 8: Start Your Presentation
In PowerPoint, start your slide show. OBS should now be capturing your presentation. Any slides you progress through in PowerPoint will be captured by OBS.
Step 9: Start Recording

When you're ready to start your presentation, go back to OBS Studio and click on the 'Start Recording' button located in the lower right. Once you hit this button, everything captured in OBS is recorded until you hit 'Stop Recording.'
Step 10: Save Your Recording
Once you've finished your presentation, click 'Stop Recording'. Your video is automatically saved in a specific location. To find where your recordings are saved, go to the 'File' > 'Show Recordings' in OBS.
And that's it! Now you know how to use OBS Studio to record a PowerPoint Presentation and voiceover using a microphone.
If you're looking for something simpler, ScreenPal (formerly Screencast-O-Matic) is a great choice. It's ideal for getting the job done without any distractions. However, you get less control over your content and the final product. OBS has a few other contenders, including Streamlabs . Check it out if OBS doesn't do it for you.
Comparatively, this software fares well with a broader set of controls than PowerPoint. However, they might demand a steeper learning curve, so brace yourself for a bit of a climb.
Now you're all prepped and cozy with your goals, spruced-up presentation, and audio equipment, it's time to step into the recording booth.
And folks, today, we'll spotlight this cool little tool called Tella. It's like your Swiss army knife for screen recording, fully equipped to integrate smoothly with PowerPoint, too.
Talk about a dream team!
Step #1 - Getting started with Tella

Alright, first things first. We've got to get Tella onto your computer.
There are several ways you can do this, including;
Running the Web App
Running the Chrome extension
Running the Mac App
Simply download or log into the one you want to use. It's as easy as pie.
Once you've installed Tella through the app, run it, and you'll see a slick little control bar that'll be your best friend throughout this process. If you're working through the web app, just click "New Video" to get started in your browser. Don't worry, you can still screen record through the web app.

Have your presentation ready already?
You can actually upload the presentation to Tella and run the PowerPoint through the app. Just click the "New Video" option, More, and then import your slides. All major presentation formats are compatible!

Now, we've got a couple of settings to tweak.
Click on the mic icon to configure your audio input settings. Make sure it's capturing the right microphone (yes, the one we picked out earlier). Next up, choose your recording area.

You'll want to adjust the recording frame to fit your PowerPoint presentation just right—think of it like framing the perfect picture!
Step #2 - Roll cameras, action!
Start recording your PowerPoint by hitting the red button. As you present, Tella will record your voice and slides.
You can pause, restart, or stop anytime using the controls. If you go off-topic, pause and restart.
When moving between slides, adjust your voice volume to match the mood. Keep a smooth rhythm, and your audience will follow along.
Step #3 - Wrapping it up
Breathe out; you made it!
But before we call it a day, let's give our recording a quick polish. Click on 'stop' when you're done, and Tella will save your recording.
Now, fire up Tella's editing tools and trim any unnecessary bits—like when you knocked over your coffee mid-slide (we've all been there!). You can also add captions, effects, and basically anything you need to bring your presentation to life.

Aaand cut! With your shiny new feed of your PowerPoint presentation, you're all set to captivate your audience, one slide at a time. Isn't Tella just swell?
Other solutions to record a PowerPoint
There's a whole parade of cloud-based tools like CloudApp ( now Zight ) or Loom that lets you record right from your browser! They store your recordings in the cloud, allowing you to access or share your work from anywhere.

If you're using Zight, a basic step-by-step guide would look like this:
Open Zight: Start up the Zight application on your device. Zight is available for Mac, Windows, and Chrome.
Prepare Your Presentation: Open your PowerPoint presentation that you wish to record. Make sure it's in view on your screen.
Capture & Record: In Zight, choose the ' Screen Recorder ' feature to capture and record your screen. Make sure your entire PowerPoint window is in the capture area.
Voice-Over: As Zight records the screen, start your PowerPoint presentation and provide your voice-over. Ensure your device's microphone is on and working. Zight will record the PowerPoint and your voice simultaneously.
Edit & Annotate (Optional): If needed, make use of Zight's editing capabilities. You can trim segments of your recording, add text or highlight areas for emphasis.
Save & Share: Once you're satisfied with the recording, save the file. You can also share your recorded presentation directly from Zight through a generated link.
While easy, remember, even clouds have their gray days. With these tools, you rely on internet speeds to keep things running smoothly. Plus, you might stumble upon some limitations in editing features compared to our pals like Tella.

Before recording, you need to plan and set up. Envision your end product so you can make the right choices. This lays the groundwork for great content. This plan includes;
Setting your goals

Know the purpose of your presentation. This gives it clear direction, like finding your true north.
The purpose could be educating, convincing, or rapport building. Align it with your company or personal goals.
Once you know the purpose, you're halfway there.
Creating content to fit your audience
Tailor your content to your audience. Understand their backgrounds, needs, and preferences.
Align your content accordingly. Use familiar examples and anecdotes to create a personal, engaging experience.
Let your audience know you speak their language.
Polishing your presentation

Use good design - neat layouts, color schemes, legible fonts. Make it visually appealing.
Add informative visuals like diagrams, charts, and images to convey information effectively.
Sprinkle in interactivity - polls, links, videos. This engages your audience.
Review every slide carefully to fix any errors. Consistency is key.
Polish your presentation to make it the best it can be. This will engage your audience and get your message across clearly.
Prepare your audio equipment

Pick a good microphone for clear audio . A USB mic is simple. A condenser mic offers high quality. A lapel mic leaves your hands free.
Tune your audio settings for the best sound quality. Monitor your audio live to avoid background noise.
With your microphone and settings ready, you're set to start recording high-quality audio.

Creating an engaging PowerPoint presentation takes skill. Follow these tips to boost engagement:
Speak clearly and expressively. Your voice guides the audience, so use a friendly, steady tone.
Use visuals. Graphics, charts, and animations complement narration. Strike a balance between visuals and audio.
Provide resources. Include downloads, links, or CTAs to encourage interaction after the presentation.
Edit thoroughly. Refine audio levels and flow. Even basic video editing goes a long way in delivering a seamless presentation.
With these techniques, you can create compelling presentations that captivate your audience.
Wrapping up
We've covered every tool to record PowerPoint presentations with audio. Tella stands out for its easy interface, audio settings, and editing tools. It works seamlessly with PowerPoint, too. But the tool is only part of the equation.
You must also speak clearly, use visuals, provide resources, and edit your recording.
Whether making webinars, tutorials, or virtual classes, you've got this.
Are you ready to record your next award-winning PowerPoint?
Try Tella for your recording needs. Let your ideas take flight. Use Tella to captivate your audience, one slide at a time. Create presentations that engage, excite, and inspire.
Happy recording! Go make memorable presentations that resonate with audiences.

Jul 24, 2023
The Ultimate Chrome Screen Recorder Extension (with Audio)

May 19, 2022
How to Record Your Screen on a Mac

Aug 18, 2022
How To Record Your Screen And Webcam Simultaneously

Tella — Screen recording for entrepreneurs
Learn more ->
Learn more about Tella ->
How To Record in OBS
Become the star of your own show

Learning how to use OBS (Open Broadcaster System) isn't only for streamers. OBS can do a lot more than stream live content. It is a virtual broadcast studio capable of mixing audio and video elements together. It's easy to use and with it we can create an instructional video, talk, or the next viral sensation. Best of all, it's free software. With OBS you can record or stream your gaming sessions, your screen, or yourself.
At first OBS can be a bit confusing to use. Even with its recent updates the user interface still has a learning curve. But underneath this interface is a user-friendly application that, unlike the Etch A Sketch I never got for Christmas, has a ton of features beyond streaming. I’ve created YouTube videos with OBS, MP3 recordings, and I’ve even made voice over tracks for my demo reel.
The first set of instructions is for recording video.
In this how-to we will learn the basics of the OBS user interface with the end goal being to create our own video that mixes audio and video elements into one recording.
Setting Up OBS
OBS is a free download and it has clients for Windows macOS and Linux. Our goal here is to download the application and prepare our work environment before we record any content.
1. Download and install OBS for your operating system.
2. From the Start menu, open OBS.
Stay On the Cutting Edge: Get the Tom's Hardware Newsletter
Get Tom's Hardware's best news and in-depth reviews, straight to your inbox.

The OBS user interface is broken down into sections, each has a specific role.
1. The output. Here is where the video output is displayed. It can be a mixture of webcam, game footage, text overlays etc. All of these elements are visible in the final video.
2. Scenes. Scenes are sets of sources grouped together. An example would be one scene for a piece to camera, another scene for an alternative camera angle and a further scene with an application window open.
3. Sources. Sources are the individual elements that make up a scene. We can mix different audio and video sources such as external game capture devices, application windows, microphones and instruments. Sources can be placed on top of one another by moving the order in the Sources list. This enables us to add graphics and video on top of our camera feed.
4. Audio Mixer. The audio mixer shows a live reading of each enabled audio device. We can monitor the levels of each device, tweaking them with the slider to ensure that the audio is clear.
5. Scene Transitions. When moving between scenes, a short fade is applied to ease the viewer. The duration can be changed, or completely replaced with a quick cut.
6. Controls. Here we can start / stop a recording / streaming session, tweak our settings and in advanced use we can create a virtual camera that mixes the OBS output for use in livestreams.
Setting the Output Folder
It is good practice to save your output to a certain location. In OBS we can do this via the Settings menu.
1. Under Controls, click on Settings. Alternatively, you can go to File > Settings.

2. Under Recording Path, click on Browse and set the folder to save your output.

3. In the Output menu, click on the Recording Format menu to change the Recording Format. This will change the format of the video file. Changing the Recording Format will bring up a warning — if you know how to navigate and convert different formats, you can play around with test recordings to determine the best one for your situation. Otherwise, go with MP4, which is the standard format for video and audio. Click OK to close the Settings dialog.

Setting Up to Record
With the configuration complete, we can now start adding sources to our scene. Sources are a mix of audio and video inputs. We will start by adding a video source and then add an audio source.
1. In the sources section, click on “+” to see a drop-down menu of source types. Alternatively, right-click in the sources section and select “Add”. OBS has many different sources. We can show images, slideshows, embedded videos (via VLC), add basic text and show application windows directly in a scene. Any video / image sources can be resized to show multiple sources in one scene, which is useful for video tutorials.
2. From the list select Video Capture Device.
3. Create a new video capture device and rename it accordingly. Click OK to save.
4. In the new dialog, under Devices, select the camera and Click OK. Your setup may consist of more than one camera. They will appear as options in the dropdown list. OBS allows you to add more than one video capture device to a scene. Camera settings (such as focus, exposure, white balance) can be changed by clicking on Configure Video, but modern day webcams are able to auto-adjust for the best image quality.

5. In the output window, grab the corners of the source to resize and reposition your camera. We can tweak the layout and size to exactly how we would like it to look.
6. For a video source with specific dimensions, right Click on the Source and select Transform >> Edit Transform.
7. Change the size to 1280x720, or to a resolution that suits your requirements. Click Close to save. This menu gives us precise control of the position, size and alignment of the video source.

We have a video source and now we need to add an audio source to our recording.
1. In the sources section, click on “+” to see a drop-down menu of source types. Alternatively right click in the sources section and select “Add”. Multiple audio sources can be added to a scene, for example a microphone and electric guitar can be mixed. Just pay careful attention to their volume levels in the mixer. Vocals should be clear against any background instruments.
2. From the list, select Audio Input Capture.
3. Create a new audio input capture device and rename it accordingly. Click OK to save.
4. In the new dialog, under Devices, select the audio input and Click OK.
5. Tweak the volume settings for the audio input device. Keep the levels out of the red as clipping (distortion) will occur. Aim for a value in the low yellow range. This will ensure consistent audio levels for the listener.
Recording a Video
Now it’s time to hit record!
1. Click on Record, found in the Controls section. If you need to pause, click on the pause button to the right of Stop Recording.
2. Record 30 seconds of video and then click Stop Recording.

3. Go to the folder containing the video and play it using your preferred media player. Check the video for correct framing and sound levels. Ideally, the presenter should be in the center of the frame, and audio levels should be comfortable for viewers listening at half volume. If that is not the case, go back into OBS and reframe the shot, and tweak the audio levels until you find the right mix.
Wrapping Up
OBS is a great tool to experiment with. We can use it to add “lower thirds” (graphics to add extra information, such as news tickers) or design elements such as logos and animated graphics. Adding a background to a video is as simple as adding an image source and using the sources list to place it behind you.
Now that you know how to record in OBS, go forth and make great content! May the bandwidth be with you.

Junae Benne is a freelance writer for Tom's Hardware US. She reviews gaming peripherals and covers streaming tutorials.
- Les Pounder
Magewell's New M.2 Capture Cards Are Fit for Mini-ITX Streaming PCs
How To Crop and Zoom in OBS
Early Snapdragon X Elite benchmarks seemingly confirm the chip's incredible performance and battery life potential
- PlaneInTheSky No talk about NVENC? The most important thing about OBS you should know...is that you need to turn on NVENC hardware recording. Reply
- jkflipflop98 Actually you should use QuickSync over NVENC. QuickSync has far better quality and it has 0 impact to your game as the main GPU is now 100% utilized for gaming. The last time I installed OBS I simply could not get it to record video no matter what I did. Finally uninstalled and then reinstalled and everything works like a charm now. Reply
- Exploding PSU I wonder if there's a way to reduce CPU/GPU usage in OBS. I use OBS to record zoom calls and meetings on my laptop but it sucks out the battery very quickly. Not to mention the laptop would overheat so much it sometimes shuts down on its own. Reply
Actually you should use QuickSync over NVENC. QuickSync has far better quality and it has 0 impact to your game as the main GPU is now 100% utilized for gaming.
The last time I installed OBS I simply could not get it to record video no matter what I did.
PlaneInTheSky said: Quicksync over NVENC? Are you taking the piss? No one should be using QuickSync when NVENC is available. NVENC has no impact on your game's FPS, because it is a dedicated encoding chip on the GPU that has nothing to do with game performance. Turning on NVENC has 0 effect on your game's performance. So why are you giving terrible advice to people if you can't even get the software to work and don't understand that NVENC is a dedicated separate chip, why give out your advice?
- View All 5 Comments
Most Popular
How to video record yourself presenting a PowerPoint

What type of content do you primarily create?
Recording yourself presenting a PowerPoint can be challenging, especially getting the technical aspects right. You need to capture your screen, webcam, and audio seamlessly while delivering your content naturally and avoiding awkward transitions between slides.
Finding a tool that integrates all these components can seem daunting. However, recording yourself presenting a PowerPoint doesn't have to be reserved for the tech-savvy or professional speakers.
Whether you're a teacher creating online lessons, a marketer producing a product demo, or someone looking to improve their presentation skills, this guide will walk you through user-friendly tools and strategies that will teach you how to video record yourself presenting a PowerPoint.
- Recording yourself presenting a PowerPoint can be challenging, but it doesn't have to be reserved for experts.
- Video recording offers unlimited reach, repurposing opportunities, and a more engaging experience.
- Use PowerPoint's built-in recording feature or tools like Descript for a polished presentation.
- Other tools like Zoom, Loom, OBS Studio, Clipchamp, and Quick Time Player can also be used for recording.
- Tips include practicing your script, using slide notes, ensuring high-quality audio and lighting, and incorporating storytelling techniques.
Why video record yourself presenting a PowerPoint?
Video recording your PowerPoint presentations offers several advantages:
- Unlimited reach : Unlike in-person presentations confined to a specific time and location, recorded videos allow your message to reach audiences globally at their convenience.
- Repurposing opportunities: Recorded presentations can be repurposed as evergreen content across multiple platforms, such as social media, online courses, webinars, and internal training materials, maximizing their value.
- Personal and engaging : Recording yourself narrating a presentation adds a personal touch and dynamic element that static slides alone cannot replicate. Your viewers can see and hear you deliver the content, creating a more immersive and engaging experience.
How to record your presentation with the PowerPoint app
Built-in recording feature in powerpoint.
1. Open the PowerPoint slide you want to record.
2. Click on the Record tab of the top toolbar.
3. Click on the Record button and choose from any of the following options:
- From Current Slide
- From Beginning
4. You'll see the PowerPoint screen recording window.
5. Select the microphone and camera from the icon on the top-right.
6. Click the Stop and Replay buttons to end or replay your recording.
7. To export your presentation's recording, click Export to Video within the Recording tab.
Benefits : Easy to use, no external tools needed
Limitations : Limited editing capabilities.
How to make a more polished recording of your presentation with Descript
While PowerPoint's built-in recording features are helpful, they may not produce the refined result you want for your presentation. That's where Descript comes in handy.
It’s a whole production studio at your fingertips, with video recording, transcription, and editing capabilities, ready to transform dull PowerPoint slides into an engaging experience for your audience. Descript also has a built-in screen recorder.
You can use Descript on Windows, Mac, or even straight from your web browser.
Here's step-by-step guide to recording your PowerPoint presentation with Descript.
Set up your screen recording
1. Install and open Descript. At the top of the editor, click and open the Record panel.
2. Select Screen.
3. Set Recorder settings:
Adjust the default recording settings to your liking, including the transcription language, the maximum recording resolution, and more.
4. Set recording options. Choose which audio and video sources to record (e.g., microphone, computer audio, camera). Remember to turn the camera on to capture your talking head video alongside your PowerPoint presentation.
5. Click the Additional Settings icon for
- Studio Sound (Optional): Enhance audio quality with noise reduction and background removal
- Transcription (Optional): Enable automatic transcription for easier editing
- Recording separate audio tracks
6. Add (optional) Speaker labels for each audio track (e.g., "Narrator," "Expert") by typing them in the text box next to your audio inputs.
Capture your screen recording
1. Select the right recording option:
- Recording into script : Choose this if you haven’t recorded anything yet.
- Replace selection : Choose this if you already have a script and want to replace a specific section with a new recording.
- Record new layer : Pick this for recording your video as a new layer on top of an existing recording.
2. Click Record at the bottom of the Record panel.
3. Drag over the area of your screen you wish to record. Click Start Recording. Press Space to start recording the full screen.
4. Click Stop to finish recording
Bonus: Descript creates separate tracks for camera, microphone, and computer audio. You can edit each track individually for more precise control.
- Do a short test recording to ensure everything is set up correctly.
- Set your recording to transibe for easier editing.
Editing and polishing your PowerPoint recording in Descript
Descript's AI video editing tool makes it a breeze to trim, cut, and splice your video footage, ensuring a seamless flow from start to finish. You can add smooth transitions and other visual effects to make your presentation pop.
Here’s a glimpse of how to edit and polish your PowerPoint recording in Descript:
Edit your recording like a doc
Did you make a mistake during a slide transition? No problem. Just delete those sections in the text transcript (created automatically by Descript) and the video will adjust to match.
Remove filler words
Sound smoother and more confident by easily removing filler words like "um" and "uh" from the transcript.
Fix voiceover mistakes by typing
Didn't nail your delivery on a specific slide? No need to start from scratch! Descript's Overdub feature lets you simply type in the correct narration and replace the audio on that slide with AI voice cloning.
Boost video quality and engagement :
- Crisp up audio quality by reducing background noise and room reverb with the AI-powered Studio Sound feature.
- Replace your background completely with the Green Screen Video Editor —look like you're presenting in a sleek studio or broadcasting from a beach.
- Enable Eye Contact simulation with AI, so it appears you're making direct eye contact with viewers, even if you’re looking or reading something off-camera.
Other ways to video record yourself presenting a PowerPoint
Use Zoom’s meeting recording feature to record yourself giving a PowerPoint presentation. Start a Zoom meeting with yourself, share your PowerPoint window, and enable recording
Loom is a handy screen recording tool that also offers a webcam overlay. Launch the Loom app or Chrome extension and set it to record your screen and webcam. Expect high-quality recordings but no advanced editing features. The free plan offers only five minutes of recording at a stretch.
3. OBS Studio
OBS Studio is a free, open-source screen recorder/streaming software with a steeper learning curve. It’s popular among advanced or tech-savvy users who need granular customization and control.
To record your presentation, add a "Screen Capture" source to capture your PowerPoint window and a "Video Capture Device" source for your webcam.
4. Clipchamp: Recording natively in Windows
You can use Microsoft’s Clipchamp , the built-in screen recorder and video editor for Windows, to simultaneously capture your computer screen, webcam, and audio for recording your PowerPoint presentation. It’s also available as a browser-based app. You can record up to 30 minutes on screen and webcam recordings.
Users can also adjust the screen and webcam recordings in the editing timeline separately.
5. Quick Time Player Recording natively in Mac
Use Mac’s Quick Time Player to record your PowerPoint presentation. It’s not as straightforward as the other options on this list, so here’s a quick guide to help you out:
- Launch Quick Time Player.
- Select File and go to New Movie Recording.
- You'll be recording your entire screen in addition to recording your face, so adjust the size and location of the recording window so that it's in a nonintrusive corner of your PowerPoint.
- Go to View and select Float on Top .
- Next, go to File and select New Screen Recording.
- On the menu that appears, select Record Selected Portion and drag a border around your PowerPoint and the webcam recording window.
- Press Record and start presenting.
- You can adjust the video quality and the audio source in the webcam recording window.
How to turn your PowerPoint presentation slides into a video
Did you know PowerPoint lets you save your presentation as a video, too?
Here's a breakdown of the two ways you can do so—keeping all the presentation elements (narration, animation, pointer movements, timings, and so on) intact in the presentation itself.
Save your PowerPoint presentation as a video
This creates a separate video file (MP4 or WMV) that anyone can play, even without PowerPoint.
Follow these steps:
- Save your presentation
- Go to File > Export > Create a Video
- Ultra HD (4K): Best for large screens (if you have Windows 10+)
- Full HD (1080p): Great for computers and TVs
- HD (720p): Good for streaming online or on DVDs
- Standard (480p): Smallest size, good for phones
4. Decide on narration
- If you haven't recorded yourself talking, choose "Don't Use Recorded Timings and Narrations" from the dropdown menu
- If you have a recording, choose "Use Recorded Timings and Narrations." You can also set how long each slide shows for (default is 5 seconds)
5. Click Create Video
6. Name your video, pick a folder to save it in, and choose a file type (MPEG-4 or Windows Media Video)
Creating the video might take a while, especially for longer presentations. You can even leave it running overnight. Once done, find your video in the chosen folder and double-click to play it.
Save your PowerPoint presentation as a slideshow
This saves your presentation as a special file (PPSX) that starts playing automatically on full screen when opened. It only works with PowerPoint.
Here’s how it works:
- Make sure your presentation is saved (regular PowerPoint file)
- Go to File > Save As .
- Pick a folder to save the slideshow in.
- Under Save as type, choose PowerPoint Show (*.ppsx) .
- Click Save .
Now when someone opens the file, it will automatically play the slideshow.
Pro tips for making better video PowerPoint presentations
Practice your script.
Recording a flawless PowerPoint video rarely happens in one take. The key is practice.
Record practice run-throughs and watch them back. Make notes on areas that need improvement or parts lacking clarity. The more you drill your script, the more confident and natural you'll sound in the final recording.
Take advantage of PowerPoint's built-in Speaker Coach . The feature shows you whether your pace is too fast or slow, your use of filler words like "um," and suggestions to improve your voice modulation.
Use slide notes for coherent delivery
Wouldn’t a personal teleprompter make presentations so much easier? That’s what slide notes are for.
Having your thoughts and talking points organized within your PowerPoint file lets you have all crucial information and prompts readily available when recording.
Go ahead and add detailed notes or even a full script for each slide. This will help you stay on track and provide a handy transcript reference if you need to do any editing or voiceover work in post-production.
Use high-quality audio equipment or turn on Studio Sound
Poor audio recording quality is a surefire way to make even the most visually polished video feel amateurish. Do your presentation justice by investing in a decent external or Bluetooth microphone and audio interface to capture clear voiceover audio.
If you must use a built-in mic, record in a quiet environment to minimize background noise pickup. Or better yet, pair up with an AI-powered audio enhancement tool like Descript's Studio Sound , which reduces background noise , reverb, and other artifacts.
Ensure a clean background and even lighting
Ditch cluttered backgrounds. You want people to focus on the content of your PowerPoint and not be distracted by the funny shapes and colors in your video.
Your video lighting and framing matters, too. Position yourself facing a natural light source or bring supplemental video lighting to eliminate weird shadows and squinting-level glare.
Look directly into the camera or turn on Eye Contact
Looking directly into the camera is essential to create a sense of connection with the audience. Position your webcam or camera at eye level and imagine you're talking to a friend. If you're using Descript, enable the Eye Contact feature to auto-adjust your gaze towards the camera.
- Dress professionally and maintain a good posture to project confidence and authority.
- Use visuals, animations, and multimedia elements to enhance your presentation and keep your audience engaged.
- Consider adding closed captions or subtitles to your video for better accessibility and engagement, especially for those watching without sound.
- Speak clearly and at a moderate pace, using vocal variety to emphasize key points and maintain interest.
- Incorporate storytelling techniques, real-life examples, or personal anecdotes to make your video presentation more relatable and memorable .
Take your PowerPoint presentations from amateur to amazing
Recording yourself virtually presenting a PowerPoint allows you to distribute your message using the most engaging type of content: video. And there are many screen recording tools out there that can capture your screen and web camera footage with just a few clicks.
But how do you stand out?
By focusing on the presentation's depth, your delivery, and the video's quality. The first two are the bare minimum to communicate your message effectively.
But the right screen capture software and all-in-one video creation tool like Descript can help you with third. Use the tool to improve the quality of your recorded PPT presentations.
With Descript, it's easier than ever to record your screen, polish up the audio, and create stunning visuals all in one place. So why wait?
Sign up for Descript today and simplify your workflow while creating a PowerPoint presentation video that sticks with your audience in the long term.
How do you make a presentation video with your face?
To create a presentation video with your face, follow these steps:
- Open your presentation in PowerPoint.
- Go to the Slide Show tab.
- Click on Record and choose From Current Slide or From Beginning .
- Choose your microphone and camera by clicking on a sound icon on the top-right.
- Start recording by clicking on the record button.
- Speak into your microphone to narrate the presentation.
- Your webcam will capture your face during the recording.
- Click Stop when you finish recording.
- Export your recorded presentation by clicking on File> Export>Create a video.
How do you present yourself in PowerPoint?
To present yourself effectively in PowerPoint, follow these steps:
- Determine the key information to include in your presentation.
- Design and prepare your PowerPoint slides with a cohesive theme.
- Craft a compelling introduction to engage your audience.
- Tailor your presentation to different time constraints for flexibility.
- Capture the audience's attention before you begin speaking.
Related articles

Featured articles:
10 excellent Loom alternatives to record your screen
Looking for the best ways to record your screen without Loom? Find out 10 Loom alternatives, their features, and pricing.

How to record a YouTube video: A guide for all devices
If you want to record a YouTube video for personal use or fair-use repurposing, here are the steps to get started.
For Business
Social media video marketing: Everything you need to know
Learn how to win over potential customers (and the algorithms) with the right social media video marketing tools, strategy, and optimizations.

How to record a podcast on Zoom: A beginner’s guide
Follow this step-by-step guide on how to record a podcast on Zoom, then learn about why it may not be your best recording option.

How to record a Microsoft Teams meeting: 5 easy ways
Learn how to record a Microsoft Teams meeting on any device and get answers to common problems.

10 effective how-to videos to engage your audience
How-to videos are a great way to educate your audience. Whether you’re recording a software demo or training instructions, here’s how to create a how-to video.

Articles you might find interesting
Making the Best Out of Your YouTube Banner
A YouTube channel banner is an essential part of your self-presentation on the platform. Your banner art also gives you an opportunity to provide a snapshot of your content.

Product Updates
Marketing Strategy and Planning: Learn How to Promote and Grow Your Business
What is a marketing strategy plan, and how do you make one? We’ll go through all the basics right here and cover a few key terms.

The 11 best podcast recording software picks for 2024
Starting a new podcast? Whether you’re recording video or just audio, here are 11 of the best podcast recording software options to choose from.
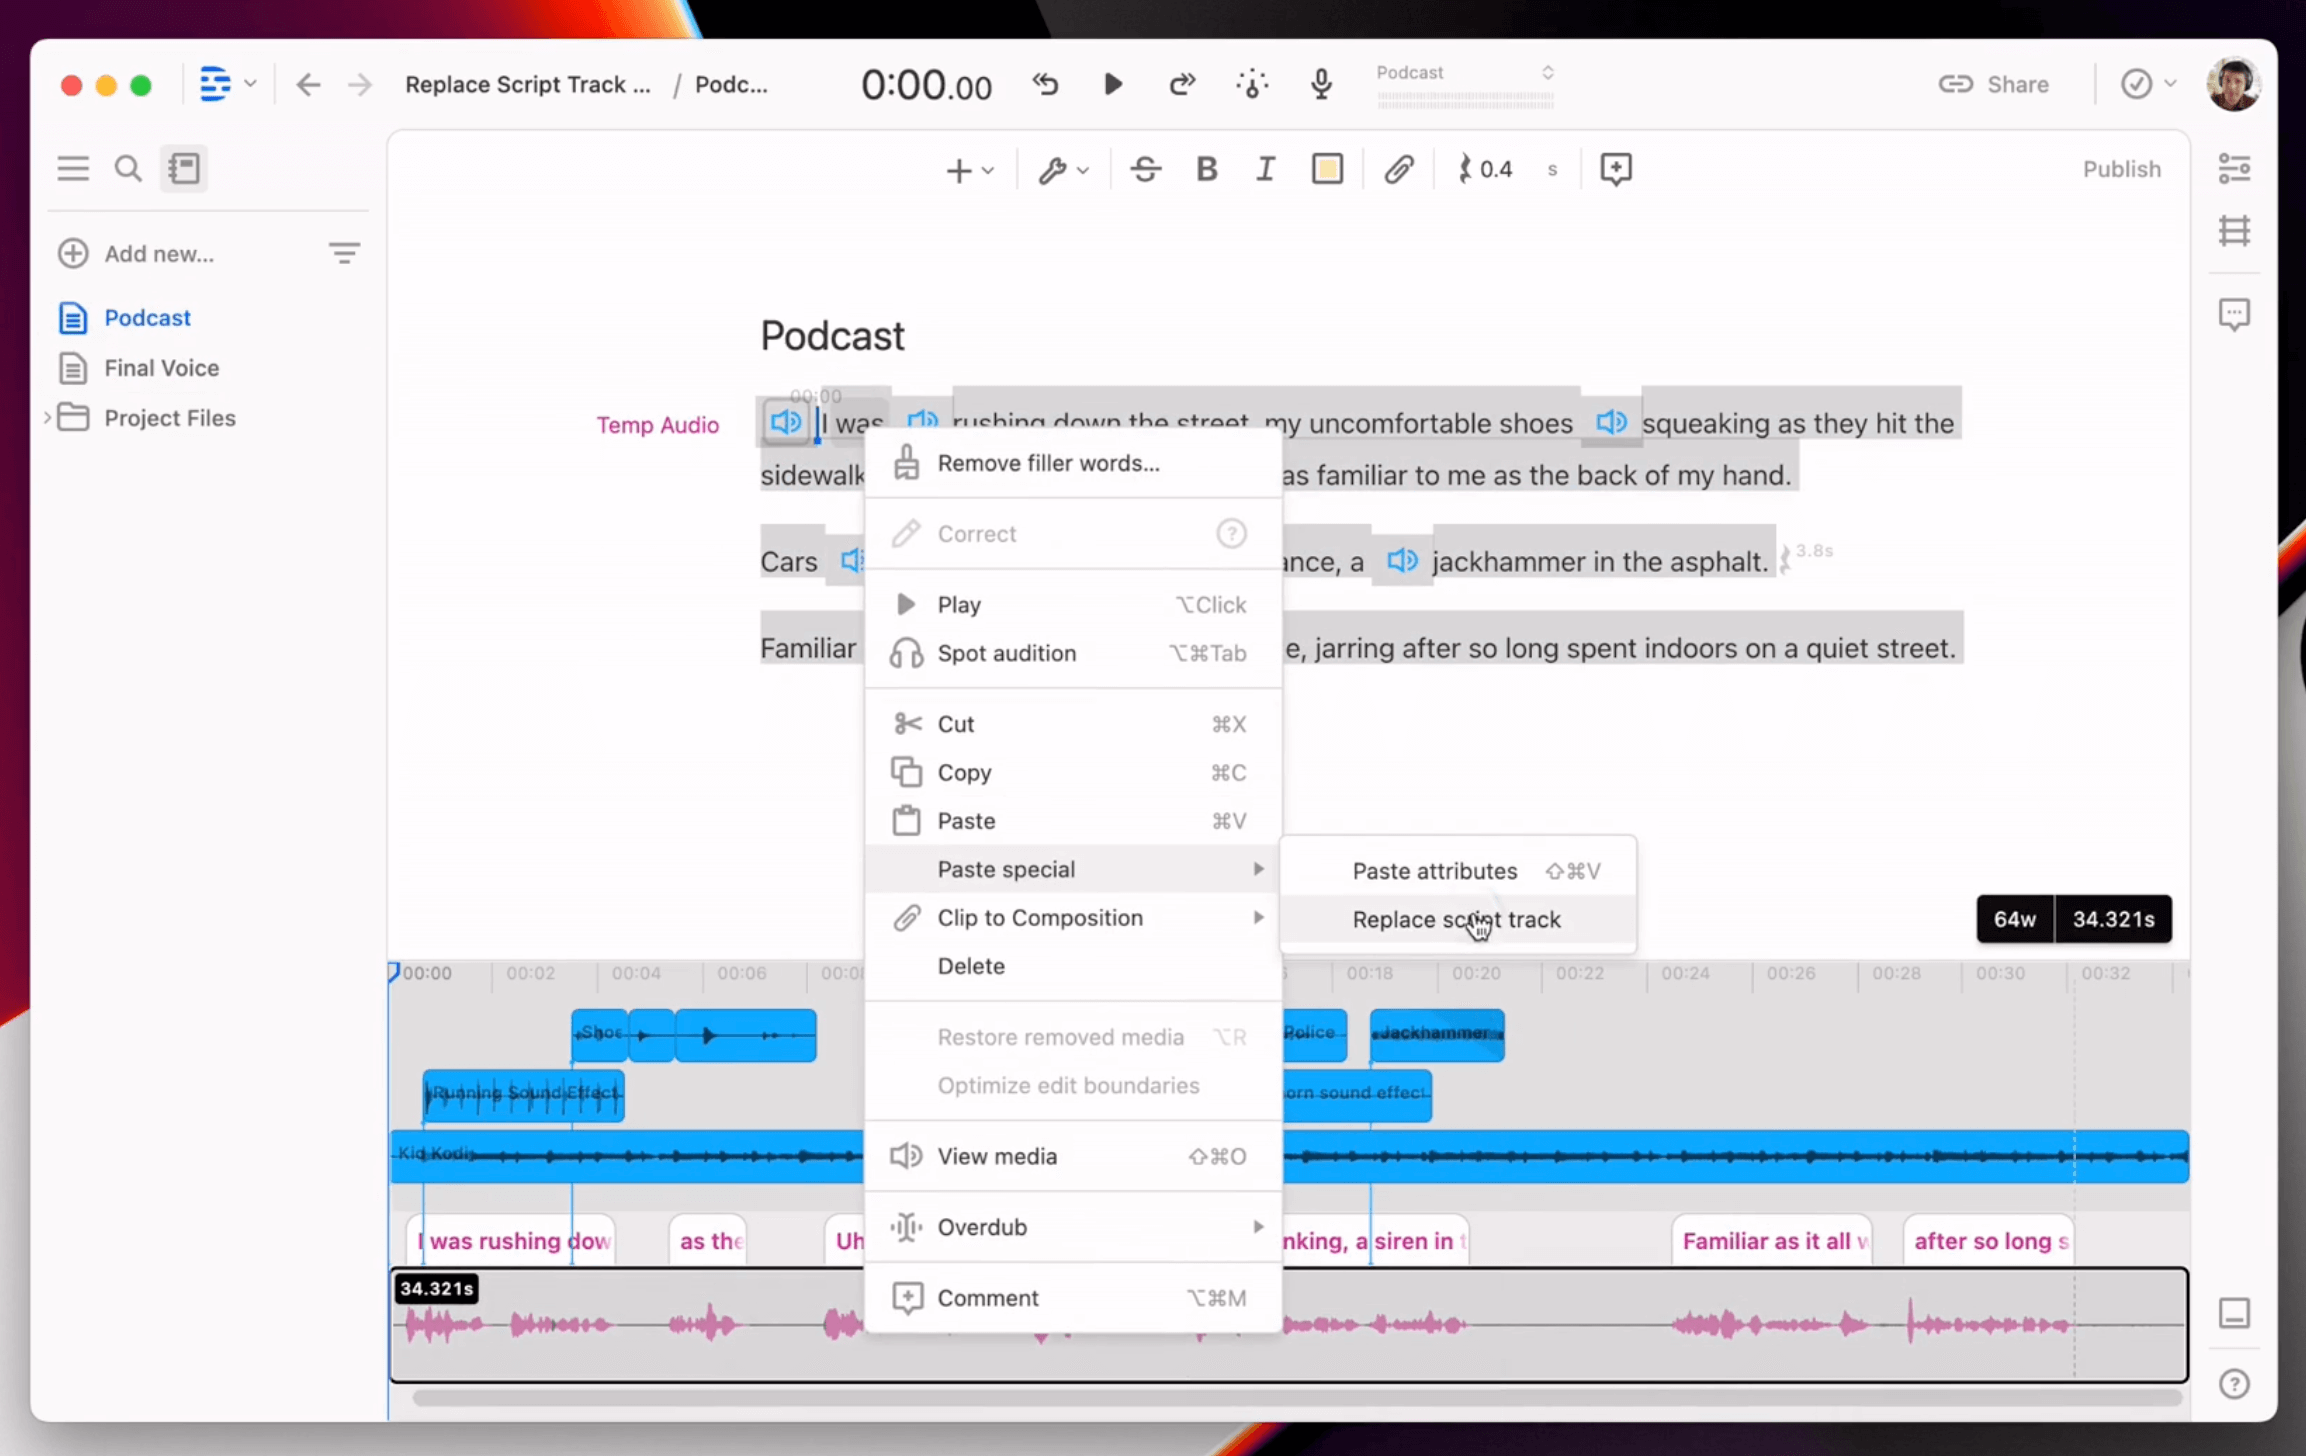
Replace script track: a new way to create scripted content
Now you can swap out your script track — ie, your voiceover — and Descript will automatically align the new version with all your music, visuals, and effects. We call this “Replace script track."

Learn to Make a Promo Video and Elevate your Brand Identity
Compared to text content, promo videos offer a more engaging and effective way to convey information. Use this step-by-step guide to map out all the steps of how to make a good promo video.

How much does TikTok pay creators?
Discover how much you can earn on TikTok. Uncover what it takes to qualify for the Creator Fund and how to become a part of it.

Join millions of creators who already have a head start.
Get free recording and editing tips, and resources delivered to your inbox.
Related articles:
Share this article

Get a free 30-day trial of StealthSeminar here.
This article assumes you read this article and know how to run a live webinar with OBS. If not please read this first.
How to run a Youtube Live webinar with OBS
How to run a Twitch Live webinar with OBS
Open up your Microsoft Powerpoint slide, and from the top ribbon, click on "View" > Select "Reading View" ( Reading view is deprecated in newer PowerPoint versions, if you are using a newer version, in that case, you have to resize your window in OBS, so it just shows the slide area ). Make sure that your PowerPoint app is NOT minimized.
Open your Open Broadcaster Software (OBS), go to "Sources", click on "+" icon and choose "Window Capture". Give it a name and from the next popup's "Window" menu, choose the "powerpoint.exe" app. Once done, you will see the powerpoint slide in the preview area.
That's it!
Here is an example of how it ran for me on Youtube Live. So in case you are also wondering whether your transition animation will work this way or not, it certainly will.
- Search forums
- OBS Studio Support
- Windows Support
Preview window stuttering, which transfers to recording stuttering
- Thread starter PocketLogic
- Start date May 13, 2024
PocketLogic
- May 13, 2024
OK, so this is a weird one... Here's my setup - Windows 11 Pro Asus ROG Maximus Hero Z790 motherboard Intel 13900K Asus RTX 4090 4 x Samsung 980 Pro SSD's running at Gen 4 speeds Corsair Vengeance DDR5 (4 x 32GB) running at 5600MT's 2 x LG 38GN95B Widescreen monitors @ 120hz (down clocked for a reason - see below) OBS is always run as Admin I am attempting to record video using the "Display Capture" setting. Both monitors are set to 120hz, and I have the recording settings set to record at 120FPS, just to make sure they sync up during a recording. However, the issue isn't with recording, it's with the preview window. I noticed this morning that the preview window in OBS was very smooth when previewing the "Display Capture" window, but would sometimes stutter a bit before going back to being smooth. Again, this isn't during a recording, this is the actual preview window that's stuttering. The preview window is supposed to capture anything in that window, right? Therefore, it makes perfect sense that when I try to record something, I get the same results as the preview window. Most of the time, it's perfectly smooth in that window, but there's random instances where that preview window is stuttering slightly, and this, of course, transfers to the recording. I have OBS on one monitor, and the "Display Capture" is set to record the other monitor. The preview window is set to 1280 x 720 (which is the size of the window I am capturing). Again, OBS is NOT recording yet, and that preview window has a slight stuttering to it, randomly. Most of the time, it's perfectly smooth. This is what got me thinking that it isn't the OBS recording that's causing the stuttering I'm seeing in my videos. It's the actual preview window, and since OBS is recording whatever is in that window, if that window stutters, it'll show up in the video. So then, I said to myself "If it's the preview window causing that stuttering, then just disable the preview window while recording..". Nope. The recordings still show a slight stuttering randomly, as if the frame rate is lowering itself slightly to be out of sync with the 120hz monitor and the 120fps that I set as the recording fps. But it's also happening in the preview window, while not recording, so I'm at a loss as to what's actually causing this behavior. The actual "Display Capture" that I am previewing/recording is 100% smooth 100% of the time, so it's not what I'm recording or previewing, it's an issue with OBS. Or, at least that's my best guess at this point. I've attached a log file. Could this be an issue with VSYNC? At the moment, all of my monitors are GSYNC compatible, but I have that turned off in the NVidia control panel. It's set to "Fixed Refresh". VSync is set to "Application-Controlled". I don't know why VSYNC would be the cause here if the thing I am capturing is 100% smooth, but the preview window sometimes isn't.. So, VSYNC being the cause seem unlikely, but I'm no expert.
Attachments
- 2024-05-13 13-03-24.txt 13.5 KB · Views: 4

Active Member
According to your log, all your three monitors are running with 144 Hz, while you're trying to record with 120 fps. This requires 144-120 = 24 frames to be omitted from the video, which is one frame every 120/24 = 5 frames. This will be perceived as unsmooth video, but I would not go so far as to say that's stutter. If the recording process itself is good or leads to frame drops isn't visible in the log, because you use custom ffmpeg output, which omits almost all logging. Recommendation: switch to simple output mode and select the "indistinguishable quality, large file size" quality.
koala said: According to your log, all your three monitors are running with 144 Hz, while you're trying to record with 120 fps. This requires 144-120 = 24 frames to be dropped, which is every 120/24 = 5 frame. This will be perceived as unsmooth video, but I would not go so far as to say that's stutter. If the recording process itself is good or leads to frame drops isn't visible in the log, because you use custom ffmpeg output, which omits almost all logging. Recommendation: switch to simple output mode and select the "indistinguishable quality, large file size" quality. Click to expand...
Here's a new log file with the correct 120hz for all monitors, and the settings you suggested. It still stutters in the preview Window, and not the actual thing I'm capturing, and it still does it without recording ( and while recording). I don't know why the preview would be stuttering, other than the fact that there could be a discrepancy between the framerate of the thing I am previewing/recording (which is hard capped at 120FPS and never goes below that) and the preview window of OBS. What I find strange is the fact that on one screen (the thing I am previewing/recording) it's perfectly smooth, and in OBS it isn't at times. It only does this for a few seconds, then things smooth out. It almost looks like a VSync issue, where the framerate is being halved for a few seconds, then returns to normal, but only in OBS's preview window.
- 2024-05-13 15-19-23.txt 10.1 KB · Views: 5
There were no errors for your recording. No lagged or lost frames. Should be flawless. Did you try a different media player such as VLC? The internal media player of Windows isn't the best and might fail with some media with higher bandwidth.
- May 14, 2024
koala said: There were no errors for your recording. No lagged or lost frames. Should be flawless. Did you try a different media player such as VLC? The internal media player of Windows isn't the best and might fail with some media with higher bandwidth. Click to expand...
- Sunday at 6:50 PM
I've managed to get the recording to smooth out by doing a "Display Capture", but at full screen size. I'm a game developer, and I've been testing my game at normal size (1280x720), and then just shrinking the preview window down to capture the game window. I decided to try and switch the game window to full-screen-windowed mode, and just capture the display at full screen resolution and just scale down the output. The preview window is still slightly choppy at times, but the recording is smooth, so at least the output is what I want.
- This site uses cookies to help personalise content, tailor your experience and to keep you logged in if you register. By continuing to use this site, you are consenting to our use of cookies. Accept Learn more…
IMAGES
VIDEO
COMMENTS
In this video I'll be showing you how to record your Powerpoint or Keynote presentation with camera. Get FREE access to my full training here: https://vault...
2nd Monitor I recommended: https://amzn.to/3cDL3kkOBS Studio Tutorials Playlist: https://www.youtube.com/playlist?list=PLlM_xT8ActQHCEgNi7gyjFLMFjBBavqYiDown...
How to record lectures using OBS Studio? Include webcam with screengrab, Powerpoint slides, and sound using OBS Studio. Download OBS Studio: https://obsproje...
Step 1: Launch PowerPoint and start the presentation you wish to record. Step 2: To add a source, open OBS Studio and choose the Plus (+) icon in Sources. Now, tap Display Capture to create a new source on the screen. Tap the Properties option from the screen capture source and select the correct display you need.
Recording Presentations with OBS With OBS you can record your content without live streaming, which is a great way of preparing pre-recorded live presentations. Because you can also use a video as source, nothing prevents you from pre-recording your stream and then using the recorded video (edited if necessary) as source for a live stream.
Follow instructions in installation wizard. 3. Open OBS Studio. Run the application. 4. Add your webcam to OBS Studio. Right-click on the black screen, select "Add" > "Video Capture Device". In the following dialog, select radio button "Create new" and click OK. In the "Properties for 'Video capture device'", you must see your ...
Step 7 - Start Recording! Your OBS Studio is ready for recording. Just press the "Start Recording" button in the lower right corner, "Alt+Tab" into your fullscreen presentation, and go on! At the end of your presentation, "Alt+Tab" back into OBS Studio and click "Stop Recording" at the same place.
However, when you use the app Full Screen Camera, the iPhone's camera (either front or rear) takes up the whole display with no buttons, so you can use the camera as an input source. Add a tiny tripod and a 10′ iPhone cable, and you've got a webcam with a built-in monitor for under $200.
Member. IMHO you don't need PowerPoint to browse by an individual window. When in fullscreen presentation, have the Presentation Mode window at your external monitor and the presentation itself on your laptop behind the OBS Studio window. Have the Window Capture source point to the. POWERPNT.EXE]: PowerPoint presentation - name of the ...
Following these steps, you can capture your slides: NOTE: These steps are for the Windows version of OBS. In your 'Sources' pane, click on the '+' button to add a new source. Select "Window Capture" as the type of source. Create a new source by giving it a name (something like "PowerPoint"). Press "OK" to confirm the device ...
Note: The standard version of OBS should follow a very similar process. There are 2 main ways to stream or record a slide presentation with Streamlabs OBS. Exporting images for each slide and using the "Image Slideshow" source in OBS. Using Google Slides, PowerPoint, or Keynote as a source with window or display capture.
In this video I give two methods for presenting your slideshow presentation using Streamlabs OBS (also works with OBS Studio). Follow along with the written ...
Step 4. Select your recording location and video format. To do this, click on "settings" on the bottom right of your screen. Then, click on the "output" tab under "recording path" to choose the location you want to save the recordings on your computer. Finally, go to "recording format", and click on "mp4", or any other file ...
At a high level, an important work-flow decision you need to make is whether to. - create (Record) a video (of whatever, PowerPoint presentation in your case) and then locally edit it before uploading to YouTube . OR . - (live)Stream OBS' output direct to content delivery network (CDN, You Tube in your case) and use that video as is.
Setting up OBS Studio. First download and install OBS Studio. Within OBS Studio, you have Scenes which hold Sources. By adding and configuring the correct sources you can easily make recordings. Configure the Sources to record. There are several things which are good to know when configuring your Sources; Be on time for a meeting.
Recording your Screen. Download Article. 1. Open OBS Studio on your PC or Mac. It's in the All Apps area of the Start menu on Windows, and the Applications folder on macOS. If you want to record yourself playing a game, see this method. 2. Click + under "Sources.". It's near the bottom-left corner of OBS.
For audio recording in OBS Studio, pay attention to the sample rate and the channel. You can adjust both using these steps: Step 1: Access the Settings via the Controls section. Step 2: From the menu on the left, select the Audio tab. Step 3: Choose Audio Settings. Step 4: Locate Sample Rate and Channels in this menu.
Step 3: Start the recording. In the PowerPoint menu, select the Slide Show tab. From here, click on Record Slide Show. This will open the recording window with two options to choose from: Record from Current Slide: This option allows you to start recording from your selected slide. Record from Beginning: This option enables you to record the ...
Turn your slideshow presentation into a recorded video by recording with OBS (Open Broadcaster Software) Chris Recommends Protect Your Online Privacy with ...
In OBS we can do this via the Settings menu. 1. Under Controls, click on Settings. Alternatively, you can go to File > Settings. (Image credit: Tom's Hardware) 2. Under Recording Path, click on ...
Record new layer: Pick this for recording your video as a new layer on top of an existing recording. 2. Click Record at the bottom of the Record panel. 3. Drag over the area of your screen you wish to record. Click Start Recording. Press Space to start recording the full screen. 4. Click Stop to finish recording.
Make sure that your PowerPoint app is NOT minimized. Open your Open Broadcaster Software (OBS), go to "Sources", click on "+" icon and choose "Window Capture". Give it a name and from the next popup's "Window" menu, choose the "powerpoint.exe" app. Once done, you will see the powerpoint slide in the preview area. That's it!
About Press Copyright Contact us Creators Advertise Developers Terms Privacy Policy & Safety How YouTube works Test new features NFL Sunday Ticket Press Copyright ...
OBS is always run as Admin I am attempting to record video using the "Display Capture" setting. Both monitors are set to 120hz, and I have the recording settings set to record at 120FPS, just to make sure they sync up during a recording. However, the issue isn't with recording, it's with the preview window.
Tutorial How to Display Power Point Presentation in OBS Studio with fullscreen when streaming or recording.