
Apr 6, 2021

Try presenting in Teams meetings from PowerPoint
- Add our blog to your RSS feed reader" href="/rss/blog.xml" data-bi-name="RSS Subscription" data-bi-id="rss_feed" data-bi-bhvr="120" data-bi-socchn="RSSSubscription" title="Microsoft 365 Insider Blog RSS" target="blank" class="d-inline-block">
Hello Office Insiders, I’m Lishan Yu, a program manager on the PowerPoint team. You might have heard that we announced the PowerPoint Live in Teams feature at Microsoft Ignite last month. Today, I’m excited to show you how to check out this new experience, and start presenting in Teams meetings from PowerPoint.
Presenting in Teams meetings
Presenting in a meeting used to be as simple as clicking Slide Show in your PowerPoint deck. Nowadays, even though you may not be in the same room as your audience, we believe your flow to present should be as easy and intuitive – clicking the Present in Teams button in PowerPoint is the only step you need to take to present the deck in your Teams meeting!
How it works
Give the feature a try next time you need to present in a Teams meetings:
- Join a Teams meeting or an ad-hoc Teams call.
- Open your presentation in PowerPoint for Windows.
- Click the Present in Teams button in the top right corner.

Scenarios to try
Ready to take the PowerPoint Live feature for a spin? Try some of the scenarios below.
As a presenter :
- After clicking the Present in Teams button in PowerPoint, notice that you can see both the chat and your content at the same time in Teams (and don’t feel like you’re missing out on the discussion).
- Take advantage of features like grid review and slide notes to present more effectively.
As an audience member :
- If you joined late, move back through the deck and quickly catch up without having to ask the presenter to stop and recap what was already shared.
- Interact with and experience the richness of the content being presented such as better video quality, live web links, and more.
- Make any adjustments you need to more fully enjoy the presentation (i.e., use high-contrast mode).
Requirements
In order to try out the feature, you will need to:
- Have the latest Teams desktop app installed.
- Store the presentation on OneDrive for Business or SharePoint.
- Join a Teams meeting before clicking the Present in Teams button in PowerPoint for Windows.
- Be using an Office 365 E3/A3, Office 365 E5/A5, or Microsoft 365 for Government license.
Availability
This feature is rolling out over the next several days to Insiders running Beta Channel Version 2104 (Build 13926.20000) and later.
We’d love your feedback, so please let us know how you think. To get in touch, do either of the following:
- Inside the app, select the Help button in the top-right corner of the app.
- Respond to this post or tweet at @OfficeInsider .
Learn what other information you should include in your feedback to ensure it’s actionable and reaches the right people. We’re excited to hear from you!
Sign up for the Office Insider newsletter and get the latest information about Insider features in your inbox once a month!
Sorry, JavaScript must be enabled to use this app.
How to Present PowerPoint Slides in Microsoft Teams
Ready to elevate your virtual presentations in Microsoft Teams? Discover three distinct methods to deliver flawless PowerPoint presentations.
A successful PowerPoint presentation extends beyond just the content—its delivery is just as important, especially in a virtual space like Microsoft Teams.
In Microsoft Teams, you can choose to present your slide deck by sharing your entire screen, PowerPoint window, or using the Microsoft Teams' PowerPoint Live feature. Let's explore how you can use each of these three methods and discuss their pros and cons.
Method 1: Share Screen
Sharing your screen in Microsoft Teams is pretty easy and straightforward. It's best to minimize or close unnecessary tabs before joining the Microsoft Teams meeting to avoid exposing sensitive information. Once you're confident in your screen's content, follow the steps below:
- A red border appears around your desktop, indicating you're sharing your screen.
- Present your PowerPoint slideshow.
Sharing your screen is a straightforward method, especially when you want to present other documents besides your PowerPoint slideshow. However, the downside is that you may accidentally reveal sensitive information.
Method 2: Share PowerPoint Window
If you want only to present your PowerPoint slide deck, it's best to share just that window. Here's how:
- A red border will appear around your PowerPoint window, indicating you're sharing just that window.
- Launch your slides in slideshow mode and start presenting.
- Open the Microsoft Teams window and click Stop sharing when you're done presenting.
Sharing just your PowerPoint window prevents accidental display of sensitive desktop content. Even if you switch windows, viewers only see the PowerPoint presentation.
However, this method also has its limitations. One of the main limits is that you can't view your PowerPoint speaker notes without the audience seeing them as well. You also can't access Microsoft Teams features like the chat and reactions during your presentation.
Additionally, If your network connection has low bandwidth or slow upload speed , sharing your screen can result in a blurry and stuttering presentation for the audience. Thankfully, the PowerPoint Live feature provides the solution to these issues.
Method 3: Use PowerPoint Live
Presenting with the PowerPoint Live feature is easy and provides additional benefits. Your audience only sees the slides, while you get to see all the extra controls that come with the presenter view. When using the presenter view in your presentation, you have a few helpful tools at your disposal:
- You can easily adjust the font size of your slide notes to make them more readable.
- To navigate between slides, simply click on the corresponding thumbnail.
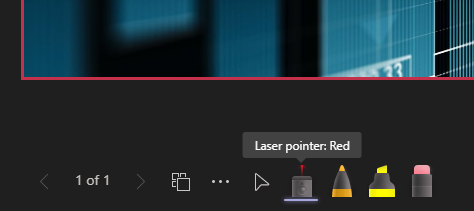
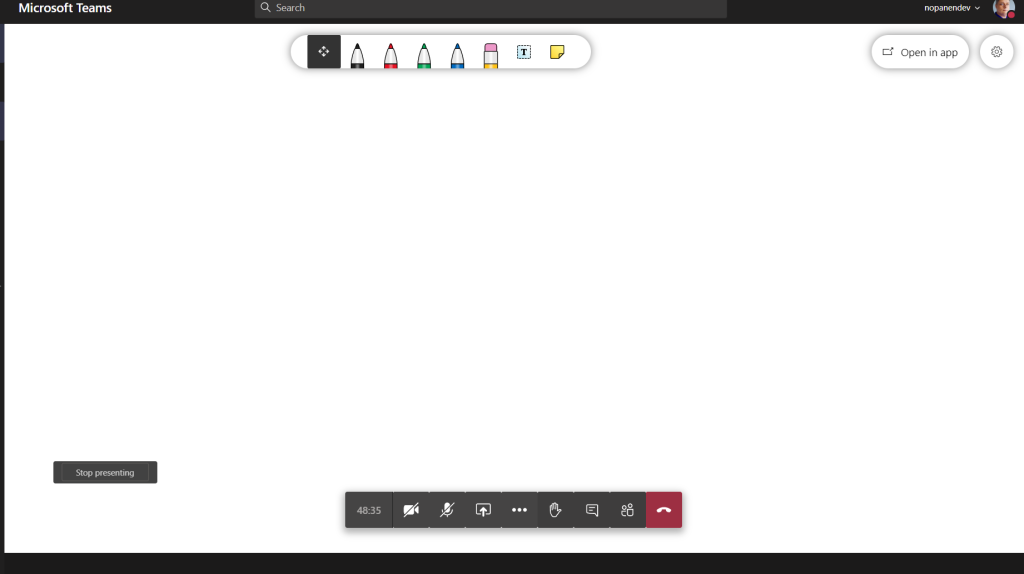
- You can use the laser pointer, pen, or highlighter tools to draw attention to specific areas of a slide.
- Use the Standout layout to place your camera feed on the slide without the background.
- Use the Cameo layout to insert yourself into the slide, provided you've set up Cameo to record customized camera feeds .
Here's how you can use PowerPoint Live to share your presentation:
- When it's your turn to present, click Share .
- When you're done presenting, click Stop sharing in the top toolbar.
The PowerPoint Live feature tackles the limitations of sharing your entire screen or PowerPoint window. It also comes with really cool features like co-presenting and allowing attendees to click on links in the presentation.
Your Audience's View When Using PowerPoint Live
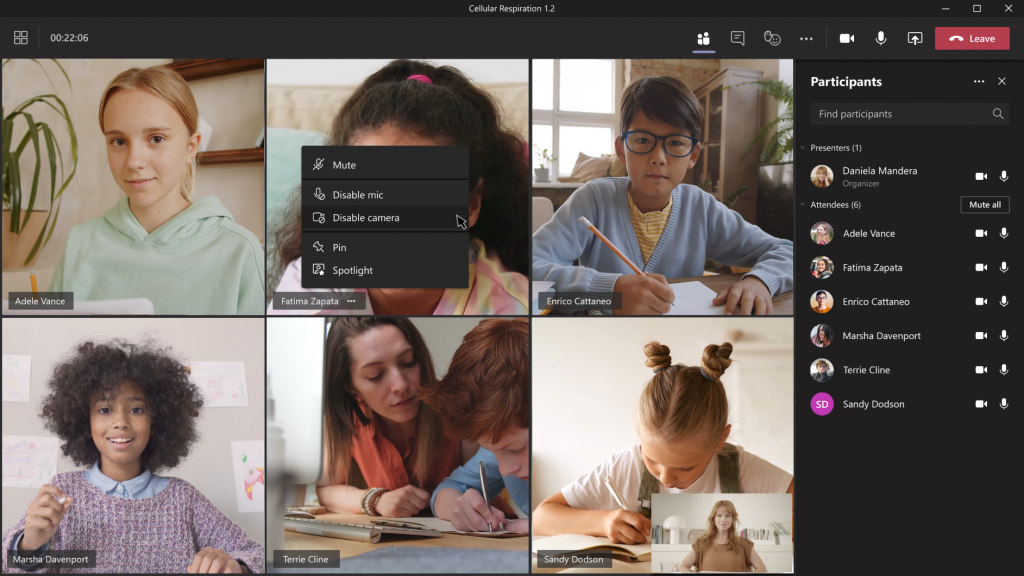
In addition to the main slide view, your audience also has access to the slide navigation, grid, and more options controls (the three dots icon below the slides).
This means they can navigate the slides at their own pace and change specific slide settings to suit their preference without affecting your view and that of others. If you find this non-ideal for delivering an engaging presentation , you can disable the audience's navigation control. To do so, enable Private view in the top toolbar.
By default, each meeting attendee joins as a presenter. This means they can share their own content or control someone else's presentation. If that's not what you want, you can change each person's meeting roles in Microsoft Teams to prevent it.
Deliver a Seamless Presentation Experience in Microsoft Teams
Presenting your PowerPoint slides in Microsoft Teams might seem tricky at first, but once you get the hang of it, it's a piece of cake. Practice makes perfect. So before your next Teams presentation, familiarize yourself with your chosen method to ensure an effective delivery.
How to Use PowerPoint Live in Teams: A Step-by-Step Guide
- Recent Posts
- How to Add Bullet Points in PowerPoint: A Step-by-Step Guide - May 25, 2024
- Where is Slide Master in PowerPoint: A Comprehensive Guide for Beginners - May 25, 2024
- How to Use Copilot in PowerPoint: A Step-by-Step Guide - May 25, 2024
PowerPoint Live is a powerful tool for creating and delivering presentations, and it’s now available in Microsoft Teams. This feature allows you to present your slides in Teams meetings with interactive features and accessibility options. As a presenter, you can share, navigate, annotate, and customize your presentation view. As an audience member, you can follow along and interact with the presentation in real-time.

To use PowerPoint Live in Microsoft Teams, you’ll need to open the PowerPoint file within Teams and click on the “Share” button in the top right corner of the screen. This will open a window where you can select the people you want to share the presentation with. Once you’ve selected the people, click “Share” to send the presentation to them. From there, you can click the “Present in Teams” button in the top right corner of the PowerPoint window to start the presentation.
Collaboration is made easy with PowerPoint Live in Teams. You can work with others to create and edit presentations in real-time, and then present them to your team members during a meeting. This feature is especially useful for remote teams or those who work from different locations. With PowerPoint Live in Microsoft Teams, you can make your presentations more engaging and interactive, and collaborate with your team members more effectively.
JUMP TO TOPIC
Using PowerPoint Live in Teams Meetings
Navigating through slides, interactive elements and feedback, accessibility features for inclusivity, effective use of visual aids, managing co-presenters and participant interaction, post-presentation collaboration and feedback, setting up your presentation.

Before presenting your PowerPoint slides in a Microsoft Teams meeting, you need to make sure that your presentation is set up correctly. In this section, I will guide you through the process of setting up your presentation so that you can make the most out of PowerPoint Live in Teams.
To use PowerPoint Live in a Teams meeting, you need to first join the meeting and then share your presentation. Here’s how you can do it:
- Join a Teams meeting or start an ad-hoc Teams call.
- Open your presentation in PowerPoint for Windows or Mac.
- Click on the “Share” button in the top right corner of the screen.
- Under the “PowerPoint Live” section, choose the PowerPoint file you want to present.
- If you don’t see the file in the list, select “Browse OneDrive” or “Browse my computer”.
Once you have selected your presentation, click on the “Share” button to send the presentation to the other participants in the meeting.
Once you have shared your presentation, you can start navigating through your slides. Here’s how you can do it:
- To move to the next slide, click on the “Next slide” button in the presenter view or use the arrow keys on your keyboard.
- To go back to the previous slide, click on the “Previous slide” button in the presenter view or use the arrow keys on your keyboard.
- To switch to presenter view, click on the “Presenter view” button in the top right corner of the screen.
- To switch to private view, click on the “Private view” button in the top right corner of the screen.
Presenter view allows you to see your speaker notes and slide thumbnails preview, while private view allows you to see your presentation without any distractions.
In conclusion, setting up your presentation correctly is crucial to make the most out of PowerPoint Live in Teams. By following the steps outlined in this section, you will be able to share your presentation and navigate through your slides with ease.
Enhancing Audience Engagement
As a presenter, keeping your audience engaged and interested is crucial for a successful presentation. With PowerPoint Live in Teams, you can use interactive elements and receive real-time feedback to enhance audience engagement.
PowerPoint Live in Teams allows you to use interactive elements such as polls and quizzes to keep your audience engaged. You can also receive real-time feedback through reactions, chat messages, and raised hands. This feature enables you to read the room and adjust your presentation accordingly.
To use interactive elements, simply select the “Forms” button in the PowerPoint Live toolbar and choose the type of interactive element you want to use. You can also monitor the audience’s reactions and feedback by selecting the “Reactions” and “Chat” buttons in the toolbar.
PowerPoint Live in Teams also offers accessibility features to ensure inclusivity for all audience members. Screen readers can read the presentation aloud, and high contrast slides can be used for visually impaired individuals. Additionally, closed captioning can be enabled for those who are hearing impaired.
To enable accessibility features, select the “Accessibility” button in the PowerPoint Live toolbar. From there, you can choose to enable closed captioning or high contrast slides.
In conclusion, PowerPoint Live in Teams offers many features to enhance audience engagement and inclusivity. By using interactive elements and receiving real-time feedback, you can keep your audience engaged and adjust your presentation accordingly. Additionally, accessibility features ensure that all audience members can fully participate in the presentation.
Advanced Presentation Techniques
Visual aids are an essential tool for any presentation, and PowerPoint Live in Teams offers a range of options to enhance your delivery. The use of videos, pen, laser pointer, and highlighter can help to keep your audience engaged and focused on the content. However, it’s important to use these tools judiciously and not overdo it.
For instance, videos can be a powerful tool to illustrate a point, but they should be used sparingly to avoid overwhelming the audience. The pen and laser pointer can be used to highlight specific points on the slide, and the highlighter can be used to emphasize particular text or images. However, it’s essential to avoid excessive use of these tools as it can be distracting.
One of the significant benefits of PowerPoint Live in Teams is the ability to have multiple co-presenters and participants. However, managing these interactions can be challenging, especially if you have a large audience.
To manage co-presenters, it’s essential to establish clear roles and responsibilities before the presentation. This can help to avoid confusion and ensure that everyone knows what they need to do. Additionally, it’s crucial to test the presentation with all co-presenters to ensure that everything runs smoothly.
Participant interaction is also an important aspect of any presentation, and Teams offers several tools to facilitate this. The chat feature can be used to allow participants to ask questions or provide feedback, and links can be shared to external resources or additional information. It’s also crucial to ensure that the font size is appropriate and that the presentation is optimized for bandwidth and audio quality.
In conclusion, PowerPoint Live in Teams offers a range of advanced presentation techniques that can help to enhance your delivery and engage your audience. However, it’s important to use these tools judiciously and manage co-presenters and participant interaction effectively to ensure a successful presentation.
Once the presentation is over, PowerPoint Live in Teams offers a variety of ways to collaborate and receive feedback from your audience.
One of the best features of PowerPoint Live is that it allows you to share your presentation with your audience in real-time. This means that you can collaborate with your team members or clients, even if they are not in the same room as you. You can also use the grid view to see all the attendees, making it easier to communicate with them.
Another great feature of PowerPoint Live is that it allows you to receive feedback from your audience. You can use the chat feature to receive questions and comments from your audience, and you can also use the raised hand feature to allow your audience members to ask questions. This feedback can be invaluable in improving your presentation skills and making your presentations more effective.
If you want to share your presentation with your team or clients after the meeting, you can save it to OneDrive or SharePoint. This makes it easy for everyone to access the presentation and collaborate on it later. You can also use PowerPoint Live to share content during training courses or other educational events, making it easier to engage your audience and keep them interested.
Overall, PowerPoint Live in Teams is an excellent tool for anyone who wants to create engaging and effective presentations. Whether you are a business professional, teacher, or student, PowerPoint Live can help you create presentations that are both informative and engaging. So if you haven’t tried it yet, give it a try and see how it can help you create more effective presentations.
Related posts:
- Unfortunately, PowerPoint Cannot Read: Troubleshooting Tips
- Error Occurred When PowerPoint Was Saving the File: How to Fix It
- Add Sound to PowerPoint Animation: A Step-by-Step Guide
- Vielen Dank für Ihre Aufmerksamkeit PowerPoint: Tips for an Engaging Presentation
- How to Easily Add Annotations in PowerPoint
- How to Easily Delete Comments in PowerPoint: A Step-by-Step Guide
- Remove Page Numbers in PowerPoint: A Simple Guide
- PowerPoint Presentation Images: Do You Need to Cite Stock Photos?
- How to Easily Open Designer in PowerPoint: A Step-by-Step Guide
- Adding a Slide to an Existing PowerPoint Presentation: A Step-by-Step Guide
- How to Easily Insert a 3D Clustered Column Chart in PowerPoint
- How to Easily Insert a Bar Graph in PowerPoint: A Step-by-Step Guide
Leave a Comment Cancel reply
Save my name, email, and website in this browser for the next time I comment.
Vesa Nopanen – My Metaverse Day
Mr. Metaverse welcomes you to my Metaverse day to explore the Future Work.
The Ultimate How To Guide for Presenting Content in Microsoft Teams

Sharing / presenting content in Teams meeting is at the same time simple but is also has some options available that may not be known enough by everyone. This guide lets you get started and dive deeper what happens when you share your window, document or desktop in Microsoft Teams.
This article will be updated when there are new features or based on feedback.
Updated 22.3.2021 Presenter View section.
Community: I am happy to add Mac and iOS screenshots into the article as well if someone is willing to collaborate & provide them. 😎💪
Teams Desktop: sharing a screen (Windows)
Opening the sharing with Microsoft Teams Desktop (in the New Meeting experience mode).
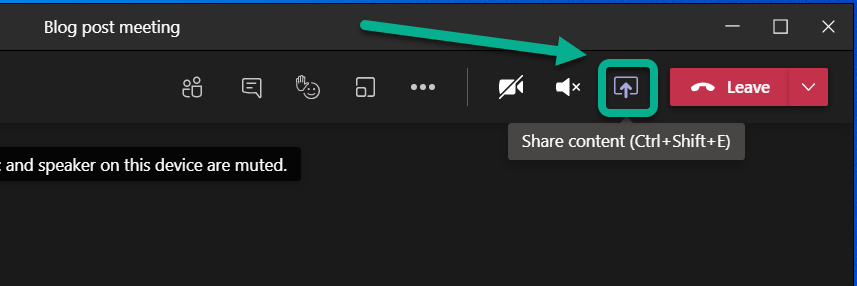
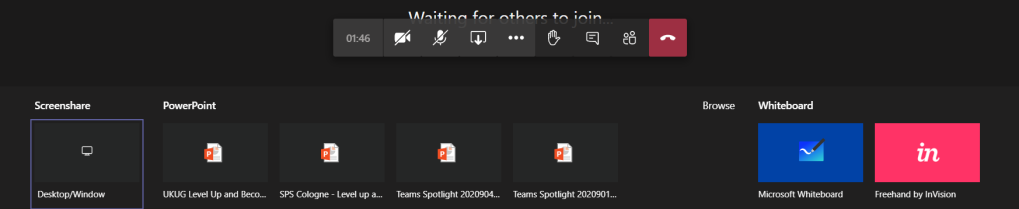
This opens the Share Tray. From it you can choose to start sharing
- Your Desktop (Screen share)
- Specific application (Window)
- Whiteboard application: either Microsoft Whiteboard (natively with Microsoft 365) or available 3rd party Whiteboards
- PowerPoint document
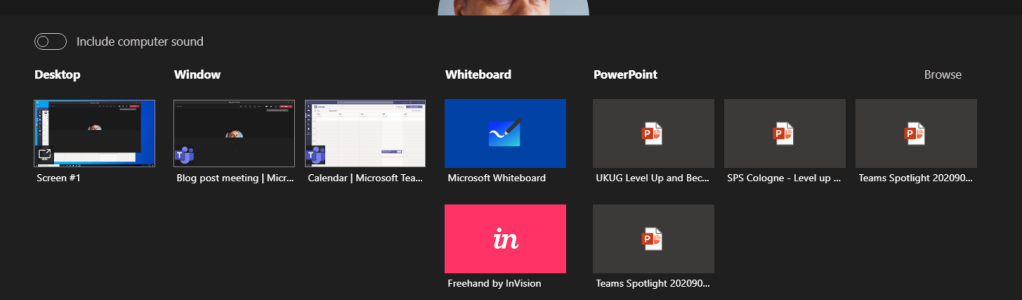
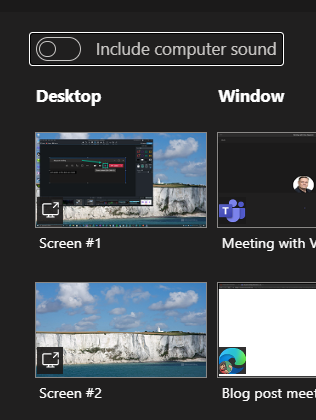
TIP: When you choose to share something using Teams Desktop you can choose to include your computer sounds to meeting. This is a must-have option if you are playing music or video to your participants. You can not toggle this on later – you need to choose this when you start sharing.
When you choose to include computer sound included with the sharing you need to have configured the speaker for computer and Teams meeting to be the same one.
If you have multiple monitors available for your Microsoft Teams you can choose any of those displays.
And you have the sharing open. Shared area is marked with red rectangle around it. You will find the more smaller Teams meeting control window in one of your desktops – and if you have the camera on it will show the video.
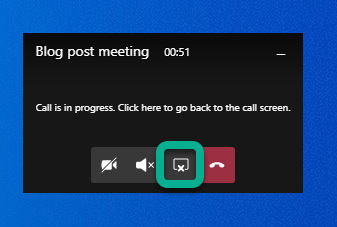
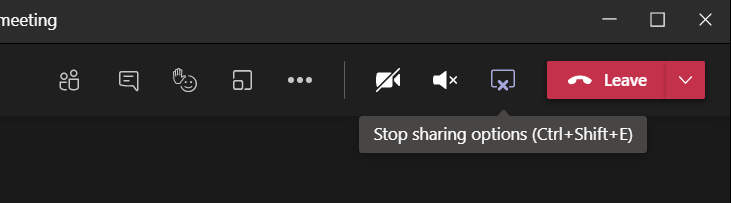
But more importantly you can use that small window to control camera, audio or sharing (ending it with one press). Or you can click on the small window (not on meeting toolbar) and it will expand back to the full size.

You can use that same icon to stop sharing in the expanded window.
Tip: If you have two screens available you should consider presenting your PowerPoint presentation so that you share the external screen and project your presentation there (PowerPoint – Slide Show – Monitor). Share that external screen to Teams meeting so you can be sure that whatever you show in that screen it is shown to attendees. Just check that your second screen is not a ultra-wide display or 8k (or preferably even 4k) because the content is going to be tough to read and view by attendees. FullHD screen works the best here.
Tip2: when you are presenting PowerPoint in external screen (and sharing that to Teams meeting) do they advantage of inking and pen if you are using a device with touch screen (like Surface)!
Tip3: if you have an embedded video in your PowerPoint and you use screen/display sharing to present it to the audience: Don’t forget include computer sound with your share!
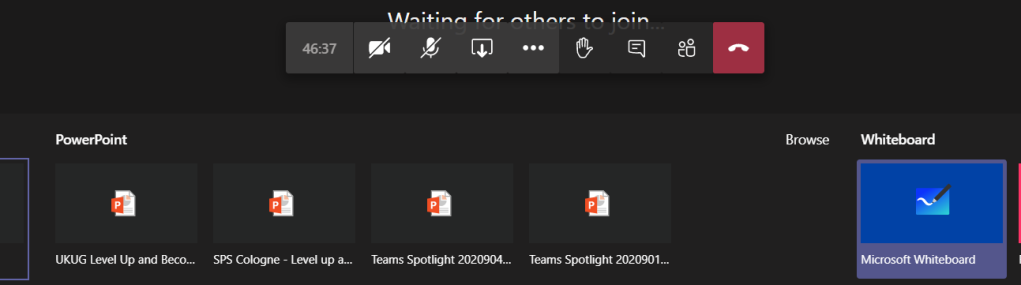
Teams Desktop: sharing a PowerPoint
You can choose from your recent PowerPoint documents in the list
- A PowerPoint document you opened or edited in Microsoft Teams (in a team you belong to) or in your OneDrive
- Browse for more
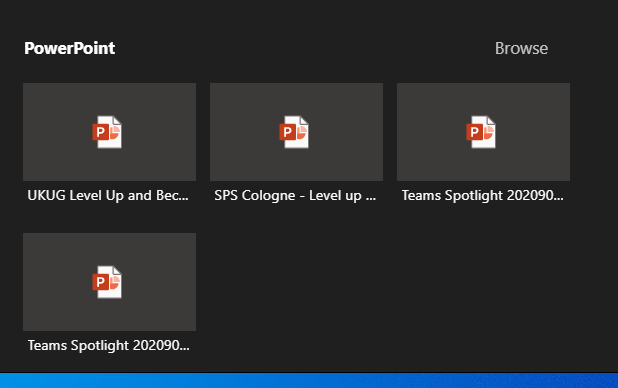
This list of sharing PowerPoints is causing often some big questions. PowerPoints will appear in the list once you edit or open the PowerPoint presentation in Teams or OneDrive (there may be some short delay). Generally it applies to the next meeting you join. Make sure you prepare for the meeting by opening the document in advance. Simply uploading a presentation to OneDrive or Teams does not bring it to the list – you need to open/edit it as well.
Browse-option lets you choose a PowerPoint from your OneDrive or from your computer.

What this one lacks is the ability to choose a file from a team you belong to.
TIP: Use OneDrive syncing to have an easy access to files in the most relevant teams you belong to .
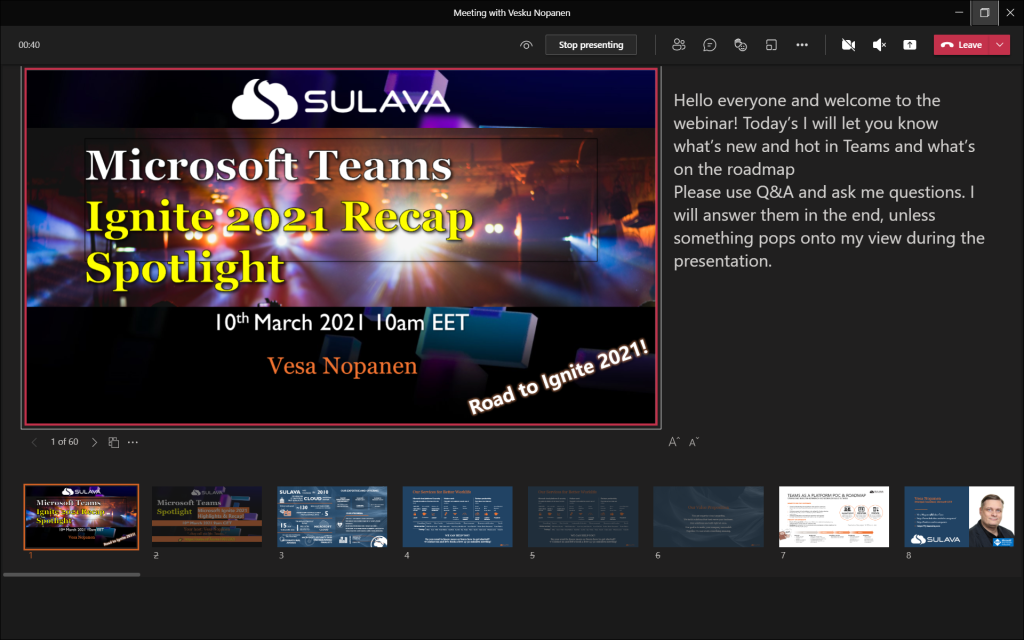
Once you are sharing the PowerPoint you can see it in the presenter view mode! This feature is generally available ! This makes it easy to do presentations using Teams – without having to have a PowerPoint desktop app open at the same time. Seems to work only on Teams Desktop with new meeting experience mode at the moment.
The presented area (PowerPoint) is shown surrounded with a red rectangle.
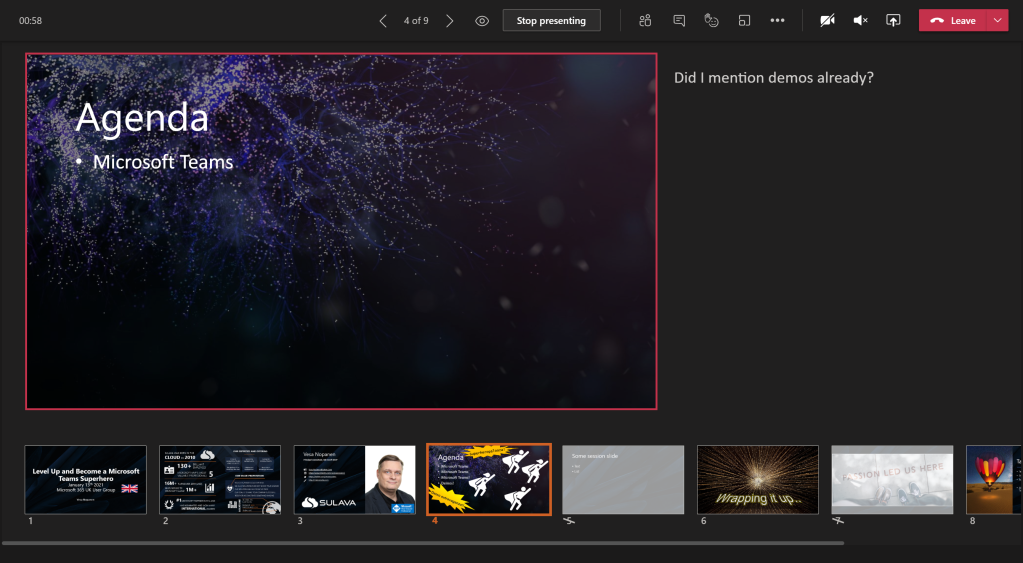
Updated 22.3.2021. There are other controls in this as well for jumping between slides and accessibility controls.
I have a another article diving deeper to Presenter view in here !
NEW: PowerPoint Live has now laser pointer and inking capabilities. Read about them here !
Once the presentation is shared you can move back and forth easily with arrows in the screen.

Note: there is the “eye” icon. If you press that one it locks the PowerPoint for the participants so that they see the same slide as you do: they can not browse the deck on their own. This is called private viewing disable (arrows for other participants will be disabled). Private viewing is enabled on default.

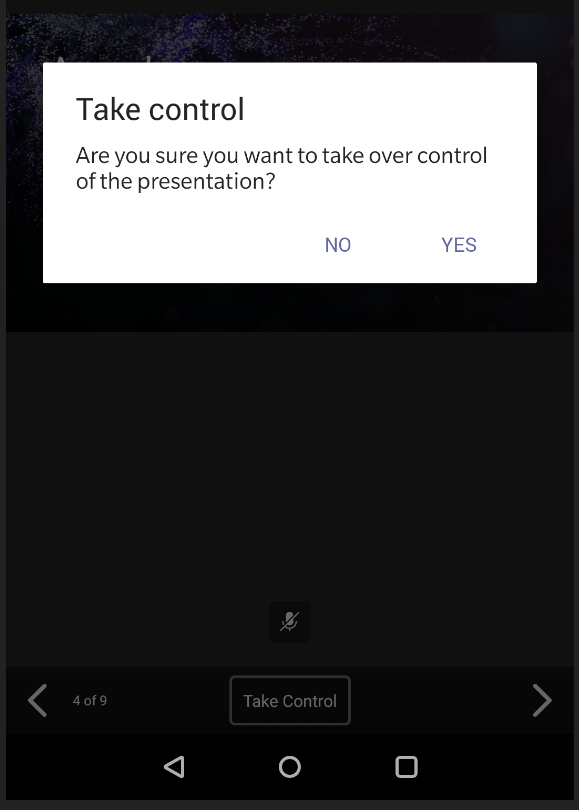
Note: if you are a presenter in the meeting where a PowerPoint is shared to you can take control of the shared PowerPoint to advance slides. This does not ask for any confirmation and the feature is really useful when you have multiple presenters who use the same slide deck. Just be careful that everyone else are not presenters – or they know not to touch it.

You will get a warning that someone has taken the control and can easily take it back.

Whoever is in control of the presentation has also the control to disable/enable private viewing mode. As can be seen in the picture above (with Take control) the eye is missing and arrows are greyed out: this means someone else than you have the control and they have disable the private viewing.
Note: When you share PowerPoint to a meeting this way participants can click links you have in your presentation. Thank you Joe for this reminder!

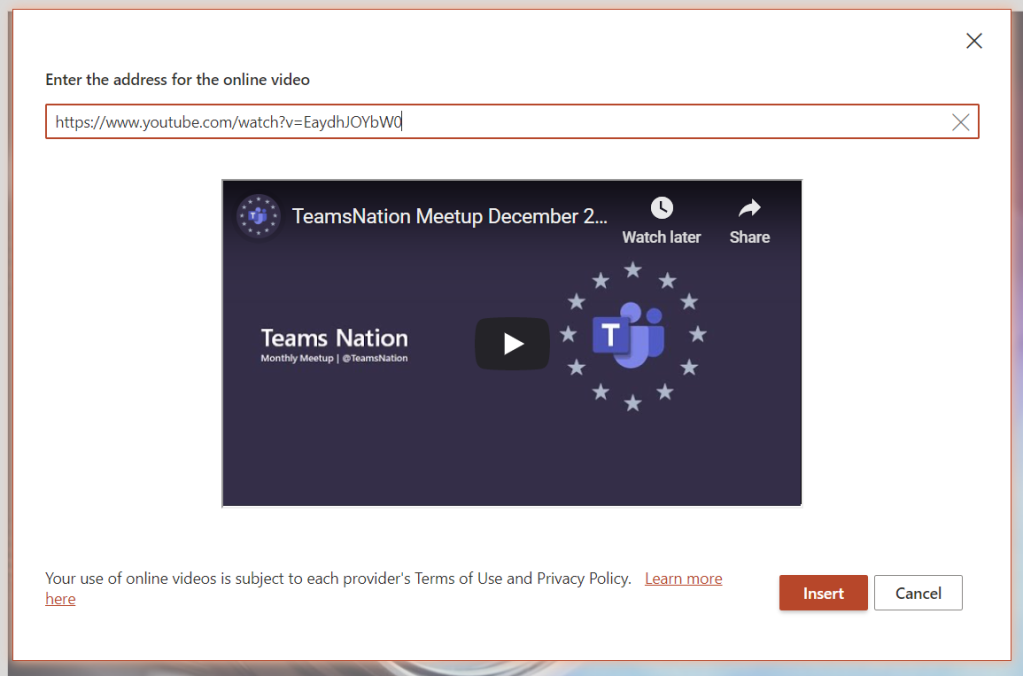
If you add a online video to your presentation your participants can activate that on their own as well. It is good also to note that if you hit “play” it doesn’t reflect to attendees (=they need to play the video themselves)
Teams Desktop: sharing a Whiteboard
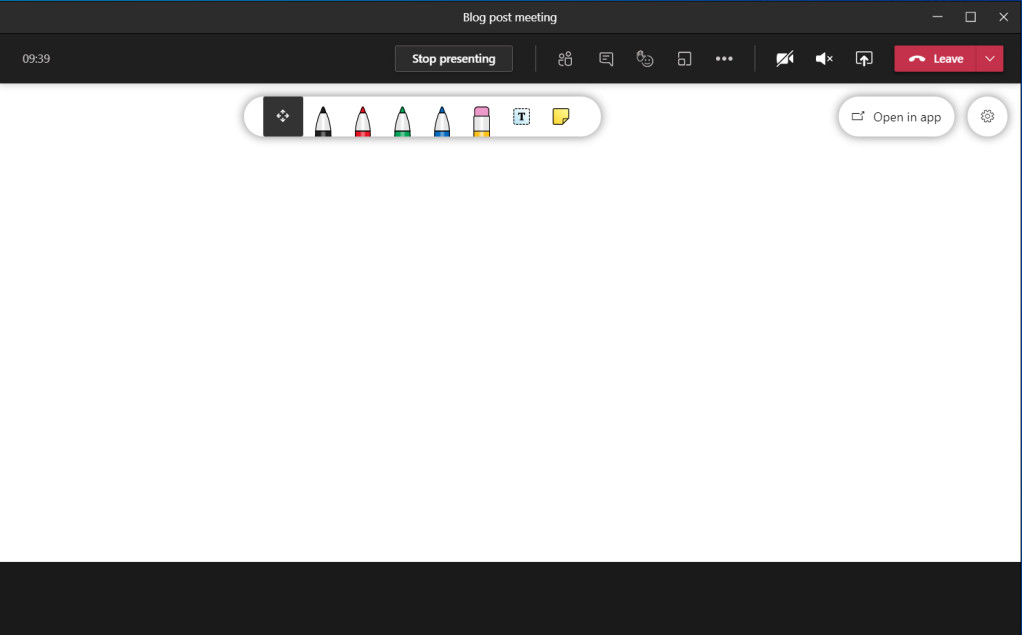
When you choose Microsoft Whiteboard from the Share Tray you are taken directly to the Whiteboard view. Everyone who is in the same organization as you are (the situation in January 2021) can co-author the Whiteboard with you. Once you are done you can Stop presenting (middle top screen) or share something else.
Teams web client: sharing a screen (Microsoft Edge)
Sharing looks a bit different when you are using Teams web client. Sharing is available in (new) Microsoft Edge and Google Chrome browsers. The toolbar is hovering on top of the meeting. From the toolbar you can open the share tray.

When you have the share tray open you can choose to share something of following
- Desktop (Screenshare)
- A specific PowerPoint document
- Whiteboard: either Microsoft Whiteboard or Freehand (3rd party).
- Entire screen
- Application window (a specific application only)
- With Microsoft Edge you have option to choose a selected, specific, tab
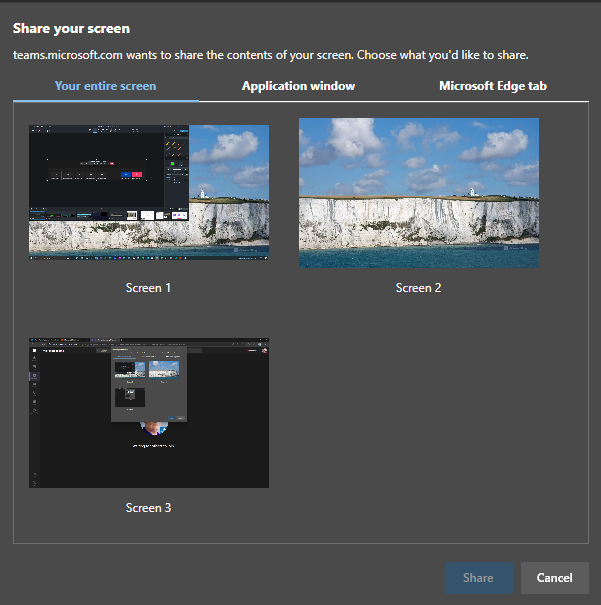
When(if) you have multiple monitors it is easiest to just share a one of them: it makes the sharing really simple and easy to manage: anything on that display is shared.
If you don’t have multiple monitors then you might want to just share a single application.
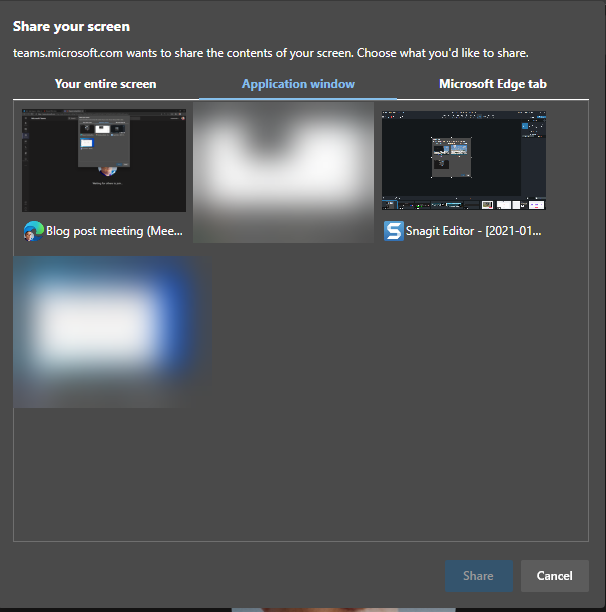
This is useful when you want to show something specific that runs in it’s own application but you can not share anything else on your screen.
Note: Teams is not in the list (not even on blurred ones) and nor is Spotify or ToDo. Not every application can be shared with this.
Note2: you can not share desktop audio to the meeting using Teams web client.
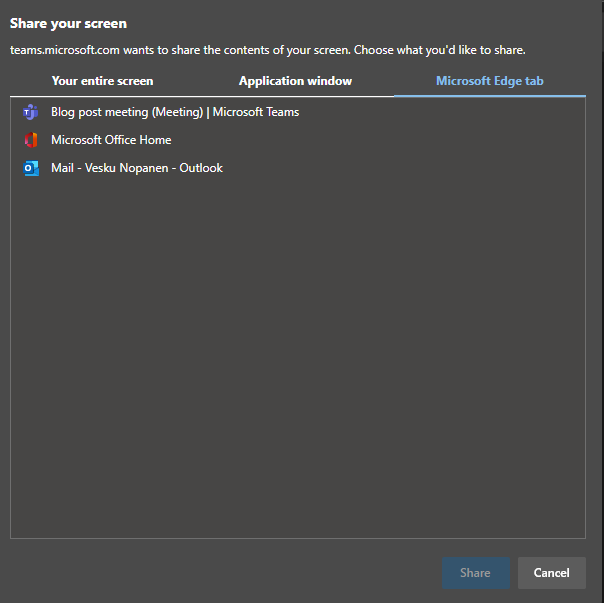
And the last option is to share a selected Edge tab – and if you have multiple Edge profiles open you can share from any of those by clicking the desired Edge active and choosing the tab.
In my example I chose to share one of my screens. You don’t get much feedback – you just click on the screen and hit Share. In one of your screens you will have this toolbar:

You can end sharing using either that toolbar or you can navigate to your web Teams meeting and choose Stop sharing from the toolbar there.

Teams web client: sharing a PowerPoint
This list of sharing PowerPoints is causing often some big questions. PowerPoint presentations will be in the list once you edit or open the PowerPoint presentation in Teams or OneDrive (there may be some short delay). Generally it applies to the next meeting you join. Make sure you prepare for the meeting by opening the document in advance. Simply uploading a presentation to OneDrive or Teams does not bring it to the list – you need to open/edit it as well.

Note: there is the “eye” icon. If you press that one it locks the PowerPoint for the participants so that they see the same slide as you do: they can not browse the deck on their own. This is called private viewing disable. Private viewing is enabled on default.

Whoever is in control of the presentation has also the control to disable/enable private viewing mode.
Teams web client: sharing a Whiteboard
Sharing a Whiteboard is initiated simply by choosing Microsoft Whiteboard (or Freehand or other available 3rd party application) from the share tray.
I have found out that sometimes when you start sharing Microsoft Whiteboard to the meeting using Teams web client it doesn’t do anything. The solution is to try again.
Once the Whiteboard opens you can work on it normally – or choose to open it in the Whiteboard app to have a broader set of tools available.
When you are done you can choose the “Stop presenting” that is hovering on the left bottom area (left of meeting toolbar).

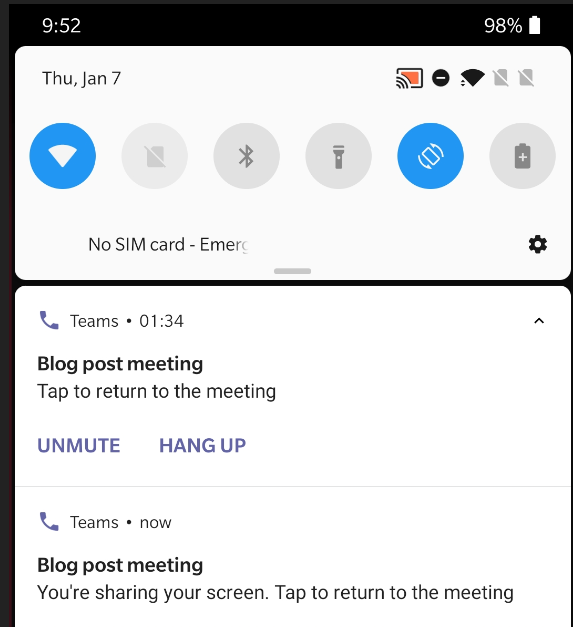
Teams mobile: sharing a screen
Were you aware that you can also share content using your mobile device? I have examples and screenshots using a Android device but these also work with iOS – the user interface might be slightly different.
You initiate the sharing via … menu selection in the mobile to open the list of options
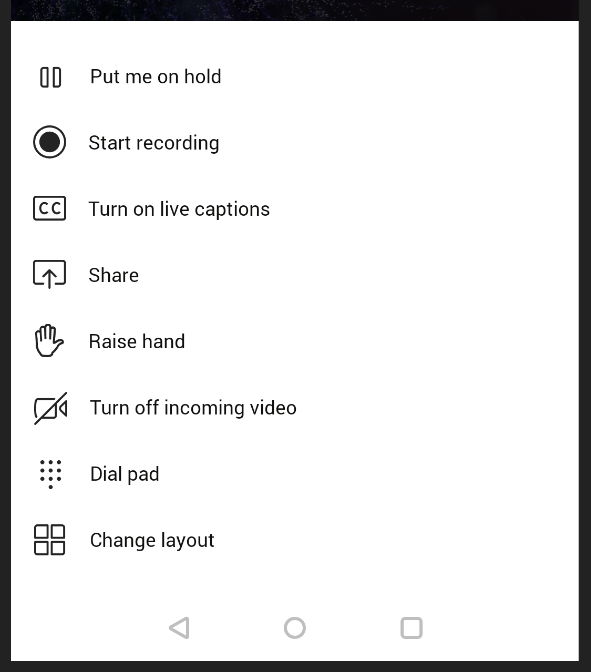
You choose Share and you get to choose what to share

Yes – you can share your mobile device screen to the meeting. This is really useful if you have a application you want to show or train to others.
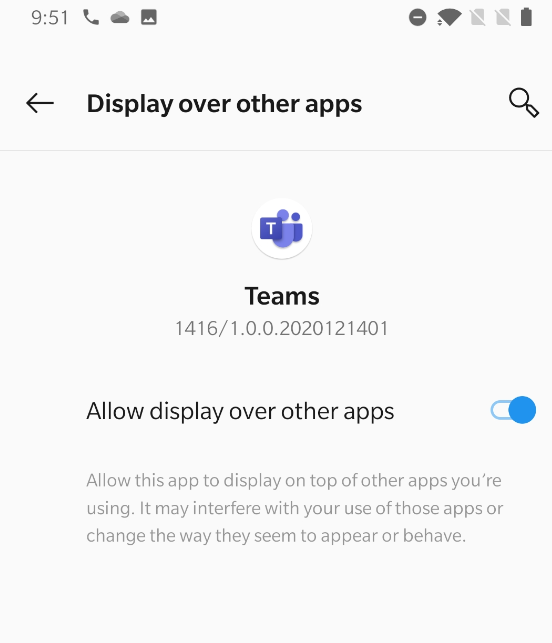
You may have to adjust settings to turn on allowing Teams to display over other apps.
After that one you may have reshare the screen. And you get the next warning.
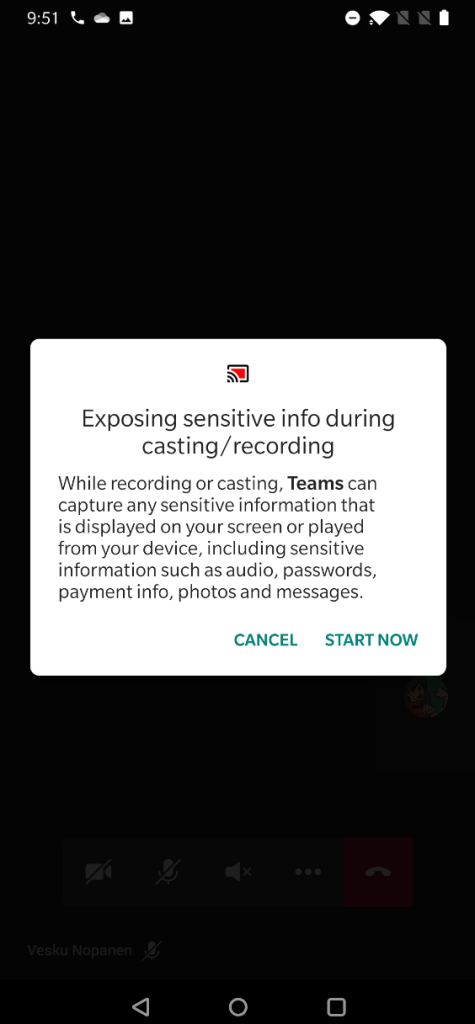
And your screen is now shared. You can see the red block that lets you know what are of your mobile device screen has been shared.

And if you pull down notifications area you have option to return to Teams meeting (if you have been using some other app) and there is also the notification that you are sharing your screen.
When you are done sharing you can return to Teams meeting and then choose to Stop presenting.

Teams mobile: sharing a PowerPoint
Sharing a PowerPoint works really well on Teams mobile! It is in fact even better than the version in other clients.
You start by imitating the sharing (as with screen share) and choosing the PowerPoint instead. You get a screen:
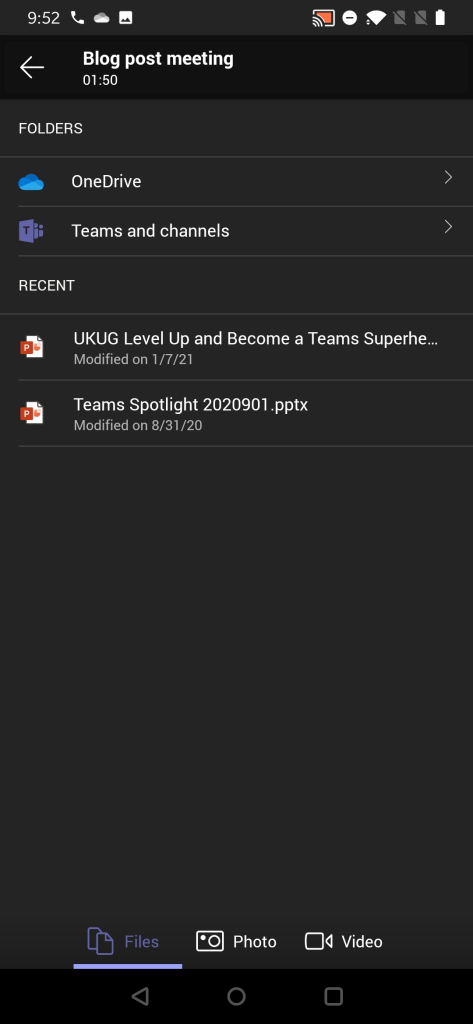
From this screen you can choose to browser thought
- A PowerPoint presentation from any Team and channel you belong to!
- Choose a PowerPoint presentation you opened or edited most recently (as you notice compared to other examples that this isn’t 1:1 in sync.. There are differences so that is why I am really happy that you can browse through Teams for sharing)
Once you have selected the PowerPoint to present it is very straight forward from that moment.
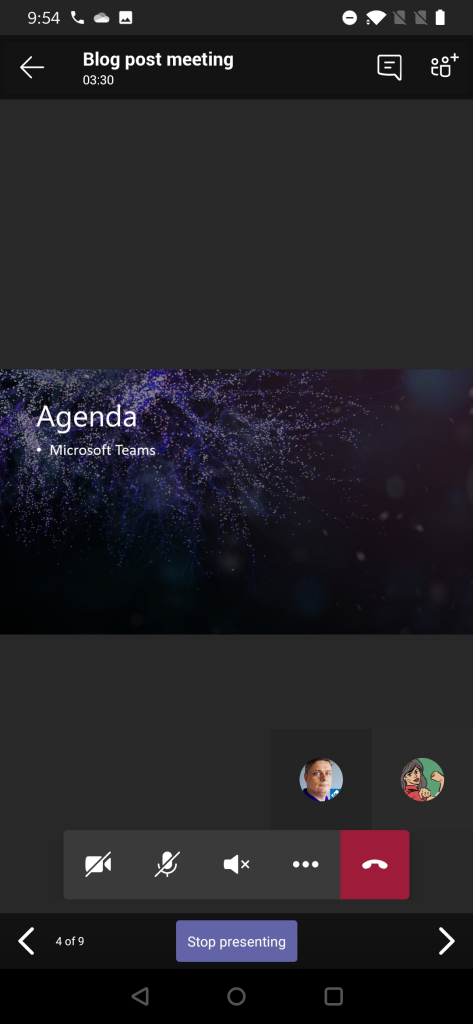
Using Teams mobile you can also take control of a PowerPoint someone else is presenting (if you are a presenter in the meeting). This means that you can participate in a multi-presenter meeting quite easily by using just your mobile device and Teams!
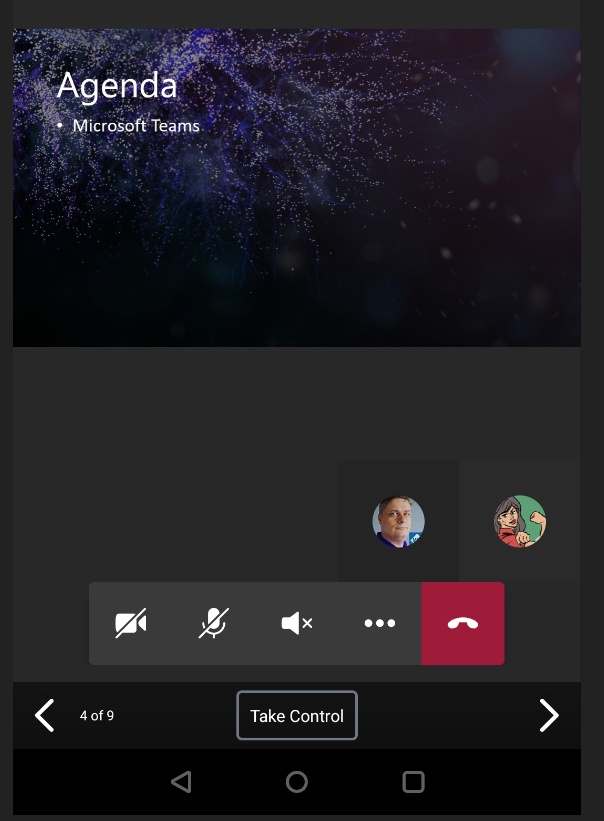
You will get a warning before you take the control – in case you pressed Take Control accidentally.
Teams mobile: sharing a photo or video
Follow the steps laid out earlier and instead of screen or PowerPoint you select this time a picture (from device’s picture gallery) or a video (using device’s video camera). Since sharing a picture is very straight forward I use the video instead as example.
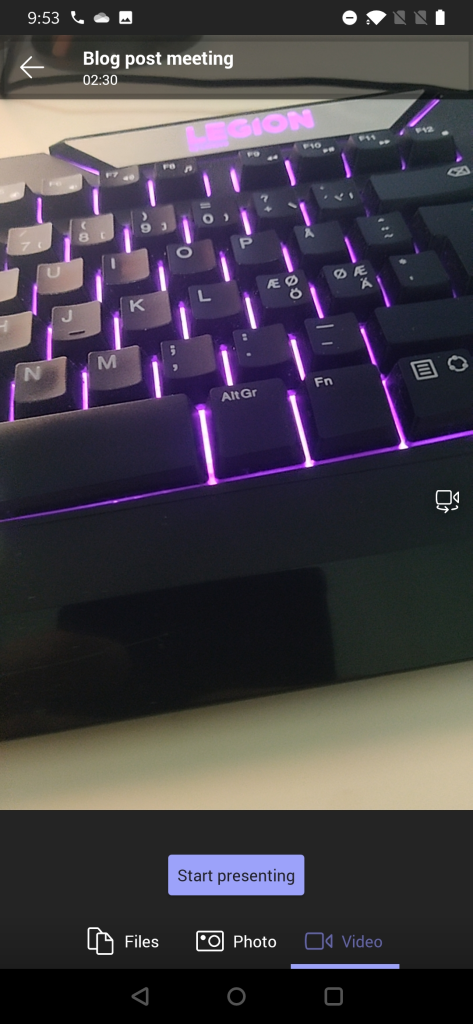
You get to see a preview of video first. You can switch to other camera (front/back usually) & position the device properly and once you are ready you just hit Start presenting .
And when you are done you can press on “Stop presenting” to end your video feed.

This video is different from showing your own video using Camera icon the meeting toolbar. Instead of being a attendee video this one is shown in the shared area for every participant in the meeting. This is useful when you have something in the same room/space that you want to share to others in the meeting. Possible use cases: a model on table, physical whiteboard, view from the window, interviewing someone, view in the outside, …
Best practices from my experience
The way I use to share content when in Microsoft Teams meetings is
- I share one of my screens (I have three screens so this is a natural choice for me). This way I know what is being shared all the time since I always share the same screen (the one in the middle, my camera is on top of that screen). Be careful what you drag to the shared screen. This is the way I share my PowerPoint presentations (projecting the presentation to the shared screen)
- If you have a touch-screen device (like Surface-laptop) you should use pen/inking to enhance the presentation experience. This also works when you are sharing the external screen & presenting from touch-screen device: make your presentation stand out!
- Prepare the content you share in advance. Open PowerPoints, apps, browsers etc so you don’t have to spend any time with them when you are live.
- Share your screen early rather than later. This will give you time to reshare.
- When doing a presentation with multiple persons using just the PowerPoint deck share it directly to Teams meeting so you can switch between speakers easily. With the new Presenter view -support this is now a good option.
- Make use of Teams features: Put everyone but real presenters else as attendee so they can’t start sharing their screen accidentally – and you can hard mute them as well. Use meeting options -setting before they join in.
- When people complain they don’t see the share: check that you are actually sharing your screen. If someone is seeing your share and some others not: those who can’t see your share need to leave and rejoin the meeting. Sometimes restarting your sharing can fix that issue too but usually the issue is in the participant end.
- I rarely use application / window -sharing.
- Sharing a video in Teams meeting (or in Live event) is usually ok but you can expect some quality drop – especially if you have a lower bandwidth. Have a backup link to the video available. People seem to struggle more with videos embedded inside a PowerPoint.
- Use Windows Focus Assist and Teams Do Not Disturb mode so you don’t get any unwanted popups on your shared screen. Microsoft Teams will also have a upcoming feature (currently usable in public preview) that let’s users to choose if Teams notifications do their own “toast” (pop-up banner) or do they go directly to Windows notification area (honoring the Focust Assist setting).
- Use Teams Desktop version + new meeting experience when possible. Check that you have the latest version.
More information or different view into this?
Check out Microsoft Support article about Sharing content in Microsoft Teams meetings .
I hope you have enjoyed this guide and it has provided to be useful. Please do drop a comment from below if you have any questions or you want to send me greetings!
Sharing is Caring! #CommunityRocks
Aiheeseen liittyy.

Published by Vesa Nopanen "Mr. Metaverse"
Vesa "Vesku" Nopanen, Principal Consultant and Microsoft MVP (M365 Apps & Services and Mixed Reality) working on Metaverse, AI and Future Work at Sulava. I work, blog and speak about Metaverse, AI, Microsoft Mesh, Virtual & Mixed Reality, The Future of Work, Digital Twins, and other services & platforms in the cloud connecting digital and physical worlds and people together. I am extremely passionate about Metaverse, AI, natural language understanding, Mixed & Virtual Reality and how these technologies, with Microsoft Teams and Microsoft Azure & Cloud, enable to change how people work together. Azure OpenAI Services - yes, I build AI solutions using those and other Azure AI services. I have 30 years of experience in IT business on multiple industries, domains, and roles. View all posts by Vesa Nopanen "Mr. Metaverse"
5 thoughts on “ The Ultimate How To Guide for Presenting Content in Microsoft Teams ”
- Pingback: Dew Drop – January 18, 2021 (#3361) – Morning Dew by Alvin Ashcraft
- Pingback: [m365weekly] #19 – M365 Weekly Newsletter
- Pingback: PowerPoint Live / Presenter View in Microsoft Teams – Vesa Nopanen – My Teams & Microsoft 365 Day
- Pingback: PowerPoint Live / Presenter View in Microsoft Teams - Tech Daily Chronicle
- Pingback: Microsoft Tech News and Product Updates: 4/26/2021 – Mr. Wombat
Leave a comment Cancel reply
This site uses Akismet to reduce spam. Learn how your comment data is processed .

- Already have a WordPress.com account? Log in now.
- Subscribe Subscribed
- Copy shortlink
- Report this content
- View post in Reader
- Manage subscriptions
- Collapse this bar
The right way to present a PowerPoint file during a Microsoft Teams meeting

Check out Matt's book!
This is the field guide every Microsoft Teams user out there has been waiting for, covering Teams, chat, meetings, files, and more!
Subscribe to our newsletter!
Stay in the know with goings-on in Office 365, SharePoint, Microsoft Teams and more. It only takes a second, plus it's free!
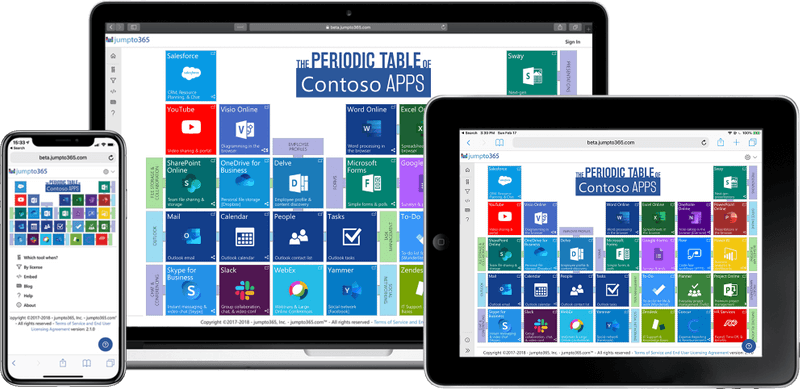
Get the Periodic Table as a Poster
You can have your PPT cake and eat it too
PowerPoint is likely one of the most popular apps shared during a Teams meeting. There’s a reason when you bring up the share options, PowerPoint takes up more than a third of it. People present slides all the time. But are they using PowerPoint to its potential when they use Teams? Most people do not. To view a video version of this post (lots of video demos!), press play below. (You should watch it, actually.)
PowerPoint has a lot of really great features and while this isn’t a PowerPoint best practices post, I do really appreciate PowerPoint for many of its professional features, like smooth transitions (Morph can be amazing), slide notes, non-distracting animations, screen annotations, and especially presenter view.
Well, if you’ve ever tried to present a slide deck in Teams, you’ll know that some of these features can be hard to find depending on which method you use to share your slides. There are three main sharing options and these are the only three I’ll cover today.
The three options—and I’m going to stick to this naming convention throughout the post—are The Teams Built-In Share, Desktop Window Share, and Presenter View Share.
TL;DR: For the most part, you want Presenter View Share. Launch your slideshow like you would normally. Alt-Tab to your meeting and share the window (not the screen) , Alt-Tab back to your presentation, right-click, and select Use Presenter View . That's it! Below is a more in-depth review of this way and the most common other ways to share slide decks during a Teams meeting.

Teams Built-In Share
Teams Built-In Share is the first option we’re going to discuss and it uses the built-in PowerPoint option. The sharing drawer shows you all your recent PowerPoint files. Though note that they’re only ones you’ve accessed in SharePoint or OneDrive; you don’t see anything from your local device or other cloud locations like Google Drive. Whether you know it or not, this method makes use of PowerPoint for the web—or formerly known as PowerPointOnline—so you’re getting the “Lite” version of PowerPoint when you present. That can work in many situations, especially if your slides are simple and straight forward.
There are a couple major upsides to this method. First, everything stays right in Teams and you have full control of your computer and its screen, unlike normal presentation mode with PowerPoint, where it completely takes over your screen. The other is that your viewers can actually choose to jump ahead or backward in your slides at their own pace without impacting what others see, which is a benefit you don’t get from any otherPowerPoint sharing option. You can disable this if you want to keep them on the slide you’re presenting, though. I generally don’t like people being able to jump slides on their own; it's usually more a distraction than a benefit. So for me, this isn’t a compelling feature.
The major downsides to this method are that you’re stuck with PowerPoint Lite: animations and transitions are sometimes really poor—and yes, animations and transitions are incredibly powerful for your message when they’re used correctly. But more importantly to me, you don’t get presenter view, so no annotations, no notes, and you have absolutely no idea which slide or animation is coming up next (unless you practice your slides a lot, but let's be real: you probably cobbled them together right before the meeting). Those downsides are the reason that I never use this method, even if it is right up in my face when I want to share a slide deck in Teams. The only way you’ll find me using Teams Built-In Share is once presenter view is built into PowerPoint for the web.
Desktop Window Share
Desktop Window Share, the second option, is a nice little hack for sharing your presentation from the desktop app, complete with all the slick transitions and animations you’d like. You won’t get presenter view with this method, but you will get safety and comfort of all the full-fledged features in the desktop app and it won’t take up your whole screen while you’re presenting. Though it will include a little chrome in the top toolbar.
This method is similar to what people use when they set up kiosks for people to browse at expos or stores, except in this case, it doesn’t take up the whole screen. To present this way, you need to toggle a setting. Jump into the Slide Show tab in PowerPoint and click Set Up Slide Show . Select Browsed by an individual and click OK.
Now when you present this slideshow, it’ll show your entire slide in its own window, without the rest of PowerPoint showing. It’s like a mini PowerPoint presenter mode. To share this window, jump to your Teams meeting, click Share , and select PowerPoint under the Window section. Handy.
Presenter View Share
Note: This feature seems to have been recently removed from PowerPoint on macOS; I haven't been able to test it on Windows to confirm any impact there. I've reached out to Microsoft for some explanation or insights on this. I'll provide an update when I have one.
And lastly, Presenter View Share is my favorite way to present a slide deck during a Teams meeting and it’s really the subject of this post. Presenter View Share gives you all the features of the desktop app—because that’s what you’re using—including presenter view. That means you get notes and annotations, can see the upcoming slide, and can jump around slides as much as you want.
This technique is actually stupidly simple, but it’s not obvious at all. To share your presentation this way, it works best if you’re only using one monitor. If you have a second monitor, I’d actually recommend disconnecting it. And that’s coming from someone who always uses two monitors. The reason for that is the feature isn't available when you have two monitors because you'll already have presenter view on one of them and you can't share PowerPoint as a window when you have two monitors because the app takes up two windows and becomes essentially disqualified from being shared as a window (the only way to share the slides is by sharing the whole screen, which is less private).
First, have your PowerPoint file open and start the presentation the way you normally would. Now, Alt-Tab (Command-Tab on Mac) back to your Teams meeting and share the PowerPoint window—not the whole screen. Alt-Tab back to PowerPoint. And here’s where the magic happens: right-click on your slide and click Use Presenter View . And that’s it!

Wait, you’re worried that the people on the other end are seeing presenter view? They’re not. In fact, they didn’t even see you right-click because the menu isn’t part of the window. For them, nothing happened. While on your side, you just went from low fi to high fi in a matter of two clicks. From here you can do all the stuff you want through presenter mode and everyone on the other end will only see slides.
So, why do I like this method the most? Because I get to have my cake and eat it too! Sure, the slides take up my whole screen, but that doesn’t stop me from jumping around my device all I want. Alt-Tab is your best friend. If you’re not an Alt-Tab person now, you will be moving forward, because it’s a great little trick for jumping between apps.
That means I can be taking notes about a potential customer in my OneNote app during a demo without them knowing. Or I can check in on the meeting itself to see if someone’s raised their hand or said something I need to respond to. All they’ll ever see is the current slide—even if you see another app on top of it—because all I’m sharing with them is the PowerPoint window.
Edit: Some folks have reported they can actually use two monitors and still are able to share the single presented-view of PowerPoint. I can't confirm this because on Mac, the Use Presenter View isn't available when you have two screens (the option is not available in the right-click menu). That said, if you use multiple monitors, you're a power user. So take 2 minutes to check with a colleagues to test if it still works in your situation to pull this off, but with the multiple monitors you're used to. So if one of your original thoughts was, "I can't not use two monitors", test before you knock it. 🙂

Frankly, I’ll never look back on any other presentation options again. At least until Teams Built-In Share—remember, I really mean PowerPoint for the Web when I say this—finally transitions from PowerPoint Lite to a full-fledged version of PowerPoint. Once that day comes, I may convert. But for now, I’m sticking to the desktop app because it’s a beast.
But what do you think? How do you present slides during Teams meetings? What tips do you have when you’re presenting? Share them in a comment below so others can learn some of your tips and hacks for better meetings in Teams.
Recent blog posts
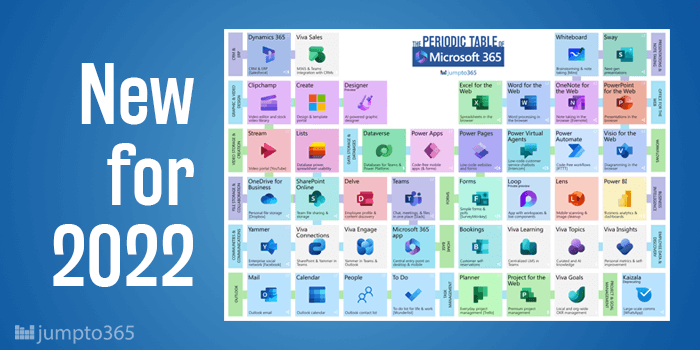
Periodic Table of Microsoft 365 - 2022 Edition

Send a link to a Power App in an email or communication
Publish a Power App to a SharePoint page
Obviously you have an opinion, so share it.
[email protected] jumpto365, Inc. PO Box 1960 PMB 24057 Wilmington, DE 19899
- Infographics
- Periodic Table
- Periodic Table Poster
- Other Tables
- Recipes by jumpto365
- Reuse Requirements
- Privacy Policy
- Terms of Service
- Billing Portal
Tools & Service Descriptions (preview)
Integrations (alpha).

Engaging new presentation features in Microsoft Teams
March 02, 2021.
By Microsoft Education Team

Share this article
Keeping students focused on learning can start with an engaging presentation. Today, we’re kicking off Microsoft Ignite, an annual event held virtually this year, with some exciting new Microsoft Teams features to help presenters deliver impactful presentations and provide meeting participants with dynamic experiences to keep them engaged.
Dynamic view intelligently and dynamically arranges the contents and participants in your meeting for a better viewing experience. In addition, the participant gallery automatically adjusts when the meeting window is resized.
The new Presenter mode empowers presenters to customize how their video feed and content appears for the audience. Our first mode, Standout , shows the speaker’s video feed in front of the shared content. Next, Reporter mode will show content as a visual aid above the speaker’s shoulder just like during a news segment. Third, Side-by-side mode will show the presenter’s video feed alongside their content as they present.
Educators will have the ability to disable video for students, either for individual students or for the entire class. This will help protect synchronous classes from unwanted disruptions and help keep students focused.
Educators will have the new option to download Attendance Reports after a class meeting is over in the meeting chat and channel thread. Only the meeting organizer has access to the Attendance Report, which will cover Join Time and Leave Time, Email Addresses, along with the class Duration so educators can more easily track student attendance and engagement.
Learn more about all these awesome new capabilities coming soon to Teams and if you’re not already using Teams, sign up for free to get started today.
Related stories

New LMS integrations offer seamless learning experiences
Education has evolved significantly over the past three years, and so have the needs of educators, students, and institutions. Educators need time-saving workflows, students need access to classroom content wherever they are, and institutions need the seamless integration of these LMS experiences.

Top tips to get the most out of Microsoft classroom tools
As teachers continue to embrace the lesson plans and teaching methods of education’s digital age, finding new ways to make the most of technology can help simplify workflows, engage students, and improve outcomes in all learning environments, whether in person, remote, or hybrid. We created our new YouTube series, How to with Microsoft EDU, with this purpose in mind.

How one district is improving literacy with Reading Progress
Here’s how Microsoft’s Reading Progress helped students at Sarasota County Schools catch up and embrace reading—and how the tool can help other students, too.
- SCHOOL STORIES
- MICROSOFT EDUCATOR CENTER
- CONTACT SALES
Like what you're reading?
How to create and deliver a winning team presentation
Get your team on prezi – watch this on demand video.

Anete Ezera May 31, 2024
Team presentations are about creating a dynamic experience for your audience whilst working together to share valuable information.
You might need to do a team presentation in various situations. For example, in a school project, a team presentation lets each member highlight their contributions. In the workplace, team presentations are great for updating projects, pitching ideas to clients, or sharing research findings with stakeholders.
Using a platform like Prezi can really boost your team’s presentation. Let’s look at what makes team presentations effective and how you can create a successful one.

Team presentations explained
So what exactly is a team presentation? Simply put, in a team presentation you’re working with others to share information or ideas. Each person brings their strengths and viewpoints, making the presentation more engaging.
Typically, the team divides the content so everyone has a part to focus on. This involves planning, creating visual aids like slides, and practicing together. The goal is to ensure everything flows smoothly and the message is clear. By combining everyone’s efforts, you end up with a presentation that effectively shares your team’s insights and knowledge.
How to create a great team presentation: a step-by-step guide
When done right, team presentations can be a really rewarding experience for everyone involved. To make sure the creation process runs smoothly, follow this step-by-step guide.
1. Gather your team
To start, you need to get everybody together. Use this opportunity to discuss the purpose of the presentation and what you want to say. This way, everyone understands the goal and can be on the same page with the project.
2. Divide the responsibilities
During the discussion, pinpoint what each team member is good at and assign roles based on their strengths. For example, one person might be great at research, another at designing slides, and someone else might excel at public speaking. By dividing tasks this way, you ensure a high-quality presentation as everyone gets to contribute the best way they can.
3. Plan the content
When planning your content, outline the key points you want to cover. Break down the presentation into sections and decide who will handle each part. Make sure the content flows logically from one section to the next. This planning phase is crucial for a cohesive presentation.
4. Develop visual aids
Great visuals can make your presentation stand out. That’s where Prezi steps in to help you create engaging visuals that complement your content. Also, make sure to keep the design consistent and not too cluttered. Remember, visual aids should enhance your message, not distract from it.
5. Rehearse together
Practice makes perfect! Schedule a few rehearsals where everyone presents their part. Pay attention to the transitions between speakers to ensure they’re smooth. Rehearsing together helps you catch any issues and make sure everyone is comfortable with their role.
6. Get feedback
To improve your delivery, practice in front of a trusted audience of friends or colleagues, and get their honest opinions. They can give you feedback on any tweaks you can make to improve your presentation. Following this, you can then make any necessary adjustments based on their feedback.
7. Prepare for Q&A
Be ready to answer questions from your audience. To prepare, discuss potential questions with your team and decide who will answer which types of questions. This preparation helps ensure you can handle the Q&A session confidently.
8. Present with confidence
On the day of the presentation, stay calm and confident. Trust in the preparation you’ve done. Remember to engage with your audience, make eye contact, and speak clearly. Most importantly, support each other as a team, and have fun with it.
To learn more about delivering a successful presentation with two or more people, explore our article on co-presenting tips and techniques .
9. Reflect and learn
After the presentation, gather your team to reflect on what went well and what could be improved for next time. Learning from each experience helps you continually improve your presentation skills.
By following these steps, you can be sure that every aspect of creating a team presentation is covered, allowing maximum success.
What are the advantages of team presentations?
Collaborating as a team for presentations has many advantages, including:
The opportunity to work together as a team provides a sense of unity. Whether it’s in the workplace or an educational setting, relying on each other and sharing insights can really improve morale in any team. Also, being in a group provides motivation and excitement that you may not necessarily experience in solo presentations.
Understanding of each other
In education and business settings, working on a team presentation means interacting with other members. Hearing other’s opinions and suggestions can help in getting to know your team better, which can help in other aspects of work or school.

Promotes teamwork
The ability to work together effectively for a team presentation can improve other team interactions further down the line. It’s a great opportunity to get everyone involved, especially those who might usually shy away from group discussions. This creates a more forthcoming team for the future.
Less opportunity for errors
Having more than one person contributing to a presentation means that there’s less chance of making mistakes. There’s going to be more than one person looking over progress, which means that any initial errors will likely be spotted by someone in the team. Even when working on your own sections, the chance to rehearse together means that you can all pick up on potential mistakes before the big day.
Diverse perspectives
Having a whole team involved means that several different viewpoints are brought together. Having each team member contribute their unique insights can lead to a richer and broader presentation overall. This ensures your presentation has a bigger impact on your audience.
Shared workload
With a team presentation, the workload is distributed among the group, making it more manageable. This should reduce the pressure off any one individual and allows for more thorough preparation before you take to the stage.
Improved audience engagement
Having multiple speakers can help to keep your audience interested. Each presenter will have different voices and styles of presenting, which can help maintain the audience’s attention throughout the whole presentation.
Demonstrates team strength
For business professionals in particular, creating and presenting a successful team presentation shows the power of your company. It portrays to your audience how reliable you are as a team and how you can work together to deliver great results. This is going to help you with future prospects and gaining the trust of clients, investors, and partners.
Top tips for creating and presenting your team presentation
Here are some top tips to help you nail a team presentation, with some advice on what to do and what to avoid.
Do: plan early
Start planning your presentation as soon as possible. Early planning gives you ample time to organize content, assign roles, and create visuals. Don’t wait until the last minute – good preparation is key to a smooth presentation.

Don’t: overload slides
Avoid cramming too much information onto your slides. Instead, keep them clean and simple with key points and visuals. Your audience should be listening to you, not reading dense text on the screen.
Do: practice together
Rehearse your presentation as a team several times. This helps ensure smooth transitions between speakers and a cohesive delivery. In addition, practicing together builds confidence and helps you refine your timing.
Don’t: ignore feedback
Constructive criticism can help you improve your presentation. However, don’t take feedback personally – use it to make your presentation stronger.
Do: engage your audience
Keep your audience engaged by incorporating questions or a brief activity into your presentation. This interaction helps maintain their interest and makes your presentation stand out.

Don’t: monopolize the presentation
Ensuring everyone on the team has a chance to speak values each member’s contribution and keeps the presentation dynamic and interesting.
Do: use effective visuals
Visuals are great for engaging your audience and capturing their attention! That’s why make sure to incorporate charts, images, and videos to illustrate your points. Compelling visuals can make complex information easier to understand – just make sure they’re relevant and support your message.
Don’t: forget to smile
A friendly demeanor can make a big difference. Smiling helps you appear confident and approachable, and it can put both you and your audience at ease. Remember, you’ve prepared well, so enjoy the experience!
Do: use Prezi
If you want to stand out, use Prezi for your presentation! Its dynamic, non-linear format can make your content more engaging and visually appealing. Prezi allows you to create a more interactive and memorable presentation experience and makes the presentation creation process even easier with AI-powered functionalities .
Don’t: rush through transitions
Transitions between speakers are crucial. Don’t hurry through them; take your time to smoothly hand over to the next person. This maintains the flow of the presentation and keeps the audience engaged.
Creating a team presentation is a fantastic opportunity to showcase your collective talents and knowledge. By following these tips, you’ll be well on your way to delivering a presentation that’s both impressive and enjoyable.
Why Prezi is perfect for team presentations: the power of Prezi AI
Prezi is the go-to platform for team presentations, thanks to its incredible AI features. Prezi AI makes creating a polished, professional presentation a breeze, allowing you to focus on your content while it handles the design.
With Prezi AI, you can simply provide a prompt about your subject, and it will suggest the best layout, color scheme, and design elements. This means you don’t have to be a design expert to create a visually stunning presentation. Prezi AI can even put your entire presentation together for you, ensuring that it looks cohesive and engaging.
One of the standout features is the Prezi AI text tool. It can suggest edits to improve your content, recommend the best way to display your text—whether it be in lists, bullet points, or paragraphs—and even adjust the length of your text to fit perfectly on your slides. This not only saves time but also means you don’t need to constantly double-check your work. You can present with assurance, knowing your presentation is professionally polished.
Presenting with Prezi is incredibly easy, making it ideal for both virtual and in-person settings. For virtual presentations, Prezi Video allows you to display your slides live next to you, creating a more engaging experience for your audience. Prezi’s collaborative features are perfect for team presentations, enabling the entire team to present together virtually. Each member can take turns presenting their sections seamlessly, making it feel as if you’re all in the same room, even if you’re miles apart.
Prezi AI takes the stress out of creating and presenting, making it the best tool for team presentations. With its intelligent design suggestions, text editing capabilities, and seamless virtual presentation features, Prezi ensures your team can deliver an impressive and professional presentation every time.
Here’s a summary of the key things Prezi AI can do
Build your presentation: Prezi AI can literally put together your team presentation for you. It will come up with the best theme and layout and put the whole presentation into action.
Suggest improvements: Prezi AI can offer suggestions to make sure your presentation looks visually appealing and engaging. By proposing matching color palettes, images, and layouts, Prezi AI helps you create a polished presentation that leaves a lasting impression.
Text editing: To make your message clear and concise, use the Prezi AI text editing tool. It can generate text based on prompts you provide as well as offer edit suggestions on existing text. This way, you know your text is correct and makes sense.
Team presentation ideas from Prezi
Here are some Prezi presentation examples that would work well as team presentations:
TED talks: From Inspiration to innovation
The Prezi presentation by Neil Hughes is a great example of a team presentation because it’s divided into sections, giving each participant a chance to share their insights. Incorporating videos for each section, where specific team members speak, effectively ensures that everyone has their say. This approach helps convey the message clearly and makes sure all voices are heard.
Adopting a gratitude frame of mind
The layout chosen for this presentation is ideal for a team effort. With four main points, each delved into further, it allows each team member to take responsibility for one point. This ensures a fair division of speaking time and workload among all team members.
UX design tips for product managers
Similar to the previous example, this serves as great inspiration for team presentations due to its division into five main points, each explored in detail. Assigning one team member to focus on each area allows them to dedicate their full effort to their section, resulting in a high-quality presentation overall. Additionally, this showcases how Prezi’s open canvas can create an immersive experience by zooming in and out of points, making your message much clearer.
Hopefully, these examples have given you more of an insight of what your team presentation could look like. Allocating one team member to each key point is a great idea to split the workload and ensure everyone gets their chance to speak and show off their expertise.
However, not all team presentations require every team member to be involved in the presenting stage. Sometimes, tasks may be split in a way where some participants focus on the creation process, while others focus on the presenting aspect. It purely depends on where the talents of your team members lie.
Wow your audience with a team presentation created with Prezi
Team presentations provide many positives that may not be attained with solo presentations. The opportunity to have different ideas and points of view can really broaden the perspective of your audience. They can deliver a sense of team unity and strength, which is particularly important in business. When it comes to educational settings, team presentations are a great opportunity to practice working in a group and identify each student’s strengths and weaknesses.
Creating a team presentation should be more about the content you’re sharing and less about spending hours on design. This is why utilizing Prezi AI to create your finished product is a great choice, as you can focus more closely on working as a team.
By using Prezi for your next team presentation, you can take your audience on an immersive journey through your words, ensuring your audience is hooked from start to finish.

Give your team the tools they need to engage
Like what you’re reading join the mailing list..
- Prezi for Teams
- Top Presentations
How to View Notes in PowerPoint While Presenting on Teams

Do you frequently use Microsoft Teams for online presentations, but struggle to view your notes simultaneously? If so, it’s important to know how to view your PowerPoint notes while presenting on Teams. By doing so, you’ll be able to stay organized, on-topic, and well-prepared during your presentation. In this article, we’ll explore step-by-step instructions on how to view notes in PowerPoint while presenting on Teams. Let’s dive in.
Table of Contents
Why You Need to Know How to View Notes in PowerPoint While Presenting on Teams
Firstly, it’s essential to understand precisely why it’s so crucial to learn how to view notes in PowerPoint while presenting on Teams. By doing so, you’ll have access to all the essential information and talking points during the presentation without getting lost or distracted. By keeping prompt notes for quick reference, you’ll be able to stay on topic and maintain your confidence throughout the presentation. Furthermore, by viewing your notes onscreen alongside your PowerPoint presentation, you’ll be less likely to forget crucial points and details, which can help you to deliver a more successful and impactful presentation altogether.
Another reason why it’s important to know how to view notes in PowerPoint while presenting on Teams is that it allows you to customize your presentation for different audiences. With access to your notes, you can easily adapt your presentation on the fly to better suit the needs and interests of your audience. For example, if you notice that your audience is particularly interested in a specific topic, you can quickly refer to your notes and adjust your presentation accordingly. This level of flexibility and adaptability can help you to engage your audience more effectively and deliver a more memorable presentation overall.
The Benefits of Viewing Notes While Presenting on Teams
There are numerous benefits to viewing notes while presenting on Teams. For one, it can help to keep you on track, ensuring that you don’t miss any important points or ideas throughout your presentation. Additionally, it can be a convenient way to access information quickly, without having to refer to physical notes or other external sources. By keeping your notes visible on your screen, you’ll be able to give the audience clearer explanations, details, and statistics that can help you to maintain their engagement throughout the presentation.
How to Prepare Your PowerPoint Slides for Presenting on Teams
Before you learn how to view your notes in PowerPoint while presenting on Teams, it’s crucial to ensure that your PowerPoint slides are fully prepared for the Teams presentation. This involves taking care of the visual elements such as the font size, type, color, and layout of the slides. It’s a best practice to keep the slides concise and straightforward while also keeping the audience engaged with visually appealing slides, and effective transitions. By preparing your PowerPoint slides upfront, you’ll be able to focus better on your presentation and deliver a more impactful and effective message.
Step-by-Step Guide: How to View Notes in PowerPoint While Presenting on Teams
Now that you understand the importance of viewing notes in PowerPoint while presenting on Teams and have prepared your slides let’s explore the step-by-step process of how to view notes while presenting on Teams.
Open your PowerPoint presentation and select the “Slide Show” tab on the top menu bar.
Click on the “Presenter View” button located within the “Monitors” group. This will initiate the Presenter View mode.
You will now see the Presenter View appear on your primary screen, and your presentation on the secondary screen. Here, you’ll be able to see your notes in one section, along with the next slide and timing for each slide.
To advance to the next slide, use the arrow keys on your keyboard, or click on the forward button located at the bottom of the presenter view section.
If you wish to make any quick annotations or highlight points during the presentation, you can use the laser pointer tool, which will make it easier for the audience to follow your cues.
Once done with the presentation, press the “Esc” key to exit the presentation mode.
Tips for Using the Presenter View in PowerPoint on Teams
There are some essential tips and tricks that you should keep in mind when using the Presenter View in PowerPoint on Teams. Firstly, adjust the settings to match your needs and preferences. Adjust the font, text size, and color of the notes to get the attention of your audience. Also, keep a reliable internet connection and a computer that can handle a high-graphic presentation. This will ensure that you enjoy a seamless experience, with no interruptions or delays. Additionally, keep your notes organized and labelled in a clear and logical manner, for easy reference when presenting.
Troubleshooting Common Issues When Viewing Notes in PowerPoint on Teams
Despite the ease of use of PowerPoint on Teams, there are some common issues that can arise when viewing notes. For instance, if you have a low-quality video or network problem, the notes and slides might not display correctly. The fix is to ensure that you have a high-quality connection and adjust the display resolution of your presentation. Also, ensure that your PowerPoint software is up-to-date, and avoid opening too many files at once, as this can make the software crash and your notes inaccessible.
Best Practices for Using Presenter View in PowerPoint While Presenting on Teams
To make the most of the Presenter View in PowerPoint presentation on Teams, it’s essential to follow best practices for its use. Some of these include choosing a well-lit and quiet place to present, using a high-quality microphone, and maintaining eye contact with the camera if presenting virtually. Additionally, continually referring to your notes and utilizing the laser pointer tool can help to reinforce your arguments and improve your delivery. Finally, ensure that you engage your audience during the presentation by asking questions, responding to feedback, and keeping them interested throughout the presentation.
Advanced Techniques: Customizing the Presenter View in PowerPoint on Teams
There are some advanced customization options that you could take advantage of when using the Presenter View in PowerPoint on Teams. For instance, you can customize the gradient or solid color of your background, amend the size and location of the notes section, and adjust the timing for the presentation. This comes in handy especially when you want to add more details or data to the presentation to automate certain functions, like changing the slide transitions or animations.
How to Take Advantage of the Laser Pointer Tool in Presenter View on Teams
The laser pointer tool is a handy presenter tool that helps you highlight crucial points and get the audience’s attention. By using this tool, you can focus audience attention on a particular point or graph, which can help to help emphasize the point you’re making. You can easily access the laser pointer tool during your presentation by clicking on the “Use Pen” button in the Presenter View tab. Please select the “Laser Pointer” option to activate the tool, and then click on the slide where you wish to use the pointer.
Maximizing Your Presentation Impact with Notes and Annotations on Teams
One of the best ways to maximize the impact of your presentations on Teams is to use notes and annotations to make your presentation more organized, informative, and engaging. You can choose to add comments, highlights, or even bold text to your notes, which can help to reinforce your points and communicate more effectively with your audience. Annotations, on the other hand, can help emphasize a point, establish credibility, elicit emotions, or even create more interactivity with your audience.
Comparing Presenter View Versus Normal View: Which is Better for Your Presentation?
When it comes to presenting on Teams with PowerPoint, you have the option of using the Presenter View or the Normal View. While the latter option might be more straightforward and more accessible, Presenter View offers substantial benefits like seeing the next slide and having your notes visible alongside the slides. This helps to keep your presentation more organized and engaging. On the other hand, Normal View offers a more straight forward approach, and is ideal for short, less detailed presentations. Ultimately, the choice between Presenter View and Normal View comes down to the specific needs of your presentation and your audience, and what will work best to help you deliver the most effective results.
How to Switch Between Full-Screen and Presenter View Modes in PowerPoint on Teams
Another useful trick to learn is how to switch between Full-Screen and Presenter View modes in PowerPoint on Teams. To switch to full-screen mode while in presenter view, press the “F5” key. To return to presenter view, press the “Esc” key. This can come in handy when you want a more immersive presentation, but with quick access between your notes and your slides.
Using Presenter View as a Teaching Tool for Online Learning with Microsoft Teams
Using Presenter View as a teaching tool is a great way to enhance learning, cover significant topics, and ensure that the class is kept focused and engaged during online classes. With Presenter View on Teams, teachers can utilize the notes and annotations to help explain concepts, reinforce essential concepts, and keep the students engaged throughout the presentation. Some students might find it easy to follow the teacher’s notes and images during the presentation, while others might prefer to have them in-hand afterward. Overall, using Presenter View on Teams is an innovative and effective approach to modern teaching and e-learning.
Best Practices for Collaborating with Co-Presenters Using Presenter Mode on Teams
When it comes to working with co-presenters using Presenter View on Teams, there are some best practices to follow to ensure an excellent presentation. Firstly, assign roles to each co-presenter to avoid confusion and make running of the presentation smooth and effortless. Secondly, ensure that there is proper coordination and communication between the co-presenters to avoid any confusion or overlap during the presentation. Finally, ensure that everyone has access to the notes and annotations, and that everyone follows the same presentation guidelines to ensure an organized and effective presentation.
Viewing notes in PowerPoint while presenting on Teams is easy once you know how to do it. By following the step-by-step guide and implementing the tips and tricks we’ve covered in this article, you’ll be able to deliver professional, well-organized, and effective presentations to your audience on Teams, no matter what your topic or subject happens to be. Whether you’re preparing for a business meeting or holding a webinar, utilizing the PowerPoint presenter view on Teams is a great way to inform, educate, and entertain your audience all at once.
By humans, for humans - Best rated articles:
Excel report templates: build better reports faster, top 9 power bi dashboard examples, excel waterfall charts: how to create one that doesn't suck, beyond ai - discover our handpicked bi resources.
Explore Zebra BI's expert-selected resources combining technology and insight for practical, in-depth BI strategies.

We’ve been experimenting with AI-generated content, and sometimes it gets carried away. Give us a feedback and help us learn and improve! 🤍
Note: This is an experimental AI-generated article. Your help is welcome. Share your feedback with us and help us improve.

Teams Forum Top Contributors: EmilyS_726 ✅
May 10, 2024
Teams Forum Top Contributors:
EmilyS_726 ✅
Contribute to the Teams forum! Click here to learn more 💡
April 9, 2024
Contribute to the Teams forum!
Click here to learn more 💡
- Search the community and support articles
- Microsoft Teams
- Unknown/other
- Search Community member
Ask a new question
When sharing a presentation in Microsoft Teams, why does Powerpoint Live seemingly insist on sharing a previous version of a recently amended file?
Hi all, when trying to share a Powerpoint presentation in a Teams call using Powerpoint Live, it opens the incorrect file, or more to the point, an incorrect or previous version of the file.
I have renamed the file by adding 'v2' to the file name (to allow for easier navigation), saved the file and closed Powerpoint. However, Powerpoint Live insists on opening the wrong file when I've selected 'v2'.
Is there anything silly I'm doing wrong? Should I be saving and closing Powerpoint before I even open the Teams call for example?
Thank you in advance for any help with this.
- Subscribe to RSS feed
Report abuse
Reported content has been submitted
Replies (1)
- Independent Advisor
Hi Phil, My name is Umar and I'd be happy to help you out with your question. Please note: This is a user-to-user community forum. We are users just like you who help others. We are not employees of Microsoft. I am sorry for the inconvenience this has caused to you. When sharing a Powerpoint presentation in Microsoft Teams using Powerpoint Live, it may sometimes open an incorrect or previous version of the file, even if you have made recent amendments and saved the file with a new name. Here are some steps and considerations to ensure the most recent version of your PowerPoint file is shared: Ensure Proper File Saving and Closing Save and Close: Ensure you save the latest changes to your PowerPoint file and close it before opening Microsoft Teams. File Location: Verify that the file is saved in the correct location, especially if you are using cloud storage like OneDrive or SharePoint. For specific instructions on the items listed above, kindly check the link below. https://support.microsoft.com/office/0c30ee3f-8674-4f0e-97be-89cf2892a34d Clearing the Teams cache can resolve issues where old versions of files are being accessed: Close Microsoft Teams. Navigate to %appdata%\Microsoft\Teams. Delete all files and folders within this directory. Restart Microsoft Teams. If you are using OneDrive or SharePoint, make sure your files are fully synchronized: Open OneDrive or SharePoint and ensure that the latest changes are reflected online. If using the desktop app, ensure it has completed syncing the latest version to the cloud. Sometimes renaming the file and re-uploading it to the intended location can resolve version conflicts: Rename the file to something distinct, e.g., Presentation_v2_final.pptx. Upload the newly named file to OneDrive, SharePoint, or directly into the Teams meeting. I hope this information is helpful. Please let me know if you have any other questions. Help the next person who has this issue by indicating if this reply solved your problem. Click Yes or No below. Best Regards, Umar Majeed
Was this reply helpful? Yes No
Sorry this didn't help.
Great! Thanks for your feedback.
How satisfied are you with this reply?
Thanks for your feedback, it helps us improve the site.
Thanks for your feedback.
Question Info
- Norsk Bokmål
- Ελληνικά
- Русский
- עברית
- العربية
- ไทย
- 한국어
- 中文(简体)
- 中文(繁體)
- 日本語
FA Cup winners! Reds claim club's 13th triumph

Improve your presenting skills with Teams Meeting Coach
When you’re sharing a PowerPoint deck in a Teams meeting, Meeting Coach can offer private, real-time tips to help make your presentation more compelling.
Turn on Meeting Coach
Share your PowerPoint deck. For instructions on how to start sharing, read Share PowerPoint slides in a Teams meeting .
Beneath the current slide, select Meeting Coach .
Near the top of the screen, you’ll see suggestions for improving your delivery.
Types of feedback
Meeting Coach provides feedback in the following areas:
Fillers: Are you overusing sounds like “um” or “ah”, or words like “basically” or “like"? Reducing these filler words can help your presentation flow better.
Pace: Should you try slowing down or speeding up your delivery? Studies have shown that 80 to 160 words per minute is best for listener comprehension.
Sensitive language: Have you used words or phrases that could be interpreted as insensitive? Meeting Coach listens for non-inclusive speech about disability, age, gender, sexual orientation, race, mental health, and ethnic identity.
Pitch: Should you try varying you speaking tone? Monotone delivery can make paying attention more difficult.
Speech refinement: provides suggestions on better grammar and usage.
View feedback details
Your Meeting Coach report will appear on-screen after the meeting with an option to save it for future reference.
You can select a category on the left to view details on your delivery.
The report will also be available to view and download on the Details tab of the meeting event in your calendar.
Change my photo

Need more help?
Want more options.
Explore subscription benefits, browse training courses, learn how to secure your device, and more.

Microsoft 365 subscription benefits

Microsoft 365 training

Microsoft security

Accessibility center
Communities help you ask and answer questions, give feedback, and hear from experts with rich knowledge.

Ask the Microsoft Community

Microsoft Tech Community

Windows Insiders
Microsoft 365 Insiders
Was this information helpful?
Thank you for your feedback.
Salesforce is closed for new business in your area.
IMAGES
VIDEO
COMMENTS
Present your slides. If you're already in a Teams meeting, select Share and then under the PowerPoint Live section, choose the PowerPoint file you're wanting to present. If you don't see the file in the list, select Browse OneDrive or Browse my computer. If your presentation is already open in PowerPoint for Windows or Mac, go to the file ...
Present your slides. If you're already in a Teams meeting, select Share and then under the PowerPoint Live section, choose the PowerPoint file you're wanting to present. If you don't see the file in the list, select Browse OneDrive or Browse my computer. If your presentation is already open in PowerPoint for Windows or Mac, go to the file ...
In this article I am using the Teams app in Windows 10. The seven options are: Share your entire screen/desktop. Share the Slide Show window. Share the editing window with a clean look. Run the Slide Show in a window and share that window. Use the PowerPoint sharing option in Teams. Use Presenter View to show the audience your slides while you ...
In this step-by-step tutorial, learn how to best present Microsoft PowerPoint slides in Microsoft Teams.⌚ Timestamps0:00 Introduction1:58 Example of the prob...
Sharing computer sound lets you stream audio from your computer to meeting participants through Teams. You can use it to play a video or audio clip as part of a presentation. To share sound, select Share content in your meeting controls and then Include computer sound (it's the switch on the top right of your sharing options). All sound from ...
PowerPoint Live transforms your presenting experience - only in Microsoft Teams. PowerPoint is used around the world to share compelling stories—from personal to professional. As the world shifted to working remotely, we all faced new challenges presenting without a live audience. Reading the room, seeing people's expressions, and natural ...
Join a Teams meeting before clicking the Present in Teams button in PowerPoint for Windows. Be using an Office 365 E3/A3, Office 365 E5/A5, or Microsoft 365 for Government license. Availability. This feature is rolling out over the next several days to Insiders running Beta Channel Version 2104 (Build 13926.20000) and later. Feedback
The combined power of cameo in PowerPoint Live and Teams helps you easily create personalized and engaging presentations. PowerPoint cameo empowers full customization of how and where you want to appear on each of your slides. It helps you communicate effectively with audiences whether they are in-person or remote.
Open your PowerPoint presentation and launch in slideshow mode—go to the Slide Show tab and select From Beginning or From Current Slide . Minimize the small window in the bottom right corner (or reposition it as needed). Present your PowerPoint slideshow. When you finish your presentation, open Microsoft Teams and click Stop sharing .
Join a Teams meeting or start an ad-hoc Teams call. Open your presentation in PowerPoint for Windows or Mac. Click on the "Share" button in the top right corner of the screen. Under the "PowerPoint Live" section, choose the PowerPoint file you want to present. If you don't see the file in the list, select "Browse OneDrive" or ...
PowerPoint presentations will be in the list once you edit or open the PowerPoint presentation in Teams or OneDrive (there may be some short delay). Generally it applies to the next meeting you join. ... You may have to adjust settings to turn on allowing Teams to display over other apps. After that one you may have reshare the screen. And you ...
Learn how to share PowerPoint Slides in Microsoft Teams the correct way. There are different ways to present your PowerPoint slides in a Teams meeting. In th...
First, have your PowerPoint file open and start the presentation the way you normally would. Now, Alt-Tab (Command-Tab on Mac) back to your Teams meeting and share the PowerPoint window—not the whole screen. Alt-Tab back to PowerPoint. And here's where the magic happens: right-click on your slide and click Use Presenter View.
Learn how to present in Microsoft Teams with Dynamic View and Presenter Mode. These new Features in Teams 2021 help make more engaging Teams presentations. P...
QUICK LINKS: 00:28 — Video playback challenges when sharing your desktop. 01:24 — The solution using web streaming. 01:58 — Using PowerPoint Live to share and synchronize video playback. 02:22 — Demo: adding online videos using PowerPoint on the web. 03:34 — Demo: Microsoft Teams meeting experience for the presenter and other participants. 04:29 — Demo: Using PowerPoint desktop to ...
After your meeting starts, at the upper-right corner of Teams, select Share content to choose a Presenter mode and other options. Under Presenter mode, choose the mode that you want. Also, be sure that your camera is turned on. Before starting the presentation, select Customize and choose a background image. To start your presentation, choose ...
Here are 5 tips to get the most out of your presentations in Microsoft Teams. 1. Presenter View on. We all love to take a peek at our notes from time to time and doing so on a Teams meeting is ...
Keeping students focused on learning can start with an engaging presentation. Today, we're kicking off Microsoft Ignite, an annual event held virtually this year, with some exciting new Microsoft Teams features to help presenters deliver impactful presentations and provide meeting participants with dynamic experiences to keep them engaged.. Dynamic view intelligently and dynamically arranges ...
Dave is one of fewer than ten people in North America recognized by Microsoft with the Most Valuable Professional Award for his contributions to the Excel, PowerPoint, and Teams communities. His articles and videos on virtual presenting have been viewed over 4.8 million times and liked over 17,000 times on YouTube. View all of Dave Paradi's posts.
In Teams share the screen that has the slides on it; Deliver your presentation; Full detailed article. I have an article with full details, including screen captures, on PowerPoint Presenter View with 2 screens on a Mac. Video. The steps are very similar to using 2 screens in Zoom because sharing a screen is similar in Teams or Zoom.
Plan the content. When planning your content, outline the key points you want to cover. Break down the presentation into sections and decide who will handle each part. Make sure the content flows logically from one section to the next. This planning phase is crucial for a cohesive presentation. 4.
If you're leading a presentation and need to share your PowerPoint slides during a Microsoft Teams meeting, here's how: • Once your meeting is active, select...
With Presenter View on Teams, teachers can utilize the notes and annotations to help explain concepts, reinforce essential concepts, and keep the students engaged throughout the presentation. Some students might find it easy to follow the teacher's notes and images during the presentation, while others might prefer to have them in-hand afterward.
Hi all, when trying to share a Powerpoint presentation in a Teams call using Powerpoint Live, it opens the incorrect file, or more to the point, an incorrect or previous version of the file. I have renamed the file by adding 'v2' to the file name (to allow for easier navigation), saved the file and closed Powerpoint.
Manchester United won the FA Cup on Saturday, defying the odds to defeat overwhelming favorite Manchester City 2-1 and deny its crosstown rival back-to-back league and cup doubles. A week is a ...
Manchester United are FA Cup winners for the 13th occasion in the club's history after beating Manchester City 2-1 in the 2024 final at Wembley Stadium. The Reds will now enter the Europa League ...
The Boston Business Journal features local business news about Boston. We also provide tools to help businesses grow, network and hire.
Present your slides. If you're already in a Teams meeting, select Share and then under the PowerPoint Live section, choose the PowerPoint file you're wanting to present. If you don't see the file in the list, select Browse OneDrive or Browse my computer. If your presentation is already open in PowerPoint for Windows or Mac, go to the file ...
Turn on Meeting Coach. Share your PowerPoint deck. For instructions on how to start sharing, read Share PowerPoint slides in a Teams meeting. Beneath the current slide, select Meeting Coach. Near the top of the screen, you'll see suggestions for improving your delivery.
Lead generation is the process of building interest in a product or service and then turning that interest into a sale. Lead gen makes the sales cycle more efficient because it focuses on the strongest and most valuable prospects. The result is greater success in new customer acquisition and conversion rates. There are three types of leads: