- Online Text to STL
- 3D Printed Soldering Helper
- 3D Printed Coin Vault
- 3D Printed FLARE GUN (PROP/REPLICA) MULTI PART
- 3D Printed Mini Container with PET Bottle Cap Size

TEST 3D PRINTS
Easy & Fun Things to 3D Print

How To Make DIY Pen Plotter / Homework Writing Machine at Home
This Drawing Robot/Pen Plotter/Drawing Machine is similar to the commercially available AxiDraw. It is powered by an Arduino Uno controller, uses a CNC Shield, and GRBL firmware.
The cost to build the Drawing Robot is between $75 and $100 depending on where you buy your parts and whether you already own some of the parts such as the Arduino.
Parts and Materials Required
- 2 x Nema 17 Stepper Motors
- 2 x Linear Rod M8 x 450mm for X Axis
- 2 x Linear Rod M8 x 350mm for Y Axis
- 2 x Linear Rod 3mm for Z Axis (you can get it from old CDROM)
- 1 x Threaded Rod M8 x 480mm
- 8 x LM8UU Bearings
- 1 x Servo Sg90
- 1 x Spring 5m (from ball point pen)
- 2 x GT2 Pulley, 16 teeth
- 5 x Bearing 624zz
- 1 x 2000mm GT2 belt
- 1 x Arduino Uno
- 1 x CNC Shield
- 2 x A4988 Stepper driver with heatsink
- 6 x Jumpers
- 1 x 12V 2A Power Supply
- 4 x 5/16in-18
- 13 x Phillips M3-0.5 x 16mm
- 4 x Phillips M3-0.5 x 6mm
- 5 x Phillips M4-0.7x 35mm
- 1 x Hex M3-0.5 x 20mm
- 4 x 5/16in washer
- 4 x M3 washers
3D Printing
- Download the files from Thingiverse
- Open the 3D models in Cura or any other slicer(Sli3er, Simplify 3D, etc.)
- Use 75% infill on all the parts (An infill of 70 – 100% will work as well)
- Printed all the parts with 0.10 – 0.20 mm layer height
- Printed with Hatchbox Red PLA
- Use supports on the Penholder, Slider, X_Support_L and the X_Support_R
Note: The longest part took around 9hrs and the shortest took 30 minutes to print
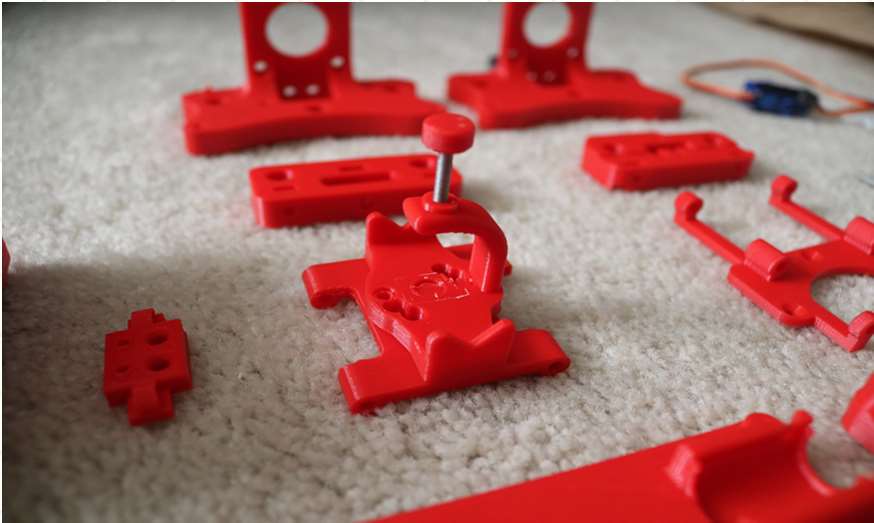
3D Printed Parts
Cut your Linear Rods
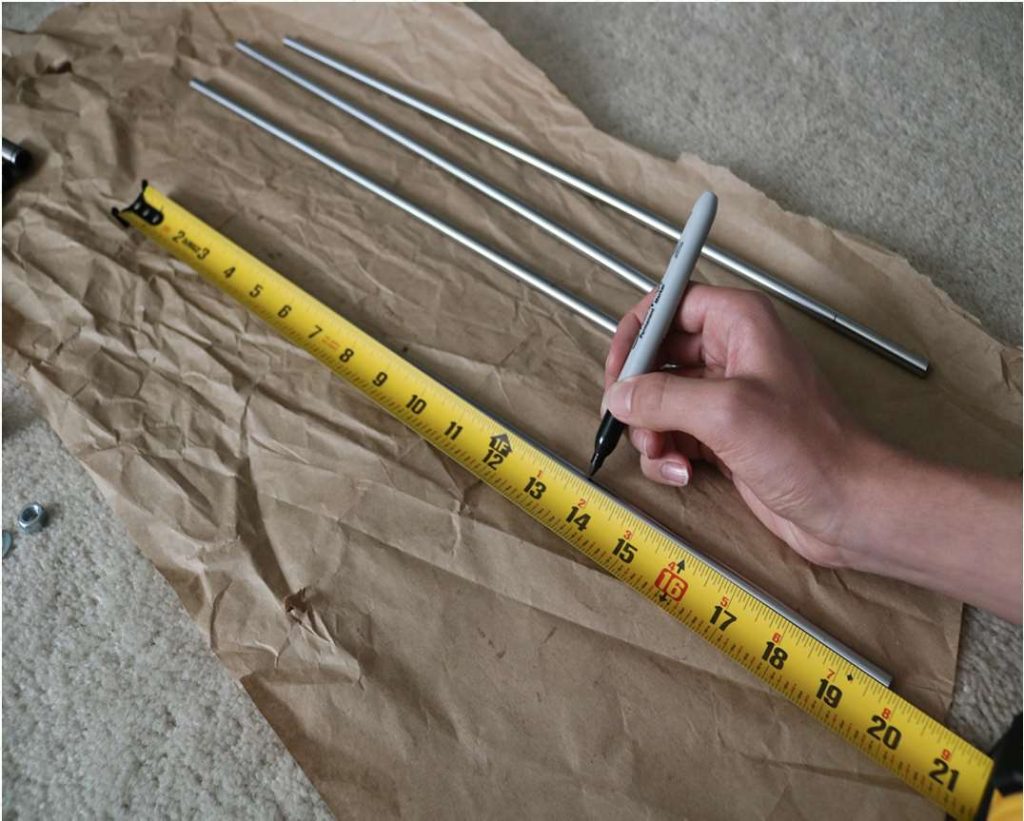
Use a measuring tape and sharpie to mark the spots where the rods need to be cut
- Use a vise to hold the rods in place when you cut them
- Remember that you need (2) 350mm and (2) 450mm long linear rods
- On the threaded rod, mark your cutting point at 470mm
Assemble the X-Axis (Linear/Threaded Rods)
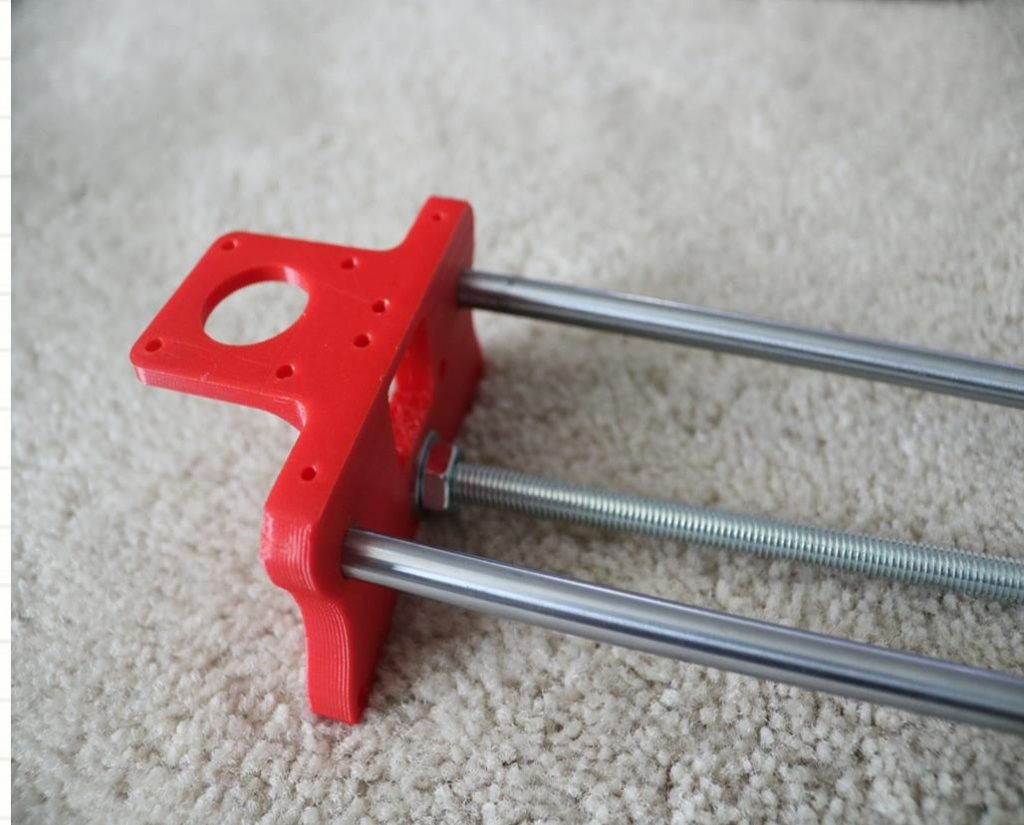
Take the (2) 450mm linear rods and insert them into either x-support part
- Use may need to use a round file to smooth out the holes that you insert them in
- Also, you can use a rubber mallet to help insert the rods
Now take the threaded rod and insert it in the hole below. Feed a 5/16in washer and 5/16in nut on both sides of the x-support part
Assemble the X-Axis (Bearings)
Now you want to push the LM8UU bearings into their place on the top and bottom clamshell (The top and bottom clamshell take (4) bearings each)
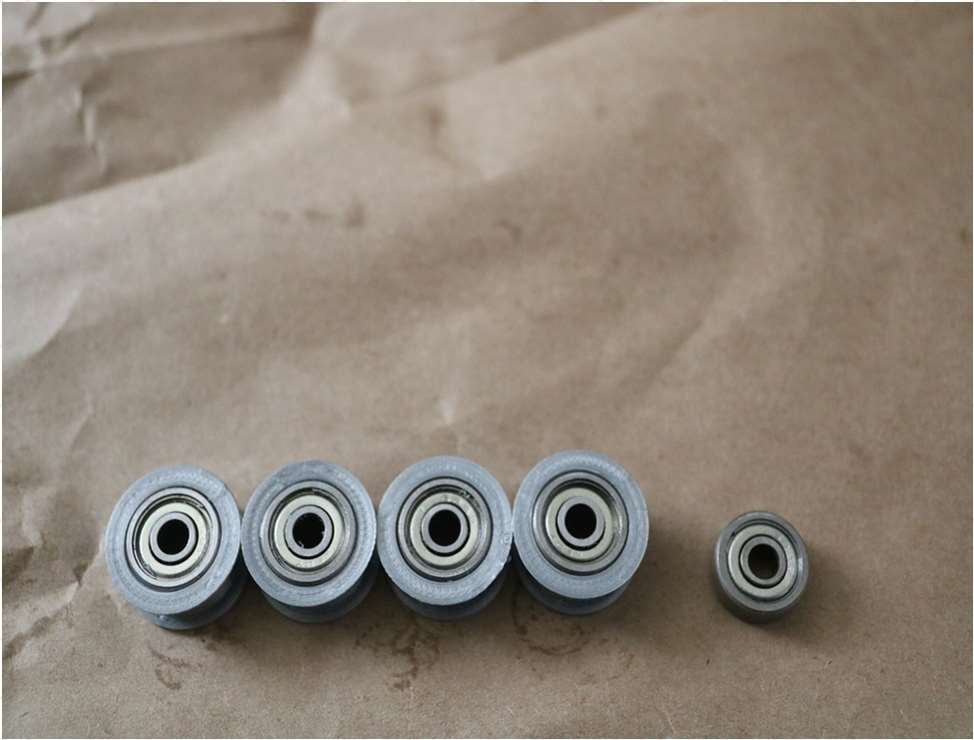
Take (4) 624zz bearings and push them through the 3D-printed idler pulleys. Leave the 5th bearing for later when you assemble the Y-axis
Assemble the X-Axis (Carriage)
- Get (4) M3-0.5 x 20mm screws, (4) M3 nuts, (4) M3 washers and (4) 624zz bearings with the idler pulleys installed
- Take one screw and feed a washer through it, the washer will rest on the bearing. The nut will be at the bottom of the carriage, which will secure the bearing in place

Assemble the X-Axis (X-Support)
- Slide the clamshell through the 450mm (X-axis) linear rods
- Use a rubber mallet again to attach the last X-support on the linear rods
- Make sure that the rods stick out equally on both sides
- Slide the other end of the threaded rod through the hole on the X-support
- Put on the last set of nuts and washers to hold the X-support in place
- Now that the X-axis is complete, you can use (2) Phillips M3-0.5 x 16mm screws per X-support to help keep the linear rods from sliding
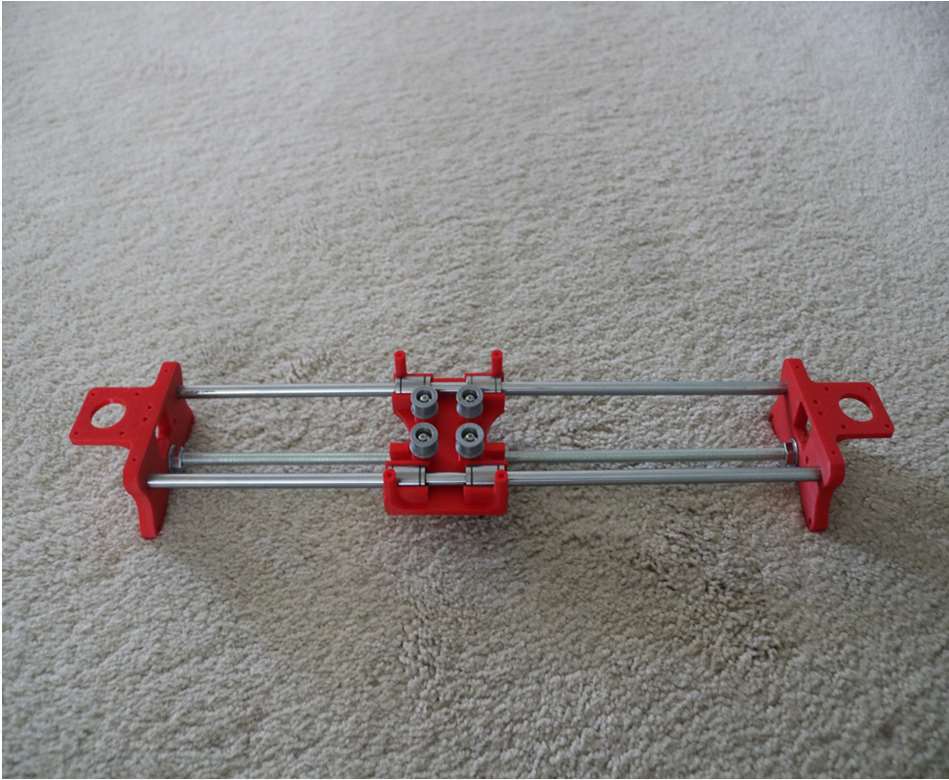
Assemble the X-Axis (Stepper Motors)
- Use an appropriate sized allen wrench to attach the 16 teeth pulleys on the stepper motor shafts
- Flipping the entire chassis around will make it easier to attach the stepper motors
- Use (8) M3-0.5 x 6mm screws and a Phillips screwdriver to attach the (2) stepper motors
Assemble the Y-Axis (Clamshell)
(Optional if you have problems keeping belt on bearings)
- Grab (4) M4-0.5 x 35mm screws and (4) M4 nuts
- Make sure that you have the (4) idler pulleys ( Download from Thingiversa ) and the (4) washers printed
- Insert the washers in between the two clamshells, with a screw in between
- Screw the top and bottom clamshells together
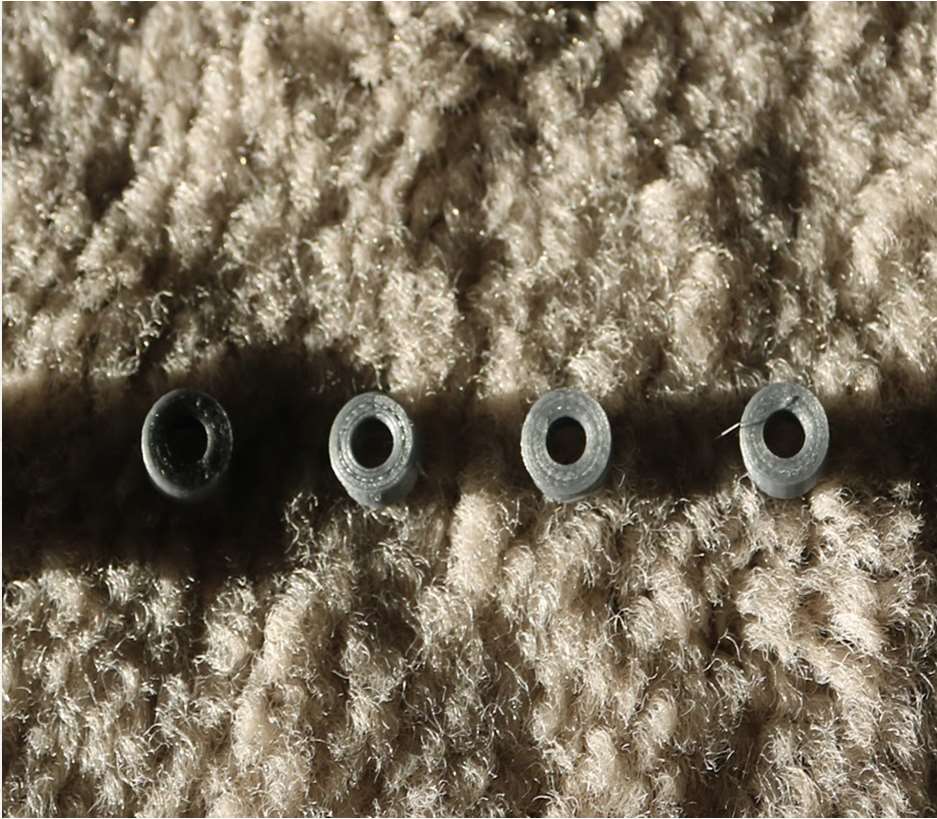
Assemble the Y-Axis (Y- Back/Front)
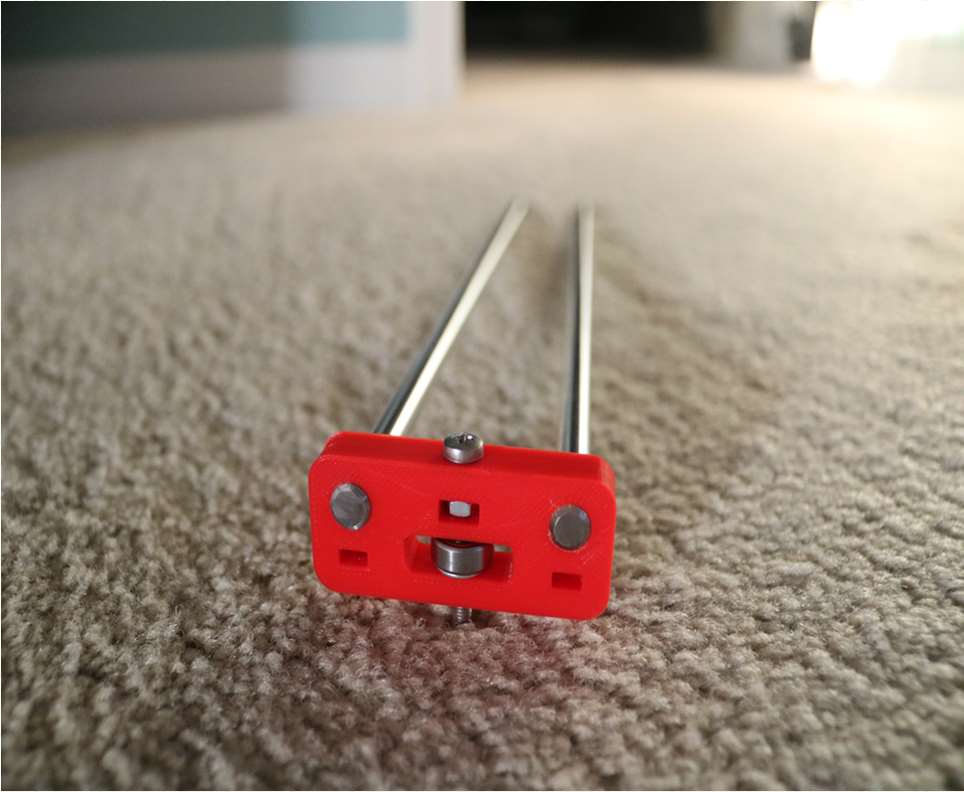
- Take the (2) 350mm linear rods and insert them the Y-back piece by using a rubber mallet
- Get (1) M4-0.5 x 35 screw, (1) M4 nut and the 5th 624zz bearing
- Get (2) M3-0.5 x 16 screws to secure the linear rods
- Slide in the bearing when inserting the screw through the Y-back piece
- Slide the the linear rods/Y-back piece through the LM8UU bearings and attach the Y-front piece using a rubber mallet
Assemble the X-Y Axis (Belt)
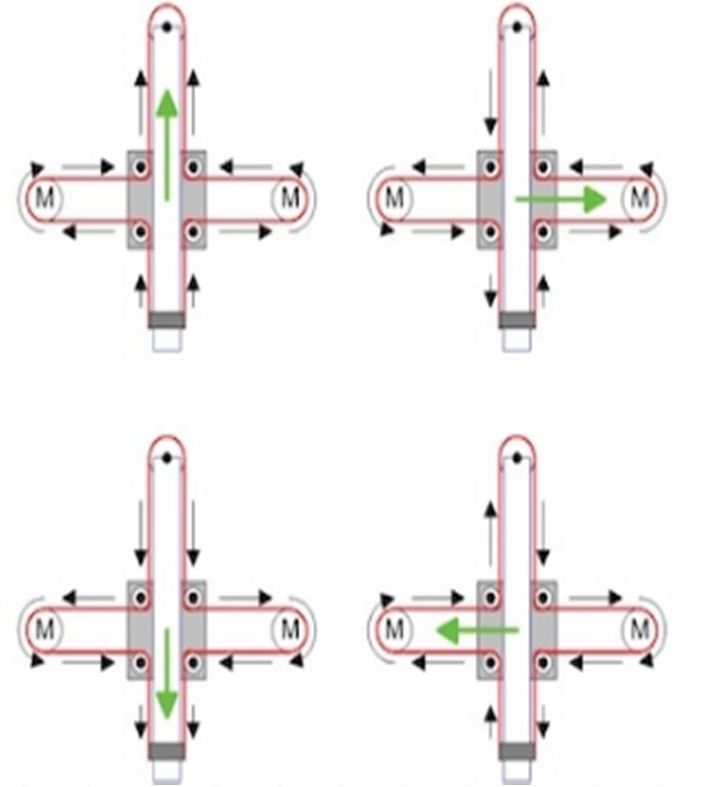
- Use a pair of needle nose pliers to help guide the GT2 belt more easily through the clamshell
- Take the two ends of the belt and slide them through the “teeth” on the Base Slider
- The belt should be tight and not loose
- Note that once the GT2 belt is on, it is normal for the clamshell not to move easily
Belt Diagram
Assemble the Z-Axis
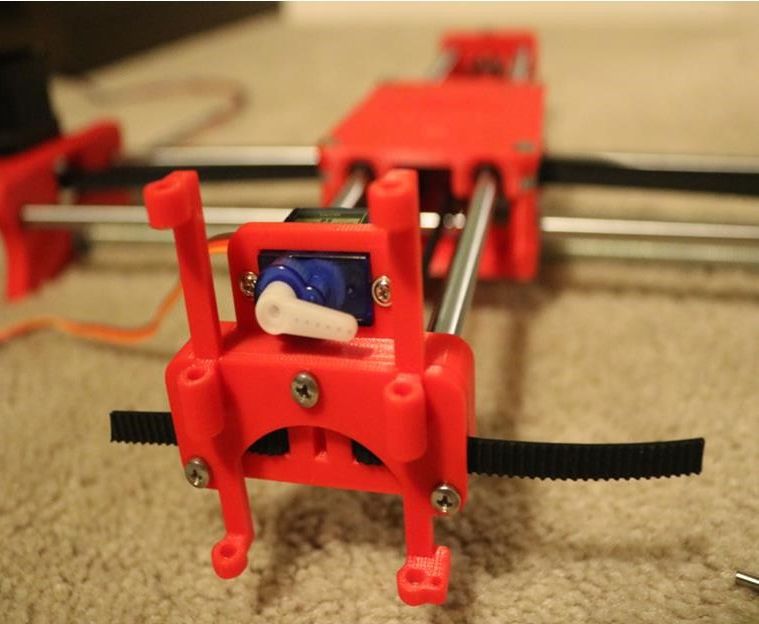
- Get (2) 3mm linear rods and the following 3D printed parts (Slider, Pen Holder, Base Slide, 3MM Metric Thumb Screw)
- Get (1) Hex M3-0.5 x 20mm screw and the Metric Thumb Screw and push them together. Use superglue to keep it together.
- Get (3) M3-0.5 x 16mm screws which you will use the secure the Base Slide to the Y-Front part. You may need to use (3) M3-0.5 nuts in order to hold it in place
- Push the Slider and Pen Holder together to make one piece
- Now take that new part and the (2) 3mm linear rods and slide the rods through the holes. Place a small spring in between the two parts so there is a little bit of pressure to lift the Slider. You may need to cut the spring a bit until there is an adequate amount of pressure on the slider.
Step By Step Video
The Original Instructions by Henry Arnold Jonathan K
- 3D Printed Hairy Lion →
12 thoughts on “ How To Make DIY Pen Plotter / Homework Writing Machine at Home ”
i constructed all the machine but when i press X+ the both X and Y axis are moving what is the problem
double check the steppers wiring
Have you solved it? I have the same problem with my machine, when I press X+, it’s necessary both motors move at same time, but, only one of them move…
Did you solve this problem?
Same problem how to solve ,?
Is it true that you didn’t use the microswitches in the final design?
Hello how to co figurę this machine to RUN on GRBL. What I mean is that GRBL interprets commands for x axis and y axis independently and if I look on your belt diagram it looks like both Motors have to run at the same time in order to move the carriage along y axis… How did you do that?
Have you solved it?
Thank you, thank you. It’s a very good built.
Is it possible to modify it to draw using brush ang oil based paint ?
Could you please tell what software/plug in and which version do you use to generate g-code for this machine?
Hello, what is the width of your belt? 6mm or 10mm? Thanks!
Leave a Reply Cancel reply
Your email address will not be published. Required fields are marked *
Save my name, email, and website in this browser for the next time I comment.
Embed the widget on your own site
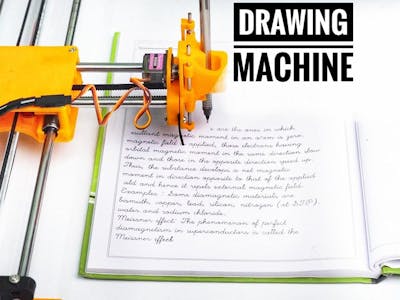
Drawing Robot/Pen Plotter/Drawing Machine is an Open Hardware version of the famous machine AxiDraw which it is a pen plotter, capable of wr

Make DIY Homework Writing Machine at Home
Step 1: parts and materials required, step 2: 3d printing, step 3: assemble the x-axis, step 4: assemble the x-axis bearing, step 5: assemble the y-axis.
- Step 6: Assemble the X-Y Axis (Belt
Step 7: Assemble the Z-Axis
Step 8: electronics, step 9: software, step 10: drawing machine at work.
- Comments (8)

Things used in this project
- Buy from Newark
- Buy from store.arduino.cc
- Buy from Adafruit
- Buy from Arduino Store
- Buy from CPC

Software apps and online services

Hand tools and fabrication machines

Drawing Robot/Pen Plotter/Drawing Machine is an Open Hardware version of the famous machine AxiDraw which it is a pen plotter, capable of writing or drawing on almost any flat surface. It can write with pens, permanent markers, pencils, and other writing implements to handle an endless variety of applications.
Its unique design features a writing head that extends beyond the machine, making it possible to draw on objects bigger than the machine itself. The biggest advantage of the machine is that it can be placed over the book because of the core XY extending design of the machine.
This Drawing Robot/Pen Plotter/Drawing Machine is similar to the commercially available AxiDraw. It is powered by an Arduino Uno controller, uses a CNC Shield, and GRBL firmware
The cost to build the Drawing Robot is between $75 depending on where you buy your parts and whether you already own some of the parts such as the Arduino.
You can find all of my projects on https://www.diyprojectslab.com/
Maximum drawing area 24 * 30 CM.
Thank You NextPCB
This project is successfully completed because of the help and support from NextPCB. Guys if you have a PCB project, please visit their website and get exciting discounts and coupons.
Free shipping 0$ PCB Prototype: https://www.nextpcb.com/pcb-quote?act=2&code=Romeo...
Thanksgiving Christmas lucky draw 100% win: https://www.nextpcb.com/christmas-lucky-draw?code...
2 x Nema 17 Stepper Motors Amazon.com
2 x Linear Rod M8 x 450mm for X Axis Amazon.com
2 x Linear Rod M8 x 350mm for Y Axis Amazon.com
2 x Linear Rod 3mm for Z Axis (you can get it from old CDROM)
1 x Threaded Rod M8 x 480mm8 x LM8UU Bearings Amazon.com
1 x Servo Sg901 x Spring 5m (from ball point pen) Amazon.com
2 x GT2 Pulley, 16 teeth Amazon.com
5 x Bearing 624zz Amazon.com
1 x 2000mm GT2 belt Amazon.com
1 x Arduino Uno Amazon.com
1 x CNC Shield Amazon.com
2 x A4988 Stepper driver with heatsink Amazon.com
6 x Jumpers Amazon.com
1 x 12V 2A Power Supply Amazon.com
- 4 x 5/16in-18
- 13 x Phillips M3-0.5 x 16mm
- 4 x Phillips M3-0.5 x 6mm
- 5 x Phillips M4-0.7x 35mm
- 1 x Hex M3-0.5 x 20mm
- 4 x 5/16in washer
- 4 x M3 washers
Download the files from Thingiverse
Open the 3D models in Cura or any other slicer.
Use 75% infill on all the parts (An infill of 70 – 100% will work as well)
Printed all the parts with 0.10 – 0.20 mm layer height
Printed with PLA
Use supports on the Penholder, Slider, X_Support_L and the X_Support_R
Note: The longest part took around 10hrs and the shortest took 30 minutes to print
PLA is fine for this design. I print at 200C on BuildTak. None of the parts require rafts or brims. I suggest supports only for the pen holder and the Z axis end plate which is standing up.
Remember that you need (2) 350mm and (2) 450mm long linear rods
Take the (2) 450mm linear rods and insert them into either x-support part
- Use may need to use a round file to smooth out the holes that you insert them in
- Also, you can use a rubber mallet to help insert the rods
Now take the threaded rod and insert it in the hole below. Feed a 5/16in washer and 5/16in nut on both sides of the x-support part
Now you want to push the LM8UU bearings into their place on the top and bottom clamshell (The top and bottom clamshell take (4) bearings each)
Take (4) 624zz bearings and push them through the 3D-printed idler pulleys. Leave the 5th bearing for later when you assemble the Y-axis
Assemble the X-Axis (Carriage)
- Get (4) M3-0.5 x 20mm screws, (4) M3 nuts, (4) M3 washers and (4) 624zz bearings with the idler pulleys installed
- Take one screw and feed a washer through it, the washer will rest on the bearing. The nut will be at the bottom of the carriage, which will secure the bearing in place
Assemble the X-Axis (X-Support)
- Slide the clamshell through the 450mm (X-axis) linear rods
- Use a rubber mallet again to attach the last X-support on the linear rods
- Make sure that the rods stick out equally on both sides
- Slide the other end of the threaded rod through the hole on the X-support
- Put on the last set of nuts and washers to hold the X-support in place
- Now that the X-axis is complete, you can use (2) Phillips M3-0.5 x 16mm screws per X-support to help keep the linear rods from sliding
- Take the (2) 350mm linear rods and insert them the Y-back piece by using a rubber mallet
- Get (1) M4-0.5 x 35 screw, (1) M4 nut and the 5th 624zz bearing
- Get (2) M3-0.5 x 16 screws to secure the linear rods
- Slide in the bearing when inserting the screw through the Y-back piece
- Slide the the linear rods/Y-back piece through the LM8UU bearings and attach the Y-front piece using a rubber mallet
Step 6: Assemble the X-Y Axis (Belt)
- Use a pair of needle nose pliers to help guide the GT2 belt more easily through the clamshell
- Take the two ends of the belt and slide them through the “teeth” on the Base Slider
- The belt should be tight and not loose
- Note that once the GT2 belt is on, it is normal for the clamshell not to move easily
- Get (2) 3mm linear rods and the following 3D printed parts (Slider, Pen Holder, Base Slide, 3MM Metric Thumb Screw)
- Get (1) Hex M3-0.5 x 20mm screw and the Metric Thumb Screw and push them together. Use superglue to keep it together.
- Get (3) M3-0.5 x 16mm screws which you will use the secure the Base Slide to the Y-Front part. You may need to use (3) M3-0.5 nuts in order to hold it in place
- Push the Slider and Pen Holder together to make one piece
- Now take that new part and the (2) 3mm linear rods and slide the rods through the holes. Place a small spring in between the two parts so there is a little bit of pressure to lift the Slider. You may need to cut the spring a bit until there is an adequate amount of pressure on the slider.
ELECTRONICS
I prefer you can use Arduino uno CNC Shield
Ready to your all circuit
1) 4pcs A4988 Stepper Motor Driver
2) Expansion Board A4988 Driver
3)Arduino UNO First of all take hit sink and stick on A4988 motor Driver.
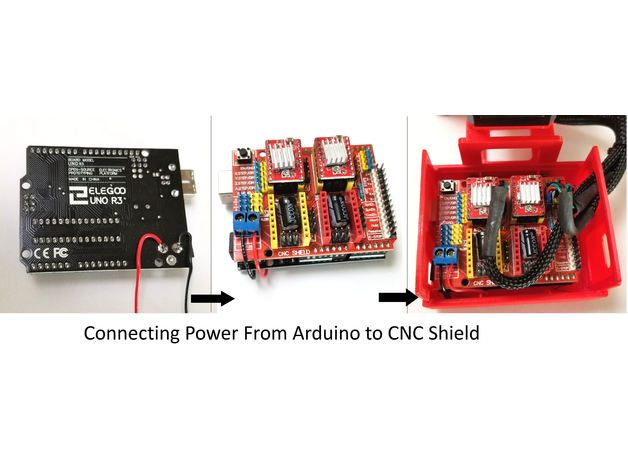
4pcs A4988 Stepper motor driver connect on expansion board A4988 driver module, then connect the arduino with expansion board and connect all wiring The shield also has a built-in micro stepping control - meaning that instead of using full steps or half steps like a large CNC would do, we can make the motors move by 1/16 or 1/32 of a step to make the laser move with the maximal precision possible. However, the motors will consume more electricity: they will get hot quicker.
To use the micro stepping modes, short some of the mode pins together. Different combinations give different resolutions. Take a look at the chart for the different configurations possible. When the shield is programmed, add the A4988 drivers to it and wire up the rest of the electronics.
To find the coils of the stepper motors, use a multimeter. If there's resistance between the two wires, you have a coil. On the schematic, the coils are represented by two wires of the same color.
Inkscape which is the graphics design software (draw or import graphics)
Inkscape MI GRBL Extension (convert graphics to G-Code)Universal G Code Sender (sends the G-Code to the robot causing drawing motion)GRBL which is the Arduino firmware (programmed into the Arduino Uno)
Arduino: https://www.arduino.cc/en/software
Universal G-code sender: https://winder.github.io/ugs_website/...
Inkscape: https://inkscape.org/release/inkscape..
4xiDraw & km laser: https://drive.google.com/file/d/1YO8-...
Processing: https://processing.org/download/
drawing to G-code processing: https://drive.google.com/file/d/1PIFx...
watch video for full setup
hookup_QLVR1z3Ob1.jpg
DIY Projects Lab
Related channels and tags.

- home automation
Simple, modern, and precise pen plotters
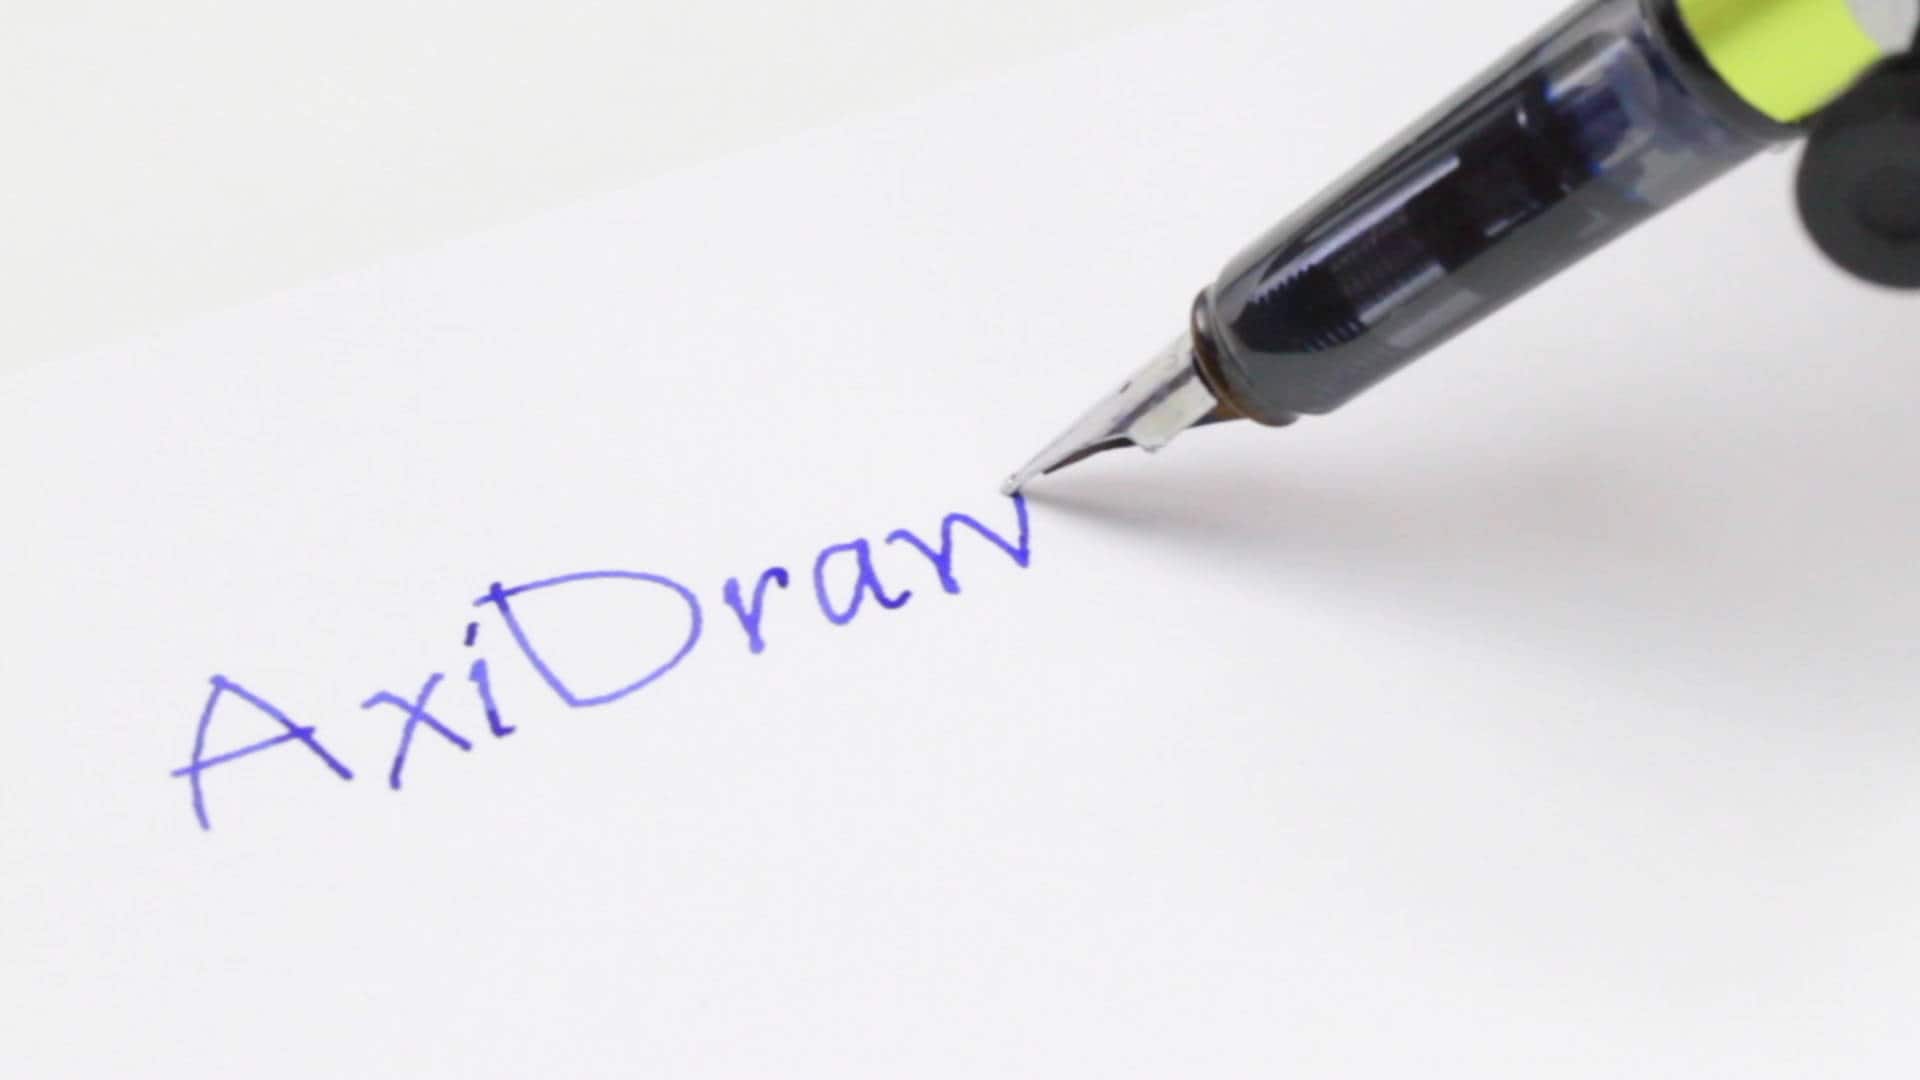
Axidraw machines work with a variety of writing instruments, including permanent markers and fountain pens. the unique writing head extends beyond the base of the machine, making it possible to write or draw on almost any flat surface. axidraw is the real deal: designed, manufactured, and supported in usa, and backed by exclusive software for realistic handwriting and automation..
Watch the video >
AxiDraw Models
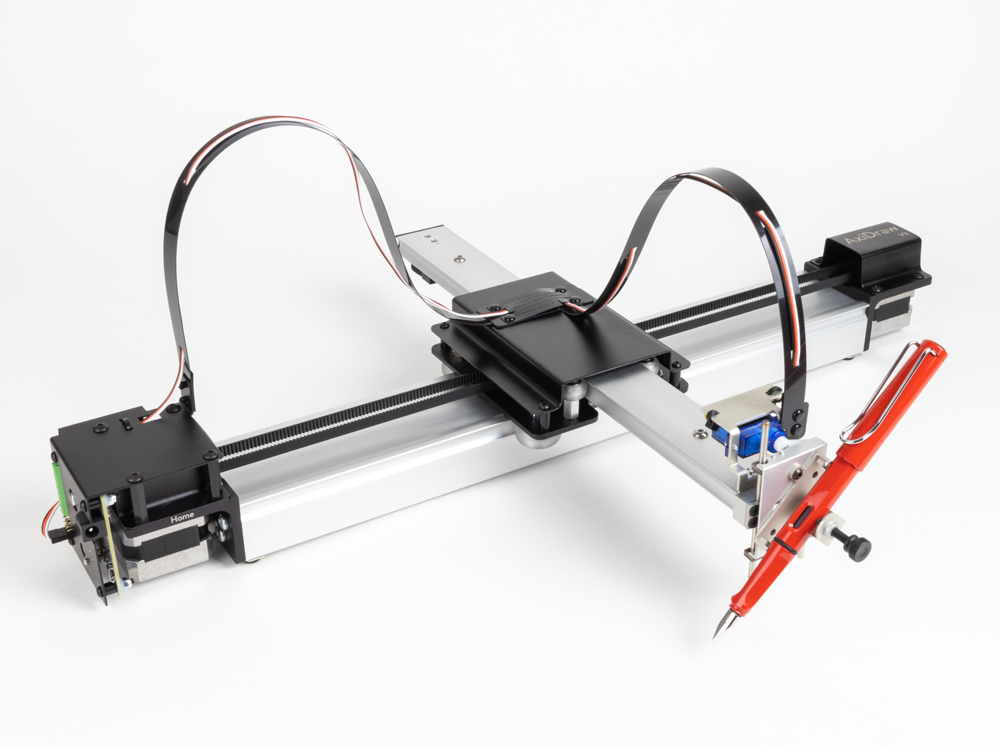
Compact and popular
- 8½ × 11” / A4 Plot Area
- Sturdy aluminum construction
- Our most popular model
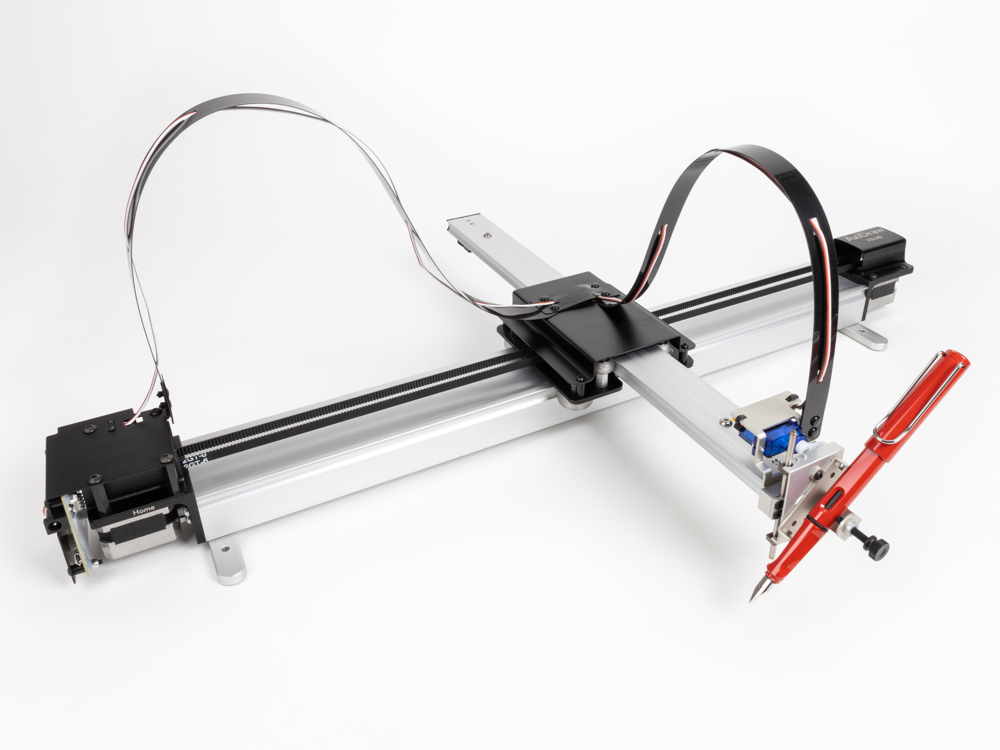
AxiDraw V3/A3
Larger plot area.
- 11 × 17” / A3 Plot Area
- Extended feet for stability
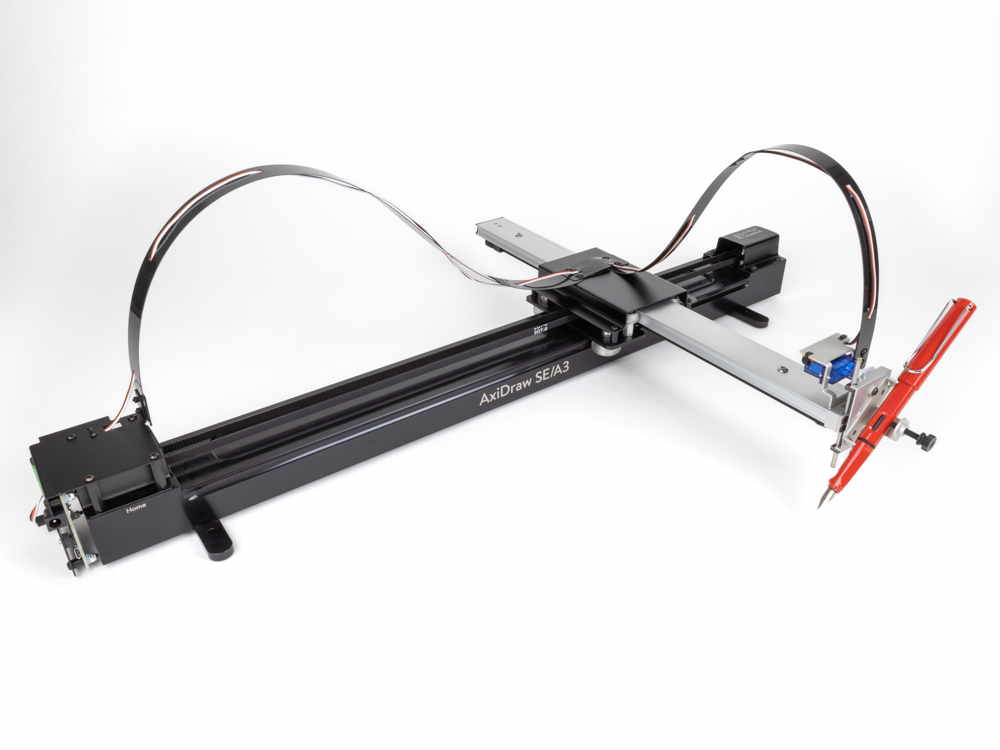
AxiDraw SE/A3
Special edition.
- CNC milled solid aluminum base
- Additional accessories included
Additional AxiDraw models and accessories are available at Evil Mad Scientist
Where to buy AxiDraw
AxiDraw machines are available for purchase directly from Evil Mad Scientist as well as from select distributors:

Frequently Asked Questions
The AxiDraw is a pen plotter, which is a type of simple robot. Its sole function is to guide a pen (or other implement mounted in the pen holder) along the set of vector lines, curves, and paths that you ask it to follow. Everything that the machine is ultimately capable of, such as drawing graphics, writing text, or signing documents, are expressions of this basic function. It is capable of drawing essentially anything that can be composed from a set of lines.
In practice, this is much like using a traditional printer, except that you need to take care that your documents are made of paths, rather than pixels.
The AxiDraw is an extremely versatile machine, designed to serve a wide variety of everyday and specialized drawing and writing needs. You can use it for almost almost any task that might normally be carried out with a handheld pen.
AxiDraw does not require proprietary pens or ink: you can use your own pens, chosen within certain guidelines.
AxiDraw can hold most types of pens and similar instruments up to 5/8" (16 mm) diameter. (A larger XL Pen Clip is available as well to fit larger pens.)
Good choices for pens to use include fountain pens, permanent markers, liquid-ink rollerball pens, technical pens, small-bodied whiteboard markers and other writing and drawing instruments that do not require significant downward pressure. While we refer to writing and drawing instruments as “pens” to be concise, other instruments such as automatic pencils (particularly with soft lead), chalk, charcoal, and brushes can also work well in many cases.
You can read more about pen choices in our documentation here .
AxiDraw does not require special paper; you can use almost any kind and size of paper. (You can even use all kinds of things that are not paper.)
The XY travel (printable area) of the AxiDraw V3 is just over that of both US letter (8½ × 11”) and A4 paper sizes. The larger size models have about twice this travel.
You can work with any size of paper up to the size of the travel area. You can write directly onto small pieces like business cards (or a whole array of them), medium size pieces envelopes and note cards, or sheets of paper.
You can also work with paper larger than the travel area. The unique design of the AxiDraw features a drawing head that extends beyond the body of the machine, making it possible to also draw on flat objects bigger than the machine itself. For example, you can set it right on top of a box to write an address. You can even set it on top of a poster board, chalkboard, or whiteboard to draw graphics in place.
For most applications, the standard-size AxiDraw V3 is the best choice. It's compact so that it fits on your desk more easily, and has enough plotting area to cover any size up to 8½ × 11” / A4.
The larger AxiDraw V3/A3 has twice the plotting area and is perfect for people who need to plot larger items, or to fit two smaller items — like two US Letter or A4 pages side by side, or a sheet of paper plus an envelope.
The Special Edition AxiDraw SE/A3 has the same plotting area as the V3/A3, but features a heavy, rigid base CNC machined from a solid block of Aluminum. It's our top-of-the-line machine, and includes a few nice accessories as well.
Available AxiDraw accessories include alternate pen holders, a tripod mount, a rigid mount that can be used instead of the pen slide, extended feet, extra clip easels, and magnetic workholding easels. You can find them listed here at Evil Mad Scientist.
AxiDraw requires a reasonably modern computer (Mac, Windows, or Linux) with an available USB port and internet access to download software.
Mac requirements: MacOS 10.7 or newer
Windows requirements: Windows 7 or newer
Linux requirements: Recent versions of Ubuntu and similar widely-supported distributions work well. If you are using an obscure or "challenging" distribution, we'll still do our best to help you out.
No. All standard AxiDraw models (V3, V3/A3, SE/A3) come complete, assembled, tested, and ready to use.
If you get a head start by reading the user guide and installing the software, you can be up and plotting five minutes after opening the box.
If you prefer a model that requires assembly, there is now also AxiDraw MiniKit 2 which comes as a kit.
Internet access is required only for downloading software and for access to online documentation.
Internet access is not required while preparing files or using AxiDraw.
A universal-input plug-in power supply is included with the AxiDraw. It accepts worldwide 100 V - 240 V input, and has a US/Canada style plug. For other regions, an inexpensive plug shape adapter will be needed.
No. Most users just make a file or drawing and plot it.
(That said, programming interfaces are available for those who are interested in them.)
You do not need to purchase any additional software to use AxiDraw.
AxiDraw is normally controlled through a set of extensions to Inkscape, the excellent, popular and free vector graphics program. Basic operation is much like that of a printer driver: you import or make a drawing in Inkscape, and use the extensions to plot your text or artwork. It's all handled through a straightforward graphical user interface, and works cleanly on Mac, Windows and Linux.
Yes, and we highly encourage you to do so. Reading the manual is a great way to determine if AxiDraw is a good fit for you.
The AxiDraw V3 family user guide is available for download here .
Unlike a (raster-based) inkjet or laser printer, the time that it takes a plotter to print a page is not fixed. Rather, it depends on the length of distance that the pen has to travel. The AxiDraw typically moves at about the speed of a human hand, depending on your settings, and the plotting time varies accordingly.
This question is much like asking how long a human takes to write or draw on a piece of paper: Addressing an envelope might typically take a minute or two, but complex artwork can potentially be a matter of hours. Such is the case as well for AxiDraw.
Yes. The speed of the AxiDraw is adjustable, depending on your tradeoff between faster completion and higher precision. AxiDraw can move quite quickly (faster than a human normally can) when making large strokes with a wide-tipped marker, but even a (human) calligrapher will slow down for higher neatness. The wedding invitation text in our video should give you a decent idea of typical writing speed when going for higher neatness; that example is a little slower than people normally write.
Yes! The best way to do that is by directly capturing your signature as you sign it, for example on a phone or tablet screen. That way, the AxiDraw can replay it just in the same way that you wrote it. Capturing a signature is covered in our documentation on handwriting, here .
We also have exclusive utilities, available to AxiDraw owners, that can add handwriting-like "defects" to your text. Text laid out in perfectly even rows (like what you get with a handwriting font in MS word) always looks a little too "robotic" to be handwriting.
No, not in the way that you might hope.
Yes, you can scan handwritten text, trace it with a bitmap tracing tool, and plot it. This is straightforward, and your AxiDraw will be more than happy to comply. (AxiDraw will plot the paths that you provide to it.)
However, and with only rare exceptions, automatic tracing of scanned handwriting creates a somewhat unpleasant imitation of handwriting, and we do not recommend this approach as part of any workflow.
You can read more about tracing scans in our documentation, here . (In brief: there are excellent ways to use the AxiDraw to reproduce handwriting, but starting with a scan is not one of them.)
Not at present, but it is something that we are looking into.
Some AxiDraw users do use various types of paper handling machines — sometimes printers with built-in paper feeders and sometimes commercial solutions. Professional print shops and companies that make equipment for them have many different ways of moving pieces of paper from point A to point B.
More commonly, for small scale use, AxiDraw users manually swap out paper clipped to small clipboard easels or use larger-size AxiDraw units that allow multiple pages to fit within the print area.
Yes; you can see a few examples here .
The key issues that you need to be aware of is that the fabric generally needs to be held taut, and you need to choose markers that don't easily catch on the fabric. It is likely that with care and experimentation you will be able to make it work.
Calligraphy is not the same in any sense as (for example) simply using computer fonts or plotting a drawing. Calligraphy generally involves individually sculpted letter shapes, and in many cases pen movements that are far more complex than AxiDraw can provide.
That said, some calligraphers do use AxiDraw for low-end busywork (say, addressing hundreds of place cards), saving some wear on their wrists and presumably passing along some of the cost savings.
The AxiDraw is designed for moving a pen, not a carving or cutting tool. It does not have the type of rigidity that you need for carving, nor the ability to apply significant downward force.
That said, a number of people have experimented with it. Here is one notable project, using the AxiDraw for cutting cardstock and vinyl.
AxiDraw can be used with whatever fonts are on your computer, so long as the text is converted to paths before plotting.
We have developed a special-purpose software application called AxiDraw Merge , which is a mail merge solution for AxiDraw.
Once you are set up with it, AxiDraw Merge can automatically (1) populate a template with data sourced from a CSV file, (2) render the text into handwriting-like stroke-based fonts, (3) add intentionally variations so that text does not lie upon straight lines, and (4) plot the document. It can also merge and plot subsequent pages upon a button press or after a time delay.
AxiDraw Merge is available to AxiDraw owners at no additional cost.
The AxiDraw is designed to work on flat surfaces, and we do not test them in the vertical orientation. That said, quite a few AxiDraw users have mounted theirs to the wall without apparent difficulty.
One issue to consider is that the AxiDraw's pen holder normally rests the pen on the writing surface by its weight alone. On the wall, you'll need an alternative to gravity for lowering the pen. The typical solution is a rubber band.
(1) We maintain a large and growing library at the AxiDraw Wiki Page , our central documentation site for all things AxiDraw. Our documentation is clear and comprehensive, with special sections to help you get up and running quickly.
(2) We have support forums for the AxiDraw, here .
(3) Most importantly: We're the designers and manufacturers of the AxiDraw, and we're here to help! Please don't hesitate to contact us directly.
AxiDraw does not have a duty cycle limit. You can run it all day long if you like.
The AxiDraw is designed to be serviceable for a long life. Components such as the drive belt, rolling wheels, ball bearings, and stepper motors can all be replaced in the unlikely event that it should become necessary. (And, those parts are actually available if you need them.)
One component on the AxiDraw is considered expendable and may need regular replacement in heavy duty (e.g., industrial) settings. The small pen-lift servo motor does wear out over time but is inexpensive and straightforward to replace. For heavy duty applications, you may wish to keep a spare on hand. We do also offer a performance upgrade option to a long-lasting brushless pen-lift servo motor , which also gives the AxiDraw a major speed boost.
No. While AxiDraw is most commonly controlled through a set of extensions to Inkscape, there are other methods of plotting including the command-line interface (CLI).
Many AxiDraw users do their design work in other programs, and use Inkscape as their "page setup" screen for plotting.
For real-time plotting in response to user input and for certain other generative applications, you can plot directly within Processing .
AxiDraw machines are designed, manufactured, and tested right at our facility in Sunnyvale, California.
Demos are available by appointment at our shop in Sunnyvale, CA. Please contact us to request an appointment.
We're open M-F, 12-6, and closed on US postal holidays.
The AxiDraw has two precision stepper motors in its base. Together, they drive a single looped belt that moves the carriage around in the XY plane. The high-performance linear stages feature custom-designed wheels that roll smoothly on custom aluminum extrusions, specially designed for high stiffness and light weight.
The pen-lift stage uses a separate mechanism: a smaller third motor, combined with a precise low-friction linear stage, serves to lift the pen off of the page.
In addition to the popular AxiDraw models listed above we do make a few other standard sizes, as well as custom-sized and custom-configured AxiDraw machines.
One notable version is the compact AxiDraw MiniKit 2 which comes as a kit.
If you need a compact AxiDraw that is not a kit, we do make an AxiDraw V3/B6 (with plot area of 190 × 140 mm, or 7.48 × 5.51 inches) that is available by special order.
We also make larger format and customized AxiDraw machines to order, including the AxiDraw SE/A2 and SE/A1 with plot area of 594 × 432 mm (23.4 × 17 inches) and 864 × 594 mm (34 × 23.4 inches), respectively. These larger machines typically require a custom shipping quote.
No; we do not offer any printing services.
Please contact us and ask; we're here to help.
Support Resources
Our AxiDraw documentation wiki is a continually growing library of resources for getting started with the AxiDraw, including a thoroughly detailed PDF user guide , support forum, a number of tutorials on specialty topics, and links to additional resources.

Personal support: We're here to help!
Having an issue? Need to know where to find something in the manual, or how to do something that isn't in the manual? Want to ask us about your application before deciding to purchase?
If so, please don't hesitate to contact us directly. Our goal is to provide personal, competent service both as you get set up and running, and for as long as you have your AxiDraw.
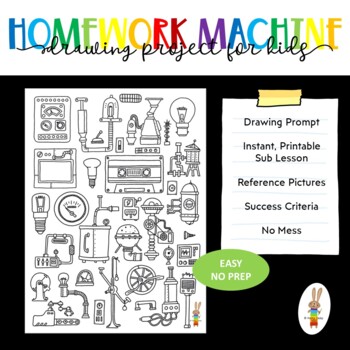
Homework Machine Drawing - Printable Art Lesson Plan
Also included in

Description
DESCRIPTION
- 5 page PDF printable art worksheet
- Homework Machine Drawing Prompt - instant printable art worksheet for the art room, the classroom, homeschooling or remote learning
- Students use their imagination to design a Homework Machine
- Good for a stand alone drawing project
- Use as an introduction to a larger art project or as a stand alone art activity.
- Use printable art worksheets as work for fast finishers or even for sub lessons .
- You may also like these Instant Art and Art History Printable Worksheets:
Cut and Colour your own Masterpiece: Frida Kahlo
Cut and Colour your own Masterpiece: Picasso Faces
Cut and Colour your own Masterpiece: Van Gogh's Sunflowers
Cut and Colour: Robots
Don’t miss out on freebies, flash sales and more!
Follow me on TPT
Find me on Instagram
Follow me on Pinterest
All graphics are created by Kerry Daley (c) 2021
T erms and Conditions Copyright © Kerry Daley. All rights reserved by author. This product is to be used by the original downloader only. Copying for more than one teacher, classroom, department, school, or school system is prohibited. This product may not be distributed or displayed digitally for public view. Failure to comply is a copyright infringement and a violation of the Digital Millennium Copyright Act (DMCA). Clipart and elements found in this PDF are copyrighted and cannot be extracted and used outside of this file without permission or license. Intended for classroom and personal use ONLY.
printable art worksheet, printable art activity,
printable art worksheet for kids, drawing worksheet for kids
homework machine printable art worksheet
printable art project
art projects for kids, drawing prompt
Questions & Answers
Kerry daley.
- We're hiring
- Help & FAQ
- Privacy policy
- Student privacy
- Terms of service
- Tell us what you think
This is a game built with machine learning. You draw, and a neural network tries to guess what you’re drawing. Of course, it doesn’t always work. But the more you play with it, the more it will learn. So far we have trained it on a few hundred concepts, and we hope to add more over time. We made this as an example of how you can use machine learning in fun ways. Watch the video below to learn about how it works, and
Built by Jonas Jongejan, Henry Rowley, Takashi Kawashima, Jongmin Kim, Nick Fox-Gieg, with friends at Google Creative Lab and Data Arts Team.

Homework Machine

Introduction: Homework Machine

The homework machine is an interactive tool to collect homework. It's a machine that stands in a class room. The kids can put there homework into the mouth of the machine. The kids have to do some teamwork, some of them operate the inside of the machine and others are watching thrue the window to guide the homework into the right direction. The homework can end in 1 of the 4 compartments with there own achievements. The homework machine is a stimulating and a fun way to make homework and collect it.
ideas, concepts, drawings, pictures, videos, documents, posters, comments, mock-up scale models, prototypes and machines that are developed in the context of MyMachine are the property of MyMachine vzw.
Unauthorized use and/or duplication of this material without express and written permission from MyMachine vzw is strictly prohibited. MyMachine vzw is a social profit organization that fosters creativity, entrepreneurship, open education and STEM in education.
www.mymachineglobal.org
Step 1: Body Base Plate
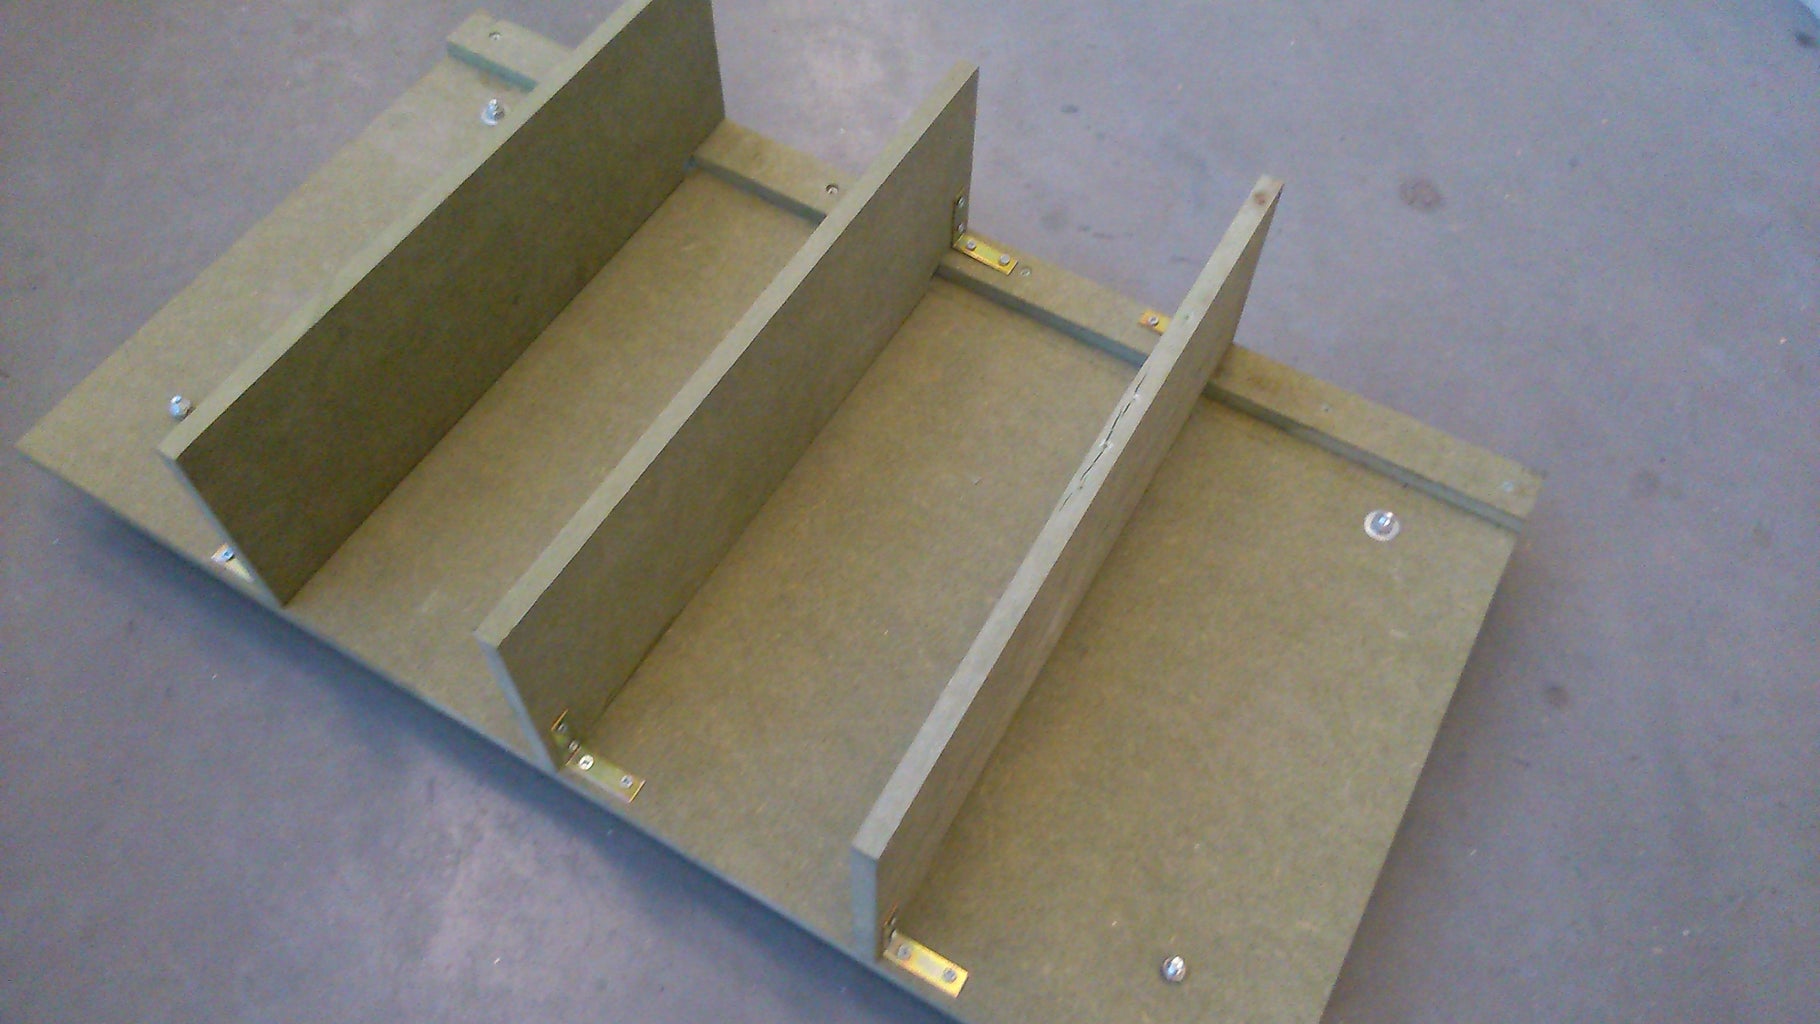
1) Used materials :
- MDF (A) : base plate 900*500*15 mm
- MDF (B) : 3 shelfs 500*170*15 mm
- MDF (C): beam 40*500*15 mm
- Wood connectors
- Nuts and bolts
3) Saw a corner off :
- MDF (B) : 15*40 mm => 15 mm in width, 40 mm in length of 1 corner.
- Apply this step for all 3 pieces
4) Construct :
- Screw and glue MDF (C) on 1 side of the base plate MDF (A)
- Line out the MDF (B) shelfs over the length of the base plate MDF (A). A schelf on every 22.5 cm.
- Screw and glue the shelfs (B)
- Reinforce the shelfs with wood connectors to the base plate (A)
- Attach the wheels to the plate ( 80*80 mm from corner)
Step 2: Right Body Plate (wood)
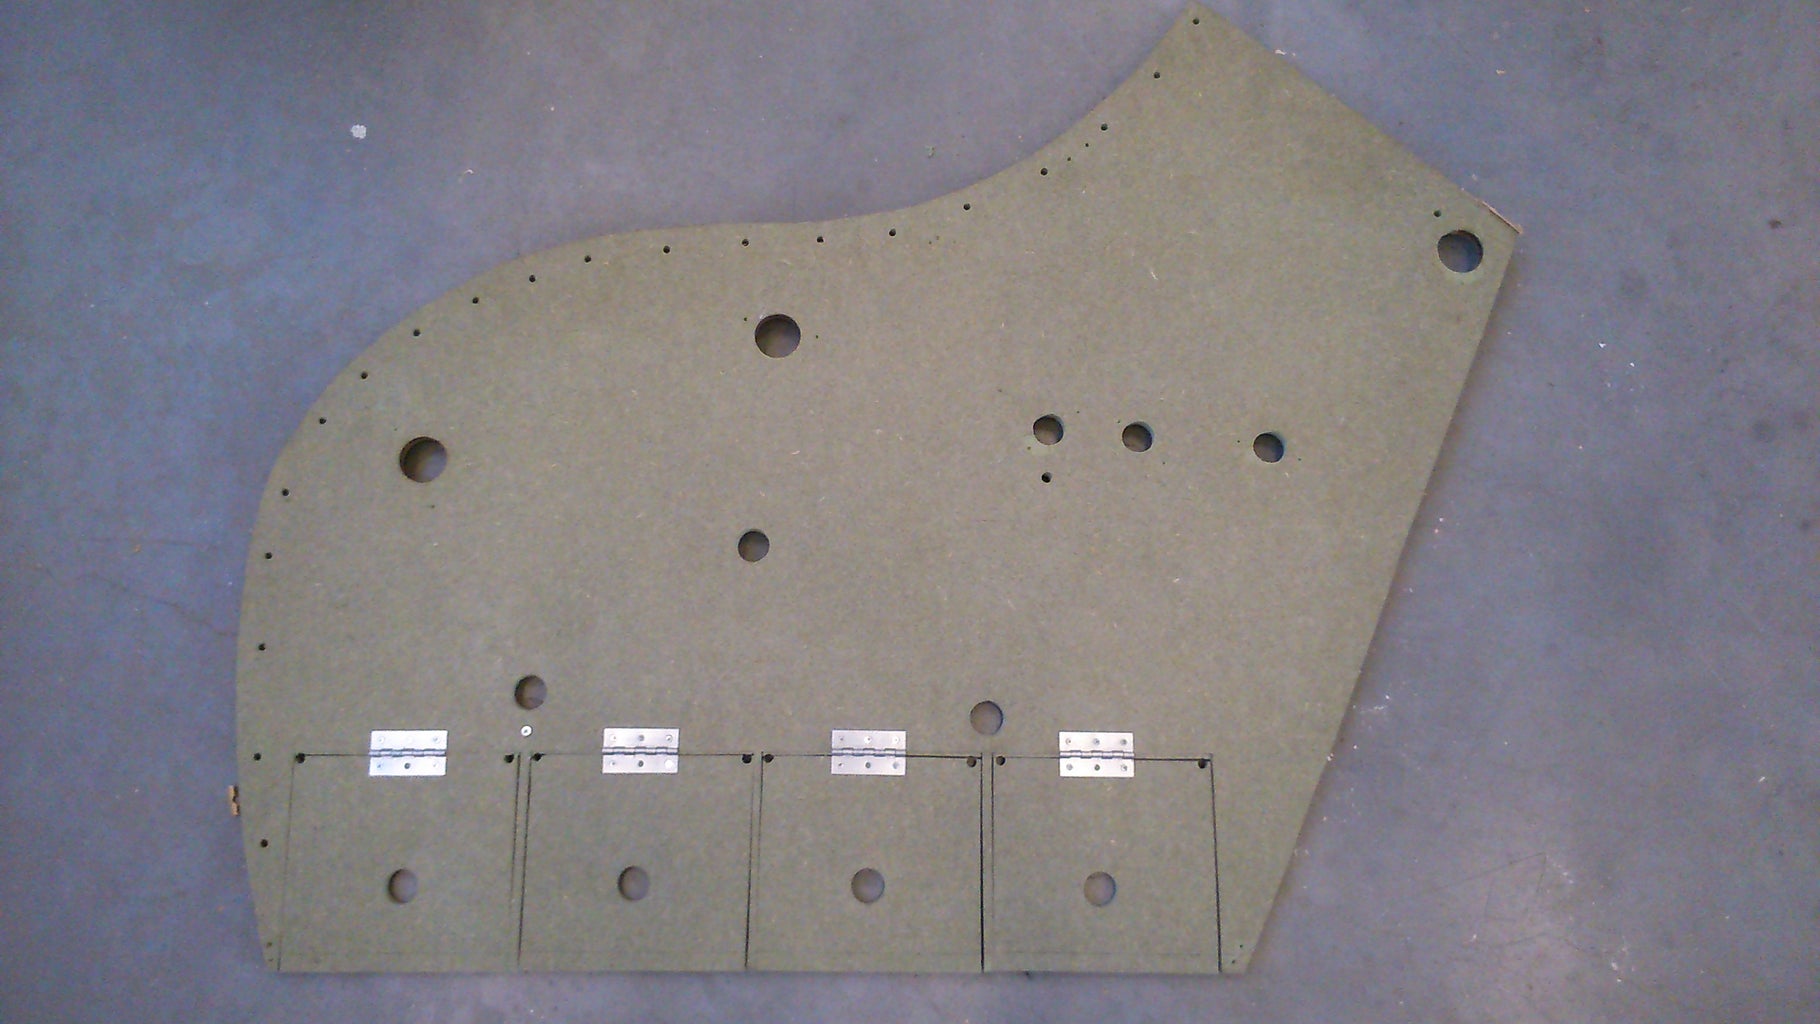
1) Used materials:
- MDF 100 x 120 x 1,5 CM
- Drill 46 mm & 32 mm
3) Saw the right body plate:
- MDF, saw the right body plate in the next dimensions: Height base plate – highest peak = 100 CM Height start mouth till base plate 70 CM, distance to rear end 120 CM Height back 75 CM
4) Drilling 3 holes:
- Drilling 3 holes of 46 mm at the top of the plate. measured from the bottom right, straight up and then sideways. See the picture above.
5) Drilling 6 holes:
- Drilling the 6 other holes of 32 mm in the plate. measured from the bottom right, straight up and then sideways. Distance B-C = 13, distance A-b = 9. See the picture above.
6) Saw the 4 doors:
- Line out the 4 doors on the bottom line. 16 x 16 CM.
- Screw them back in with hinges.
Step 3: Left Body Plate (perspex)
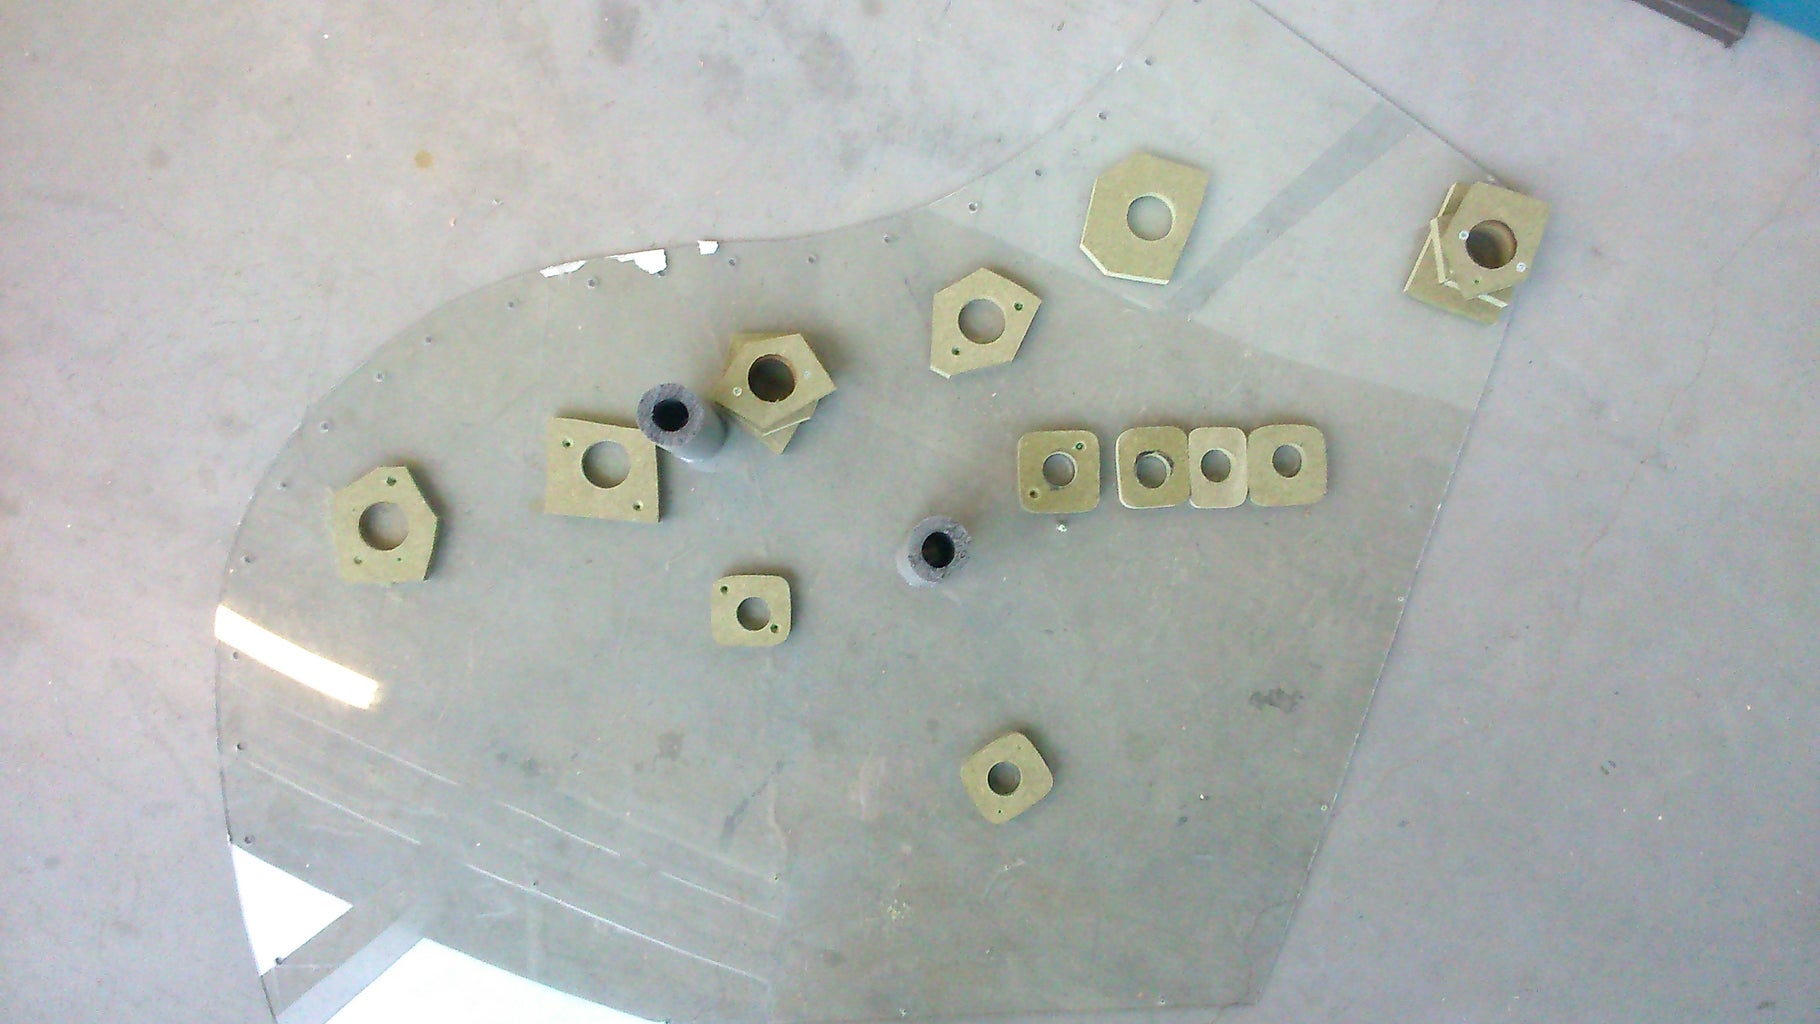
3) Saw the left body plate:
- Saw the right body plate in the next dimensions:
Height base plate – highest peak = 100 CM
Height start mouth till base plate 70 CM, distance to rear end 120 CM
Height back 75 CM
The same as in step 2.
Step 4: Front Plate (wood)
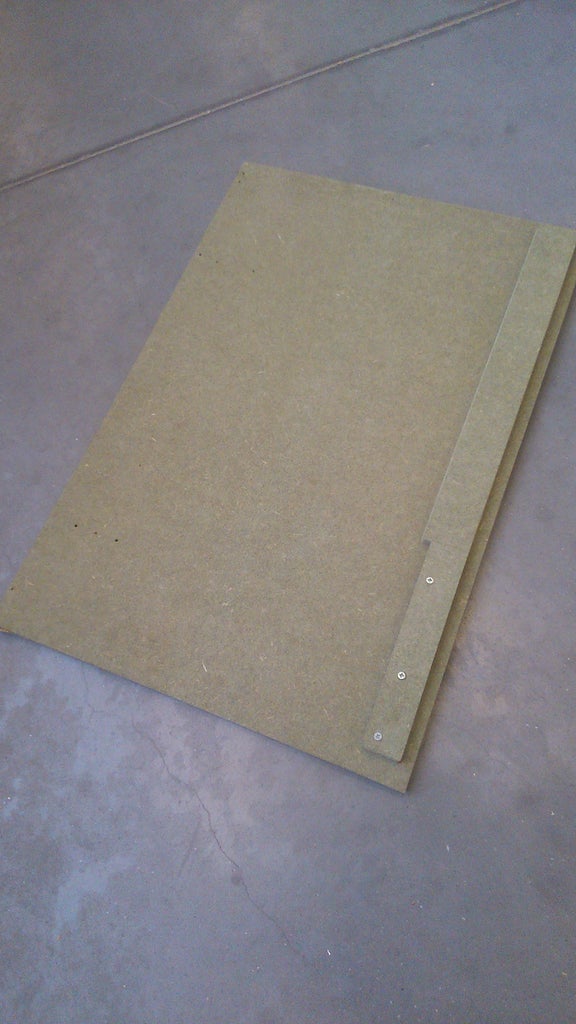
- MDF 530 mm * 790 mm * 15 mm
- MDF 60 mm * 740 mm * 15 mm
3) Saw the MDF plates in the right dimensions.
Step 5: Polygonal Holders (right)
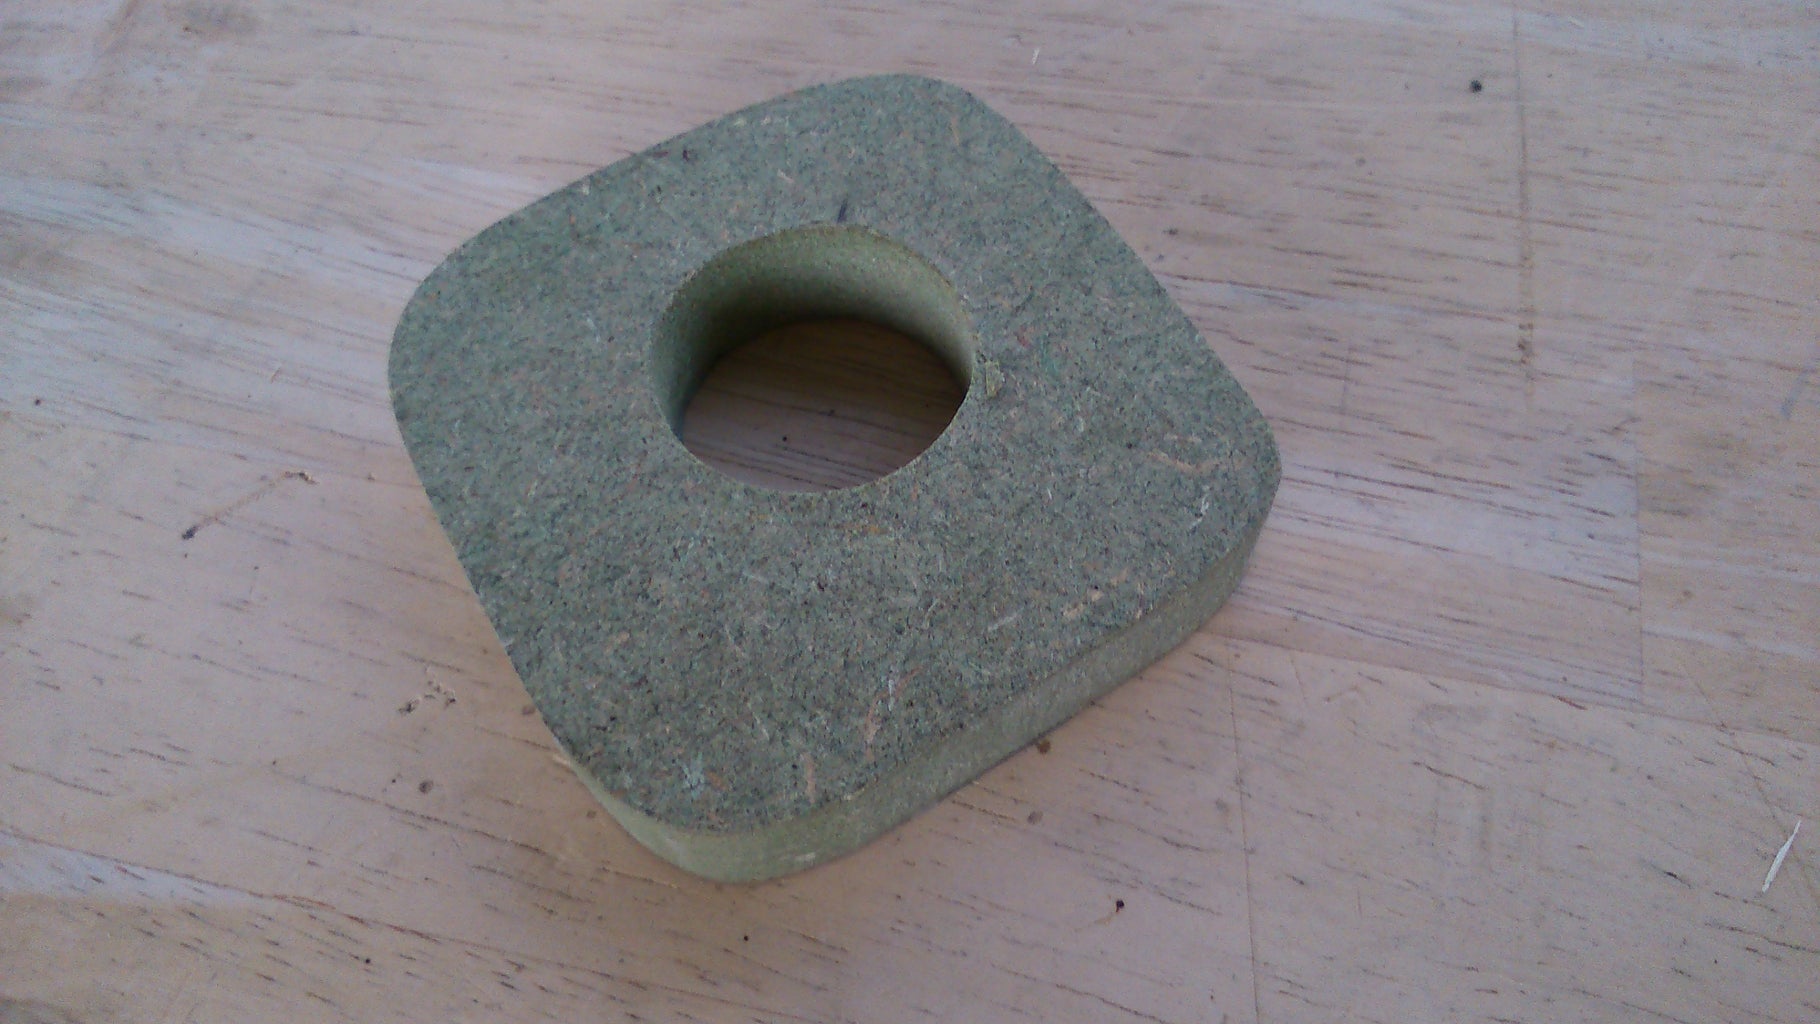
- 4 x MDF (100mm*100mm*15mm)
3) Saw 3 polygonal holders with in the middle a hole diameter 46 mm and 1 with diameter 32 mm.
The holders are in the places where you can not rotate the axes.
Step 6: Polygonal Holders (left)
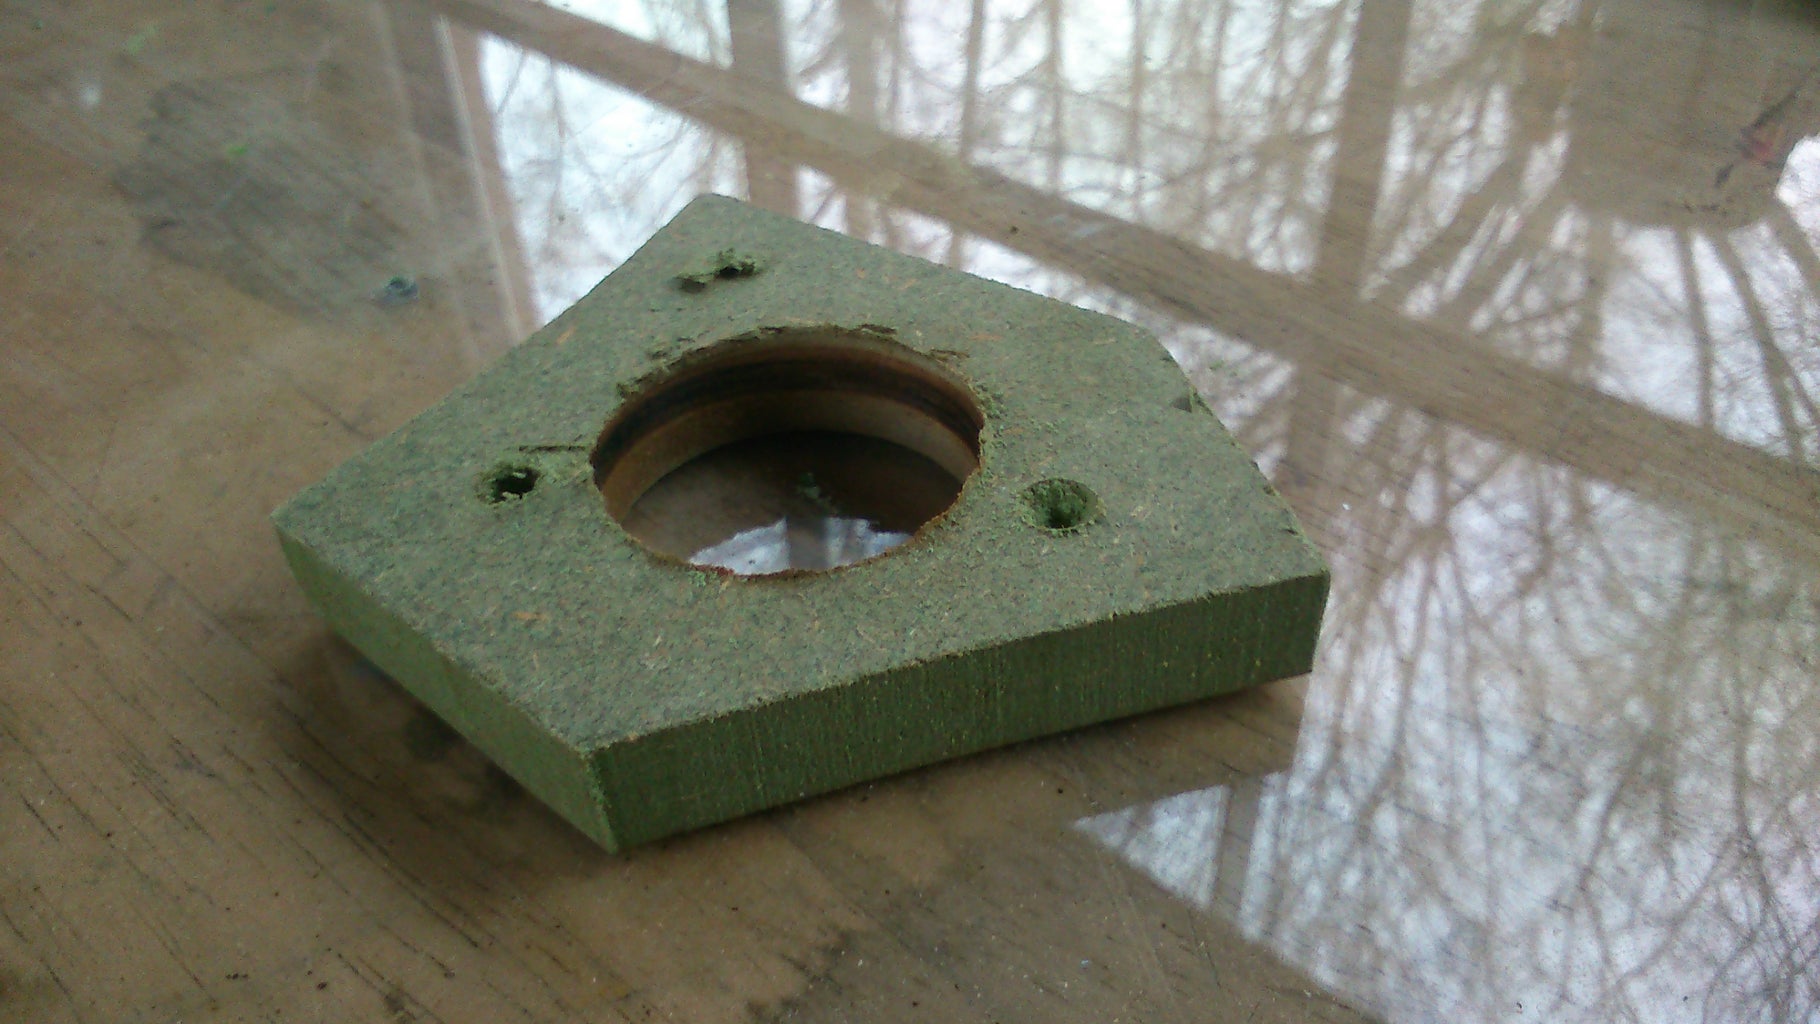
- 12 x MDF (100mm*100mm*15mm)
3) Saw 6 polygonal holders with in the middle a hole diameter 46 mm.
Saw 6 polygonal holders with in the middle a hole diameter 32 mm.
Wherever there are holes or holders placed at the right side, there are holders placed with the same dimensions on the left perspex side.
Attach the holders with screws to the perspex.
Step 7: Hollow Profiles for Peripherals
1) Used Materials:
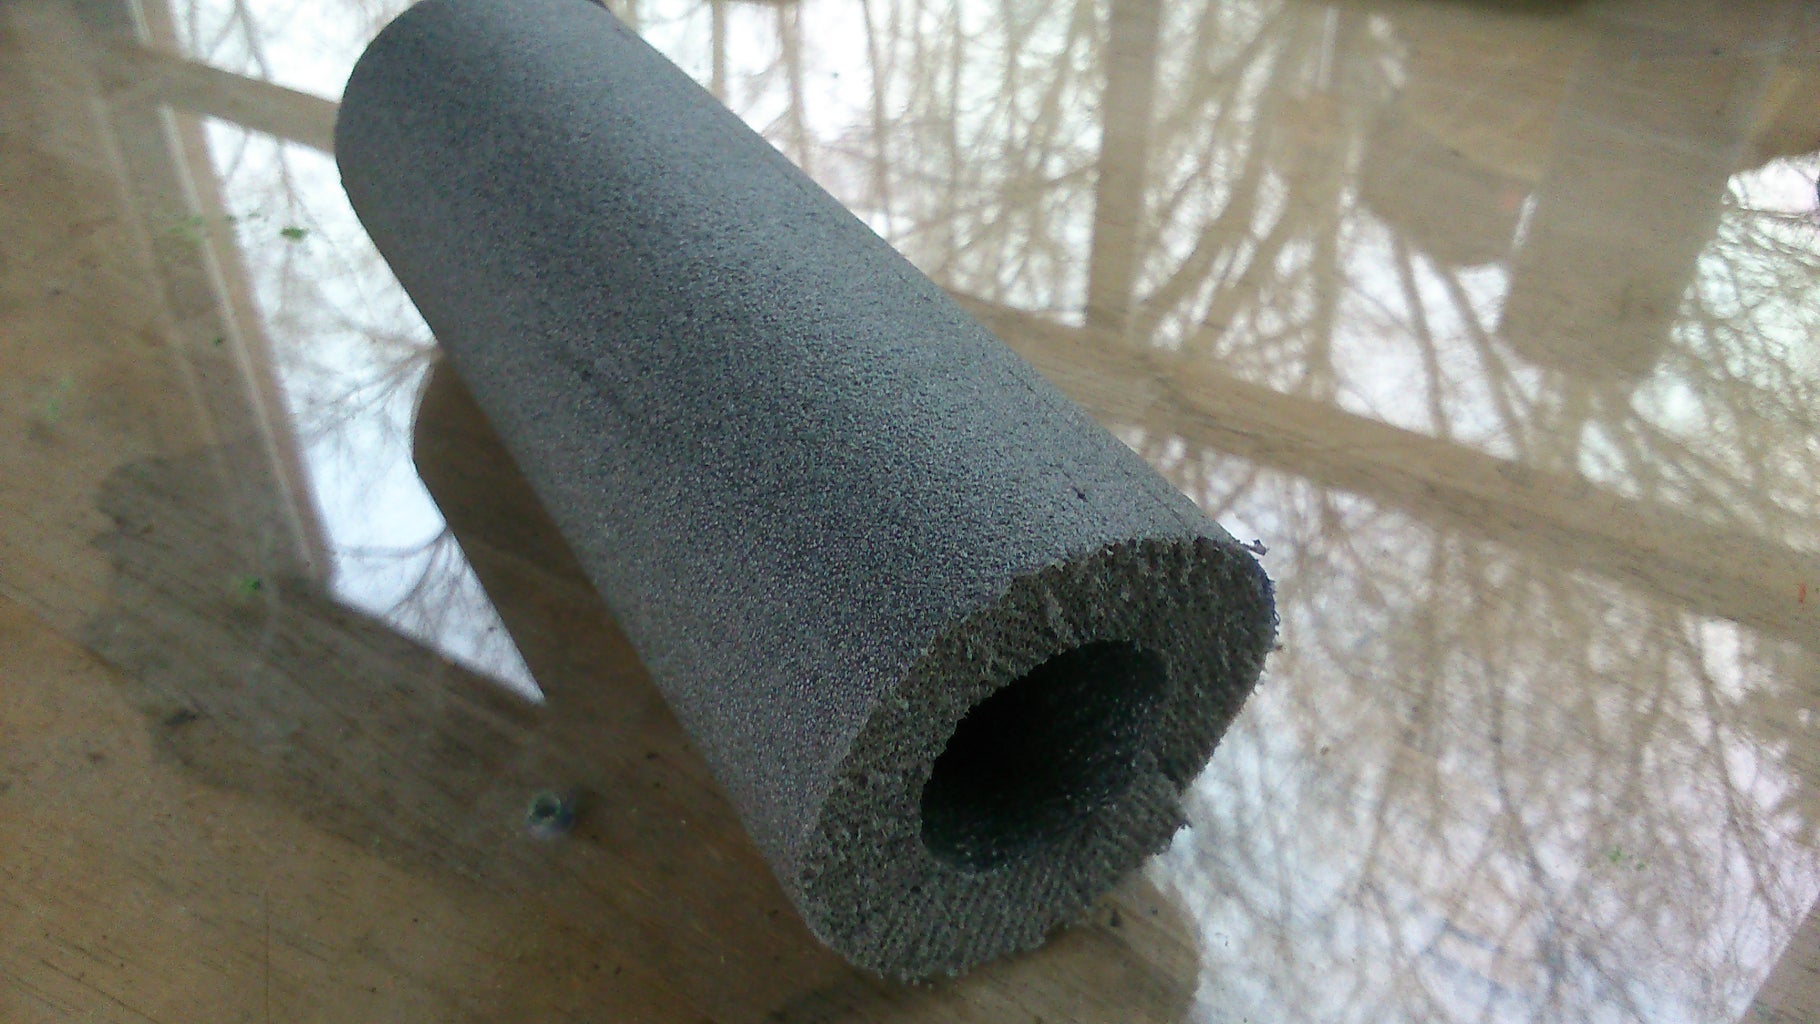
- 4 x insulation foam (or others)
- Contact glue
3) Cut off 3 pieces (length = 200 mm and a diameter of 80 mm)
Glue the profiles onto the perspex side and the MDF side at the correct dimensions.
Step 8: Axes
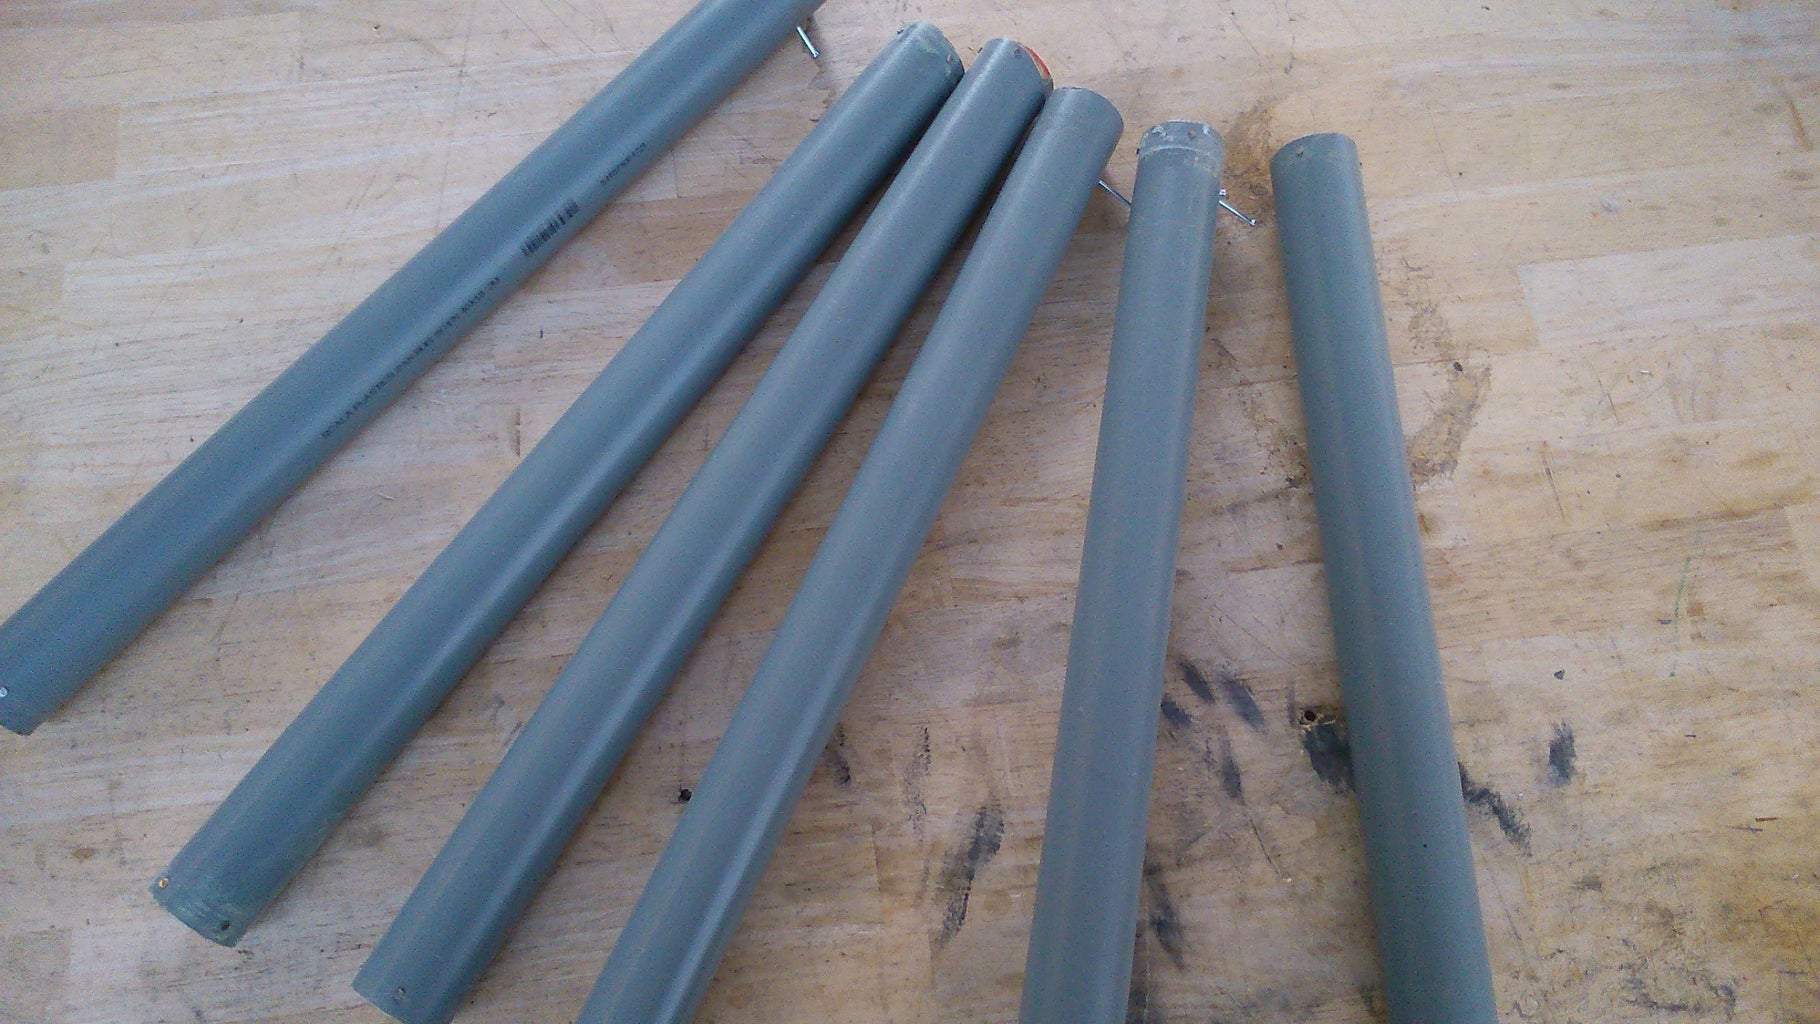
- 3 wooden cylinders (length = 540 mm and diameter 40 mm)
- 3 wooden cylinders (length = 500 mm and diameter 40 mm)
- 5 wooden cylinders (length = 650 mm and diameter 25mm)
- 1 wooden cylinder (length = 500 mm and diameter 25mm)
- The axes can be covered witch all kinds of materials: we use a paint roller, gloves, insulation foam and a wooden plate.
3) The foam, paint roller, gloves, PVC and the wooden plate are glued or screwed to the axes.
Step 9: Handle Wheel
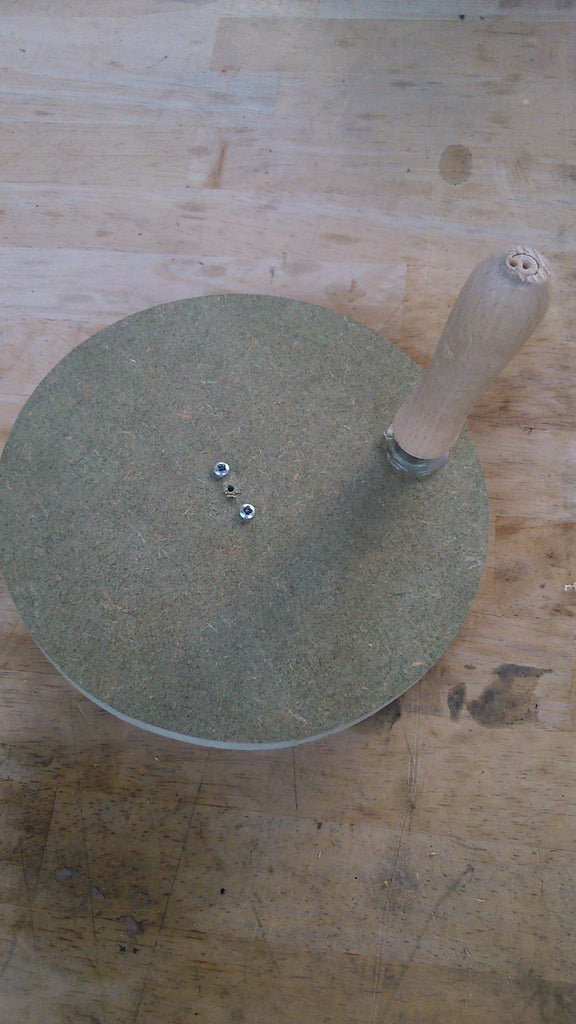
- 3 x MDF plate 250mm*250mm*15mm
- Standard wooden handle
3) Make a circle witch a diameter 220 mm. Use a saw and a sander to become the correct dimensions of the circle.
Screw the handle to the circle.
Step 10: Teeth and Tongue
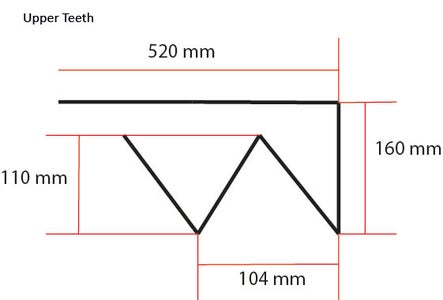
- MDF plate 520mm*110mm*8mm
- MDF plate 520mm*100mm*8mm
- Flexible foam
3) Saw the shape of the teeth out of the MDF plate. (see image for dimensions)
Finisch with sandpaper.
Cut out a tongue from the flexibel foam by using a box cutter.
Glue the tongue to the lower teeth.
Step 11: Assemble Body
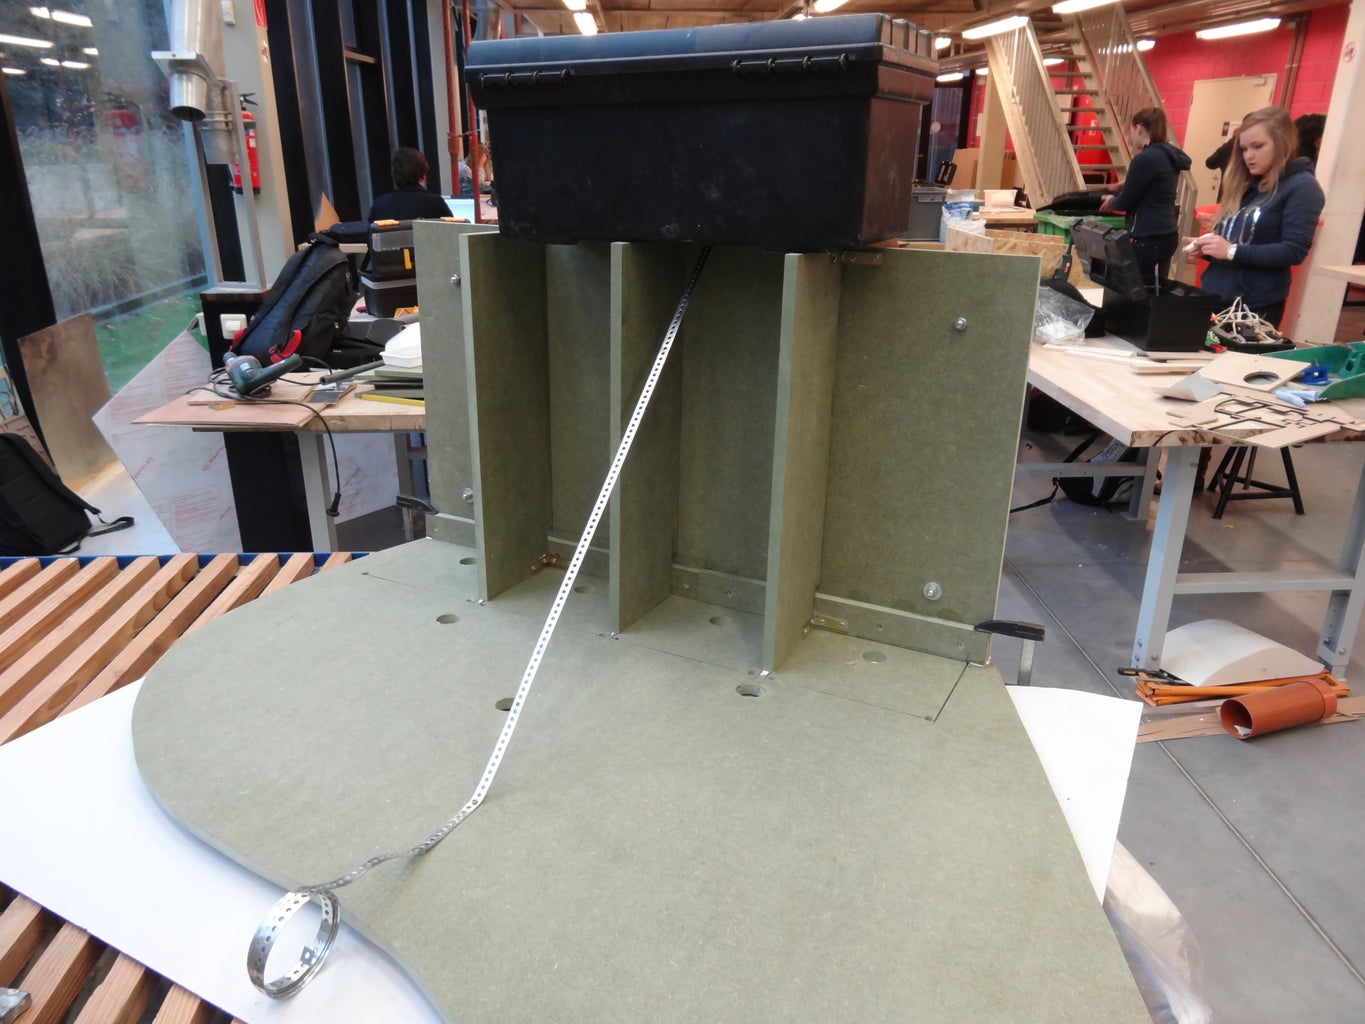
2) Screw and glue the left body plate(perspex)and the right body plate (MDF) to the base plate.
Screw the front plate to the left, right and base plate.
Step 12: Assemble Other Components
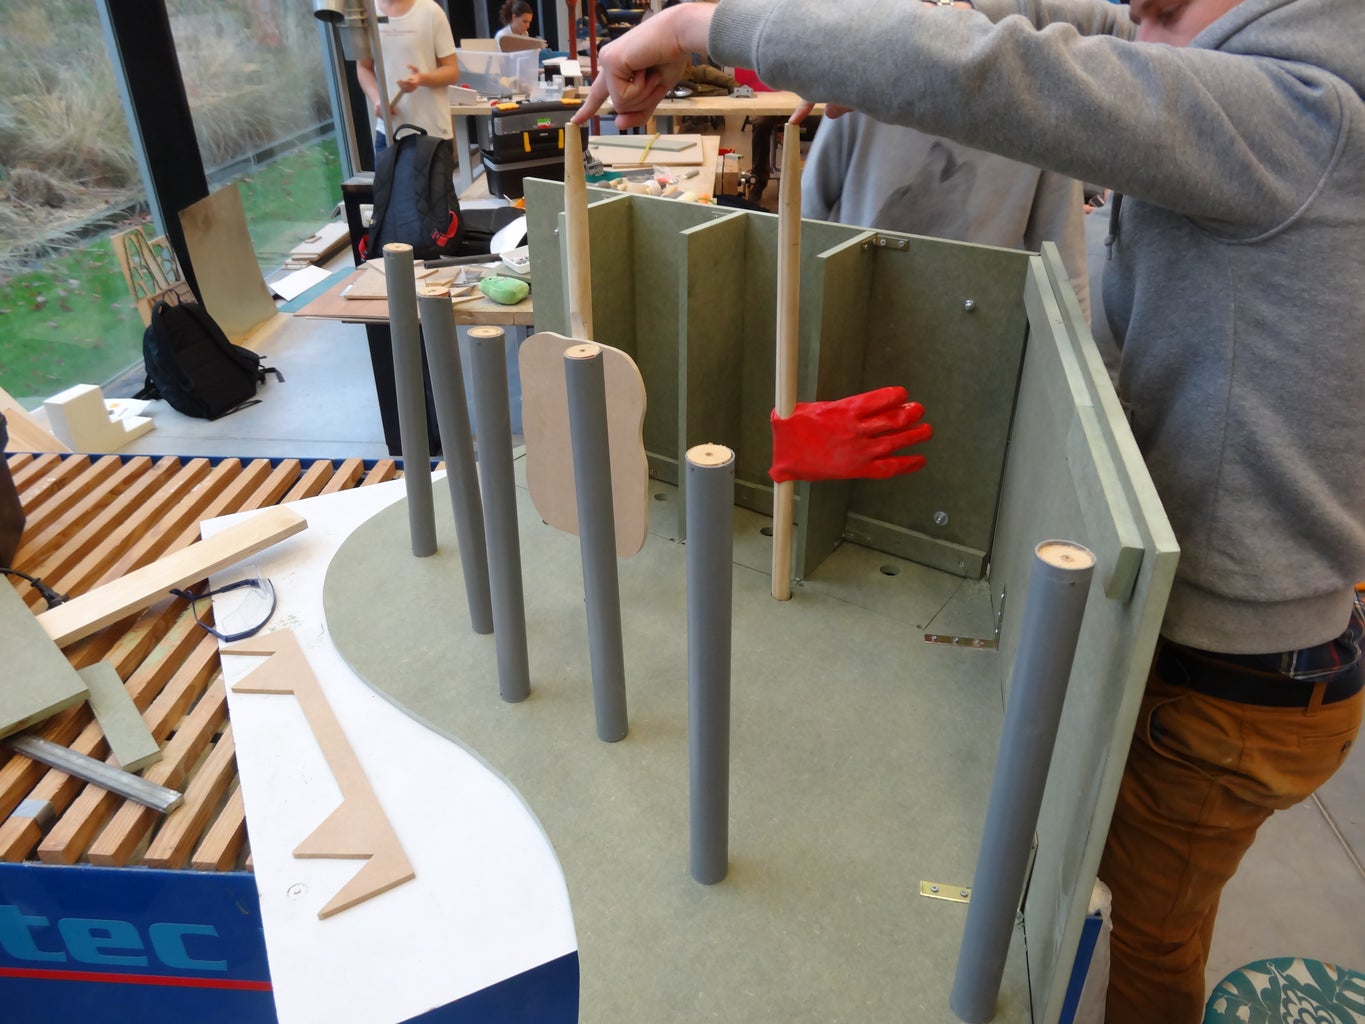
2) The axes are disposed between the holders and thrue the holes. (blue on the image)
The wheels are screwed and glued to the axes of the conveyors. (green on the image)
The teeth are screwed and glued to the body (yellow on the image)
Step 13: Conveyors
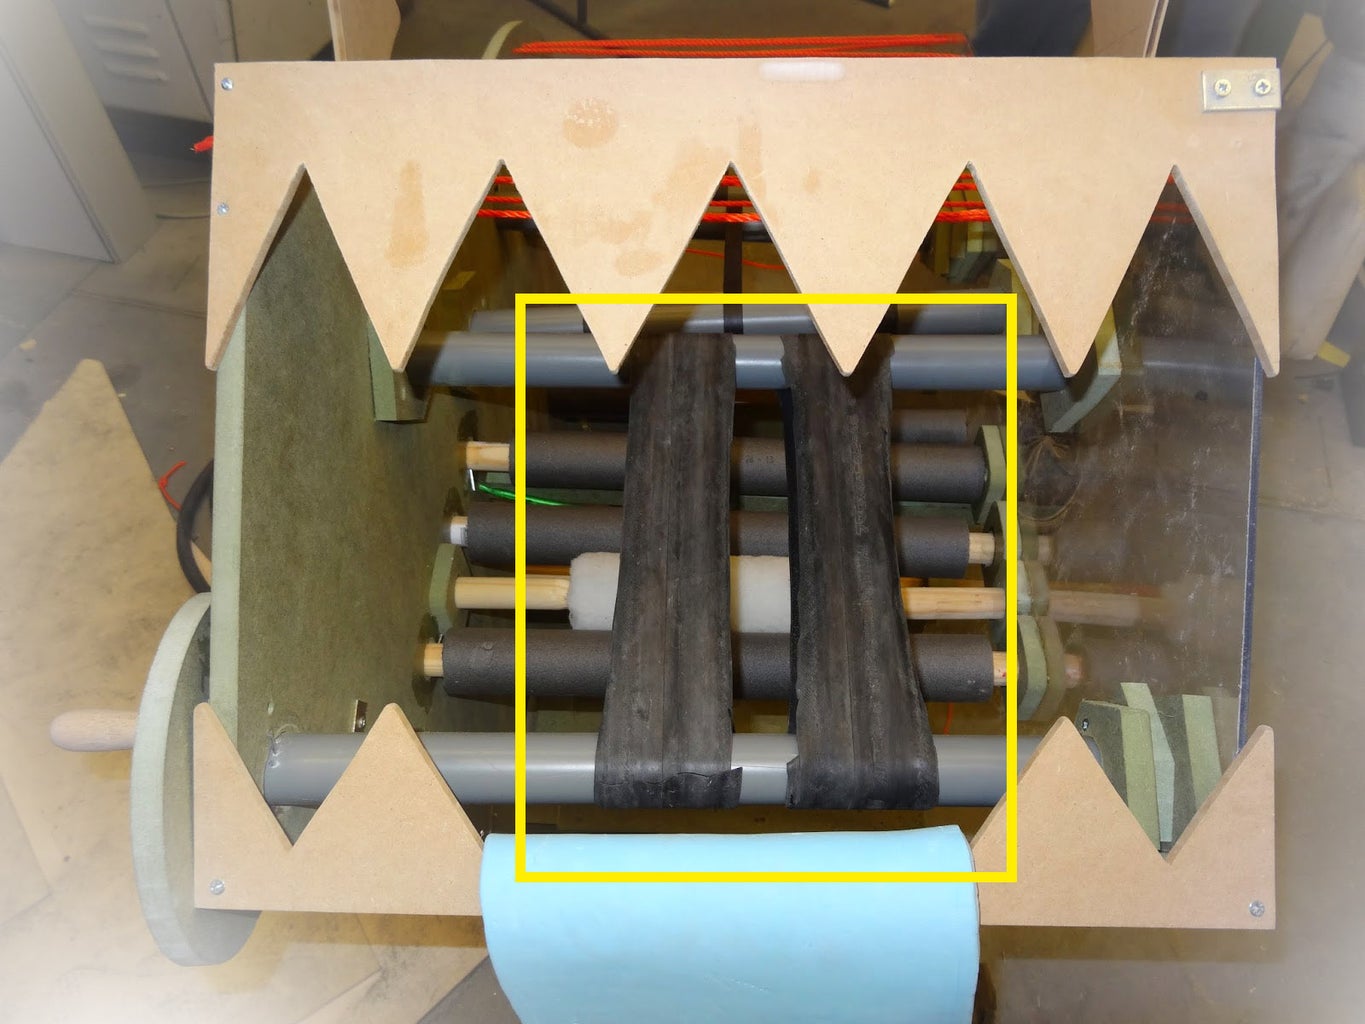
The conveyor belts are tensioned between the thickest axes.
We use bicycle tires as conveyor belts.
Step 14: Make Back
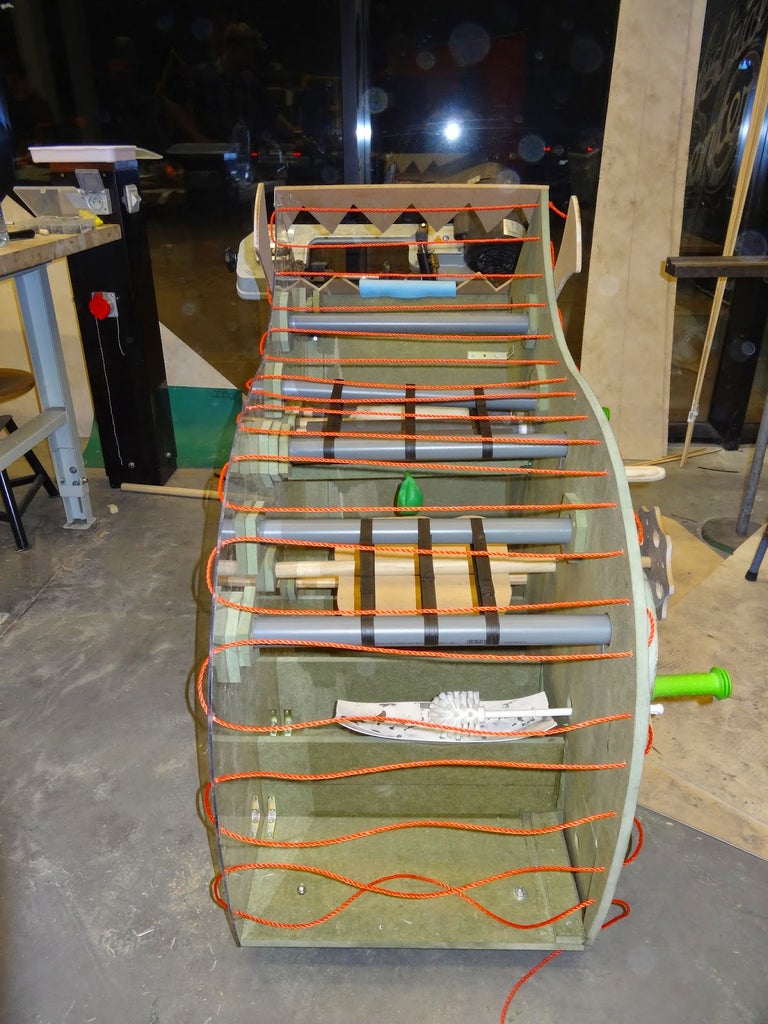
We stretch an orange rope between the two sides as reinforcement.
On the ropes we put a cardboard.
Step 15: Final Result
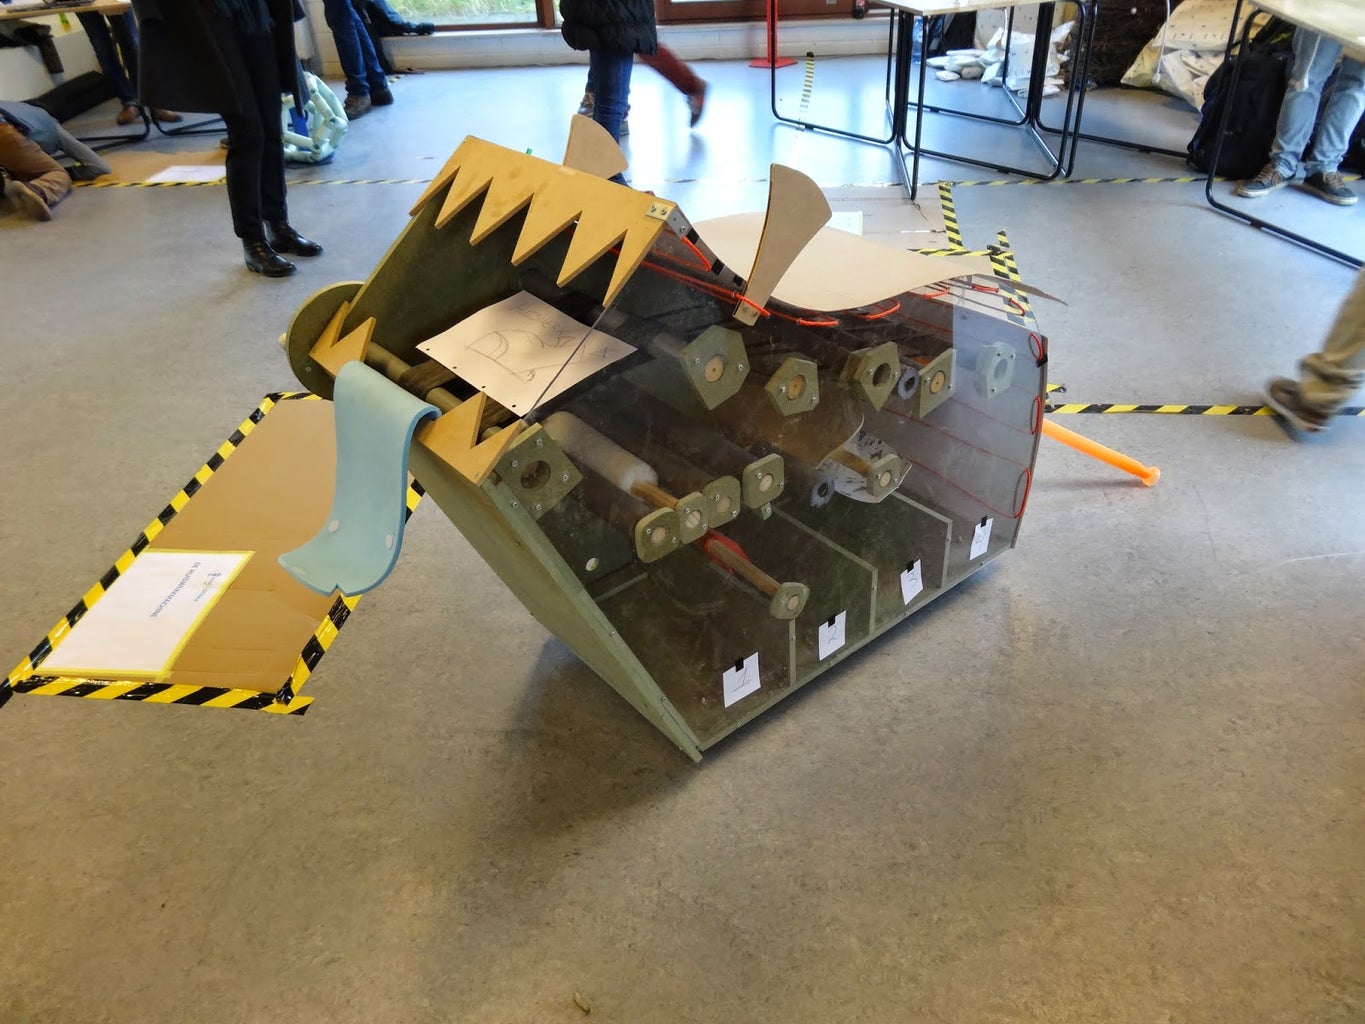
Step 16: Product Is Use

Recommendations

Build-A-Tool Contest

Colors of the Rainbow Contest

Make it Resilient

Hurry! Father's Day Sale:Up to 40% OFF
Item added to your cart
Collection: homework machines.
Welcome to UUNA TEK's Homework Machines Collection, where innovation and efficiency converge to redefine your academic journey. Trusted by over 20,000 global customers and partnered with industry leaders since 2015, UUNA TEK is your premier destination for state-of-the-art robotic solutions tailored for educational needs. Our expansive range of homework machines caters to every student's need and academic level, from the user-friendly Automatic Homework Doing Machine to the precise Homework Complete Machine. Whether you're tackling math problems, writing essays, or studying for exams, our machines empower you to complete your assignments effortlessly. Experience the convenience and efficiency of automation with our Homework Doing Machine and Home Work Doing Machine . Bid farewell to tedious manual tasks as our machines handle the workload for you, ensuring accuracy and timely completion. With our Homework Machine Price and The Home Work Machine, academic success is within reach. At UUNA TEK, quality and service are paramount. Enjoy peace of mind with our comprehensive 1-year warranty, 30-day money-back guarantee, and round-the-clock customer service support. With complimentary free shipping and swift delivery, your satisfaction is our priority. Our homework machines boast unmatched speed, reliability, and quality, ensuring superior performance every time. Whether you're solving equations, conducting research, or writing reports, our machines deliver impeccable results. Save time and effort with our machines' ability to handle a variety of academic tasks. Explore the versatility of The Homework Machine, capable of streamlining your study sessions and enhancing your academic performance. Choose UUNA TEK for top-tier robotic technology and academic support. With our unwavering commitment to innovation and customer satisfaction, we're dedicated to empowering you to achieve academic success with ease. Embrace the future of education with UUNA TEK's Homework Machine Collection.
UUNA TEK® iAuto - Handwriting Machine with Feeder/Automatic Signature Machine/Handwriting Machine for Letter/Automatic Writing Machine
Uuna tek® idraw h - a3 size drawing robot/drawing machine/homework machine/calligraphy plotter/handwriting robot/pen plotter/laser engraver, uuna tek® idraw h - a2 size large format plotter printer/drawing machine/homework machine/calligraphy plotter/handwriting robot/pen plotter/laser engraver, uuna tek® idraw 1.0 - a3/a4 size drawing robot/drawing machine/homework machine/calligraphy plotter/handwriting robot/pen plotter/laser engraver, uuna tek® idraw 2.0 - a3 size drawing robot/drawing machine/homework machine/calligraphy plotter/handwriting robot/pen plotter/laser engraver, uuna tek® idraw h - a1 size large format plotter printer/drawing machine/homework machine/calligraphy plotter/handwriting robot/pen plotter/laser engraver, uuna tek® idraw 2.0 - a4 size drawing robot/drawing machine/homework machine/calligraphy plotter/handwriting robot/pen plotter/laser engraver, uuna tek® idraw h - a0 size large format plotter printer/drawing machine/homework machine/calligraphy plotter/handwriting robot/pen plotter/laser engraver, subscribe to our emails.
Be the first to know about new updates and exclusive offers.
- Choosing a selection results in a full page refresh.
- Opens in a new window.

- Search for:
No products in the cart.
Return to shop

EasyDraw V2 Writing and Drawing Machine (FULLY ASSEMBLED)

₹ 8,590.00 (inc GST)
- Description
- Additional information
- Reviews (43)
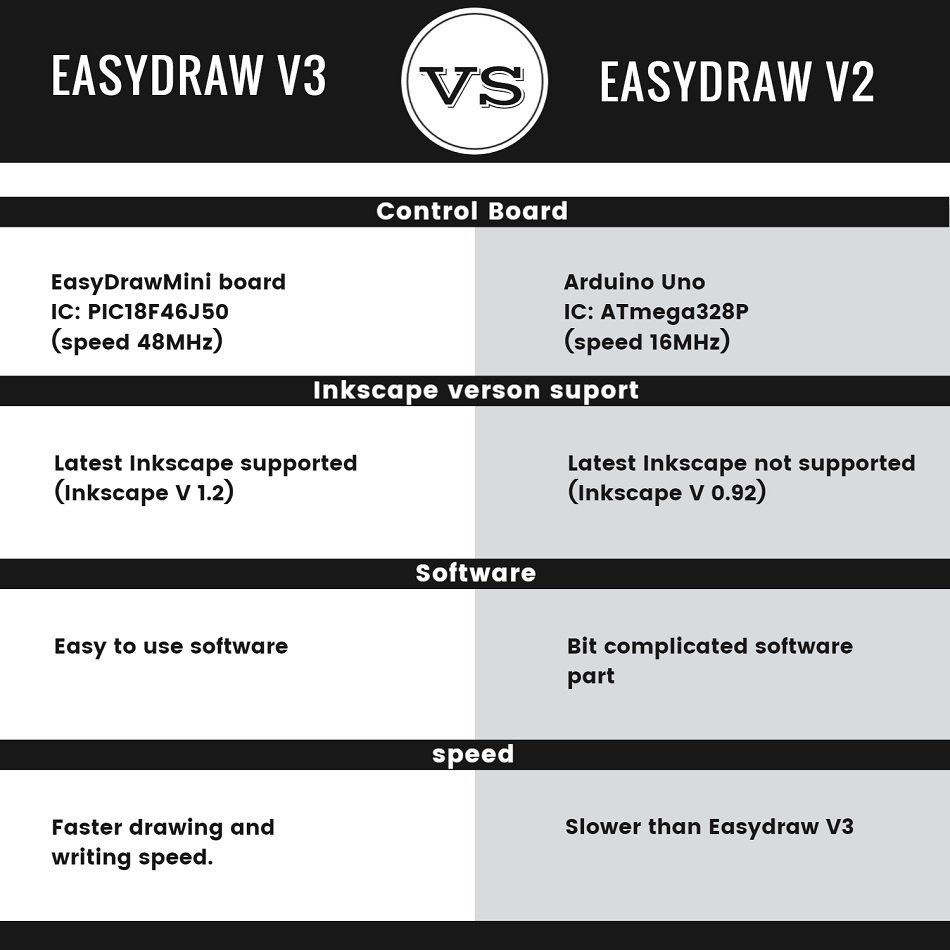
buy easyDraw V3 with more FEATURES and very easy to use software.
software tutorial english
software tutorial hindi
DRAWINGBOT is an Open Hardware version of the famous machine AxiDraw which it is a pen plotter, capable of writing or drawing on almost any flat surface. It can write with pens, permanent markers, pencils, and other writing implements to handle an endless variety of applications. Its unique design features a writing head that extends beyond the machine, making it possible to draw on objects bigger than the machine itself. The biggest advantage of the machine is that it can be placed over the book because of the core XY extending design of the machine.
All parts are printed in ABS plastic in 70 °C heated chamber which makes the 3d printed layer very strong.
PLA parts are bad its brittle and break easily and lose strength after few months and the glass transition temperature of PLA is very low so if we place the parts under the sun or inside a parked car under the sun. the parts will slowly melt and deform and become unusable.
All of the above problems are solved by using ABS plastic. ABS is tricky to print its printed in a special water-cooled actively heated 3dprinter.
The Arduino will be programmed by us. so you dont have to upload any code to Arduino.
it’s just plugged and play, just connect the USB cable to the PC or laptop and power adaptor to the machine. and install the software and start drawing or writing
MAX DRAWING ARE : 24 X 30 CM
The machine comes with 3 month’s warranty. In case any parts get damaged contact us via WhatsApp / PH: 8590094244 we will send replacement parts without any cost and guide you to fix it.
After the warranty, you have to pay for the parts. ( all parts will be available )
Delivery will take 5-8 woriking days
43 reviews for EasyDraw V2 Writing and Drawing Machine (FULLY ASSEMBLED)
Safeer Khan – 03/03/2021
I found this product after researching some marketing options for handwritten style letters for my business, and I am SO GLAD I did. This machine allows me to work on other aspects of my business while it writes out my direct mail pieces. You do have to be around to put the next page and hit go, but it is so much less time-consuming than doing it myself, and miles cheaper than hiring it out. I had not used Inkscape before, or any kind of machine like this, so it took me some time to learn to use it.
Tinu Balaji – 05/03/2021
The quality of the product is excellent, but the software is not beginner-friendly
Ankit Mhatre – 10/03/2021
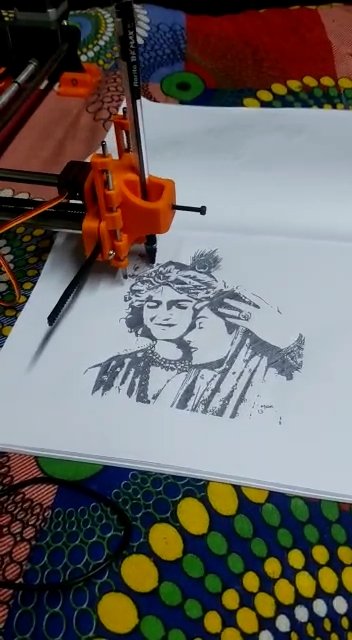
karthik Deekonda – 11/03/2021
The hardware works well. The provided software didn’t work on macOS out of the box, you have to install windows
Veer Gurjar – 20/03/2021
binod kumar – 20/04/2021
The product worked great. I hit a couple of bumps and WhatsApp for help. The help came immediately and all is working great. I REALLY recommend this product.
Ritik Shah – 13/05/2021
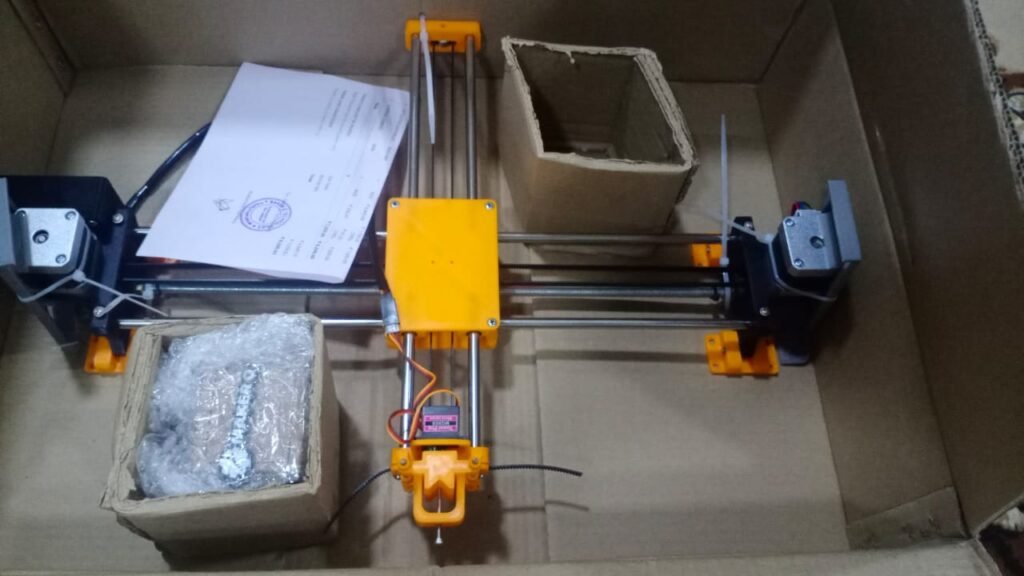
nice packing
Mutheswar Rao – 18/05/2021
Excellent product! I love what I buy, I recommend 100% makes perfect drawings and incredible accuracy.

salim M – 14/07/2021
I ordered this product expecting nothing and got a really nice surprise. Works great. Minor software issues were resolved quickly.
Sudhir Bharti – 23/08/2021
The plotter came 100% assembled, and the files were easy to download and install. One happy customer here.
Logeshwaran Shankar – 02/09/2021
Good product, great service
Veer Gurjar – 24/09/2021
slow shipping, it took 8 days to deliver. product is good
Jaya prakash Reddy – 29/09/2021
received, thanks
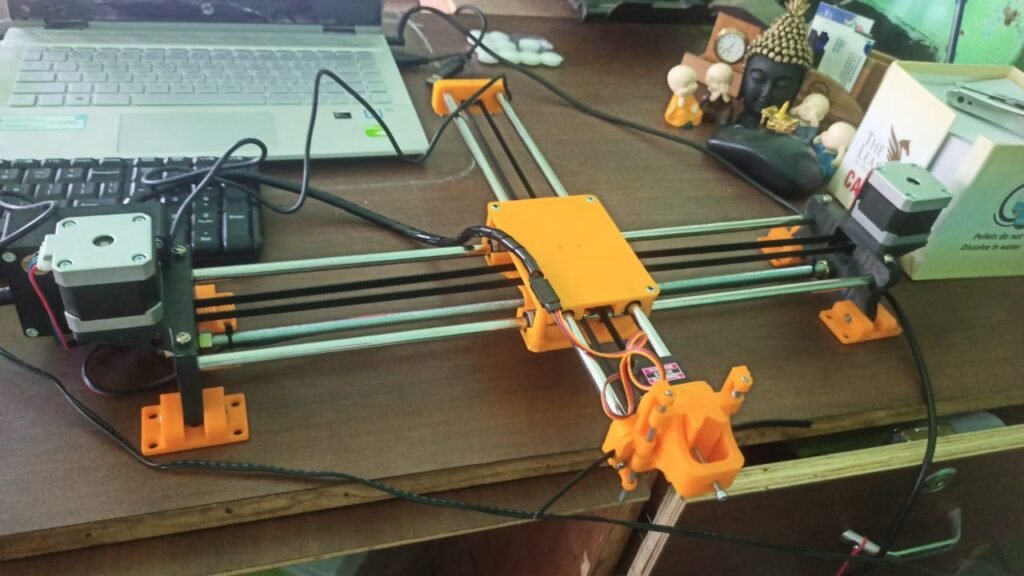
Selvarajan Natarajan – 29/11/2021
Very nice quality and repeatability on prints.
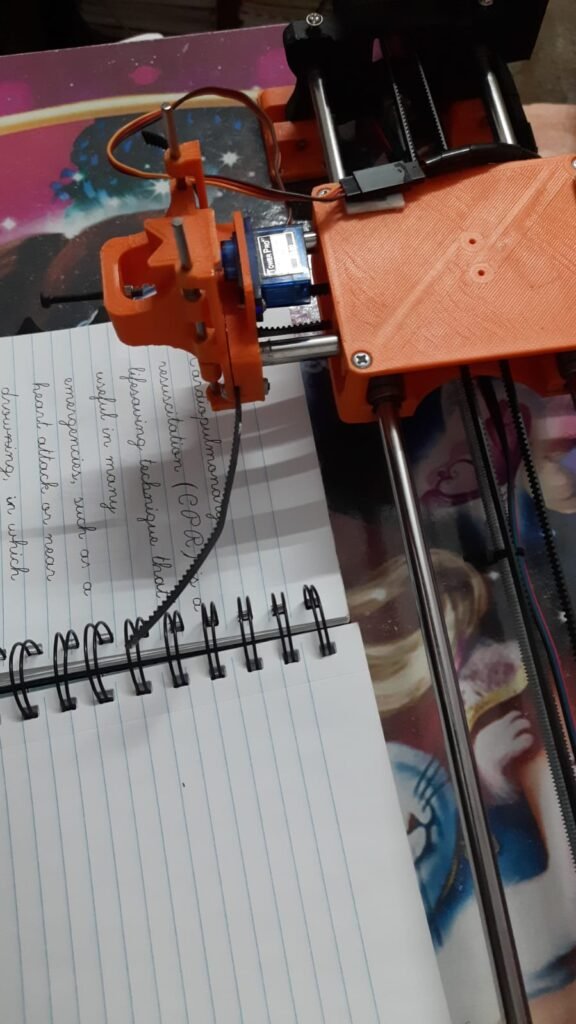
Indrajith Vs – 02/12/2021
i received my box but without any instruction book or CD inside it 💔 the good thing is that there is a detailed video in the website product description which explains everything in detail. now the machine is working fine. and also the packaging is very good.
Arjun Nambiar – 04/12/2021
The product works great. I have a disability that makes writing difficult and got this to write thank you notes. Like other reviews, the software was a challenge but customer support was top draw and we were up and running in minutes
T Anandhakrishnan – 15/12/2021
The pen up and down servo motor stopped working after 4 months of use, and when I contacted maker q they told me that there is only 3 months warranty for the machine, so I paid for the servo motor (250 rs). After replacing the servo motor the machine is working fine.
Adeel Khan – 30/12/2021

Sureddy Narendra – 08/01/2022
This innovation is amazing!! I was able to “write” all 100 of my wedding thank you notes while working!
Noor Mohammed – 08/01/2022
Software is crap and it won’t work on Mac
ANIK DAS – 19/01/2022
This thing is perfect! i does what it say it will do. I wanted it for drawings and it does it perfectly its just trying to figure out the software. Trail and error is all i have to say and plenty of YouTube videos hahaha it pretty much can draw anything.
rakesh kumar – 28/01/2022
thank you very much
Parikshit Saha – 11/02/2022
The parcel came unharmed and satisfied with the order
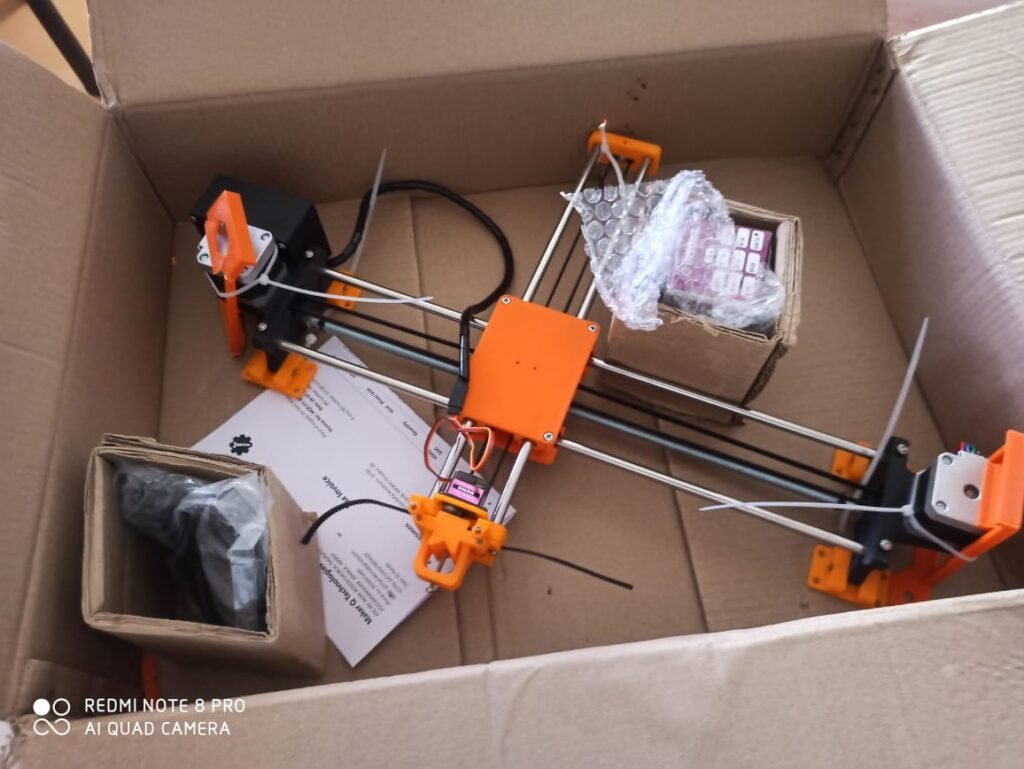
Shinto John – 12/02/2022
1st time having a calligraphy machine and I love it. Took me a while to figure out how things work, but seller provides prompt support. Plus, I recommend watching tutorials on Inks-cape on you-tube if you are not already familiar.
gaurav biswas – 25/02/2022
Takes a second to figure out but once you do its gold. I use it for marketing
Prince Kumar – 26/02/2022
Beautiful and amazing product it help me in my project work i am very happy with this budget segment product thank you maker q for this 2d cnc plotter
Rajesh K – 27/02/2022
when I opened the box one of the motor sides is broken and I contacted customer support they shipped a replacement part and refunded 400 RS. but it took a total of 12 days from the day of ordering the machine and finally being able to use the machine. Response for the maker q side is good and fast, that’s the only reason am giving 3 star
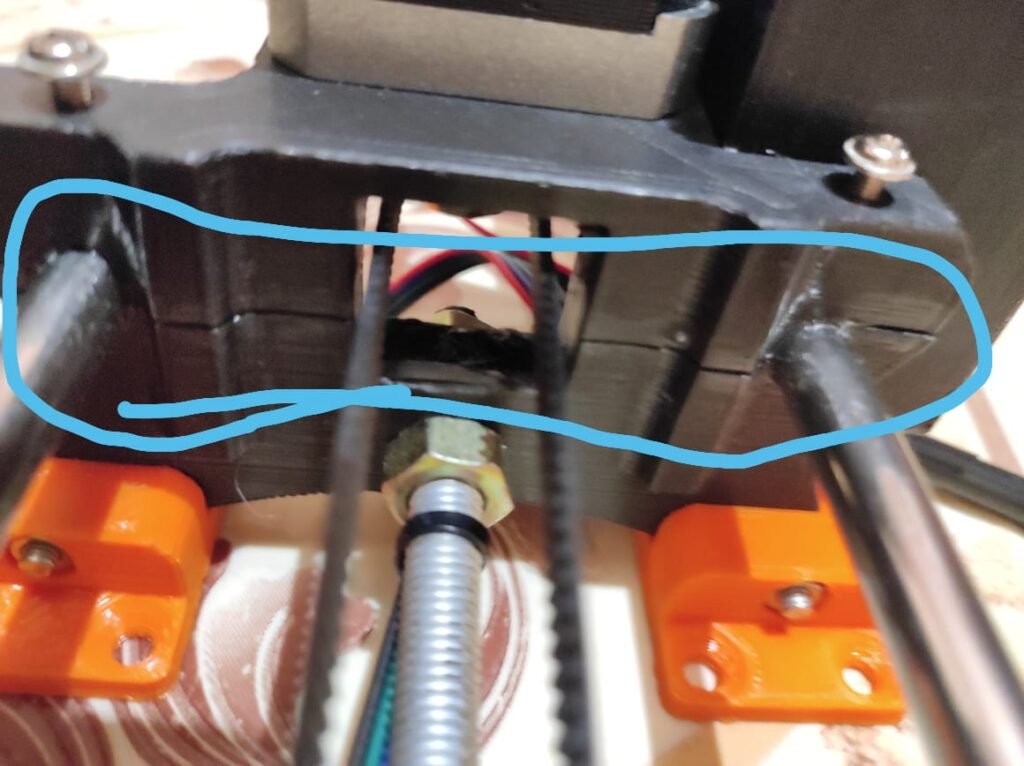
Alwin KJ – 21/04/2022

Gaurav Jain – 02/05/2022
So.e parts are broken and the wooden board is missing
Yadamani Venkateswarlu, Retired SI – 09/07/2022
Chiranjeevi P. – 13/07/2022
Anonymous – 25/07/2022
Nice product, fully assembled
I. Fiaz Ahmed – 08/08/2022
A Product without Software Installation Instructions or a Product Instruction manual and no Warranty card.
Joseph F. – 21/09/2022
Good product, helpful support by supplier. Price is also reasonable.
Anonymous – 29/09/2022
Exceeded my expectations! The tutorial was very helpful and within few trials were able to use the device. Highly recommended for engineers.
Aditya Mahajan – 17/12/2022
Good quality. VERY AWESOME, EASY TO UNDERSTAND AND EASY TO USE.
Ravikumar Kr – 15/01/2023
Software not provide bad problem
Prasad Mandelkar – 19/02/2023
your CNC plotter is very good but facing problem for softwares
Dudekula Basheer – 09/03/2023
It’s good tqs for u and u are team members
Arun – 15/03/2023
Working as expected..
Vispi – 29/05/2023
Your Tech Support, in setting up my plotter was really out of the way Tech Support … you really went the one step extra for a customer … THANK YOU 🙏
Yathish K. – 18/06/2023
Very good but the ugs is very headache
Karan – 31/01/2024
Bit difficult to operating
Only logged in customers who have purchased this product may leave a review.
Related products
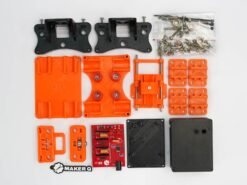
EasyDraw V2 2D Plotter 3d printed parts (ABS plastic) kit
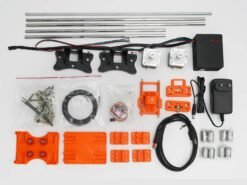
EasyDraw V2
EasyDraw V2 Writing and Drawing Machine kit (NOT ASSEMBLED)
Username or email address *
Password *
Remember me Log in
Lost your password?
Email address *
Your personal data will be used to support your experience throughout this website, to manage access to your account, and for other purposes described in our privacy policy .

IMAGES
VIDEO
COMMENTS
Get (1) Hex M3-0.5 x 20mm screw and the Metric Thumb Screw and push them together. Use superglue to keep it together. Get (3) M3-0.5 x 16mm screws which you will use the secure the Base Slide to the Y-Front part. You may need to use (3) M3-0.5 nuts in order to hold it in place.
Step 1: Assembly - Y Axis. Take the 2040mm profile and attach the base plates to both the ends. Use the sliding nuts and m4 bolts to attach the base plates to the profiles. Now turn the profile and attach rubber feet to the bottom slots of the base plates. These rubber feet will hold the machine in place on smooth surfaces.
Step 2: Make Y Axis Slider. Take two 42 cm long 8 mm threaded rods, 8 mm nuts, and the stepper motor holder after all the 3D-printed parts have been completed printing. Then, as shown in the picture, passing this threaded road from the bottom holes in the stepper motor holder.
This is the Version 2.0 of the Arduino Homework Writing Machine - 2D CNC Plotter. this version comes with a lot of upgrades from the previous one, which incl...
Make DIY Homework Writing Machine at Home: Drawing Robot/Pen Plotter/Drawing Machine is an Open Hardware version of the famous machine AxiDraw which it is a pen plotter, capable of writing or drawing on almost any flat surface. It can write with pens, permanent markers, pencils, and other wr…
Learn- how to make a drawing of homework writing machine for student using arduino nano micro controllerFull Details - https://techboystoys.com/152-2/ Compon...
1. Download and run the AxiDraw software installer for Windows: Download link (21 MB ZIP archive) The installer is an executable, named "AxiDraw_391.exe"; Unzip, open, and run it. 2. Download and install Inkscape version 1.2 from the download page at Inkscape.org. (Most users will want the 64-bit version and the "MSI" installer.)
Get (2) 3mm linear rods and the following 3D printed parts (Slider, Pen Holder, Base Slide, 3MM Metric Thumb Screw) Get (1) Hex M3-0.5 x 20mm screw and the Metric Thumb Screw and push them together. Use superglue to keep it together. Get (3) M3-0.5 x 16mm screws which you will use the secure the Base Slide to the Y-Front part.
Make DIY Homework Writing Machine at Home. Drawing Robot/Pen Plotter/Drawing Machine is an Open Hardware version of the famous machine AxiDraw which it is a pen plotter, capable of wr. Intermediate Full instructions provided 15 hours 20,334. Things used in this project . Hardware components:
Learn: How to make a drawing of homework writing machine step by step making process for a student using Arduino UNO and L293D modules.Components Required:1....
Product description. introducing the AxiDraw V3 The AxiDraw is a simple, modern, precise, and versatile pen plotter, capable of writing or drawing on almost any flat surface. It can write with your favorite fountain pens, permanent markers, and other writing implements to handle an endless variety of applications.
AxiDraw machines work with a variety of writing instruments, including permanent markers and fountain pens. The unique writing head extends beyond the base of the machine, making it possible to write or draw on almost any flat surface. AxiDraw is the real deal: Designed, manufactured, and supported in USA, and backed by exclusive software for ...
Experience limitless creativity with the UUNA TEK® iDraw 2.0 - A4 Size Drawing Robot/Drawing Machine/Homework Machine/Calligraphy Plotter/Handwriting Robot/Pen Plotter/Laser Engraver. Redefine precision with increased speed, GRBL compatibility, and versatile laser engraving. Shop Now!
DESCRIPTION5 page PDF printable art worksheetHomework Machine Drawing Prompt - instant printable art worksheet for the art room, the classroom, homeschooling or remote learningStudents use their imagination to design a Homework MachineGood for a stand alone drawing projectUse as an introduction to a...
Introducing the UUNA TEK® iDraw H - A1 Size Wide Format Plotter Printer/Drawing Robot/Drawing Machine/Homework Machine/Calligraphy Plotter/Handwriting Robot/Pen Plotter/Laser Engraver, the ultimate solution for larger-scale artwork creation and design projects. This specialized machine is tailored for tasks like generative arts, ethnic costume ...
How to Make Homework Writing Machine at homeLearn How to make homework writing and drawing machine at home using Stepper motor.You can make this type of auto...
See how well it does with your drawings and help teach it, just by playing. ... We made this as an example of how you can use machine learning in fun ways. Watch the video below to learn about how it works, and . Built by Jonas Jongejan, Henry Rowley, Takashi Kawashima, Jongmin Kim, Nick Fox-Gieg, with friends at Google Creative Lab and Data ...
The homework can end in 1 of the 4 compartments with there own achievements. The homework machine is a stimulating and a fun way to make homework and collect it. c.2007 All. ideas, concepts, drawings, pictures, videos, documents, posters, comments, mock-up scale models, prototypes and machines that are developed in the context of MyMachine are ...
UUNA TEK® iDraw 2.0 - A3 Size Drawing Robot/Drawing Machine/Homework Machine/Calligraphy Plotter/Handwriting Robot/Pen Plotter/Laser Engraver. Regular priceFrom $419.00 USD. Regular price$699.00 USD Sale priceFrom $419.00 USD. Unit price/ per.
DRAWINGBOT is an Open Hardware version of the famous machine AxiDraw which it is a pen plotter, capable of writing or drawing on almost any flat surface. It can write with pens, permanent markers, pencils, and other writing implements to handle an endless variety of applications. Its unique design features a writing head that extends beyond the machine, making it possible to draw on objects ...
Easydraw v3 purchase link :https://shopmakerq.com/product/easydraw-v3-writing-and-drawing-machine-fully-assembled/Hello, friends this time I have amazing CNC...
Funvention DIY Spin Art Machine & Drawbot Paint Craft Kit, Drawing Robot STEM Construction Activity Toys for Kids 5+ Years, Fun Learning Educational Best Birthday Gift. 3.5 out of 5 stars 8 ... homework writing machine homework writing machine kit ...
Question: 1- will show 3D drawing and dimensioning of a machine part that will be different for everyone
Hey, guys welcome back to my channel, This is a robot that can draw all kinds of pictures and also write your homework. Also known as a 2d CNC PLOTTER machi...