10 Photo Assignments to Inspire and Challenge Your Skills
Liz Masoner is a professional photographer and she shares her tips and techniques on photo editing and how to photograph nature, portraits, and events with film and digital cameras. Liz has over 30 years of experience and she is the author of three books on photography.
The best way to learn photography is to practice, though sometimes you can get stuck in a rut and not know what to shoot. That is why photographers love assignments; they give us a purpose and an idea of what to photograph.

Why Are Assignments Important?
Self-assignments are key to any photographer's growth. Even professionals with decades of experience will work on personal assignments that they may never get paid for. The goal of any self-assignment is to spur creativity, solve problems, learn new techniques, and challenge yourself.
As you start out in photography, you're probably filled with excitement and ready to shoot anything you can. That being said, sometimes a little direction and guidance are necessary.
Below, you will find ten photography assignments. Each covers a new topic, skill, or concept and they were chosen to help you learn how to see as a photographer. They are meant to be a personal challenge that you can complete at your own pace and with no outside judgment, simply as a means to practice and improve your photography. Hopefully, you will learn something new with each assignment and be able to use that in every photograph you take in the future.
Remember when composing your images to keep in mind the basics: the rule of thirds, shutter speed , aperture, depth of field , and exposure .
Assignment #1: Up Close
This assignment encourages you to get close and personal with your subject. It is an exercise in viewing a common object in a new way and examining its finer details.
- Choose an object that you see or interact with every day.
- Focus on a small part of it, get as close as your camera will allow you to focus, and shoot away.
- Try to capture different angles and unusual lighting to add to the mystery of this tiny world.
From the whiskers of your cat to a fragile Christmas ornament, and even common soap bubbles, there is an entire world that we often overlook because we don't get close enough.
Assignment #2: Motion
Photography is a static medium which means that it doesn't move. Conveying a sense of motion is often crucial to capturing a scene or emotion and it is an essential skill for photographers to practice.
The goal of this exercise is to understand how shutter speeds can be used to convey motion.
- Choose a subject or series of subjects that will allow you to convey motion in your images.
- It can be slow motions, like that of a turtle, or fast motion, like a speeding train.
- Blur it, stop it, or simply suggest that there is motion in the photograph.
Challenge yourself to capture the same motion in different ways. For instance, you might go to a race track and stop the movement of the cars completely in one image, then leave the shutter open and allow them to blur out of the frame in the next.
Assignment #3: Shadows
Shadows are everywhere and they are vital to photography because this is the art of capturing light. With light comes shadows and when you begin to look at shadows as a photographer, your world will open up.
- Take a look around for shadows and record them with your camera.
- You could show the shadow as the total focus of the image. Perhaps the shadow is incidental to the subject.
- Is the shadow natural or created by flash?
Shadows are integral to creating depth in a two-dimensional medium such as photography. Take some time to seriously explore the "dark side" of the light.
Assignment #4: Water
Water is everywhere in photography and it presents many challenges. There are reflections and movements to work with and in this exercise, you will take a deeper look at water.
- Find water anywhere: lakes, streams, puddles, even the glass on your kitchen table.
- Pay attention to reflections and use them to your advantage in the photographs. Use this opportunity to get familiar with a polarizing filter (a very useful tool in your camera kit) so you can accentuate or eliminate reflections.
- Play with the motion of a stream or the crashing waves. Notice the difference between stopping the flow of water and allowing it to blur to create a real sense of movement.
Be sure to make water the subject and not an accent to the image. Water alone is beautiful and mysterious and your challenge is to explore all of its potential as a subject.
Assignment #5: Leading Lines
A classic assignment in photography schools, 'leading lines ' is a popular and fun subject. The goal of this assignment is to learn how to direct the viewer to your subject using lines.
- Choose a subject then look around for lines in the scene that you can use to 'lead' the viewer to the subject.
- Find an interesting line then determine what the subject of your photograph is.
- Remember that lines can be man-made or natural. For instance, the yellow line down the middle of the road or a tree branch. Even a person's arm can be a leading line of their face.
Use this assignment as an excuse to take an afternoon photo excursion. Walk downtown or in the woods and look around you for interesting lines that lead the eye to a subject. There is an amazing assortment of lines out there in the world and once you begin to see them, you won't be able to stop.
Assignment #6: Perspective
How do you normally stand when you shoot? If your answer is straight up like a 5-foot-something human being then this assignment is for you. The perspective assignment challenges you to view the world from an entirely new perspective, which in turn gives the viewer a new look at the ordinary.
- Take another afternoon or evening for a photo excursion wherever you like.
- This time, every time you find something to photograph, stop!
- Ask yourself: How would a squirrel see that tree? How would a robin view that birdbath? How would a snake view that log?
- Take your photographs from very high or very low angles. Get on your belly or stand on a chair, whatever you have to (safely) do to get the 'right' angle on your subject.
If you pay attention to professional photographs, many of the images that have the WOW factor are photographed from extreme angles. People enjoy these photos because they've never seen an object from that viewpoint. It is new and unique, and you can train yourself to shoot with this in mind.
Assignment #7: Texture
You may have captured a few textural details in the 'Up Close' assignment, but this assignment takes that to the next level. The goal in this one is to study textures and forget about the object itself: the texture becomes the subject. You will also begin to realize how light affects the appearance of texture.
- Find a few objects that have very detailed textures like trees or rocks, even knit sweaters or woven rugs.
- Photograph them as close as your lens will allow.
- Use different angles and capture the same texture as the light changes. Notice how the different lighting directions and camera angles can change how much texture appears.
Textures are all around us and many of the best photographs in the world play up the textural element. This assignment should teach you how to recognize and accentuate those elements in your photos.
Assignment #8: Color Harmony
Color is important to photography because the world is full of color. This exercise requires a bit of study in color theory, which you will then put into practice in your photographs.
Do you remember art class in elementary school? You may have learned that yellow and blue make green, but color theory goes beyond that. There are cool and warm colors, complementary and contrasting colors, neutral colors, and bold colors.
It can get quite complicated, and photographers should have a basic understanding of color so you can use that when composing photographs. You don't have to study color like a painter would but can use tricks used by interior designers to influence your color decisions.
- Once you have an idea of color theory, take another photo excursion and put what you've learned into practice.
- Capture photographs with the primary or tertiary colors.
- Look for complementary colors then contrasting colors to photograph.
- Try finding a scene to photograph that is filled with neutral colors, then one that uses a bold color to 'pop' from the scene.
This is an advanced lesson, but one that any photographer working with color images will find useful. As you practice working with colors, it will become second nature and you will know how to work with color to change the feel of your images.
Assignment #9: Emotions
Take a photo of a person smiling or scowling, right? Not so. The intent of this assignment is to convey emotion in photographs without a face.
- Take photographs that express each of the basic emotions: happy, sad, and mad.
- How would you express the feeling of anger with no person? What about happiness? Sadness?
This is a purely conceptual assignment, but it is important to be able to relay emotion in your photographs and you might not always have a person available to do that with. Challenge yourself to think deeper about this one.
Assignment #10: Don't Look!
Are you ready to put your photography skills to the test? In today's world of digital cameras and the ability to see image captures right there on the LCD screen, photographers are losing some of the skills needed to visualize a photograph.
In this assignment, your challenge is to shoot as if you were using a film camera. That means that you will not look at the photographs you've taken until they are downloaded on your computer. Instead of relying on the camera's screen to see if you 'got the shot' you will rely on your instinct and knowledge, just like photographers did before digital photography. Can you do it?
- Plan a photo excursion to a particular location and permit yourself to photograph only 36 images (a roll of 35mm film).
- Turn off your camera's LCD screen so it does not show you the image after you have taken it.
- If you cannot turn off the camera's screen, cut a piece of thick paper and tape it over the screen. Use masking or painter's tape so you don't leave a residue on the back of your camera.
- Go out and shoot your 36 frames, thinking carefully about each image because you don't have an endless number of shots. Bonus points if you turn your camera to completely manual settings for focus and exposure.
- Don't peek at your photos until you get home and download them.
How did you do? Were you able to get good exposures on your own? How did it feel to be 'blind' and not know how your image turned out right away?
This is similar to what it is like to shoot with film and it does require you to think harder about every image you take. Next time you shoot, slow down and pay attention, pretend that the screen is not there and rely on your own skills to create a great image. You will be a better photographer in the end.
More from The Spruce Crafts
- Introduction to Photography: 8 Tips for Beginners
- A Brief History of Photography and the Camera
- An Introduction to Photography Exposures
- The Best Online Drawing Classes of 2024
- How to Control Depth of Field With F-Stops in Photography
- What Are Complementary Colors?
- Horizontal vs. Vertical Photographs
- What Are the Autofocus Points on a Camera?
- How to Use Point of View to Improve Your Photos
- Learn How to Draw Flowers in Pen, Ink, and Pastel
- The Basic Elements of a Camera
- All About Telescope Photography
- DSLR vs. Point and Shoot Cameras
- Pros and Cons of Film and Digital Cameras
- What Are the Different Parts of a Camera Body?
- The Parts of a Camera Lens
15 Photography Assignments to Challenge and Inspire
By Tata Rossi 23 days ago, Amateur Photography

Photography assignments allow you to experiment with something you have never tried before and play around with different photographic approaches. With such an assignment, you will challenge yourself and develop your skills.
15 Ways to Make Photography Assignments
This list of photo assignments consists of 15 points, so I am sure that you will find the idea to your liking.
1. Self Portraits

The first task is a no-brainer: just take a self-portrait picture each day. Don’t forget to use a tripod and shutter release aside from regular shooting with your arm extended and holding a camera.
Since you will be the model, feel free to unleash your creativity with all sorts of make-up, outfits, poses until you figure out a proper look. Remember to use props as well. Then share your shots with the world via social networks or the dedicated Flickr and Twitter groups.
2. Color Challenge

Here is one of the greatest color photography assignments for the urban environment photos . Bring the camera with you and take pictures for several hours. Pick a color (or ask a friend to choose it for you to complicate the task) and photograph subjects of the chosen color only.
Once you are done, you will find yourself seeing this color everywhere! Then pick the best shots and merge them into a collage or mosaic in Photoshop .
3. After Dark

Practice with night photography and try taking pictures after dark. In case you are outside the city, you may shoot moonlight or star trails. While being in the city, capture light trails of vehicles or buildings with the light-up windows. Regardless of the location, experiment with light-painting by means of long exposure photography and moving a flashlight across areas of the scene.
4. Crop or Rotate All your Photos a Specific Way
One of the best photography practice assignments is to neglect your comfort zone and try something new for a change. For instance, if you have a tendency to snap the same kinds of photos, you should modify their perspective.
Try an approach to cropping or rotating your next 50-100 shots that differs from your regular one. Play around with square photos, 180° rotation or whatever else you can come up with. Once you get out of the familiar artistic routine, you will be able to perceive the world from another angle and get creative.
5. Quit Social Media Temporarily
/cdn.vox-cdn.com/uploads/chorus_asset/file/13439373/shutterstock_425107399.jpg "photography assignments for beginners")
Social networks can serve as an excellent source of photography inspiration or lead to a complete lack of it. If you use social networks without critical thinking, you may start comparing yourself to other photographers, which will be a total waste of time and effort.
While it may be one of the hardest photography assignments these days, taking a hiatus from social networks is highly important. Log off your Instagram account for some time or uninstall apps that leave you in a bad mood.
In case your job requires staying online on a daily basis, devote some of your time to non-Internet tasks, like taking pictures or gaining knowledge on photography. I suggest taking some online photography courses .
6. Shoot Every Day for a Month
If you wish to become a better photographer , you shouldn’t stop shooting. By taking pictures constantly, you will receive more feedback and will be interacting more actively with the world.
One of the most widespread photography class assignments is to take one picture each day for a month. Do it with the help of the smartphone, DSLR camera or any device that can photograph. But don’t take meaningless pictures just because you have to. The shots you take should resonate with you in one way or another and be valuable to you.
The Zen masters suggest that you have a “daily practice.” When we repeat something, we become closer to recognizing the “truth”. You may read a great number of photo theory books , but you won’t be able to shoot properly. Only through practice, repetition, feedback and constructive criticism, you can grow as a photographer. Remember that this assignment is about forming a habit, not about taking a perfect picture each day.
7. Experiment with a Completely Different Genre

The array of photography genres is truly vast. Underwater photography , glamour, smartphone, landscape photography , portrait photography – that’s only a beginning. If you feel like you are losing interest in photography, switch to another genre.
Try staying away from your primary photography genre for a while. In case you shoot portraits, go outside and capture the area where you live in. If you are involved in photographing pets , play around with self-portraiture. By getting familiar with various photography genres, you are widening your photography horizons and gaining new knowledge that may come in useful one day.
8. Put Together a Photo Album

We live in a digital world, and even nowadays’ photography comes mostly in a digital form. We constantly find ourselves sharing our photos online. It is a rare thing to print photographs, even touch them, let alone create something physical out of them.
That’s why one of the greatest photography tasks is to compile a photo album. You can buy one at a store or online. Print the desired shots in the small 4×6 size. I suggest collaborating on this task with your friend, child or partner. Think of the main idea, theme or story of the album. Put all the printed shots on a surface and consider how you will lay them out in an album, how you will pair them and in what sequence.
No wonder that our parents and elderly relatives used to create a photo book together. It is a nice way to preserve precious memories in a physical form and bring back the moments that we sometimes tend to forget over time.
9. Take Creative Self-Portraits with a Friend

While you may enjoy your own company while taking self-portraits, you may feel bored or lonely after some time. In this case, you can implement one of the most entertaining photography assignment ideas and take self-portraits with a friend (pets are welcome as well!).
Don’t forget to think through the poses, set up the tripod and find the perfect photography light. As you will be engaged in all these activities, you will be able to get a hang of a photographer’s workflow. Then, when it comes to a real photo shoot with the clients, you will be more skilled at dealing with the camera and lights.
10. Attend a Photography Workshop
Photography workshops is an excellent investment in your education as a photographer and one of the most helpful beginner photography assignments.
Pick a workshop that is dedicated to the topic relevant for you. Thanks to workshops, you will get not only theoretical but also practical information. Also, you will have your questions answered by real professionals.
11. Photograph the Same Person or Object Every Day
In case you aren’t as excited about photography as before, try capturing one and the same person or object each day for a week or month. Similar to the smartphone photography challenge, as a result, you will realize the importance of having the freedom to photograph anything you wish.
While snapping pictures of the same object, you will boost your lighting skills. To make the shots differ from each other, don’t hesitate to play around with various types of lighting and photo editing apps .
12. Go a Month Without Using Social Media
Being the photographer of the 21st century, you may find yourself in the never-ending trap of feeling the need to post photos on social networks each day. It all turns into some sort of addiction – all you crave is likes, comments and new followers. If you don’t receive the online praise you need, your photography stops making sense.
In fact, photography is something you should pursue on your own. What truly matters here is your personal thoughts on your shots, not the opinion of users online. Simply uninstall all the social network applications from the smartphone (you can bring them back once the assignment is over). Posting photos and looking through photos of others is prohibited.
If you manage to stay away from social networks for a month, you will acquire a clearer purpose of your photography work. Besides, you won’t be so obsessed with the imaginary social network competition that everyone seems to be involved in.
13. Shoot with a Limited Amount of Equipment

Regardless of whether you are an experienced, amateur or a beginner photographer , you are likely to be after all sorts of photography gear to enhance your results.
How about photography assignments where you have to use a restricted amount of shooting equipment? You can photograph strictly with one camera body or camera lens . There is no need to do it for an entire month.
For this assignment, I suggest coming up with a plan, and do it, for instance, only once a week. Working with the same gear every day will give you more flexibility in both the creative and physical aspects of the process.
So, in case you deal only with a zoom lens, you will have to experiment whenever you shoot indoors . With a wide-angle lens only, you will need to work on cropping and correcting distortions.
14. Limit Yourself to X Photos a Day
Similar to the previous assignment, limiting yourself to 10, 20, 30 or more shots per day, week or month will help you realize what your true creative needs are. Besides, with a photo limit, you will understand what subjects or scenes you are more inclined to photograph.
Another benefit of a photo limit is that it will bring more patience and creativity into the process. You won’t be able to take numerous pictures of one place, so you will be forced to risk and play around with various perspectives.
15. Take Photos with Your Smartphone Camera Only

Take pictures only with a smartphone camera for a week. For better results, download a top-notch camera app and try to figure out all of its settings. A modern smartphone will help beginning photographers get acquainted with the technical side of the shooting process.
To complicate the task, I suggest recreating some of your portfolio photos with the smartphone camera. With this assignment, you will learn all the intricacies of shooting with a smartphone and may even start taking shots not only with a standard camera but with a smartphone one as well on a regular basis!
Freebies for Photography Assignments

Thank you for download!
Check your email to download freebies. (approx. 1-2 min)
Using these presets for beginners, you will be able to enhance portrait, wedding, newborn, landscape, real estate and e-commerce photography. The presets are compatible with all Lightroom versions. Experiment with adjustments to achieve the ideal result!
- New approach
- Freebies

Photographers Field
Exploring the photographic field, 27 engaging photography exercises for beginners to learn from {free pdf}.
Many times we start our photography journey with just noticing things around us. What we should also do is to start learning different ways to communicate through our images. If you didn’t yet hop on the 52 week photography challenge , we have added these 30 engaging photography exercises for you to develop your skills during the next few months.
Table of Contents
Why Should You Do These Exercises ?
The question actually is, why shouldn’t you?
Have you been monitoring your journey as a photographer, and what kind of changes have you been seeing?
When you decide to start moving to the direction of intentional practice, the development will follow.
27 Engaging Photography Exercises
Every exercise will force you to inspect your images from a different perspective, so try to focus on only one exercise at a time.
These exercises vary from photographic ones to ones that will have you inspecting your work as an artist. Each of them is essential in learning new ways of creating images.
![Looking for ways to inspire your own photographic journey? These 27 photography exercises will raise your creativity to a new level. [download your free PDF]](https://i0.wp.com/photographers-diary.com/wp-content/uploads/2022/03/pexels-photo-3673550.jpeg?resize=748%2C1122&ssl=1 "photography assignments for beginners")
1. Photograph something you love
This can be anything you decide. It can be an event, a place or an object. You can also choose to photograph people, but since it might require more effort than choosing to photograph other elements, we recommend you get back to it once you’re mastered to be comfortable with your camera.
2. Photograph something round
This is pretty self-explanatory. We have alot of organic and non-organic round shapes around us, so the framing will ultimately determine what round objects you let into the image.
![Looking for ways to inspire your own photographic journey? These 27 photography exercises will raise your creativity to a new level. [download your free PDF]](https://i0.wp.com/photographers-diary.com/wp-content/uploads/2022/03/pexels-photo-8399299.jpeg?resize=748%2C1122&ssl=1 "photography assignments for beginners")
3. Photograph someone close to you
Family members, other relatives or friends. People you already feel comfortable being with. See how directing them and having the access to be close to them might affect your way of photographing.
4. Photograph an object / subject that is moving
Running people, passing by cars or other vehicles. Can you use your cameras setting so that you stop their movement – or on the other hand – set them so that the movement is visible and can be seen in the final image?
![Looking for ways to inspire your own photographic journey? These 27 photography exercises will raise your creativity to a new level. [download your free PDF]](https://i0.wp.com/photographers-diary.com/wp-content/uploads/2022/03/pexels-photo-9899966.jpeg?resize=748%2C935&ssl=1 "photography assignments for beginners")
5. Learn to use negative space
Negative space is an important element when creating your image; it gives more stillness and room for other elements to pop up in your work. How you decide to compose it, is up to you. In landscape negative space is a natural way of creating imagery, but how can you add it to let say, portraiture?
6. Focus on an object in the frame
Once depth of field is nothing new to you, start implementing the focus point only on the subject you want to emphasize. You will be able to truly bring the focus point to the elements that you want to show. This is a highly effective way of photographing, especially if there is surrounding noice in your frame.
7. Play with shadows
In this one try to focus not on the object itself, but on the shadows that the objects / subjects have. What kind of shapes can you find, and are they even more interesting that the objects itself? Can you frame them in a way that creates an abstract image?
8. Shoot analog
Many photographers say that photographing with a digital camera might feel convenient, but also steals the image of it’s moment. Since there is no rush in taking the image or no surprise whether you’ve had the shot you were looking for, you will approach it differently. At least at some point, try to photograph with an analog camera, and see how your approach changes. The best film cameras to start out as a beginner, are listed here.
![Looking for ways to inspire your own photographic journey? These 27 photography exercises will raise your creativity to a new level. [download your free PDF]](https://i0.wp.com/photographers-diary.com/wp-content/uploads/2022/03/pexels-photo-2910028.jpeg?resize=748%2C668&ssl=1 "photography assignments for beginners")
9. Create a self-portrait
We are quick to photograph others, but what if you turn the camera to yourself? You can better practice lighting, but self-portraiture is a great way to start accepting ourselves as we are, without judgement. You can also practice as long as you feel like it, since theres not pressure in succeeding.
10. Play with reflections
Take a walk and look around; notice any mirrors, ponds or glass windows? They can be a great tool for seeing the world differently. Using them as self-portrait elements or just reflecting two different surfaces into one image.
![Looking for ways to inspire your own photographic journey? These 27 photography exercises will raise your creativity to a new level. [download your free PDF]](https://i0.wp.com/photographers-diary.com/wp-content/uploads/2022/03/pexels-photo-5514777.jpeg?resize=748%2C935&ssl=1 "photography assignments for beginners")
11. Analyze your images
If you can, print out your favorite image you’ve made and look at them critically; what are the main themes you like to work with? Do you have a specific way of composing the elements in your images (ie. always horizontal / vertical) ? Are you great at photographing people, or are you more intrigued by moments or small details in your life? Looking deeper into what you’re good at and what you like to focus on, can determine better who you are as a photographer.
12. Use objects to frame your image
It’s called ‘frame-within-a-frame’ – look for elements which you can use as a frame within your image: branches of trees, window panes or doors can all work when framing your main object / subject in the image. But you can get creative and use a cut out fabric or a cardboard to create this frame.
![Looking for ways to inspire your own photographic journey? These 27 photography exercises will raise your creativity to a new level. [download your free PDF]](https://i0.wp.com/photographers-diary.com/wp-content/uploads/2022/03/pexels-photo-7674327.jpeg?resize=748%2C935&ssl=1 "photography assignments for beginners")
13. Look at things through shapes and lines
Once you manage this one, it will support your photographic journey in every image you’ll ever take. When looking at great photography locations, noticing how the surrounding elements will play out in your images will determine whether they will work or not. Seeing lines immediately or noticing if the place already has an organic shape which you can use in your images, will help you to better build impressive images.
14. Create a photo essay
Creating a photo essay is another great way to find your visual language. How do you form a story through images, what kind of different images are you combining to tell an intriguing story? Try to shoot 5 images alternating between different angle of views and practicing composition.
15. Use less light in your images
When starting out photography, we often think the image is created around the light. Which it essentially is, but tweaking the amount of light you let in, is what can drastically change the mood the image. Shed only a beam of light on your subject or or let the light be reflected from an illuminating surface like screens, will give just enough light to build interest.
![Looking for ways to inspire your own photographic journey? These 27 photography exercises will raise your creativity to a new level. [download your free PDF]](https://i0.wp.com/photographers-diary.com/wp-content/uploads/2022/03/pexels-photo-3794732.jpeg?resize=748%2C997&ssl=1 "photography assignments for beginners")
16. Learn to read the light in the space
Eventually this will be essential if you don’t want to always guess what settings you’re going to adjust when you’re about to shoot. Being able to look around you to verify; what is the main light source in the room and how or if you’re going to fill it with any additional light. And if not, how are you going to set your camera to support the lighting circumstances that are present.
17. Try to shoot black and white
For the aesthetic purposes and the feel of film, it’s quite nice and is definitely worth a try. Black and white film will also let you understand the importance of color, once it’s absent, you will notice how the viewer focus will move once the colors are not colliding with each other. Will they focus more on the narrative in the image instead of reading the colors ?
![Looking for ways to inspire your own photographic journey? These 27 photography exercises will raise your creativity to a new level. [download your free PDF]](https://i0.wp.com/photographers-diary.com/wp-content/uploads/2022/03/pexels-photo-3048527.jpg?resize=748%2C1122&ssl=1 "photography assignments for beginners")
18. Create a theme before you start photographing
One way of shooting is this intuitive way of noticing details and thins you want to take a picture of. Another way is to plan ahead; what elements are you looking for to photography, and why? This is also much needed if you’re planning on doing a photoessay, or possibly even small commission job – staying ahead with knowing how you create the storyline.
19. Create a new photo by cropping
Some days you’ll notice later how you could’ve created an amazing image if you you’d go closer to your subject or object you were shooting. Instead of starting to crop the images and not moving an inch closer, try to crop it the way you’d like the image to be. Then next time, use this image as a guideline to go closer and create the actual image.
20. Recreate a photo you like
Maybe don’t choose the most ambitious one as your first picture, but do choose one that for some reason you feel is well created or -lighted or just sparks your interest in some way.
![Looking for ways to inspire your own photographic journey? These 27 photography exercises will raise your creativity to a new level. [download your free PDF]](https://i0.wp.com/photographers-diary.com/wp-content/uploads/2022/03/pexels-photo-2311851.jpeg?resize=748%2C1122&ssl=1 "photography assignments for beginners")
21. Learn to create a moodboard
If you want to plan more on what you photograph, creating a moodboard will bring you more focused view on what it is the photos are going to look as whole. We often just want to photograph without much thought, but it brings another level of reward once you see the end result of multiple ideas come into one.
22. Use a disposable camera in one day
This has a similar effect then photographing with an analog camera, except that you cannot do fancy settings or think much about the images. Disposable cameras will not give you the best quality in images but it will give its own feel to them. Photograph one full roll in your disposable camera and see what comes out. To find the best disposable cameras, I’ve made an extensive list for them here . For additional challenge; create small photo essays of the images you make.
![Looking for ways to inspire your own photographic journey? These 27 photography exercises will raise your creativity to a new level. [download your free PDF]](https://i0.wp.com/photographers-diary.com/wp-content/uploads/2022/03/pexels-photo-5111467.jpeg?resize=748%2C1122&ssl=1 "photography assignments for beginners")
23. Photograph something abstract
We are prone to trying to find meaning in our images, but what if you decide that there isn’t any and just look for things that you find aesthetically pleasing? It can be texture, color collision or just something you turn into nothing specific.
24. Choose a spot to photograph from
Trying to find new ways of looking at the same things; choose one spot you create 3 images for 3 days in a row. You can direct your camera upwards or downwards, or however you see fit. But do not change the spot you’re photographing from. Think about the time you shoot the images at and if they differentiate from each other.
25. Photograph a person without any faces
If you feel you’re not familiar with photographing people just yet, start by photographing them without showing their face. This will let them be at ease but you will also find it easier to access their space when you do not have to think too much about identifying them in a specific way.
![Looking for ways to inspire your own photographic journey? These 27 photography exercises will raise your creativity to a new level. [download your free PDF]](https://i0.wp.com/photographers-diary.com/wp-content/uploads/2022/03/pexels-photo-4546117.jpeg?resize=748%2C1124&ssl=1 "photography assignments for beginners")
26. Create a fictional journalistic image
Having even the slightest interest for journalism and the visual aspect of it, this will work as a stepping stone in understanding how journalistic images are created. Usually, of course these events are actual, but how a photographer decides to portray the event is always a responsibility and it can change the viewpoint of how the viewer will see it. Create a fictional happening and build an image that could easily be published in your local paper.
27. Go closer
This was almost covered in one of the earlier exercises, but is such an important aspect of photography overall that it needs to be underlined. As much as changing your viewpoint changes the content of your images, so does the distance you have between you and your subject. As Robert Capa once said: “If your photographs aren’t good enough, you’re not close enough”.
These photography exercises can be found in the free PDF below . Follow your development and how you perform these exercises.
If you liked this article, you will love
Photographers Artist Statement | 9 Ways To Write An Interesting Statement
9 Best Used Tips For An Epic Photography Collaboration
How To Start Your Photography Side Hustle Today And Earn Extra Money
Aiheeseen liittyy
One thought on “ 27 engaging photography exercises for beginners to learn from {free pdf} ”.
Nice article
Leave a comment! Cancel reply
Discover more from photographers field.
Subscribe now to keep reading and get access to the full archive.
Type your email…
Continue reading
- Skip to primary navigation
- Skip to main content
- Skip to primary sidebar
- Skip to footer
DIGITAL PHOTO MENTOR
Photography tips, tutorials and guides for Beginner and Intermediate Photographers.

10 Creative Photography Assignments to Inspire You Into Action
by Andrew S Gibson | Last Updated: November 8, 2022
Finding interesting things to photograph can be one of the most difficult things for a photographer to do.
You’re surrounded by potentially interesting subjects, but you might not realize it if you’re stuck for inspiration. I have been stuck, so I know what that feels like.
The good news is that the world is full of interesting ideas and subjects. All you have to do is find the good ones and develop them into personal photography projects that work for you.
Of course, wouldn’t be easier if you could find lots of ideas in one place?

That’s why I wrote an ebook called 100 Creative Photography Assignments . It gives you lots of ideas for projects that you can do close to home, without traveling to exotic locations.
The book is structured into 20 broad themes, with five assignments for each theme.
To give you a taste of what’s in the book, and to help you get inspired into action here are 10 of my favorite assignments. (The theme for each is shown in brackets after the assignment number and name)
Assignment 3: Urban trees (trees)
Humans have planted trees in formal gardens for centuries to bring nature into towns and cities. Photographing trees in urban environments gives you something that is different than traditional landscapes.
How can you explore the juxtaposition of man-made and natural items?
In the photo below, the tree, which is obviously well-cared for fits in perfectly with the historic home. The two go together, as intended.
But in other situations, you might find a jarring contrast between the natural and urban environments. That is called juxtaposition and it can make for some really striking images.

Assignment 8: People and the sea (or a lake)
How do people interact with the sea?
The sea has strong links to leisure, sport, and industry, all of which have plenty of potential photographically. Think beyond simple photos of people on summer holidays. How can you explore the relationship between people and water in more depth?
Another approach is to show scale and photograph people in a way that shows the vast size and scope of the ocean. Yet another is to show people battling the weather, perhaps fishermen at sea.

Assignment 20: Framed by color (frames)
Some frames are visual rather than literal. One way to make a visual frame is to look for compositions where the main subject is surrounded by a solid block of color, as in the photo below.

This is another assignment that tests your observational skills. It also has the potential to make an interesting series. What happens when you group a set of photos that use color as a frame together?
Assignment 24: Weathered surfaces (texture)
Old buildings of all descriptions are made of materials with interesting textures. The definition of old is relative, your chosen building might be hundreds of years old or just a few.
The important thing is that it looks old. That means visible signs of weathering, like the metal wall and wooden door frame in the photo below. Some texture surfaces, like rust, also have interesting colors that you can use to your advantage.

Assignment 31: On the outside (buildings)
One approach to photographing buildings is to include as much of the building as possible in the frame. But what happens if you take another approach?
Have you ever stopped to notice the interesting things that people put outside buildings?
In Italy, I found a shrine on the outside of a colorful red building in Venice (below). In the United States window boxes and mailboxes are commonplace. Nearly everywhere you go you’ll see plants in pots outside people’s homes.
All these items make potentially interesting subjects and have the potential to be turned into an interesting series.

This assignment gets more interesting when you do it in different places, and compare the things you find outside buildings in one place with those in another location.
Assignment 39: Urban decay (your local neighborhood)
Some buildings can look good for centuries if they’re well maintained. But others soon fall into decay, especially if they’re not kept up. Look for the beauty in decayed or run-down buildings.
You expect older buildings to be in a state of disrepair, especially if you live in a country that has plenty of ruins. But more modern, urban decay can be just as interesting.
Why do modern buildings fall into disrepair? What stories do they tell about their neighborhoods, towns, and cities?
Another approach to this idea is to photograph urban decay in other countries, and then compare the results with what you capture in your local area.

Assignment 54: Capture the character of a place (b/w)
The absence of color gives you another way of capturing the character of a place. Yes, it’s true that in some areas color is an essential part of the essence of the place. But in others, it’s less important.
Working in black and white gives you a chance to see through the colors and get to the essence of a place. Visually speaking that’s texture, contrast, and tone.
But in another way, black and white images seem to help you see further and deeper. They’re moody, atmospheric, and timeless. Use these characteristics to create a set of photos that capture the character of a place.
It’s also an assignment you can do when you travel. It’s easier because you get to see everything with fresh eyes. But for a real challenge try it in your local neighborhood, where familiarity can prevent you from seeing things that might be obvious to newcomers.

Assignment 62: Embrace hard light (light and shadow)
In this assignment, your brief is to photograph a scene on a sunny day when shadows are falling across the subject in an interesting way.
Look at the way the sun casts shadows across the scene during the day. How do the shadows move as the sun moves across the sky? Do the shadows make interesting shapes?
For example, in the photo below the shadow falling across the building comes from a neighboring house and you can clearly see the chimney.

Assignment 71: Signs (everyday objects)
We’re surrounded by signs – signs that tell us which way to go, what to do, that advertise to us, state the name of a business, or tell us about roadworks.
Signs are designed to be informative, but they can also tell a story. Signs in the American mid-west look different from signs in New York City. Signs here in the UK look different from the ones in rural France. Old signs have character and tell you something about the place.
What interesting photos can you make using signs?

Assignment 94: People in the landscape (landscape)
Some landscapes are empty or void of visitors. But others are closer to large population centers and therefore you’re more likely to see other people there in the scene. The idea of a pristine landscape untouched by man is appealing, but it’s also interesting to see how people interact with the scene.
One way to approach this assignment is to use people for scale. A human figure can anchor a composition and show the width and breadth of the landscape. A small figure in the frame emphasizes the size of the landscape, and the idea of people being small compared to the beauty of nature.
The photo below juxtaposes two elements of human interaction. The stone pillar is part of a Neolithic settlement, and the people on the right are modern visitors who came to see it.

Taking it further – traveling and exploring your archives
You’ll get the most from these assignments if you make new photos for them. They’ll get you thinking about your local neighborhood – and areas a little further afield – in a new way.
The beauty of these assignments is that most of them are repeatable. You can select your favorites and use them as themes to follow when you’re traveling away from home.
You might also find that you can go through your archives and find photos that match a particular assignment. It’s an interesting exercise because you’ll start to see themes and connections that you didn’t realize were there.

For example, I have photos that fit Assignment 39: Urban decay from Alaska, Chile, and my hometown (see above). And I can continue to explore this theme when I travel to new places as well.
These ideas are explored further in Creative Photography Assignments: Themes & Projects, a bonus ebook that comes with 100 Creative Photography Assignments.

100 Creative Photography Assignments
Buy 100 Creative Photography Assignments now for just $14 USD.
Buy it now and get out there taking photos!

Note from Darlene: This is perfect if you want to get out there doing some photography. But maybe due to covid, finances, or other circumstances you can’t currently travel. Look no further than your front door to get started! To really challenge yourself do the 100 assignments one a day for the next 100 days!
About Andrew S Gibson
Andrew S. Gibson is a writer based in England’s southwest. His interest in photography began when his parents bought him a Ricoh KR-10m camera more than 20 years ago. Since then, he’s taken photos in over 60 countries, studied for a degree in photography, and worked as Technical Editor for EOS magazine. Today, he makes a living helping people make better photos through ebooks and photography courses.
Learn Photography Basics
Yes, you can learn to take better photos! It’s my passion to help you learn the photography basics and take better pictures. It’s also the same reason I teach workshops, do photo travel tours, and have online photography courses available.
Enroll in our free photography basics for beginners course, or 12-part portrait photography course , also free.
Recent Photography Articles
- Get Into Gear By Completing 10 Powerful Composition Challenges
- Lifestyle Photography Tips for Realistic Portrait Photos
- Step-by-Step Guide to Making Stunning Portraits With One Light
- How To Discover and Develop Your Unique Photography Style
- Luminar Neo GenExpand: Game-Changer or Just Hype?
Useful Links
- Beginner Photography
- Intermediate Photography
- Photography Challenges
- Photography Tips
- Photo Editing
- Recommended Amazon Products
- Course Login
- Write for Us
Five Self Assignments That Teach You To See
A Post By: Rick Berk
In my 20 years in photography, I’ve seen a lot of different assignments teachers have given their students. Most I have heard, or been given myself from time to time, have centered around learning to use the camera. Things like “Use Only One Exposure Mode”, “Use Only One Lens”, or “Use One Aperture Setting”. The most interesting to me, from a photographic standpoint, involved learning to see. The reason I say this is that simple camera use can be easily learned. It’s basic math when you boil it down. But learning to see creatively, learning to compose a shot, takes much more than learning buttons, dials, and controls. These self assignments force you to look around you, to really see what you’re shooting and try to make interesting images.
1. Pick A Color
Pick up your camera and choose a color for the day. Go out and make images with that color as a dominant element in the image. Find as many different ways as possible to do this.

This image I went in search of things red. 1/320, f/7.1, ISO 1000. EOS 5D Mark II, EF 100mm f/2.8L IS Macro.
2. Pick A Shape
Choose a shape and create images which use that shape in an interesting way. It could be features in architecture, artwork, or juxtaposition of multiple structures. Squares are relatively easy. Start there, and then search out triangles, circles, or combinations of shape. Again, look for the most interesting composition you can to highlight that shape in your image.

I ventured into Central Park in New York City without a real game plan in mind. I found a sundial and started shooting that, and then went in search of more circles. Found this ironwork and used it to frame a pair of lovers in a rowboat. 1/160. f/2.8, ISO 100. EOS 5D Mark III, EF 24-70 f/2.8L II at 24mm.
3. Shoot Something Different
If you’re like me, you probably have one type of subject you gravitate to more than any other. But it’s easy to get too comfortable, and miss opportunities to make great images, when you’re only looking for one thing. Once in a while it’s a good idea to change things up and shoot something different. If you’re a sports shooter, try shooting a still life. If you’re a landscape artist, try shooting macro. These types of exercises forces you out of your comfort zone and helps you learn to see in a new way.

Normally I’m a landscape guy first. But I decided I wanted to try a still life of one of the tools of my trade. I used some black plexi as the table, and black matte board for the background. I used a single speedlite in a softbox above and behind the subject. EOS 5D Mark II with EF 24-70 f/2.8L II. 1/200, f/8, ISO 100.
4. Shoot Reflections
Reflections are a powerful element in photography, but I’m almost embarrassed to admit how long it took me to actually start SEEING them. I had a “lightbulb moment” one day when shooting with a friend of mine, and since then, I am constantly looking for reflections as an element in my work, whether it be portraits, landscapes, or still lifes.

This is probably the most photographed puddle in New England, but it’s great for producing a reflection of Pemaquid Point Lighthouse. Reflections add interest to images so always be on the lookout. EOS-1D Mark IV, EF 16-35mm f/2.8L II. ISO 100, 1/20, f/16.
5. The 15 Foot Circle
Stand in the center of a room, or wherever you happen to be. Make photographs only of subjects that happen to be within 15 feet (or 10, or 5) of where you’re standing. Give yourself a time limit. Exhaust all possibilities. Get as many images as you can using only that area before moving on. This kind of exercise forces you to really look at things and work to compose interesting images.

I was standing in a dining room at the holidays last year and decided to try the 15 foot circle. This was a line of candles on a fireplace mantle. EOS-1D X with EF 70-200 f/2.8L IS II. ISO 400, 1/250, f/2.8.
For beginners, these assignments are great for learning to see. For more experienced photographers, these are great ways to stay fresh, to restart the creative eye when you’re feeling blocked, or to just do something different. What other self assignments have you tried to refresh your photographic vision?

Read more from our Tips & Tutorials category

is a photographer based in Freeport, Maine, shooting a variety of subjects including landscapes, sports, weddings, and portraits. Rick leads photo tours for World Wide Photo Tours and his work can be seen at RickBerk.com and you can follow him on his Facebook page and on Instagram at @rickberkphoto.
Some Older Comments
- Guaranteed for 2 full months
- Pay by PayPal or Credit Card
- Instant Digital Download

- All our best articles for the week
- Fun photographic challenges
- Special offers and discounts
- Photography Articles
- Camera Buying Guide
- Lens Buying Guide
- How to Learn Photography
- Time Lapse Photography
- Learn & Explore Photography
- How to Articles
- Holiday Gift Guides
- Photography Blog
- Color Management
- Travel Guides
- Astrophotography
- Free Photography eBooks
- Real Estate Photography
- Bird & Wildlife Photography
- Tip of the Week
- Photography Quotes
- Best Canvas Print Company
- Best Workshops & Tours 2020/2021
- Photography Glossary
- Photography Lighting
- Drone Photography
- Portrait Photography Tips
- Beginner Photography Tips
- Best Large Print Companies
- Gallery Home
- Latest Uploaded
- View by Categories
- Inspirational Photos
- Upload Your Photos
- Photography Forum Home
- Latest Posts
- Search Photography Forum
- General Discussion
- Taking The Photo & Editing
- Photo Galleries & Critiques
- General Manufacturers
- Equipment Research
- Recommended Vendor
- Camera Bags
- Camera Straps
- Maternity Gear
- Community Badges
- Get Metal Prints
- PT Scholarship
- Member Interviews
- 30 Day Creative Eye Challenge
- Bird Photography Mastery Course
- Business Builder Mastery Course
- Landscape Photography Mastery Course
- Travel Photography Mastery Course
- Portrait Photography Mastery Course
Remember me
- Forgot Username?
- Forgot Password?

Beginner Photography Projects

photo by shopformoose via iStock
While you’re stuck at home self-isolating, it may be the perfect time to start some beginner photography projects.
There are a ton of benefits to photography projects, like learning how to develop your artistic eye or figuring out how to use your photography equipment.
Plus, being forced to complete simple photography projects at home will teach you how to get especially creative with limited space and resources.
Here are some of our favorite beginner photography projects for you while you’re stuck indoors.
Photograph a Rubik’s Cube

This may seem like an odd project to start this list out with but here us out.
Rubik’s Cubes are cheap. They’re probably readily available to you and they will help you to learn how to use leading lines in your photos.
Leading lines are a wonderful compositional tool that help direct the viewer’s eye deeper into the shot. They’re often used in landscape photography, but can be used to bring attention to any kind of subject.
Recommended Photography Reading
- National Geographic Photo Basics: The Ultimate Beginner's Guide to Great Photography
- Photography: The Definitive Visual History
- Read This if You Want to Take Great Photographs
Master a Still Life
You should definitely include learning how to shoot a still life in your beginner photography projects checklist.
You can create a classic still life with fruit and wine, or get more creative with random objects lying around your house.
Still lifes will help you learn how to compose your images, allow you to work on lighting, and hone your other photography skills too.
Get some great tips on how to shoot still life photos in the video above by Karl Taylor .
Take a Self-Portrait

photo by SolStock via iStock
Not everyone is comfortable in front of the camera, but taking on a self-portrait project can be hugely beneficial for your photography.
Not only does taking a good self-portrait require you to think about posing, lighting, camera settings, and so forth, but you also have to think about styling, colors, the background , and any props you might want to use.
Self-portraits are also a great way for you to understand what it’s like being in front of a camera, which will help you as you grow your skills and start to take portraits of other people.
Force Your Kids to Sit for a Session

Photo by Caroline Hernandez on Unsplash
Okay, you don’t have to force them to sit. In fact, my kids love most of my beginner photography projects because I’ll have them pull out all of their toys and have them go crazy for 15 minutes while I take their photos.
Letting kids be kids in front of the camera can get you some truly authentic and heartwarming environmental portraits. Besides, everyone likes a good candid portrait now and then too, right?
Plus, if your little one is like mine and loves to mimic you, then you can pick up this adorable camera for toddlers and let them take photos of you too.
Photograph Your Pets

Photo by T.R Photography on Unsplash
Most photography projects for beginners include photographing things you already love and simply trying to find a new way to look at those things. So, why not photograph your adorable pets?
You already post about them on social media enough, so you may as well have some excellent photos of them for your next post.
If you need some help getting your pet to stand still, you can purchase this gadget that attaches a ball to your phone . My dog has never sat more calmly before.
Again, when you’re trying to learn the fundamentals of portraiture, your pets are a great subject. Cats, in particular, will often sit or lay there as you work your portrait magic!
Get some awesome pet photography tips in the video above by Westcott Lighting .
Learn More:
- 4 Photography Mistakes You Need to Quit Making
- How to Carry A Lot of Camera Gear
Find Cobwebs

Photo by Jill Dimond on Unsplash
Whenever I recommend beginner photography projects to people, I try and make them as practical as possible (especially now).
Which is why many of my photography project ideas for beginners include the chance to clean up their space.
Go in search of some cobwebs in your house. You can photograph them and play with lighting before cleaning them up.
Here’s some cobweb photography ideas to get you started:
- Photograph through the web toward the rising or setting sun so the light filters through the web
- Head out to your yard in the early morning to photograph the web covered in dew
- Use a flashlight to illuminate a cobweb at night for a shot with a bright, white cobweb and a dark background
Shoot the Sunrise From Your Window

Photo by Tarik Haiga on Unsplash
There is no better time for finding natural lighting in your home than at sunrise and sunset.
To shoot romantic photos from inside your home, try and capture the sunrise or sunset from your window.
You can focus on the scene outside your window and how the morning or evening light interacts with it.
You can also put a subject - your spouse, a child, your pet - in front of the window to take a beautiful natural light portrait . There might even be opportunities for creating a silhouette.
Just be sure you clean the window beforehand. Nothing ruins an otherwise beautiful indoor photo like nose smudges on the glass!
Look for Reflections

Photo by Maddy Baker on Unsplash
Most of these beginner photography projects are all about training your eye for photography, which essentially means seeing your surroundings in a new light.
Go search your house for reflections you can find. This may be in your morning coffee, or it may be your windows. You might find something interesting reflected in the hallway mirror. Chances are there is beauty hiding right around the corner. You just need to find it!
Practice Sun Stars

photo by Suntammy via iStock
I’m sure you’ve seen sun star photos before…
You can create sun stars pretty easily, believe it or not. Don’t believe me? Check out my video tutorial below!
As with many of these photography project ideas for beginners, you’ll find it’s easiest to capture starbursts when you’re using a tripod with your camera (even a cheap one for your iPhone will work).
Begin a Year-Long Project

Photo by Dan Smedley on Unsplash
For those of you who have been participating in beginner photography projects for a while, you’ve probably heard of Project 52.
It’s when you take a photo every single week for a whole year. Usually, all of these photos will pertain to a specific theme you love.
If you need some inspiration for your Project 52, the 52 Week Photography Challenge is filled with ideas.
Try New Angles

Photo by Shitota Yuri on Unsplash
Whether you’re shooting from the comfort of your home or are working with a client for the first time, you’ll want to know how to explore different angles. Why not try it now?
Get a step ladder and shoot objects around your house from above. Then, crawl around on the ground to figure out what those objects look like from below.
Doing so will help you appreciate how different perspectives can totally change how a subject looks.
Explore Negative Space

Photo by Fabrice Villard on Unsplash
Negative space is one of the most intriguing concepts to explore in photography and it is especially difficult to explore in your home, which makes it one of my favorite beginner photography projects.
Negative space is simply blank space around your subject. It helps make the subject stronger in the frame, and is often used to create minimalist compositions.
Get some practical tips for using negative space in photography in the video above by Peter Forsgård .
Capture One Thing, 10 Ways

Photo by Koen Emmers on Unsplash
If some of these beginner photography projects are too easy for you, I promise this one won’t be.
Find one object in your home. Then, try and photograph it in 10 different ways. You’ll definitely want to clear your schedule for this one and have YouTube at the ready!
Master Silhouettes

If you’re one of the lucky ones that have a yard you can escape to during these times, you can practice capturing silhouettes of your kids, your pets, or strangers on the street.
If you aren’t one of the lucky ones, you can still work on capturing silhouettes, you’ll just need to do it with your windows or artificial light.
Happy shooting!
- How to Carry A Lot of Camera Gear
Not sure what to photograph next?
Go through our 30-Day Creative Eye Challenge and discover the long last secrets to finding awesome shots, anywhere, anytime (with any camera).
We Recommend

- Maternity Photography
- Portrait Photography Master Course
Select a city
Select country, photography practice exercises, practice photography at home.
Photography is a skill that requires constant practice and experimentation, so if you want to improve you need to constantly work on it. Here are some DIY mini-project ideas that you can do anytime.

Know Your Camera The longer you hold the camera in your hand, the more you memorize the location of the buttons and their configurations using muscle memory. For photographers working outside the studio, this skill is really important. You should always know where each button is without thinking about it. You can achieve this by holding and using the camera as much as possible.
So use your home camera and try to change as many settings as you can during this practice period to get used to the feel, position, and button configuration. You should be able to change all camera settings without looking at it. This will help you use and set up your camera faster and take more photos in less time.
Don't forget to read the instructions too. There are many options that you will learn and find very useful if you read the manual. If necessary, watch Youtube videos related to your camera to see what it can do that you thought was impossible before.

Create better composition You can practice composition with almost anything you have at home. Keep in mind, though, that most subjects you find will be stationary, and you won't get much better at shooting the same thing over and over again.
Try practicing composition on non-stationary subjects such as your spouse, children, parents, pets - anything that breathes and moves in the house. You might annoy them a bit, but they'll get used to it eventually. Since they'll be unpredictable and moving all the time, you'll have to constantly readjust yourself to compose correctly, which will allow you to hone your composing skills.
You can almost do the same with stationary objects, but try to compose the shot as quickly as possible this time around. And, of course, after each shot you can switch between multiple objects so you don't get too used to the angle and position.
Try macro techniques Chances are there are at least ten small items on hand right now as you sit at your desk and read this article. There are plenty of opportunities to improve your macro skills using these items while you're sitting at your desk wasting time on the internet.
Take a few of these objects and create a cool scene to photograph (which also allows you to practice conceptual photography). Practice handheld focusing and high magnification handheld shots. You can even practice macro lighting using flashes on table stands. The possibilities are endless in this area, all you have to do is practice.
You don't even need a macro lens. Start by using macro filters or close-up filters or try reverse lens macro. You can even use lamps and other lights in your home to illuminate your subjects. Use the reflective surfaces for creative shots and if you head out to your garden you're sure to find more insects, flowers and leaves that can make good macro subjects. Also, this is the best time to try to learn focus stacking.

Improve editing To get good at editing, you can research new ways to edit something, new processes, and maybe even different workflows. This way you will gain experience in this area and possibly improve the quality of your images and post-processing techniques. Also, it will help you optimize your workflow by getting used to it and eliminating any bottlenecks you might have.
If you're not used to editing your black and white photos, you can give it a try. It can help you develop a creative eye and help you learn to see particular details in black and white. You can also learn to focus more on lines, patterns, textures, tones, shadows, etc. of a scene and create powerful images that will captivate viewers for longer.

Maintenance of your equipment Your camera and equipment should be maintained and cleaned from time to time. It's pretty easy when you're at home and have the luxury of time and a clean workspace. You won't have that luxury on the pitch, so it's essential to know what you're doing and how.
When cleaning your equipment at home, be sure to become proficient. Make sure you can clean your camera, lens, and other accessories as quickly and thoroughly as possible. If you can properly clean your camera (even using the wet process on your sensor), you'll end up saving time and money by avoiding service center visits and being without your camera when it's needed.
Apart from your camera and lenses, you will also need to clean your tripod as most of the time it gets dragged through mud, dirt sand and also salt water if you are shooting near or at the beach. Over time, the parts and the material itself wear out and render your accessories unusable. So be sure to clean and lubricate the tripod and monopod. Also take the time to frequently attend to your other tripod-like accessories.
You will learn something new every time, gain experience and improve. All you need is the will to do it. You will notice the differences and improvements in just a few days.
How to teach photography to beginners
All successful photos have three things in common. Do you know what they are? It’s not the correct aperture, exposure and focus distance. Neither is it a suitable camera, lens and tripod. What about the successful use of hyperfocal distance, ISO invariance and ETTR? No! The three variables that matter most in photography are simple: light, subject and composition.
Light Photography is light. Without it, you couldn't take any photos, let alone good photos. The quality of light varies from photo to photo, but in all cases it is what gives your images their underlying structure. You can't get more fundamental than that. You've probably seen photos with beautiful light - photos that would otherwise have been rather ordinary. What makes light so important to the final quality of your photos? The character. In its simplest form, light is an emotion. The feel of your photo will be very different depending on the lighting conditions: hard light, soft light, warm light, cold light, and everything in between. Each type of lighting conveys a different emotional message, changing the character of your final image. While there are other ways to convey emotion in your photo, light is one of the most powerful.
If you've never thought about light, go out and take some pictures. At some point, you'll find yourself capturing a scene with spectacular lighting conditions, and you'll realize that taking great photos is almost easy. But what is exceptional lighting? There are so many possible conditions that you can encounter. Which are the best? While I think there are some really spectacular and particularly special lighting conditions - which I'll get to in a moment - the truth is that any type of light can be ideal. Indeed, in itself, "good light" means nothing. On the contrary, "good light" is light that makes your photos look the way you want.
A few types of light are special enough to be researched as often as possible, as they are particularly good for a wide range of subjects. The most important, at least for outdoor photos, is the golden hour - the times of sunset and sunrise when the sky is filled with stunning colors and the atmosphere filters the light into a soft glow.
Similarly, foggy conditions often make for interesting photos, simplifying the scene in front of you and bathing the world in soft, cool light. The same goes for thunderstorms, which make the sky intense and the world dark. Additionally, clear moonlit nights, which can make a landscape look mysterious and eerie, and for "blue hour" - the time of night close to golden hour, but where the sun is well below the horizon, and where everything has deep blue and purple tones.

The quality of light depends on the conditions you encounter, and it's not always something you have the power to change. However, for particularly important photos, you always have the option to wait and capture something amazing when the lighting conditions improve. The best lighting conditions in the world - even in an ordinary field - are far better than the bland lighting of Yosemite Valley. Every photo needs light; every good photo needs good light.
Subject When most of us take a picture, we do it because something caught our eye. This "something" is, unsurprisingly, your subject. If you're describing a photo to someone else, the subject is probably the first thing you'll say. "It's a picture of a mountain with snow blowing through the air." "This is a picture of a whale I saw last year." "It's a photo of my friend." As humans, we think of the world in terms of subjects. A powerful documentary touches us by what it shows us and how it shows it, but most people don't notice the "how". Indeed, a good subject can captivate your viewers, and other parts of an image - including crucial elements, even light - can take a back seat. This is also where the technical aspect of photography comes in. How do you represent your subject? Do you want to isolate it with a shallow depth of field or do you want everything from the foreground to the background in focus? Will your photography be sharp and detailed, or impressionistic and blurry? Every technical decision is really just a creative decision on how to represent your subject in the best possible way.
So when choosing the right subject for a photograph, you have to think about the future. What would the ideal photo of this subject look like, and how can you achieve it? Visualize the end result and do whatever you can to make it happen.
Composition Finally, the third crucial element of any photography is your composition. Composition is, quite simply, the arrangement of the elements of your photograph. It encompasses the position of the camera, the relationships between the elements of a photo, and the subjects you emphasize, downplay, or completely exclude. Composition is how you tell your story. A "good" composition is one that effectively tells your story, without distraction or confusion. Your viewers don't have to get lost in a convoluted mess to figure out why you took this photo. Composition is the stage of the game where you ask yourself "how". How can you convey the beauty, excitement, darkness, intensity, sweetness or any other emotion of a scene as perfectly as possible? How can you arrange the elements of your photo so that the image is successful? A good composition emphasizes the most important parts of a photo, while minimizing what detracts from the image.
As you can imagine, composing is a very personal subject, with many different elements, way more than I could cover in a single article. For the sake of simplicity, I will only touch on them briefly:

Simplicity Your photo should convey exactly what you want, and as few elements as possible should distract from your emotional message. If there are distracting elements in your photo, or elements with different moods and emotions, find what you can do to improve them.
Eliminate anything that can harm the quality of your photo; change your position or framing to lessen the effect. Even if your goal is to take a chaotic and distracting photo, you should do so as clearly and unambiguously as possible, without "non-chaotic" elements that tell a different story. The best way to fix most photos is to exclude as many unnecessary (or harmful) details as possible.
It doesn't just mean deleting them in Photoshop. Although post-processing can play a role here, it is far from the most important. If you haven't mastered the art of simplifying photos in-camera, it's a stretch to believe that the Spot Correction Brush can save the day. Some unwanted elements can slip into your frame, and that's okay. You rarely come across a "perfect" scene without distractions or problems. But if you're aware of these issues in the field, you've come a long way to fixing them as much as possible.
Balance Every part of a photograph attracts some degree of attention - some parts more than others. Bright, saturated colors and high contrast tend to catch the eye of your viewers, for example. The same goes for engrossing subjects or unusual things in a photo, just like in the real world. It's a matter of balance. When taking a photo, be careful where you place the elements that attract a lot of attention. If the left and right halves of your photo have the same visual weight, the composition is said to be balanced; otherwise, it is an unbalanced image.
Neither is good or bad. You can take good photos that are balanced and good photos that are unbalanced. Either way, this decision has a major impact on the underlying sentiment of the photo, i.e. its moods and emotions. A balanced composition looks calm and peaceful. An unbalanced composition, on the other hand, draws more attention to one side of the photo, resulting in a more tense and dynamic result.

Breathing Room When taking photos, each subject should have their own breathing space, or personal space, in the composition, unless you have a specific reason not to. When two subjects are close together, or against the edge of your photo, the result can be disconcerting. This advice is pretty self-explanatory, but you'd be surprised how often I see shots fail because they overlooked something so minor. An otherwise fantastic mountain photo can look completely contrived if placed too close to the top of the frame or, even worse, cut off completely.
Interconnectedness Good photos work because the elements of your composition work together rather than fighting each other. In some cases, it goes even further, achieving what is called interconnection. Sometimes different parts of the same photo have deeper similarities than they appear at first glance. For example, you can photograph a tree shaped like a distant mountain, or your subject wearing a shirt that matches the color of their eyes. Perhaps the simplest example is that of a landscape perfectly reflected in a pool of water. Such patterns give the picture a purpose, even if not all viewers consciously notice this connection. The idea is to make your image feel like a singular, unified whole, where the reason you took the photo is clear. This level of interconnectedness won't always happen, but when it does, the results can be very powerful.

If you master these three variables - light, subject and composition - you will have mastered what is perhaps the most important part of photography: figuring out how to convey your emotional message. Good photos touch us because they impact our emotions and resonate with us on a deeper level. The light creates a strong atmosphere; a subject gives your viewer something to relate to; the composition structures a photo to complete your story. In this article, I have of course only scratched the surface. In fact, no matter how hard you study these subjects, photography is an endless ocean. There is no "end point" to fully understand the creative aspect of photography. It is always possible to learn more. This is what makes photography so rewarding. Light, subject and composition are things you can only really learn by going out there and taking pictures, then critically reviewing your work and seeing how you can improve. So when trying to take the best photos possible, focus on creativity. Yes, the technical aspect of photography is always important; as I mentioned a moment ago, every technical decision is also a creative decision. But you have to back up a "technically good" photo with something more powerful. Ultimately, it's your emotional message, born out of the decisions you make every time you click the shutter.
Practice photography book
A source of ideas and knowledge is a good book. But it can be difficult to choose from the many popular photography books. We've created this list of great books to help beginners and enthusiasts get to grips with photography. Take a look for yourself and see which book suits you best.

The Photography Ideas Book by Lorna Yabsley Published by ILEX in partnership with the Tate group of museums, this dynamic book dissects and reimagines the art of photography, ultimately offering lessons in how to look with fresh eyes. Each page is devoted to a mini description of an artwork and an explanation of a specific concept used to create it, including perspective, multiple exposures, glitching, collage, and scanning. All of these pages explore brilliant photographic processes while shedding light on dozens of exciting photographers working today.
BetterPhoto Basics by Jim Miotke This is an excellent technical book that seeks to demystify the often overwhelming world of photography. Perfect for beginners, it covers common camera controls, explains the basic concepts of aperture, shutter speed and focal length, and provides tips on focusing, lighting and composition. It also contains practical exercises as well as sections with more advanced instructions, making it an ideal book to develop your skills as you progress through your photography journey. Many inspiring photographs will help you understand how all these techniques can be combined, not only during shooting but also in post-processing.
Understanding Exposure by Bryan Peterson Veteran photographer Bryan Peterson explains the fundamentals of light, aperture, and shutter speed, and how they interact and influence each other. With a focus on finding the right exposure, even in tricky situations, Understanding Exposure shows you how to get (or lose) image sharpness and contrast, freeze the action, and get the best meter results, while also exploring filters, flash and light.
Authentic Portraits by Chris Orwig Taking a portrait is not an easy task. In fact, it is an art form in its own right. Chris Orwig is a past master in this art and shares his wealth of knowledge with you. The techniques are refreshingly simple and quickly build confidence. Whether it's finding subjects, preparing yourself, or encouraging your subject, this 400+ page book of portrait photography tips and information has it all. If you want to take soulful and meaningful photos, and not just snapshots, this book is for you.

Extraordinary Everyday Photography by Jed Manwaring and Brenda Tharp The driving force behind this book is the concept that beauty can be found all around us, and that you don't have to travel across the world to get "the picture". Authors Brenda Tharp and Jed Manwaring offer captivating lessons with titles such as "Practicing to See Everyday" and "Photographing at Dusk" to inspire readers to see the familiar in new ways. In plain language, they describe how one can find unexpected pleasures by getting up close, focusing on details, and creating abstract views. They also provide exercises to help you apply what you've learned to your own environment.
Photographers on Photography: How the Masters See, Think, and Shoot by Henry Carroll If you like to learn from the best, consider reading this guide, which highlights approaches from the pros. It is packed with interviews, images and quotes from photographers such as Dorothea Lange, Saul Leiter and Wendy Red Star, which explore their ideas, concerns, motives and methods. Whether you're interested in commercial work, photojournalism, or concept art, you'll come away with a greater appreciation for the artistic process — and some inspiration for your own practice.
The Art of Photography: A Personal Approach to Artistic Expression by Bruce Barnbaum It can be difficult to master the technical aspect of photography, but it is even more difficult to develop your own artistic voice. In this rhapsodic text, photographer Bruce Barnbaum explores approaches to image-making, explaining why large photos work, how color and composition contribute to emotion, and how a single moment can be interpreted in limitless ways. There are some handy tips, like shooting the film and presenting the image, but it's mostly a guide to help you harness your technical skills for maximum creativity.
The Photographers Eye by Michael Freeman Design is the most important factor in creating a successful photograph. The ability to see the potential of a strong image and then organize graphic elements into an effective and compelling composition has always been one of the key skills in photography. In this book, photographer Michael Freeman explains how digital photography has brought a new and exciting aspect to design, with instant feedback from a digital camera enabling immediate evaluation and improvement. This has had a profound effect on the way digital photographers take pictures.
Advancing your Photography by Marc Silber Marc Silber interviewed some of the best photographers in the world and learned their secrets for amazing composition. Today, he brings their wisdom to you in an easy-to-understand manual. Too many photographers reach a certain level and struggle to progress. We are bombarded with so many videos, books and people telling us what to do that it can be overwhelming. Marc wrote Advancing Your Photography so you can have an easy to read manual to take with you. All of his advice is based on decades of photography and the deep wisdom of the fantastic photographers he's interviewed.
Good Pictures by Kim Beil This book takes a fascinating look at how we got to where we are today in photography and why we use the tools we use. You've probably never thought about why we have thumbnails and where they come from. But you will feel much closer to photography after reading Good Pictures.
Picture Perfect Practice by Roberto Valenzuela If you're frustrated and overwhelmed by the challenges of real-life locations and executing a big picture, or just want to become a better shooter but don't know where to start, Roberto Valenzuela's Picture Perfect Practice gives you the tools and information you need to finally become the kind of photographer you've always wanted to be: the kind who can confidently enter any location, in any lighting condition, with any any subject, and knowing that you can create stunning photographs that have timeless impact.
The Photographers Guide to Posing by Lindsay Adler When you're shooting people, you can have great composition, perfect light, and the right camera settings, but if your subject doesn't look good, if the pose is bad, the shot won't make it. Posing is truly a crucial skill that photographers need to possess in order to create great shots. If you're looking to improve your ability to pose your subjects, whether men, women, couples or groups, The Photographer's Guide to Posing by best-selling author and photographer Lindsay Adler: Techniques to Flatter Everyone is the perfect resource for you.
Fast Track Photographer by Dane Sanders Competition in the photography industry has never been fiercer. In this guide, renowned photographer Dane Sanders reveals that the key to success is to stop worrying about what other people are doing and focus on your most powerful resource: you.
How I Make Photographs by Joel Meyerowitz With nearly 60 years of photography experience, Joel Meyerowitz knows a thing or two about cameras and shares some of his top tips for creating engaging and beautiful images in this book, How I Make Photographs. Joel Meyerowitz is considered one of the most respected street photographers of all time. In this book, he lays out four key concepts that will help you better capture your world.
- How to use a camera to own the streets.
- Why you should always look at the world with a sense of possibility.
- How to put your subjects at ease
- The importance of being playful and finding a goal that suits your personality.
Magnum Contact Sheets by Kristen Lubben This groundbreaking book features a remarkable selection of contact sheets, revealing how Magnum's most celebrated photographers capture and edit the best shots. Addressing key questions in photographic practice, the book sheds light on the creative methods, strategies and editing processes behind some of the world's most iconic images. This book is less action oriented than others on this list and focuses more on the stories of the photographers who took the photos. It is a must-read book.
The Art of Photography: A Personal Approach to Artistic Expression by Bruce Barnbaum It can be difficult to master the technical aspect of photography, but it is even more difficult to develop your own artistic voice. In this rhapsodic text, photographer Bruce Barnbaum explores approaches to image making, explaining why large photos work, how color and composition contribute to emotion, and how a single moment can be interpreted in limitless ways. There are some handy tips, like shooting the film and presenting the image, but it's mostly a guide to help you harness your technical skills for maximum creativity.

52 photography projects: a great technique to try every week of the year
Our pick of the perfect weekend photography projects

- Home photography projects
- Outdoor photography projects
- More outdoor photography projects
- Long-term photography projects
Looking for photography projects to stimulate your creativity? Whether you’re a beginner who’s just learning the ropes or a seasoned snapper in need of inspiration, trying out a new technique can help you grow as a photographer. That’s why the list below features our pick of the best ideas to try with your camera.
From painting with light trails to capturing twilight landscapes, there are countless creative ways to use your camera and its lens. This round-up of our favorite weekend projects features suggestions to suit every skill level – whether you’re shooting with a smartphone or a ‘proper’ camera like a DSLR.
Some you can do from the comfort of you home, while others will have you heading out in search of specific scenes. Whether it’s a novel technique or an inventive suggestion for finding fresh subjects, every idea below has one thing in common: it should challenge you to try something different and find a fresh perspective.
Most of the projects can be attempted using the equipment you already own. Those that do require additional materials should all be achievable with pocket-money purchases – and if there’s any crafting involved, it should be well worth the effort when you see the results.
We’ve shared 52 of our favorite suggestions to do in 2022 below. Try them all and, in a year’s time, there’s a good chance you’ll be a better photographer, with a keener understanding of your camera and what it’s capable of. Plus you’ll be all set to attempt the final project: self-publishing a photo book.

The best home photography projects:
1. water drop art.

The basic idea with this project is to suspend a container of liquid and let drops fall through a small hole, then capture the resulting splash. Timing the shutter as the splash is created is everything. We achieved good results using two flashguns set to their lowest power (1/128th), an aperture of f/22 and water mixed with Xanthan gum to make a more viscous solution. We also used a SplashArt water drop kit from PhotoTrigger , which helped to regulate the size and frequency of the drops.
2. Indoor splash shots

For this project you'll need a flashgun that you can fire remotely, a container with clear sides for your water, a coloured background and a tripod. Set up the container and backdrop, then position the flash over the container. With the camera on a tripod and set to manual focus and exposure - f/8, ISO200 and the fastest shutter speed that will work with your flash - drop the object into the water and fire the shutter as it hits.
Get daily insight, inspiration and deals in your inbox
Get the hottest deals available in your inbox plus news, reviews, opinion, analysis and more from the TechRadar team.
3. Shapes of bokeh

Out-of-focus orbs of light can add magic to any image, but the bokeh effect needn’t be limited to standard circles. From love hearts to stars, a simple cutout filter can transform background sparkles into brilliant shapes.
Using your lens cap as a guide, draw a circle on a piece of card. Cut out the circle, score a small shape in the centre using scissors or a craft knife, then push the card onto the front of your lens (or attach it with an elastic band). When you next shoot a scene, any unfocused light will take the form of your shape.
Use a wide aperture to maximize the effect and remember that, as the filter restricts the amount of light entering your lens, you’ll want to set a longer exposure or higher ISO. Try simple shapes such as triangles to get started, before progressing to stars, hearts, crosses and more.
4. Create smoke art

Smoke trails are a firm favourite among still-life photographers. But how about taking it to the next level and using the shapes in a creative Photoshop project. Once you've taken a few good smoke art photos, make a blank document in Photoshop, then copy and paste one of the smoke images into it. Set the blending mode to Screen and use Warp Transform to reshape it. Continue the process to combine a range of smoke shots into a new image.
5. DIY lightbox

Lightboxes are used to illuminate objects evenly against a plain background, often for the purposes of product or food photography. Luckily, you don’t have to have a pro budget to make one at home. All you need is a cardboard box, some white paper and a table lamp.
Remove the top flaps, stand the box on one end and cut window holes in either side. Line the box with a single, seamless piece of white paper and cover the holes with thin paper or fabric, taped in place. Then it’s as simple as positioning a desk lamp on one or both sides: the paper will diffuse the light, evenly illuminating whatever object you put inside.
Or for an even simpler setup, use a single piece of paper as the backdrop, with one white wall made from card, and position near a window (as pictured). Experiment with aperture and shutter speed to shoot subjects with totally white backgrounds or some shadow for a sense of perspective. Then mix things up with color backgrounds. If the quality is high enough, you could list your images for sale on a stock photography website to earn some lockdown pocket money.
6. Lubricate your lens

Want to give your housebound portraits added glow? If you have a spare lens filter lying around, try an old Hollywood trick: smear a layer of Vaseline on the glass to give your images a soft, dreamy look, keeping aperture wide to emphasize the ethereal effect with a shallow depth of field.
Get experimental by leaving the middle of the filter free from Vaseline to create a halo effect, with the centre in clear focus but the outer elements blurry and soft. Don’t want to sacrifice a filter? Stretch cling-film tight across the lens and keep it in place with an elastic band, before using the Vaseline in the same way. If you’re not into portraits, try the effect when shooting a light source for a unique style of diffusion.
7. Make your own filters

It’s no secret that color is a major element of any image, but you don’t need expensive filters or editing software to experiment with saturation. In fact, you don’t even need to leave your home: all manner of household objects can function as color filters to bring new hues to your photography – and to transform mundane moments into brighter snaps.
Attach tissue paper to your lens with an elastic band for an instant change of scene, or try shooting through thin fabric with a light source placed behind. Too easy? Take a snap through a laundry capsule for a liquid tone adjustment or use a whisky bottle for sepia shades with a hint of distortion. Petals are pretty effective, too, as are translucent sweet wrappers.
8. Try cross-polarization

This fun project exploits the effect that polarised light has on some plastics. You'll need two polarising filters - ideally one of these should be a sheet of polarising film. You can pick up an A4 sheet of Lee 239 polarising film for £50 (try www.robertwhite.co.uk or www.pnta.com ). The sheet of film should be placed on a lightbox or in front of the only light source. An iPad screen and most computer screens have a polarising filter built in, so if you don't have a sheet of polarising film you can always experiment by creating a white document to fill the screen. Simply attach the circular polariser to the camera lens and rotate it to make the colours appear in clear plastic items
9. Food landscapes

Spice up your food photography! All you need is a set of model figures - Hornby 00 gauge figures are perfect, as they're available in a wide range of poses. Preiser has a great range too. The most important aspect is to establish a sense of narrative. Here you can see that there's a conversation between the characters, with the mountaineer on the 'mash face' being helped by his colleagues on the ground.
10. Fine-art food

Try turning your dinner ingredients into photo art using just a lightbox and a very sharp knife. Slice fruit and vegetables as thinly and evenly as possible, then place them on the lightbox. With the camera positioned directly above, use Live View to focus manually on the details. Set an aperture of f/8 to give adequate depth of field, and dial in some exposure compensation of +1 to +3 stops as the bright light can fool the camera's meter into underexposure.
11. Flowers in ice

A relatively inexpensive way of taking 'kitchen sink' close-ups that look great blown up as wall art. Freeze flowers in plastic containers of distilled or de-ionised water (available through your local auto or hardware store). The flowers will float, so try to weigh them down or fasten them in place so that they freeze under the water. Place the block of ice on top of a clear bowl or glass in a white sink or plate, so that the light can bounce through from below. Position a flashgun off to one side, angled down towards it, and shoot from the opposite side.
12. Abstracts in oil

Oil floating on the surface of water is a great way to make striking abstracts. This table-top photo project exploits the refractive quality of oil and bubbles to accentuate and distort colours. All you need to do is place a few drops of cooking oil on the surface of water in a glass dish. Make sure the dish is supported about 25cm about the table top, then place coloured paper under it and use an anglepoise lamp or flashgun to light the paper.
13. Play with fire

It doesn’t take a pyromaniac to see the photographic potential of fire, but it does take patience, skill and plenty of precautionary measures to capture a stunning action shot of a match igniting. If you’d rather not risk singeing your fingertips, try a different type of flame photography.
Shooting by candlelight alone can lead to magical results. As with any single source of light, it allows you to experiment extensively with shadows – especially if you’re capturing a portrait – while the soft, warm tone and flicker of the flame both contribute to an especially ethereal effect.
In a darkened room, try shooting with a medium-high ISO and a relatively slow shutter speed. Start with just a candle and your subject, before introducing additional elements and playing with positioning. A nearby wall, for example, will throw the candlelight back in different ways, while glass will add to the magic with fiery reflections
Tweak shutter speed to affect the strength of shadows or try adding further flames – though you might need to adjust the white balance if things look more yellow than mellow.
14. Repaint the walls with camera obscura

Familiar with pinhole photography? That technique relies on camera obscura – a natural optical effect that occurs when a small hole in an otherwise sealed space (such as a box) projects an inverted image of the world outside onto the opposite wall. You could make a pinhole camera as an at-home project, or you could go even bigger: with the right setup, you can create the camera obscura phenomenon in an entire room.
First, you’ll need to black out a room – for example, by taping opaque sheets over your windows. Then you’ll need to make an aperture through which light can enter; the smaller the hole, the sharper but dimmer the image. Camera obscura works best in small/medium rooms, with an aperture of around 10-15mm diameter. Allow your eyes to adjust and determine whether you need to brighten the image by making a larger hole, then marvel as an inverted version of the outside world appears on the wall.
Capture the entirety of this remarkable natural effect using a wide angle, a relatively long exposure and a tripod, or focus on specific elements of your room to emphasis the effect – such as houses appearing to float upside down on your mantelpiece.
15. Camera tossing

Chucking your precious photographic equipment into the air might sound like something designed to void the warranty, but – provided you’re not too clumsy – camera tossing can deliver some truly spectacular results. Try it in a dark room with a single light source. Set a shutter speed of around one second (roughly the length of time it’ll be in the air) and, as the timer hits zero, launch it upwards. Catching it is the important part, but once you’re comfortable with the technique you can experiment with multiple light sources, different colors and even spinning your camera as you release it.
16. Psychedelic soap film

This is a wonderful project that makes for vibrant desktop wallpaper or abstract wall art. You'll need liquid soap mixed with glycerine for long-lasting soap film, plus a wire loop, a black cloth background and a macro lens of at least 100mm. The colours created by soap film only appear when hit by light from a certain angle, so set up near a north-facing window and shoot from around 45 degrees.
17. Refractive art

Light bends when it passes through water, causing the objects behind to change appearance. This is called refraction, and you'll make use of this phenomenon in this arty photo project. All you need is a few glasses, a flashgun, a tripod and a black-and-white pattern print. Simply place the pattern in the background with the glasses in front. Fill them with different levels of water and move the pattern backwards or forwards to fine-tune the effect.
18. Kitchen close-ups

Your kitchen is an ideal location for shooting a macro project. Its reflective surfaces can be used to create interesting backgrounds for your shots, and a shallow depth of field can transform the most mundane of objects you'll find there. Creating a triptych of images can result in a piece of fantastic wall art for your kitchen too, although it's important to think about how they're going to work together before you start shooting. Here, 3 objects - a fork, a bowl of cereal and coffee granules - were all shot from a similar angle, with the impression of height linking the sequence.
19. Invert the world with a crystal ball

Shoot through a crystal ball and, while you won’t see into the future, you will capture an inverted version of the scene behind the orb. Just as light is refracted when it passes through the glass elements of a lens, the same thing happens with a glass sphere. There are dedicated photography balls on the market, but the effect can often be achieved using a clear marble or even a paperweight. Nothing suitable? A water-filled wine glass can also work.
All sorts of subjects look good through an orb, from sunsets and cityscapes to abstract items and even portraits. Try shooting with a macro lens to fill the frame with the sphere, or with a wider angle to include some of the scene behind. To really play with perspectives, rotate the image with editing software so that the background is inverted but the scene in the orb is the right way up. You can also incorporate elements that support the ball into the image, such as hands, bowls or miscellaneous objects.
20. Still-life bokeh

Something as simple as a crumpled piece of foil can be the basis for a creative photo project. Position a still-life subject on a sheet of glass with a piece of dark material underneath it. Scrunch up the kitchen foil then smooth it back out and place it in the background. Shine a table lamp or torch on the foil and, with a tripod mounted camera, dial in the lens's widest aperture to create some beautiful ' bokeh '. During the exposure, shine a flashlight onto the subject.
21. Play with shadows

Photography is fundamentally about capturing light, which is exactly why shadows can be so powerful. They can create contrast with lighter parts of a composition or add texture to an otherwise plain subject. They can even be manipulated to tell a story. Incorporating shadows into your images will challenge you to think not just about the objects within a scene, but how things outside of the frame can affect the light that falls within it.
To play with shadows, all you need is a light source and a solid object to block it. This could be something natural, such as the shadow of a tree cast by sunlight. Equally, it could be something man-made, such as the outline of a street sign created by a car’s headlights. Or it could be something you create yourself: try playing puppet-master by shining a torch and dancing your hand in front of it.
You can also invert this idea by shooting a subject which is predominantly in shadow and experimenting with how splashes of light fall upon it.
22. Still life light trails

Light trails can be used in all kinds of photography, but they're perfect for a creative still life project. You can use a regular Maglite torch, but try removing the end to reveal the bulb and make the light more direct. Use some electrical tape to attach a coloured sweet wrapper, which you can use as a makeshift 'gel'. Set the canera's shutter speed to around 30 secs with an aperture of around f/8, then start moving the torch within the frame before pressing the shutter. Continue the movement throughout the exposure. Here, we suspended the torch from a piece of string and made a gentle circular movement to create a spiral around the bottle.
23. Light spirals

You'll need to attach a torch, suspended by string, to an open area of ceiling. Fit the widest lens you have on your camera, and mount it on a tripod pointing straight up. With the light turned on, autofocus on the tip of the torch and set the lens to manual focus to lock the setting in. With an aperture of f/11 or f/16 dialled in, use Bulb mode and a remote release to keep the shutter open for a minute or so as you send the torch spinning in the dark…
- Best camera flash: dedicated flashguns for Canon and Nikon DSLR
- Best macro lens 2018: close-up lenses for Canon and Nikon DSLRs
- Macro lenses: how to choose one, and how to use it
Current page: Home photography projects

Formerly News Editor at Stuff, Chris has rarely been able to resist the bite of the travel bug – so he now writes about tech from the road, in whichever Wi-Fi-equipped café he can find. Fond of coffee kit, classic cars and sustainable gear, if there’s one thing Chris loves more than scribbling, shooting and sharing his way around the world, it’s alliterative triplets.
This AI 'poetry camera' shoots haikus instead of photos – and that’s way more interesting than megapixels
“We do not view AI-generated images as photographs” – photo contest experts talk AI, and the steps they're taking to spot fake photos
How to enable YouTube picture-in-picture on iPhone
Most Popular
- 2 Dell cracks down on hybrid working again — computing giant is going to start color-coding employees to show who is coming back to the office
- 3 I tested Samsung's glare-free OLED TV vs a conventional OLED TV – here's what I learned
- 4 Microsoft is investing billions into another major US AI data center — and its location is a slap in the face to Apple
- 5 Majority MP3 Player review: one of the best cheap music players to consider
- 2 10 things Apple forgot to tell us about the new iPad Pro and iPad Air
- 3 4 reasons why most free VPNs are scams
- 4 Microsoft is bringing passkeys to all users
- 5 I tested Samsung's glare-free OLED TV vs a conventional OLED TV – here's what I learned
18 Creative Photography Ideas for Beginners to Improve Their Skills
Coming up with photography ideas can be tough for beginners. These 18 creative ideas will help you find a photography subject in no time!
You've got new photography gear. You might have even taken some lessons in basic photography. But it can be difficult to get cool beginner photography ideas, whether you're at home, college, or work. It seems like such a simple thing to do, but figuring out where to point your camera or smartphone can be surprisingly difficult.
These photography ideas for beginners will have you snapping away in no time. From toys to animals to the night sky, cool photography ideas abound. All you need to do is start snapping!
1. A Rubik's Cube
Start with something simple. Many of us have a Rubik's cube lying around. If not, they're cheap!
Art lessons often begin with renderings of cubes or spheres with one or two sources of light casting shadows to immortalize. A Rubik's cube gives photographers a similar challenge, albeit also showing off your camera's ability to capture startling colors.
Its crisp lines will also introduce you to the concept of leading lines !
2. Still Life
Once you've mastered one object, it's time to throw more into a composition. We're once more taking inspiration from art courses.
A still life is simply a collection of items, typically against a plain backdrop. Fruit is a reliable example, but you could use books, old electronic hardware, or busts.
Experiment with different lighting. Adjust the proximity of a lamp and ask, how do the shadows change? Which objects are highlighted, and which are hidden? How would the piece look with the lamp as part of the still life?
The items you've chosen say a lot about you. Paul Cézanne's interest in skulls spoke of his fascination with mortality. Steve McCurry's broken sculptures speak of lost societies. Vincent van Gogh's obsession with sunflowers summed up a tortured attitude to life.
Skulls are too morbid, but what do your still life shots tell the viewers about you?
3. Self-Portrait
All art is a reflections: of creators, of consumers, of civilizations. That extends to self-portraits. So we'll take a moment here to tackle one of the most common (and controversial) photography subjects of modern life. We're talking, of course, about the selfie.
You may consider there to be very little skill in portraying yourself. Yet a vast wealth of talented folk have used self-portraits to uncover a hidden side of themselves. What expression are you making? What's in the background? What's the focus of your piece?
This will also help you get to grips with your camera's timer or selfie mode.
Related: Photography Terms All Photographers Should Know
4. Your Own Children
You've taken a self-portrait. How do you apply those skills to other people?
Your own kids are perfect subjects. If you haven't got children, ask a relative if they'd mind you taking some photos of their kids. Children differ drastically---not just in age, but in temperament and energy too.
You'll naturally want to capture your kids having fun. But what about those more intimate moments when they're worried, reading, or listening to music? These are perfect times to practice some of your creative photography at home.
Get their consent first though.
You've mastered taking a portrait of one or two people. Now try a crowd.
People are unruly. Even in a straight line, we stop and start at strange intervals. We suddenly change direction, begin conversations or break off from them, and deviate from directions.
You'll find an infinite supply of photography ideas in any crowd. Capture the movement of the crowd itself. Look for interesting shots of individuals. How do people behave? What makes some stand out? How does a large mass of humanity differ from a single person?
You're capturing people in their natural habitat: together.
6. Moving Vehicles
Vehicles offer a wide color palette, interesting lines, reflections, textures, and many other facets that photographers love.
But moving cars are another challenge entirely.
What's the main point of interest? Does an entirely blurred composition demonstrate what you're trying to achieve? Or does having one aspect in focus make the rest of the image "speed up"? Capturing moving objects will also make you experiment with shutter speeds.
Related: How to Find Photos to Study by Lens, Aperture, Shutter Speed, and Genre
7. Carnivals
Fun fairs are always better on gloomy evenings. They're more challenging for beginners and professional photographers too. You have to think about shutter speeds and composition, and add ISO into the mix.
ISO is the sensor's sensitivity to light. The higher the ISO, the better your camera will be at shooting in the dark. But higher ISO results in more "noise," grains that pockmark an image.
With lots going on all around you, you'll want to be ambitious. Restrain yourself. Remember: there's beauty in simplicity.
You've mastered people. Now try animals.
If you're looking for fun photography ideas, you can't go wrong with photographing pets. Candid shots are ideal. Trying to direct your animals to obtain a particular composition is equally challenging.
Get onto the same level as your pet. Aim to capture eyes. They're great focal points.
The best results come from extremes. Get up close or stand back: the former gives unusually intimate insight into the animal world; the latter gives context and shows playfulness.
This is one of the most difficult photography assignments you'll attempt. Why? Because you're trying to capture a virtually intangible object.
We often can't see cobwebs with the naked eye, so how can your camera do it?
The obvious answer is moisture in the air. That means early mornings or late evenings when a mist is settling on the land. Don't spray water onto them: let nature take its course.
Factor in light. Where should its source be to illuminate your subject?
10. Sunrise and Sunset
If you're trying to shoot cobwebs in the mornings and nights, there's a perfect subject in the sky: the sun.
It's dazzling. What's more, it leaves gorgeous colors streaking across the roof of the world, especially as it rises and sets. In fact, if you're ever struggling for motivation, look up. That's your challenge.
Don't look at or point your camera directly at the sun when it's high in the sky.
Have patience. A "second sunset" occurs 20–30 minutes after the sun goes below the horizon, and will produce great results.
Don't be afraid to take lots of images. You may only be happy with one in 50, but that's one of the great things about digital and mobile photography.
11. Reflections
Playing with reflections in pictures offers an opportunity for presenting unique perspectives.
Combine reflection photography experiments with the sunrise or sunset and you can create numerous points of interest and end up with a bright, rich final product. Use mirrors for every situation on this list and you might carve out an interesting niche.
12. Fountains
When it comes to creative photography ideas, it's hard to beat water. It contains infinite changing lines. It reflects light in interesting ways. It's found in so many contexts.
Fountains are a good place to start. If you miss one freeze-frame, you'll get the chance again imminently. This allows you time to prepare yourself. Start with a shutter speed of 1/500 of a second and a lower ISO: you'll capture enough detail without detracting from the overall effect.
A lower aperture typically gives you a deeper depth of field---great in natural light, but less so under artificial illumination.
Let's turn our attentions to another unpredictable element: fire.
Take safety precautions. Make sure you're in a well-ventilated area and can put out the flames easily. Don't mess around. Better yet, simply take pictures of a candle or your home's fireplace.
Begin with a shutter speed of at least 1/250 for capturing individual flames or smoke. A slower speed will help if you want to show the full glow. What happens when fire is the sole light source?
14. Weather Extremes
All extremes are great to photograph: the light and the dark, anger and happiness, construction and destruction. Few things are as extreme as the weather.
You don't have to live in hurricane territory to show the ferocity of nature. There are loads of photography ideas in more mundane weather. A deluge of rainfall is as interesting as a monsoon. So too signs of drought. Photography is about documenting the world around us,; if there's one thing that unites us, it's the weather.
Most conditions don't last long and come without much warning, so be ready! Snow may stick around for days, but its fall can come and go intermittently in minutes.
15. Graffiti
This is divisive. For some, it's art. For others, it's vandalism. Either way, it's a perfect photography assignment for beginners.
No matter your view, you can get a point across. Should you crop close? Do you give wider context? What's in the background or foreground? This is about storytelling.
If you intend to profit from your photos, however, research copyright laws. Some graffiti artists attempt to trademark their work.
16. Cityscapes
Skylines are compelling, evocative, and nostalgic. If you've got time, stay in a position for much of the day. See how the light changes the composition and think about which you want to retain on film.
Get low to portray incredible scale or intimidation. Overlook an intersection to show how busy or empty something is. Search for leading lines or patterns to draw the eye.
17. Woodland
Woods are microcosms of life!
There's the grand scope of trunks, the rough bark, branches twisting up, and leafy veins. Daylight or twilight are excellent times to shoot, but using an artificial source of light at night might give you unusual pics.
18. Astronomical Events
At night, look up. Isn't it amazing? Capturing the infinite wonder of space? Now, there's a challenge. How do you photograph stars and natural satellites?
Start with a tripod. You'll need different ISO and aperture settings depending on what you're trying to photograph.
Start with our moon. Set your DSLR to its base ISO---likely either 100 or 200. If it's the former, you'll require a shutter speed of 1/125. For the latter, 1/250. Accompany both with an aperture of f/11.
There's too much to go into here, but as long as you're inspired, you're doing it right. But if you want to delve deeper, check out our article on tips for better night sky photographs .
Discover Your Own Photography Ideas
Mix things up by combining a few of these ideas together. Experimental is the key.
And if you've experimented with all these situations, you're not a beginner anymore. You're an experienced photographer.
SLR Photography Guide
** APRIL SALE ON NOW – UP TO 75% OFF PHOTOGRAPHY COURSES AND GUIDES **
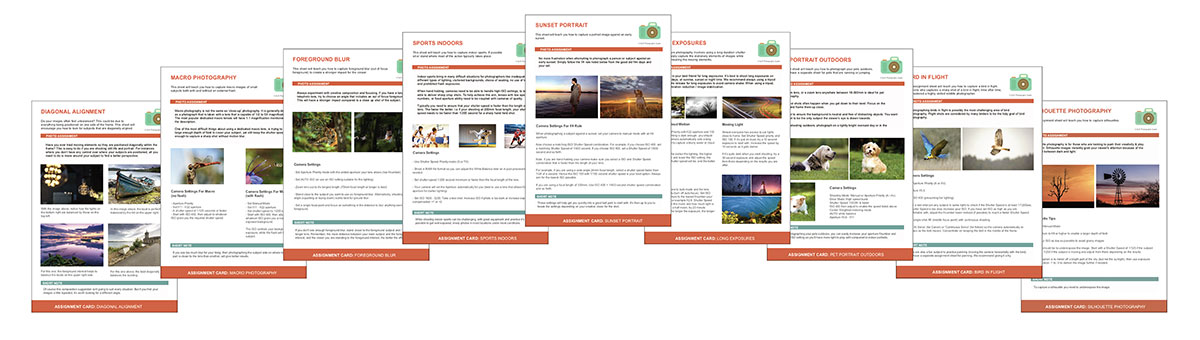
- 100 Photography Assignment Sheets
Want an easier way to learn photography without reading a lengthy camera manual or sitting down at a computer studying techniques? These assignment sheets are hands down the fastest and most active way to grasp key concepts of photography. Think of them as see and do cards.
Or maybe you’re needing some inspiration to kick start your photography again? With 100 sheets, you are sure to pick up skills you never learned previously.
SIMPLE STEP BY STEP INSTRUCTIONS AND CAMERA SETTINGS THAT ANYONE CAN FOLLOW
Here’s How They Work
These Photography Assignment Sheets discuss specific photographic topics (100 in total), then provide you with suggested camera settings so you can go out and start capturing great images immediately.
Print the Assignment Sheets or download them to your mobile device and take with you when out in the field
WAS $49, TODAY ONLY $34
- Printable / Desktop & Mobile Versions
- Three Bonus Photography Ebooks covering ISO, Aperture and Shutter Speed
- Free Monthly Photography Magazine + past editions (73 issues to date)
- Lifetime Access including future updates
- 100% Satisfaction Guarantee
Designed so you spend more time shooting, and less time reading!
No fussing around. Learn camera settings that will get you into the ball park as fast as possible for capturing great shots.
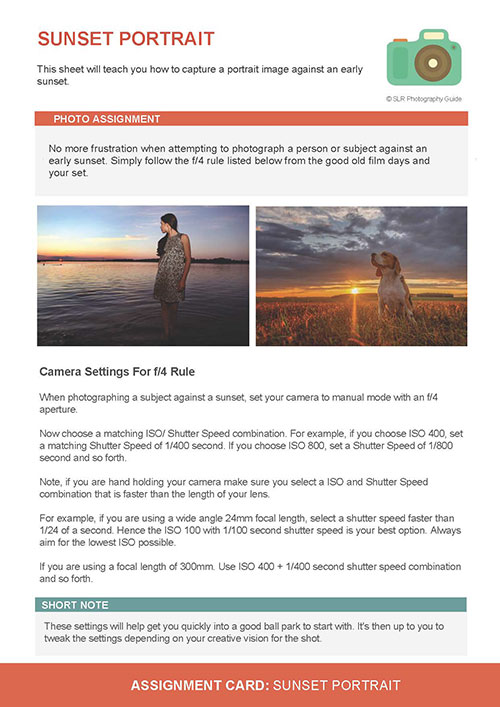
Here’s a run down on some of the topics covered
- Long Exposures
- Astrophotography
- Macro and Close Up Photography
- Flash and Lighting
- Sports (indoor and outdoor)
- Bird Photography
- Animal and Pet Photography
- Learn how to capture the moon in all phases
- Capture bolder colors in your images
- Composition
- Key camera settings, ISO, Shutter Speed, Aperture
- High Key and Low Key Photography
- Water Drops & Splashes
- Old School Rules that still work today. Sunny 16, f/8 and f/11
- Learn how to handle harsh lighting or high contrast scenes

FREE Bonus: 3 Photography Ebooks
Understanding ISO – Aperture Explained – Mastering Shutter Speed
100 Photography Assignment Sheets + 3 Ebooks + free monthly magazine including past editions (73 editions to date) with lifetime access including future updates.
We are an online Photography Community with over 300,000 members.
Depositphotos
Get started.
- Photography Tips
- Camera Settings
Quick Links
- Photography Courses
- Member Login

Photography Basics for Beginners PDF Guide
Home | Photography | Photography Guides | Photography Basics | Photography Basics for Beginners PDF Guide
Are you looking for a digital PDF photography guide for beginners where you can learn all the photography basics in a graphic, easy, and fun way?
Then you’re in the right place! In this article, you’ll be able to download the most comprehensive beginner’s photography guide in PDF that you’ll find online. And yes, it’s completely FREE !

What’s in this beginner’s pdf digital photography guide?
Although today I am lucky to be a full-time landscape photographer, my education was completely self-taught through numerous books, videos, and online PDF photography guides . However, I often found that the information contained in many of these free photography courses wasn’t organized and explained in the best possible way.
That’s why I decided to create this photography for beginners PDF with all the information about the photography basics and plenty of examples that I’d have liked to have when I was starting in photography.
In the following basics of photography PDF guide you’ll find:
- 20 lessons and more than 80 pages
- Photographic examples in each lesson
- Infographics to understand everything easily
- The best photography tips and tricks
- More than 30 photographic resources and additional content

How can I download my basics of photography PDF for beginners?
You can download this photography e-book in PDF and enjoy it on your smartphone/tablet/computer or print it and read it wherever you want.
To do so, just click on the link below and you’ll be able to download the complete digital photography for beginners PDF totally free.
Questions about this DSLR photography for beginners PDF
The first steps in photography are usually very exciting, but they are often the most challenging, especially when it comes to understanding some photography fundamentals.
If you’ve any questions related to this photography basics PDF , don’t hesitate to leave them in the comments or send me an email through our contact form. I’ll be happy to help you!
I hope this photography basics for beginners PDF helps you understand all the key concepts and you find it handy along your photography career!

11 replies on “ Photography Basics for Beginners PDF Guide ”
Very helpful
Thank you so much Phindile, glad it helped.
Thank you so much, is very informative and I have learnt a lot.
You’re welcome, Dean! So happy it helped you 😀
Thank you very much 🙂
Hi! I have a Canon sureshot 120, and sometimes it doesnt let me take any photos, and reads “H”. Do you happen to know what this might mean?
I’m sorry but I’ve never used that camera. I just found this link , it seems to be an internal error. Sorry and hope it helps.
Thank you I’m really enjoying everything on the basic camera settings thank you
Extremely helpful info. Thank you!!
Happy to see it helped! 😉
Leave a Reply Cancel reply
Your email address will not be published. Required fields are marked *
This site is protected by reCAPTCHA and the Google Privacy Policy and Terms of Service apply.

get our free ebook to mastering the PHOTOGRAPHY basics
- 20 lessons and 80+ pages
- Photography examples
- Infographics
- Photography tips & tricks
- 30+ Photography resources
Street Photography: 5 Assignments for Beginners by Neil Milton
- Learn to Shoot Film: Tips & Tutorials
- May 10, 2024

Written by Neil Milton
Many photographers want to try their hand at street photography but find they are too shy or introverted to make a start. Leaping into street photography can be unnerving, but it is not impossible, even for those like myself with a shy disposition.
The secret, however, is just to be out there, camera in hand, at the ready.
Here are five assignments for street photography beginners to get you started.
The assignments are ordered from first tentative steps through to the more adventurous, so begin at the beginning. If you feel more adventurous, feel free to do them in any order you please. If you really want to test yourself, start at the end.
Have fun, and good luck!

1. The Creative Self Portrait
Long before the advent of the smartphone, self-portraits were a popular way to play with photography.
The first known selfie was made by silversmith and photographer, Robert Cornelius, in 1839 . Through the years, many playful street photographers have flirted with the creative self portrait.
A particular favorite of mine is Cartier-Bresson ’s shoeless image in 1932. It is Elliott Erwitt , though, who is arguably the master, his career marked with increasingly absurd self-portraits.
Though we are not yet brave enough to direct our lens onto other people, we can nevertheless focus on ourselves.
How we choose to do this is limited only by imagination. Perhaps the camera will be held at arm’s length, or set on a tripod. Instead, maybe we will find a reflective surface to play around with.
It might be time to dress up, or for the more daring, dress down. Perhaps we have a story to tell.
If you need a touch of inspiration, a quick search through Pinterest should set you right.

2. Remnants of Life
Street photography is often described as pictures of life as it happens, however, it can also include photographs of the aftermath of a moment, or the remnants left behind.
Man Ray once photographed Marcel Duchamp‘s Large Glass after it had lay unattended for a year , collecting dust. Dust Breeding is a stunning, haunting photograph.
Out on the pavements of New York, children playing left behind chalk drawings, and Helen Levitt recorded these with her camera .
Think of street photography as urban anthropology. Look for signs that life has played out beyond the reach of our eyes, and what we see is what was left behind – the echoes of life.
In these photographs, your subjects will most likely be inanimate objects – a discarded, broken umbrella, a bike missing a front wheel, or a lost hat or glove. This small assignment is a firm stepping stone before we move on to people.

Related: 5 Tips to Improve Your Street Photography
Marvin E. Newman is an American artist and photographer who was briefly a member of the Photo League. At 95 years old, he continued to work in New York City, until his sad passing in September last year. Until recently, I was entirely ignorant of his work.
In 1991, his one-man show, Shadows, 1951 , was shown at the Keith de Lellis Gallery, New York. These images, produced in Chicago during the titular year, shaped his work for many years to come and are now celebrated.
The instruction for this assignment is to look only for shadows of people. You may choose to photograph in the Newman style or you can find your way of playing with shadow.
It is better to photograph in the morning or late afternoon when shadows will be longer, and there will be more to play with – of course, ensure you don’t catch your own shadow in the photograph also – unless you want to.

4. Gestures and Expressions
A whole spectrum of emotion can be revealed through a gesture or an expression; a connection between one person and another. Body language is key, and having a good sense of empathy to predict when someone may show emotion is helpful, so our next assignment is arguably what street photography is all about.
It is certainly not easy, but any street photographer worth their proverbial salt can do it. For my money, though, Richard Kalvar is one of the great photographers to anticipate expression and to position himself to catch it in the photograph.
This time we have to be more daring – we will photograph people themselves, whether they are aware of it, or not.
For example, look for people deep in conversation. This offers more scope for expression and gesture but little chance you will disturb them. Alternatively, find people looking, reading, waiting, whether alone or in groups.
Before you hit the street, spend some time studying the work of Kalvar , Garry Winogrand , Robert Frank , and other greats. Consider what gestures and expressions make a photograph engaging. Then, put the books down, and get out there.

Related: Street Photography Tips: How to Photograph Dogs
5. Eye Contact
It’s time to get personal.
French poet Guillaume de Salluste Du Bartas once paraphrased the popular saying as “these lovely lamps, these windows of the soul.” Our eyes betray so much of our state of mind, of our emotions. There’s a reason it’s difficult to look into the eyes of your crush. Or, conversely, to someone to whom you are lying.
Eye contact is intimate, and rarely more so than the timeless eye contact made with a camera. Bruce Gilden is a street photographer with a reputation for getting close to his subjects, and, in doing so, by the very nature, inviting eye contact.
For our final assignment, we will take our next step and intend to catch our subject’s eye.
You can do this by asking to make a street portrait of someone interesting you find, or simply appearing unannounced and snapping spontaneous, natural, eye contact. Whichever you choose, be prepared for possible rejection in the former, and rebuke of the latter. Nevertheless, always be polite, friendly, and sincere in responding to any potential confrontation.

Thank you so much, Neil! Neil is a regular contributor here at Shoot It With Film, and you can check out his other articles here , such as The Leica M3: A Comprehensive Guide and What is Zone Focusing and How to Use It for Street Photography .
You can find more of Neil’s work on his website , and sign up for his street photography newsletter here .
Leave your questions about these street photography assignments below in the comments!

Related Posts:

Neil Milton
Neil Milton is a street photographer and a regular contributor for Shoot It With Film. Find his other articles here , such as 5 Tips to Improve Your Street Photography and Kodak Tri-X: Why I Love It & Why You Should Too .
- Leave a comment
Leave a Comment Cancel Comment
Shoot it with film on instagram.

The leading authority in photography and camera gear.
Become a better photographer.
12.9 Million
Annual Readers
Newsletter Subscribers
Featured Photographers
Photography Guides & Gear Reviews

Top 5 Beginner Photography Mistakes and How to Avoid Them
Discover the top 5 beginner photography mistakes and learn how to avoid them with practical tips to improve your skills and capture better photos.
Learn | By Ana Mireles
Shotkit may earn a commission on affiliate links. Learn more.
Are you a beginner in photography? You might be making these five common mistakes.
Don’t worry, though; they’re easy to avoid as they don’t involve spending money on gear, attending classes, or anything like that. It’s all about your approach.
If you’re ready to overcome the first obstacles every beginner photographer faces, keep reading.
Table of Contents
Most people starting in photography focus on what they should do, learn, and improve – and that’s great!
However, it’s also important to consider what you shouldn’t do. This is why I decided to write about these five beginner photography mistakes.
Don’t worry; I’ll also give you some tips to avoid them. So, let’s get to it.
1. Shooting at eye-level

Credit: Ameliacui
Nowadays, everyone takes photos regularly – even those who don’t have an interest in photography.
Whenever we see something that interests us, we raise our camera or phone to eye level and take a picture. This way, we capture what we’re seeing.
Beginner photographers often keep this habit and don’t realize that it’s not the best practice. As a photographer, you don’t just want to capture what you see. Instead, you want to capture the world with a unique vision.
You should also avoid keeping your camera at eye level when shooting portraits, as this will not produce flattering pictures.
So, the next time you want to photograph something, get down on the ground (aka, worm’s eye view ), climb on a chair, raise your arms, etc.
In short, try different perspectives – you’ll be amazed at how your images will improve.
- How to use different perspectives in photography
2. Over-rating camera settings cheat sheets

Credit: Ellis
One of the most challenging things about learning photography is stepping out of auto-mode. Learning to use the camera settings in the best way can be daunting, and that’s why many people rely on the so popular “best settings for x” cheat sheets.
Many people don’t realize that there isn’t a one-size-fits-all solution in photography. The best settings depend on two things.
First, the unique conditions of the scene. This refers to the amount of light, where the light is coming from, how fast your subject is moving, how far away from the subject you are, etc.
Second, the results you want to achieve. Do you want a narrow or a deep depth of field ? Do you want to freeze or blur the subject? If blurred, how much? How much noise is acceptable to you? And so on.
So, the best way to learn which settings to use is to stop relying on cheat sheets and start practicing. Try bracketing your pictures and see how the picture changes.
If you’re not yet comfortable with manual mode , you can use semi-automatic modes. This method will help you master the camera settings much faster than the cheat sheets.
- Learn all the camera settings in this beginner’s guide
3. Focusing too much on the gear

Credit: Anya Juarez Tenorio
Another beginner photography mistake is overemphasizing the need for equipment. Sometimes, you think you can’t do one thing or another until you get a better camera or a specific lens.
While it’s true that specific tasks, especially at a professional level, do require upgraded gear, you can certainly start learning and practicing with whatever you have.
How Much Do You REALLY Know About Photography?! 🤔
Test your photography knowledge with this quick quiz!
See how much you really know about photography...

Your answer:
Correct answer:
SHARE YOUR RESULTS
Your Answers
You can use your camera phone to learn composition . You can learn about the exposure triangle and take excellent pictures with a crop-sensor camera if you don’t have a full-frame mirrorless.
Beyond the basics, there are many budget-friendly alternatives to specific photography types, such as diopters or extension tubes for macro shots .
Also, there are tons of photographic accessories that you can DIY. So, don’t wait until you have all the gear to start photographing – which, by the way, is a never-ending wish list.
Get creative and find another way – and if there isn’t one, you can rent.
4. Missing the point of editing

Credit: Mart Production
Editing is a very polarising issue in beginner photography. Some people hate editing; they consider it cheating and demonize it without even trying it.
Others love it. They over-edit your pictures, resulting in unrealistic images that are not aesthetically pleasing.
Understanding the role of post-production in photography is key to avoiding these pitfalls. Editing is part of digital photography, just like developing and printing were in film photography.
You need excellent skills to master editing techniques and use them to your advantage. Start by shooting raw files and learn how to develop them properly.
Then, experiment with editing techniques until you learn how you like your pictures and develop your personal style.
Most importantly, don’t get sloppy during the photo shoot, thinking everything can be fixed in post – that’s not what editing is about. Of course, it can help, but it’s not an excuse to be lazy or not pay attention to detail.
Lastly, don’t limit yourself. Technology can help, so try it and see if it fits your needs before forming an opinion.
- What is the best photo editing software ?
5. Overthinking

Credit: Betusmusum
I’ve seen this happen to many people starting in photography – and it also happened to me way back when.
Once you start learning, you stop shooting. At first, you love photographing everything and consider yourself somewhat good at it – that’s why you decide to take a more serious approach to photography.
However, as soon as you start reading, watching tutorials, or taking classes, you may overthink. Now, you’re reflecting too much about what the subject should be and waiting for the light to be as you want it.
Or maybe you’re thinking about everything you’ve been doing “wrong” and how much you need to consider now, such as composition, settings, etc.
Eventually, it becomes overwhelming, and you forget the joy of photographing. Plus, you shoot less, meaning you’ll take longer to learn and improve.
If you’re not sure if this is your case, check out this experience from The Photographic Eye and see if it rings a bell.
So, remember that not everything has to be a masterpiece or even be worthy of showing to someone else. If you don’t shoot, it will never be.
Find your balance between learning and practicing – and most importantly, enjoy every step of the way.

Check out these 8 essential tools to help you succeed as a professional photographer.
Includes limited-time discounts.
You'll Also Like These:

Ana Mireles is a Mexican researcher that specializes in photography and communications for the arts and culture sector.
All make sense.
Leave a Comment Cancel Reply
👋 WELCOME TO SHOTKIT!

🔥 Popular NOW:

Unlock the EXACT blueprint to capture breathtaking iPhone photos!
IMAGES
VIDEO
COMMENTS
Not all of them involve the camera. Several websites and books publish a mix of assignments or exercises for the intrepid photographer. I prefer the exercises that 1) involve using your camera, 2) are less assignment-based, and 3) are fun! These are my versions of various exercises that have been passed down from one creative generation to another.
Assignment #3: Shadows. Shadows are everywhere and they are vital to photography because this is the art of capturing light. With light comes shadows and when you begin to look at shadows as a photographer, your world will open up. Take a look around for shadows and record them with your camera.
Here are 12 exciting photography assignments to help you find the right one. 1. Shoot With a Limited Amount of Equipment. Whether you're a full-time photographer, a hobbyist, or a beginner, you're probably itching to invest in all kinds of equipment to take your photos to the next level. But here's a challenge.
Limit yourself to only 36 photos in a day. For this assignment, you're only allowed to take 36 photos in a day (same amount of photos in a roll of film). This exercise will help you learn ...
15 Ways to Make Photography Assignments. This list of photo assignments consists of 15 points, so I am sure that you will find the idea to your liking. 1. Self Portraits. The first task is a no-brainer: just take a self-portrait picture each day. Don't forget to use a tripod and shutter release aside from regular shooting with your arm ...
27 Engaging Photography Exercises. 1. Photograph something you love. 2. Photograph something round. 3. Photograph someone close to you. 4. Photograph an object / subject that is moving.
9. Connect with other photographers. Learning photography with others is often invaluable - whether you join an online group or you head to a local camera club. For one, your photography will progress faster, plus it will be far more fun with the help of your fellow shutterbugs.
3. With Three Objects, Shoot 10 Photos. In some cases---like landscape, astronomical, and street photography---the idea is to capture scenes in the moment as they are. In other cases---like portrait, food, and product photography---the idea is to construct your own scenes. As you imagine, this isn't easy.
Assignment 54: Capture the character of a place (b/w) The absence of color gives you another way of capturing the character of a place. Yes, it's true that in some areas color is an essential part of the essence of the place. But in others, it's less important.
If you want to harness that power and learn how to take the best possible photos, welcome to "Photography Basics: The Beginner's Guide.". This comprehensive tutorial explains the fundamental concepts you should know about photography from start to finish. Nikon D7000 + Nikon 105mm f/2.8 @ 105mm, ISO 280, 1/400, f/4.0.
1. The Park Bench. Take your camera and a tripod to a park, and find a busy park bench. Set yourself up some distance away with a long lens aimed at the bench and pre-focused. Settle in, and for the next few hours take images at fixed time intervals, say every ten minutes. This is really an exercise in timelapse photography.
Photography for Beginners. Unlock the secrets to stunning photography with this course: Learn to effortlessly set up your camera for any situation. Master the art of selecting the perfect exposure every time. Discover 10 composition rules that elevate your photos instantly. Buy from ExpertPhotography.
ASSIGNMENT. It's time to put everything you have learned into practice, and to show me and your fellow students your amazing pictures! ... Intro - The Ultimate Photography Course For Beginners: Welcome to The Ultimate Photography Course for beginners. My name is Jellis Vaes and I am a self-taught travel and adventure photographer. At the age ...
09. Draw lots. What to do: Write one easy-to-find subject on 30 slips of paper (for example: shadows, a cat, a tree, coffee, an eldery person). Put the slips of paper into a bowl, and draw one each day. Focus on finding and capturing the best possible photo of that particular subject for a day. StockSnap.
These self assignments force you to look around you, to really see what you're shooting and try to make interesting images. 1. Pick A Color. Pick up your camera and choose a color for the day. Go out and make images with that color as a dominant element in the image. Find as many different ways as possible to do this.
Get some awesome pet photography tips in the video above by Westcott Lighting. Learn More: 4 Photography Mistakes You Need to Quit Making; How to Carry A Lot of Camera Gear ; Find Cobwebs. Photo by Jill Dimond on Unsplash . Whenever I recommend beginner photography projects to people, I try and make them as practical as possible (especially now).
Photography is a skill that requires constant practice and experimentation, so if you want to improve you need to constantly work on it. ... Basics by Jim Miotke This is an excellent technical book that seeks to demystify the often overwhelming world of photography. Perfect for beginners, it covers common camera controls, explains the basic ...
The best home photography projects: 1. Water drop art. The basic idea with this project is to suspend a container of liquid and let drops fall through a small hole, then capture the resulting ...
STEP SHUTTER SPEED. Once the light has passed through the aperture of the lens, it reaches the shutter. Now you need to decide how much of that light you're going to allow into the camera. A very small fraction of a second (for example 1/250) will prevent motion blue. An even smaller fraction (for example 1/4000) for sports photography.
These photography ideas for beginners will have you snapping away in no time. From toys to animals to the night sky, cool photography ideas abound. All you need to do is start snapping! 1. A Rubik's Cube. Start with something simple. Many of us have a Rubik's cube lying around. If not, they're cheap!
WAS $49, TODAY ONLY $34. 100 Photography Assignment Sheets. Printable / Desktop & Mobile Versions. Three Bonus Photography Ebooks covering ISO, Aperture and Shutter Speed. Free Monthly Photography Magazine + past editions (73 issues to date) Lifetime Access including future updates. 100% Satisfaction Guarantee. >> YES, GRAB THIS DEAL.
That's why I decided to create this photography for beginners PDF with all the information about the photography basics and plenty of examples that I'd have liked to have when I was starting in photography. In the following basics of photography PDF guide you'll find: 20 lessons and more than 80 pages. Photographic examples in each lesson.
1. The Creative Self Portrait. Long before the advent of the smartphone, self-portraits were a popular way to play with photography. The first known selfie was made by silversmith and photographer, Robert Cornelius, in 1839. Through the years, many playful street photographers have flirted with the creative self portrait.
So, let's get to it. 1. Shooting at eye-level. Credit: Ameliacui. Nowadays, everyone takes photos regularly - even those who don't have an interest in photography. Whenever we see something that interests us, we raise our camera or phone to eye level and take a picture. This way, we capture what we're seeing.
The 200 or so members of the Lakewood Ranch Digital Photography Club range from beginners to professionals, and all are welcome to join — Lakewood Ranch residents or not. "More and more people ...
The New York State Department of Environmental Conservation (DEC) today announced the temporary closure of the Alma Pond Public Fishing Access Site in the town of Alma, Allegany County. DEC will close the fishing access site, including the main parking area, car-top hand launch, and improved path off County Route 38, for site improvement work ...