- Alternatives

10 Methods of Data Presentation That Really Work in 2024
Leah Nguyen • 15 July, 2024 • 13 min read
Have you ever presented a data report to your boss/coworkers/teachers thinking it was super dope like you’re some cyber hacker living in the Matrix, but all they saw was a pile of static numbers that seemed pointless and didn't make sense to them?
Understanding digits is rigid . Making people from non-analytical backgrounds understand those digits is even more challenging.
How can you clear up those confusing numbers and make your presentation as clear as the day? Let's check out these best ways to present data. 💎
| How many type of charts are available to present data? | 7 |
| How many charts are there in statistics? | 4, including bar, line, histogram and pie. |
| How many types of charts are available in Excel? | 8 |
| Who invented charts? | William Playfair |
| When were the charts invented? | 18th Century |
More Tips with AhaSlides
- Marketing Presentation
- Survey Result Presentation
- Types of Presentation

Start in seconds.
Get any of the above examples as templates. Sign up for free and take what you want from the template library!
Data Presentation - What Is It?
The term ’data presentation’ relates to the way you present data in a way that makes even the most clueless person in the room understand.
Some say it’s witchcraft (you’re manipulating the numbers in some ways), but we’ll just say it’s the power of turning dry, hard numbers or digits into a visual showcase that is easy for people to digest.
Presenting data correctly can help your audience understand complicated processes, identify trends, and instantly pinpoint whatever is going on without exhausting their brains.
Good data presentation helps…
- Make informed decisions and arrive at positive outcomes . If you see the sales of your product steadily increase throughout the years, it’s best to keep milking it or start turning it into a bunch of spin-offs (shoutout to Star Wars👀).
- Reduce the time spent processing data . Humans can digest information graphically 60,000 times faster than in the form of text. Grant them the power of skimming through a decade of data in minutes with some extra spicy graphs and charts.
- Communicate the results clearly . Data does not lie. They’re based on factual evidence and therefore if anyone keeps whining that you might be wrong, slap them with some hard data to keep their mouths shut.
- Add to or expand the current research . You can see what areas need improvement, as well as what details often go unnoticed while surfing through those little lines, dots or icons that appear on the data board.
Methods of Data Presentation and Examples
Imagine you have a delicious pepperoni, extra-cheese pizza. You can decide to cut it into the classic 8 triangle slices, the party style 12 square slices, or get creative and abstract on those slices.
There are various ways to cut a pizza and you get the same variety with how you present your data. In this section, we will bring you the 10 ways to slice a pizza - we mean to present your data - that will make your company’s most important asset as clear as day. Let's dive into 10 ways to present data efficiently.
#1 - Tabular
Among various types of data presentation, tabular is the most fundamental method, with data presented in rows and columns. Excel or Google Sheets would qualify for the job. Nothing fancy.

This is an example of a tabular presentation of data on Google Sheets. Each row and column has an attribute (year, region, revenue, etc.), and you can do a custom format to see the change in revenue throughout the year.
When presenting data as text, all you do is write your findings down in paragraphs and bullet points, and that’s it. A piece of cake to you, a tough nut to crack for whoever has to go through all of the reading to get to the point.
- 65% of email users worldwide access their email via a mobile device.
- Emails that are optimised for mobile generate 15% higher click-through rates.
- 56% of brands using emojis in their email subject lines had a higher open rate.
(Source: CustomerThermometer )
All the above quotes present statistical information in textual form. Since not many people like going through a wall of texts, you’ll have to figure out another route when deciding to use this method, such as breaking the data down into short, clear statements, or even as catchy puns if you’ve got the time to think of them.
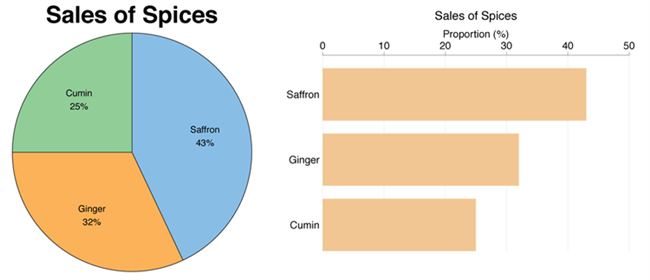
#3 - Pie chart
A pie chart (or a ‘donut chart’ if you stick a hole in the middle of it) is a circle divided into slices that show the relative sizes of data within a whole. If you’re using it to show percentages, make sure all the slices add up to 100%.

The pie chart is a familiar face at every party and is usually recognised by most people. However, one setback of using this method is our eyes sometimes can’t identify the differences in slices of a circle, and it’s nearly impossible to compare similar slices from two different pie charts, making them the villains in the eyes of data analysts.

#4 - Bar chart
The bar chart is a chart that presents a bunch of items from the same category, usually in the form of rectangular bars that are placed at an equal distance from each other. Their heights or lengths depict the values they represent.
They can be as simple as this:

Or more complex and detailed like this example of data presentation. Contributing to an effective statistic presentation, this one is a grouped bar chart that not only allows you to compare categories but also the groups within them as well.

#5 - Histogram
Similar in appearance to the bar chart but the rectangular bars in histograms don’t often have the gap like their counterparts.
Instead of measuring categories like weather preferences or favourite films as a bar chart does, a histogram only measures things that can be put into numbers.

Teachers can use presentation graphs like a histogram to see which score group most of the students fall into, like in this example above.
#6 - Line graph
Recordings to ways of displaying data, we shouldn't overlook the effectiveness of line graphs. Line graphs are represented by a group of data points joined together by a straight line. There can be one or more lines to compare how several related things change over time.

On a line chart’s horizontal axis, you usually have text labels, dates or years, while the vertical axis usually represents the quantity (e.g.: budget, temperature or percentage).
#7 - Pictogram graph
A pictogram graph uses pictures or icons relating to the main topic to visualise a small dataset. The fun combination of colours and illustrations makes it a frequent use at schools.
Pictograms are a breath of fresh air if you want to stay away from the monotonous line chart or bar chart for a while. However, they can present a very limited amount of data and sometimes they are only there for displays and do not represent real statistics.
#8 - Radar chart
If presenting five or more variables in the form of a bar chart is too stuffy then you should try using a radar chart, which is one of the most creative ways to present data.
Radar charts show data in terms of how they compare to each other starting from the same point. Some also call them ‘spider charts’ because each aspect combined looks like a spider web.

Radar charts can be a great use for parents who’d like to compare their child’s grades with their peers to lower their self-esteem. You can see that each angular represents a subject with a score value ranging from 0 to 100. Each student’s score across 5 subjects is highlighted in a different colour.

If you think that this method of data presentation somehow feels familiar, then you’ve probably encountered one while playing Pokémon .
#9 - Heat map
A heat map represents data density in colours. The bigger the number, the more colour intensity that data will be represented.

Most US citizens would be familiar with this data presentation method in geography. For elections, many news outlets assign a specific colour code to a state, with blue representing one candidate and red representing the other. The shade of either blue or red in each state shows the strength of the overall vote in that state.

Another great thing you can use a heat map for is to map what visitors to your site click on. The more a particular section is clicked the ‘hotter’ the colour will turn, from blue to bright yellow to red.
#10 - Scatter plot
If you present your data in dots instead of chunky bars, you’ll have a scatter plot.
A scatter plot is a grid with several inputs showing the relationship between two variables. It’s good at collecting seemingly random data and revealing some telling trends.

For example, in this graph, each dot shows the average daily temperature versus the number of beach visitors across several days. You can see that the dots get higher as the temperature increases, so it’s likely that hotter weather leads to more visitors.
5 Data Presentation Mistakes to Avoid
#1 - assume your audience understands what the numbers represent.
You may know all the behind-the-scenes of your data since you’ve worked with them for weeks, but your audience doesn’t.

Showing without telling only invites more and more questions from your audience, as they have to constantly make sense of your data, wasting the time of both sides as a result.
While showing your data presentations, you should tell them what the data are about before hitting them with waves of numbers first. You can use interactive activities such as polls , word clouds , online quizzes and Q&A sections , combined with icebreaker games , to assess their understanding of the data and address any confusion beforehand.
#2 - Use the wrong type of chart
Charts such as pie charts must have a total of 100% so if your numbers accumulate to 193% like this example below, you’re definitely doing it wrong.

Before making a chart, ask yourself: what do I want to accomplish with my data? Do you want to see the relationship between the data sets, show the up and down trends of your data, or see how segments of one thing make up a whole?
Remember, clarity always comes first. Some data visualisations may look cool, but if they don’t fit your data, steer clear of them.
#3 - Make it 3D
3D is a fascinating graphical presentation example. The third dimension is cool, but full of risks.
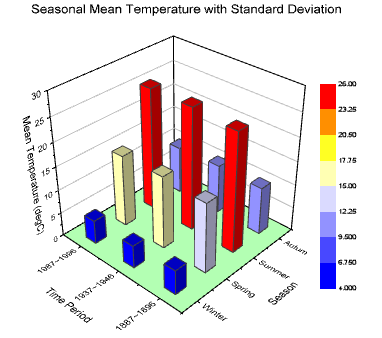
Can you see what’s behind those red bars? Because we can’t either. You may think that 3D charts add more depth to the design, but they can create false perceptions as our eyes see 3D objects closer and bigger than they appear, not to mention they cannot be seen from multiple angles.
#4 - Use different types of charts to compare contents in the same category
This is like comparing a fish to a monkey. Your audience won’t be able to identify the differences and make an appropriate correlation between the two data sets.
Next time, stick to one type of data presentation only. Avoid the temptation of trying various data visualisation methods in one go and make your data as accessible as possible.
#5 - Bombard the audience with too much information
The goal of data presentation is to make complex topics much easier to understand, and if you’re bringing too much information to the table, you’re missing the point.

The more information you give, the more time it will take for your audience to process it all. If you want to make your data understandable and give your audience a chance to remember it, keep the information within it to an absolute minimum. You should end your session with open-ended questions to see what your participants really think.
What are the Best Methods of Data Presentation?
Finally, which is the best way to present data?
The answer is…
There is none! Each type of presentation has its own strengths and weaknesses and the one you choose greatly depends on what you’re trying to do.
For example:
- Go for a scatter plot if you’re exploring the relationship between different data values, like seeing whether the sales of ice cream go up because of the temperature or because people are just getting more hungry and greedy each day?
- Go for a line graph if you want to mark a trend over time.
- Go for a heat map if you like some fancy visualisation of the changes in a geographical location, or to see your visitors' behaviour on your website.
- Go for a pie chart (especially in 3D) if you want to be shunned by others because it was never a good idea👇

Frequently Asked Questions
What is a chart presentation.
A chart presentation is a way of presenting data or information using visual aids such as charts, graphs, and diagrams. The purpose of a chart presentation is to make complex information more accessible and understandable for the audience.
When can I use charts for the presentation?
Charts can be used to compare data, show trends over time, highlight patterns, and simplify complex information.
Why should you use charts for presentation?
You should use charts to ensure your contents and visuals look clean, as they are the visual representative, provide clarity, simplicity, comparison, contrast and super time-saving!
What are the 4 graphical methods of presenting data?
Histogram, Smoothed frequency graph, Pie diagram or Pie chart, Cumulative or ogive frequency graph, and Frequency Polygon.

Leah Nguyen
Words that convert, stories that stick. I turn complex ideas into engaging narratives - helping audiences learn, remember, and take action.
Tips to Engage with Polls & Trivia
More from AhaSlides

Data presentation: A comprehensive guide
Learn how to create data presentation effectively and communicate your insights in a way that is clear, concise, and engaging.
Raja Bothra
Building presentations

Hey there, fellow data enthusiast!
Welcome to our comprehensive guide on data presentation.
Whether you're an experienced presenter or just starting, this guide will help you present your data like a pro. We'll dive deep into what data presentation is, why it's crucial, and how to master it. So, let's embark on this data-driven journey together.
What is data presentation?
Data presentation is the art of transforming raw data into a visual format that's easy to understand and interpret. It's like turning numbers and statistics into a captivating story that your audience can quickly grasp. When done right, data presentation can be a game-changer, enabling you to convey complex information effectively.
Why are data presentations important?
Imagine drowning in a sea of numbers and figures. That's how your audience might feel without proper data presentation. Here's why it's essential:
- Clarity : Data presentations make complex information clear and concise.
- Engagement : Visuals, such as charts and graphs, grab your audience's attention.
- Comprehension : Visual data is easier to understand than long, numerical reports.
- Decision-making : Well-presented data aids informed decision-making.
- Impact : It leaves a lasting impression on your audience.
Types of data presentation:
Now, let's delve into the diverse array of data presentation methods, each with its own unique strengths and applications. We have three primary types of data presentation, and within these categories, numerous specific visualization techniques can be employed to effectively convey your data.
1. Textual presentation
Textual presentation harnesses the power of words and sentences to elucidate and contextualize your data. This method is commonly used to provide a narrative framework for the data, offering explanations, insights, and the broader implications of your findings. It serves as a foundation for a deeper understanding of the data's significance.
2. Tabular presentation
Tabular presentation employs tables to arrange and structure your data systematically. These tables are invaluable for comparing various data groups or illustrating how data evolves over time. They present information in a neat and organized format, facilitating straightforward comparisons and reference points.
3. Graphical presentation
Graphical presentation harnesses the visual impact of charts and graphs to breathe life into your data. Charts and graphs are powerful tools for spotlighting trends, patterns, and relationships hidden within the data. Let's explore some common graphical presentation methods:
- Bar charts: They are ideal for comparing different categories of data. In this method, each category is represented by a distinct bar, and the height of the bar corresponds to the value it represents. Bar charts provide a clear and intuitive way to discern differences between categories.
- Pie charts: It excel at illustrating the relative proportions of different data categories. Each category is depicted as a slice of the pie, with the size of each slice corresponding to the percentage of the total value it represents. Pie charts are particularly effective for showcasing the distribution of data.
- Line graphs: They are the go-to choice when showcasing how data evolves over time. Each point on the line represents a specific value at a particular time period. This method enables viewers to track trends and fluctuations effortlessly, making it perfect for visualizing data with temporal dimensions.
- Scatter plots: They are the tool of choice when exploring the relationship between two variables. In this method, each point on the plot represents a pair of values for the two variables in question. Scatter plots help identify correlations, outliers, and patterns within data pairs.
The selection of the most suitable data presentation method hinges on the specific dataset and the presentation's objectives. For instance, when comparing sales figures of different products, a bar chart shines in its simplicity and clarity. On the other hand, if your aim is to display how a product's sales have changed over time, a line graph provides the ideal visual narrative.
Additionally, it's crucial to factor in your audience's level of familiarity with data presentations. For a technical audience, more intricate visualization methods may be appropriate. However, when presenting to a general audience, opting for straightforward and easily understandable visuals is often the wisest choice.
In the world of data presentation, choosing the right method is akin to selecting the perfect brush for a masterpiece. Each tool has its place, and understanding when and how to use them is key to crafting compelling and insightful presentations. So, consider your data carefully, align your purpose, and paint a vivid picture that resonates with your audience.
What to include in data presentation?
When creating your data presentation, remember these key components:
- Data points : Clearly state the data points you're presenting.
- Comparison : Highlight comparisons and trends in your data.
- Graphical methods : Choose the right chart or graph for your data.
- Infographics : Use visuals like infographics to make information more digestible.
- Numerical values : Include numerical values to support your visuals.
- Qualitative information : Explain the significance of the data.
- Source citation : Always cite your data sources.
How to structure an effective data presentation?
Creating a well-structured data presentation is not just important; it's the backbone of a successful presentation. Here's a step-by-step guide to help you craft a compelling and organized presentation that captivates your audience:
1. Know your audience
Understanding your audience is paramount. Consider their needs, interests, and existing knowledge about your topic. Tailor your presentation to their level of understanding, ensuring that it resonates with them on a personal level. Relevance is the key.
2. Have a clear message
Every effective data presentation should convey a clear and concise message. Determine what you want your audience to learn or take away from your presentation, and make sure your message is the guiding light throughout your presentation. Ensure that all your data points align with and support this central message.
3. Tell a compelling story
Human beings are naturally wired to remember stories. Incorporate storytelling techniques into your presentation to make your data more relatable and memorable. Your data can be the backbone of a captivating narrative, whether it's about a trend, a problem, or a solution. Take your audience on a journey through your data.
4. Leverage visuals
Visuals are a powerful tool in data presentation. They make complex information accessible and engaging. Utilize charts, graphs, and images to illustrate your points and enhance the visual appeal of your presentation. Visuals should not just be an accessory; they should be an integral part of your storytelling.
5. Be clear and concise
Avoid jargon or technical language that your audience may not comprehend. Use plain language and explain your data points clearly. Remember, clarity is king. Each piece of information should be easy for your audience to digest.
6. Practice your delivery
Practice makes perfect. Rehearse your presentation multiple times before the actual delivery. This will help you deliver it smoothly and confidently, reducing the chances of stumbling over your words or losing track of your message.
A basic structure for an effective data presentation
Armed with a comprehensive comprehension of how to construct a compelling data presentation, you can now utilize this fundamental template for guidance:
In the introduction, initiate your presentation by introducing both yourself and the topic at hand. Clearly articulate your main message or the fundamental concept you intend to communicate.
Moving on to the body of your presentation, organize your data in a coherent and easily understandable sequence. Employ visuals generously to elucidate your points and weave a narrative that enhances the overall story. Ensure that the arrangement of your data aligns with and reinforces your central message.
As you approach the conclusion, succinctly recapitulate your key points and emphasize your core message once more. Conclude by leaving your audience with a distinct and memorable takeaway, ensuring that your presentation has a lasting impact.
Additional tips for enhancing your data presentation
To take your data presentation to the next level, consider these additional tips:
- Consistent design : Maintain a uniform design throughout your presentation. This not only enhances visual appeal but also aids in seamless comprehension.
- High-quality visuals : Ensure that your visuals are of high quality, easy to read, and directly relevant to your topic.
- Concise text : Avoid overwhelming your slides with excessive text. Focus on the most critical points, using visuals to support and elaborate.
- Anticipate questions : Think ahead about the questions your audience might pose. Be prepared with well-thought-out answers to foster productive discussions.
By following these guidelines, you can structure an effective data presentation that not only informs but also engages and inspires your audience. Remember, a well-structured presentation is the bridge that connects your data to your audience's understanding and appreciation.
Do’s and don'ts on a data presentation
- Use visuals : Incorporate charts and graphs to enhance understanding.
- Keep it simple : Avoid clutter and complexity.
- Highlight key points : Emphasize crucial data.
- Engage the audience : Encourage questions and discussions.
- Practice : Rehearse your presentation.
Don'ts:
- Overload with data : Less is often more; don't overwhelm your audience.
- Fit Unrelated data : Stay on topic; don't include irrelevant information.
- Neglect the audience : Ensure your presentation suits your audience's level of expertise.
- Read word-for-word : Avoid reading directly from slides.
- Lose focus : Stick to your presentation's purpose.
Summarizing key takeaways
- Definition : Data presentation is the art of visualizing complex data for better understanding.
- Importance : Data presentations enhance clarity, engage the audience, aid decision-making, and leave a lasting impact.
- Types : Textual, Tabular, and Graphical presentations offer various ways to present data.
- Choosing methods : Select the right method based on data, audience, and purpose.
- Components : Include data points, comparisons, visuals, infographics, numerical values, and source citations.
- Structure : Know your audience, have a clear message, tell a compelling story, use visuals, be concise, and practice.
- Do's and don'ts : Do use visuals, keep it simple, highlight key points, engage the audience, and practice. Don't overload with data, include unrelated information, neglect the audience's expertise, read word-for-word, or lose focus.
FAQ's on a data presentation
1. what is data presentation, and why is it important in 2024.
Data presentation is the process of visually representing data sets to convey information effectively to an audience. In an era where the amount of data generated is vast, visually presenting data using methods such as diagrams, graphs, and charts has become crucial. By simplifying complex data sets, presentation of the data may helps your audience quickly grasp much information without drowning in a sea of chart's, analytics, facts and figures.
2. What are some common methods of data presentation?
There are various methods of data presentation, including graphs and charts, histograms, and cumulative frequency polygons. Each method has its strengths and is often used depending on the type of data you're using and the message you want to convey. For instance, if you want to show data over time, try using a line graph. If you're presenting geographical data, consider to use a heat map.
3. How can I ensure that my data presentation is clear and readable?
To ensure that your data presentation is clear and readable, pay attention to the design and labeling of your charts. Don't forget to label the axes appropriately, as they are critical for understanding the values they represent. Don't fit all the information in one slide or in a single paragraph. Presentation software like Prezent and PowerPoint can help you simplify your vertical axis, charts and tables, making them much easier to understand.
4. What are some common mistakes presenters make when presenting data?
One common mistake is trying to fit too much data into a single chart, which can distort the information and confuse the audience. Another mistake is not considering the needs of the audience. Remember that your audience won't have the same level of familiarity with the data as you do, so it's essential to present the data effectively and respond to questions during a Q&A session.
5. How can I use data visualization to present important data effectively on platforms like LinkedIn?
When presenting data on platforms like LinkedIn, consider using eye-catching visuals like bar graphs or charts. Use concise captions and e.g., examples to highlight the single most important information in your data report. Visuals, such as graphs and tables, can help you stand out in the sea of textual content, making your data presentation more engaging and shareable among your LinkedIn connections.
Create your data presentation with prezent
Prezent can be a valuable tool for creating data presentations. Here's how Prezent can help you in this regard:
- Time savings : Prezent saves up to 70% of presentation creation time, allowing you to focus on data analysis and insights.
- On-brand consistency : Ensure 100% brand alignment with Prezent's brand-approved designs for professional-looking data presentations.
- Effortless collaboration : Real-time sharing and collaboration features make it easy for teams to work together on data presentations.
- Data storytelling : Choose from 50+ storylines to effectively communicate data insights and engage your audience.
- Personalization : Create tailored data presentations that resonate with your audience's preferences, enhancing the impact of your data.
In summary, Prezent streamlines the process of creating data presentations by offering time-saving features, ensuring brand consistency, promoting collaboration, and providing tools for effective data storytelling. Whether you need to present data to clients, stakeholders, or within your organization, Prezent can significantly enhance your presentation-making process.
So, go ahead, present your data with confidence, and watch your audience be wowed by your expertise.
Thank you for joining us on this data-driven journey. Stay tuned for more insights, and remember, data presentation is your ticket to making numbers come alive! Sign up for our free trial or book a demo !
More zenpedia articles

Effective Communication in the workplace - The importance, types & tips to improve

Mastering visual presentations: Types of visual presentation examples

How to recognize and address passive-aggressive communication style and behavior?
Get the latest from Prezent community
Join thousands of subscribers who receive our best practices on communication, storytelling, presentation design, and more. New tips weekly. (No spam, we promise!)
- SUGGESTED TOPICS
- The Magazine
- Newsletters
- Managing Yourself
- Managing Teams
- Work-life Balance
- The Big Idea
- Data & Visuals
- Reading Lists
- Case Selections
- HBR Learning
- Topic Feeds
- Account Settings
- Email Preferences
Present Your Data Like a Pro
- Joel Schwartzberg

Demystify the numbers. Your audience will thank you.
While a good presentation has data, data alone doesn’t guarantee a good presentation. It’s all about how that data is presented. The quickest way to confuse your audience is by sharing too many details at once. The only data points you should share are those that significantly support your point — and ideally, one point per chart. To avoid the debacle of sheepishly translating hard-to-see numbers and labels, rehearse your presentation with colleagues sitting as far away as the actual audience would. While you’ve been working with the same chart for weeks or months, your audience will be exposed to it for mere seconds. Give them the best chance of comprehending your data by using simple, clear, and complete language to identify X and Y axes, pie pieces, bars, and other diagrammatic elements. Try to avoid abbreviations that aren’t obvious, and don’t assume labeled components on one slide will be remembered on subsequent slides. Every valuable chart or pie graph has an “Aha!” zone — a number or range of data that reveals something crucial to your point. Make sure you visually highlight the “Aha!” zone, reinforcing the moment by explaining it to your audience.
With so many ways to spin and distort information these days, a presentation needs to do more than simply share great ideas — it needs to support those ideas with credible data. That’s true whether you’re an executive pitching new business clients, a vendor selling her services, or a CEO making a case for change.
- JS Joel Schwartzberg oversees executive communications for a major national nonprofit, is a professional presentation coach, and is the author of Get to the Point! Sharpen Your Message and Make Your Words Matter and The Language of Leadership: How to Engage and Inspire Your Team . You can find him on LinkedIn and X. TheJoelTruth
Partner Center
Home Blog Design Understanding Data Presentations (Guide + Examples)
Understanding Data Presentations (Guide + Examples)

In this age of overwhelming information, the skill to effectively convey data has become extremely valuable. Initiating a discussion on data presentation types involves thoughtful consideration of the nature of your data and the message you aim to convey. Different types of visualizations serve distinct purposes. Whether you’re dealing with how to develop a report or simply trying to communicate complex information, how you present data influences how well your audience understands and engages with it. This extensive guide leads you through the different ways of data presentation.
Table of Contents
What is a Data Presentation?
What should a data presentation include, line graphs, treemap chart, scatter plot, how to choose a data presentation type, recommended data presentation templates, common mistakes done in data presentation.
A data presentation is a slide deck that aims to disclose quantitative information to an audience through the use of visual formats and narrative techniques derived from data analysis, making complex data understandable and actionable. This process requires a series of tools, such as charts, graphs, tables, infographics, dashboards, and so on, supported by concise textual explanations to improve understanding and boost retention rate.
Data presentations require us to cull data in a format that allows the presenter to highlight trends, patterns, and insights so that the audience can act upon the shared information. In a few words, the goal of data presentations is to enable viewers to grasp complicated concepts or trends quickly, facilitating informed decision-making or deeper analysis.
Data presentations go beyond the mere usage of graphical elements. Seasoned presenters encompass visuals with the art of data storytelling , so the speech skillfully connects the points through a narrative that resonates with the audience. Depending on the purpose – inspire, persuade, inform, support decision-making processes, etc. – is the data presentation format that is better suited to help us in this journey.
To nail your upcoming data presentation, ensure to count with the following elements:
- Clear Objectives: Understand the intent of your presentation before selecting the graphical layout and metaphors to make content easier to grasp.
- Engaging introduction: Use a powerful hook from the get-go. For instance, you can ask a big question or present a problem that your data will answer. Take a look at our guide on how to start a presentation for tips & insights.
- Structured Narrative: Your data presentation must tell a coherent story. This means a beginning where you present the context, a middle section in which you present the data, and an ending that uses a call-to-action. Check our guide on presentation structure for further information.
- Visual Elements: These are the charts, graphs, and other elements of visual communication we ought to use to present data. This article will cover one by one the different types of data representation methods we can use, and provide further guidance on choosing between them.
- Insights and Analysis: This is not just showcasing a graph and letting people get an idea about it. A proper data presentation includes the interpretation of that data, the reason why it’s included, and why it matters to your research.
- Conclusion & CTA: Ending your presentation with a call to action is necessary. Whether you intend to wow your audience into acquiring your services, inspire them to change the world, or whatever the purpose of your presentation, there must be a stage in which you convey all that you shared and show the path to staying in touch. Plan ahead whether you want to use a thank-you slide, a video presentation, or which method is apt and tailored to the kind of presentation you deliver.
- Q&A Session: After your speech is concluded, allocate 3-5 minutes for the audience to raise any questions about the information you disclosed. This is an extra chance to establish your authority on the topic. Check our guide on questions and answer sessions in presentations here.
Bar charts are a graphical representation of data using rectangular bars to show quantities or frequencies in an established category. They make it easy for readers to spot patterns or trends. Bar charts can be horizontal or vertical, although the vertical format is commonly known as a column chart. They display categorical, discrete, or continuous variables grouped in class intervals [1] . They include an axis and a set of labeled bars horizontally or vertically. These bars represent the frequencies of variable values or the values themselves. Numbers on the y-axis of a vertical bar chart or the x-axis of a horizontal bar chart are called the scale.

Real-Life Application of Bar Charts
Let’s say a sales manager is presenting sales to their audience. Using a bar chart, he follows these steps.
Step 1: Selecting Data
The first step is to identify the specific data you will present to your audience.
The sales manager has highlighted these products for the presentation.
- Product A: Men’s Shoes
- Product B: Women’s Apparel
- Product C: Electronics
- Product D: Home Decor
Step 2: Choosing Orientation
Opt for a vertical layout for simplicity. Vertical bar charts help compare different categories in case there are not too many categories [1] . They can also help show different trends. A vertical bar chart is used where each bar represents one of the four chosen products. After plotting the data, it is seen that the height of each bar directly represents the sales performance of the respective product.
It is visible that the tallest bar (Electronics – Product C) is showing the highest sales. However, the shorter bars (Women’s Apparel – Product B and Home Decor – Product D) need attention. It indicates areas that require further analysis or strategies for improvement.
Step 3: Colorful Insights
Different colors are used to differentiate each product. It is essential to show a color-coded chart where the audience can distinguish between products.
- Men’s Shoes (Product A): Yellow
- Women’s Apparel (Product B): Orange
- Electronics (Product C): Violet
- Home Decor (Product D): Blue

Bar charts are straightforward and easily understandable for presenting data. They are versatile when comparing products or any categorical data [2] . Bar charts adapt seamlessly to retail scenarios. Despite that, bar charts have a few shortcomings. They cannot illustrate data trends over time. Besides, overloading the chart with numerous products can lead to visual clutter, diminishing its effectiveness.
For more information, check our collection of bar chart templates for PowerPoint .
Line graphs help illustrate data trends, progressions, or fluctuations by connecting a series of data points called ‘markers’ with straight line segments. This provides a straightforward representation of how values change [5] . Their versatility makes them invaluable for scenarios requiring a visual understanding of continuous data. In addition, line graphs are also useful for comparing multiple datasets over the same timeline. Using multiple line graphs allows us to compare more than one data set. They simplify complex information so the audience can quickly grasp the ups and downs of values. From tracking stock prices to analyzing experimental results, you can use line graphs to show how data changes over a continuous timeline. They show trends with simplicity and clarity.
Real-life Application of Line Graphs
To understand line graphs thoroughly, we will use a real case. Imagine you’re a financial analyst presenting a tech company’s monthly sales for a licensed product over the past year. Investors want insights into sales behavior by month, how market trends may have influenced sales performance and reception to the new pricing strategy. To present data via a line graph, you will complete these steps.
First, you need to gather the data. In this case, your data will be the sales numbers. For example:
- January: $45,000
- February: $55,000
- March: $45,000
- April: $60,000
- May: $ 70,000
- June: $65,000
- July: $62,000
- August: $68,000
- September: $81,000
- October: $76,000
- November: $87,000
- December: $91,000
After choosing the data, the next step is to select the orientation. Like bar charts, you can use vertical or horizontal line graphs. However, we want to keep this simple, so we will keep the timeline (x-axis) horizontal while the sales numbers (y-axis) vertical.
Step 3: Connecting Trends
After adding the data to your preferred software, you will plot a line graph. In the graph, each month’s sales are represented by data points connected by a line.

Step 4: Adding Clarity with Color
If there are multiple lines, you can also add colors to highlight each one, making it easier to follow.
Line graphs excel at visually presenting trends over time. These presentation aids identify patterns, like upward or downward trends. However, too many data points can clutter the graph, making it harder to interpret. Line graphs work best with continuous data but are not suitable for categories.
For more information, check our collection of line chart templates for PowerPoint and our article about how to make a presentation graph .
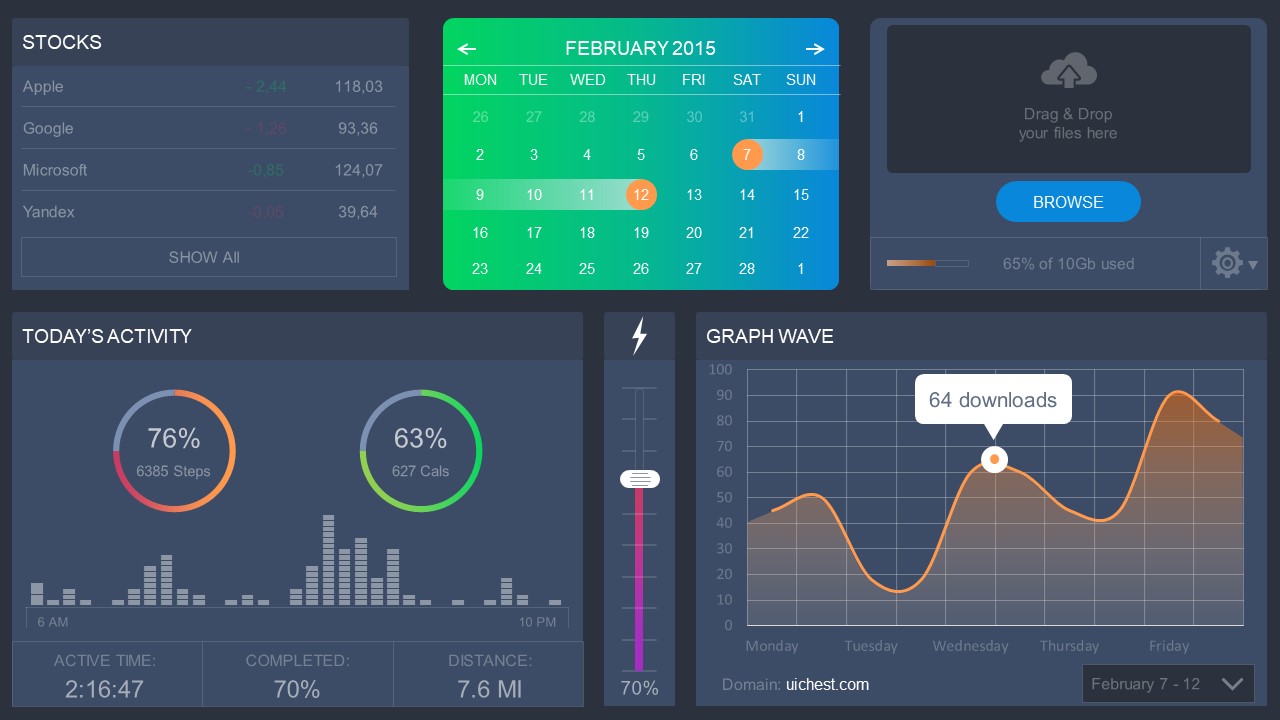
A data dashboard is a visual tool for analyzing information. Different graphs, charts, and tables are consolidated in a layout to showcase the information required to achieve one or more objectives. Dashboards help quickly see Key Performance Indicators (KPIs). You don’t make new visuals in the dashboard; instead, you use it to display visuals you’ve already made in worksheets [3] .
Keeping the number of visuals on a dashboard to three or four is recommended. Adding too many can make it hard to see the main points [4]. Dashboards can be used for business analytics to analyze sales, revenue, and marketing metrics at a time. They are also used in the manufacturing industry, as they allow users to grasp the entire production scenario at the moment while tracking the core KPIs for each line.
Real-Life Application of a Dashboard
Consider a project manager presenting a software development project’s progress to a tech company’s leadership team. He follows the following steps.
Step 1: Defining Key Metrics
To effectively communicate the project’s status, identify key metrics such as completion status, budget, and bug resolution rates. Then, choose measurable metrics aligned with project objectives.
Step 2: Choosing Visualization Widgets
After finalizing the data, presentation aids that align with each metric are selected. For this project, the project manager chooses a progress bar for the completion status and uses bar charts for budget allocation. Likewise, he implements line charts for bug resolution rates.

Step 3: Dashboard Layout
Key metrics are prominently placed in the dashboard for easy visibility, and the manager ensures that it appears clean and organized.
Dashboards provide a comprehensive view of key project metrics. Users can interact with data, customize views, and drill down for detailed analysis. However, creating an effective dashboard requires careful planning to avoid clutter. Besides, dashboards rely on the availability and accuracy of underlying data sources.
For more information, check our article on how to design a dashboard presentation , and discover our collection of dashboard PowerPoint templates .
Treemap charts represent hierarchical data structured in a series of nested rectangles [6] . As each branch of the ‘tree’ is given a rectangle, smaller tiles can be seen representing sub-branches, meaning elements on a lower hierarchical level than the parent rectangle. Each one of those rectangular nodes is built by representing an area proportional to the specified data dimension.
Treemaps are useful for visualizing large datasets in compact space. It is easy to identify patterns, such as which categories are dominant. Common applications of the treemap chart are seen in the IT industry, such as resource allocation, disk space management, website analytics, etc. Also, they can be used in multiple industries like healthcare data analysis, market share across different product categories, or even in finance to visualize portfolios.
Real-Life Application of a Treemap Chart
Let’s consider a financial scenario where a financial team wants to represent the budget allocation of a company. There is a hierarchy in the process, so it is helpful to use a treemap chart. In the chart, the top-level rectangle could represent the total budget, and it would be subdivided into smaller rectangles, each denoting a specific department. Further subdivisions within these smaller rectangles might represent individual projects or cost categories.
Step 1: Define Your Data Hierarchy
While presenting data on the budget allocation, start by outlining the hierarchical structure. The sequence will be like the overall budget at the top, followed by departments, projects within each department, and finally, individual cost categories for each project.
- Top-level rectangle: Total Budget
- Second-level rectangles: Departments (Engineering, Marketing, Sales)
- Third-level rectangles: Projects within each department
- Fourth-level rectangles: Cost categories for each project (Personnel, Marketing Expenses, Equipment)
Step 2: Choose a Suitable Tool
It’s time to select a data visualization tool supporting Treemaps. Popular choices include Tableau, Microsoft Power BI, PowerPoint, or even coding with libraries like D3.js. It is vital to ensure that the chosen tool provides customization options for colors, labels, and hierarchical structures.
Here, the team uses PowerPoint for this guide because of its user-friendly interface and robust Treemap capabilities.
Step 3: Make a Treemap Chart with PowerPoint
After opening the PowerPoint presentation, they chose “SmartArt” to form the chart. The SmartArt Graphic window has a “Hierarchy” category on the left. Here, you will see multiple options. You can choose any layout that resembles a Treemap. The “Table Hierarchy” or “Organization Chart” options can be adapted. The team selects the Table Hierarchy as it looks close to a Treemap.
Step 5: Input Your Data
After that, a new window will open with a basic structure. They add the data one by one by clicking on the text boxes. They start with the top-level rectangle, representing the total budget.

Step 6: Customize the Treemap
By clicking on each shape, they customize its color, size, and label. At the same time, they can adjust the font size, style, and color of labels by using the options in the “Format” tab in PowerPoint. Using different colors for each level enhances the visual difference.
Treemaps excel at illustrating hierarchical structures. These charts make it easy to understand relationships and dependencies. They efficiently use space, compactly displaying a large amount of data, reducing the need for excessive scrolling or navigation. Additionally, using colors enhances the understanding of data by representing different variables or categories.
In some cases, treemaps might become complex, especially with deep hierarchies. It becomes challenging for some users to interpret the chart. At the same time, displaying detailed information within each rectangle might be constrained by space. It potentially limits the amount of data that can be shown clearly. Without proper labeling and color coding, there’s a risk of misinterpretation.
A heatmap is a data visualization tool that uses color coding to represent values across a two-dimensional surface. In these, colors replace numbers to indicate the magnitude of each cell. This color-shaded matrix display is valuable for summarizing and understanding data sets with a glance [7] . The intensity of the color corresponds to the value it represents, making it easy to identify patterns, trends, and variations in the data.
As a tool, heatmaps help businesses analyze website interactions, revealing user behavior patterns and preferences to enhance overall user experience. In addition, companies use heatmaps to assess content engagement, identifying popular sections and areas of improvement for more effective communication. They excel at highlighting patterns and trends in large datasets, making it easy to identify areas of interest.
We can implement heatmaps to express multiple data types, such as numerical values, percentages, or even categorical data. Heatmaps help us easily spot areas with lots of activity, making them helpful in figuring out clusters [8] . When making these maps, it is important to pick colors carefully. The colors need to show the differences between groups or levels of something. And it is good to use colors that people with colorblindness can easily see.
Check our detailed guide on how to create a heatmap here. Also discover our collection of heatmap PowerPoint templates .
Pie charts are circular statistical graphics divided into slices to illustrate numerical proportions. Each slice represents a proportionate part of the whole, making it easy to visualize the contribution of each component to the total.
The size of the pie charts is influenced by the value of data points within each pie. The total of all data points in a pie determines its size. The pie with the highest data points appears as the largest, whereas the others are proportionally smaller. However, you can present all pies of the same size if proportional representation is not required [9] . Sometimes, pie charts are difficult to read, or additional information is required. A variation of this tool can be used instead, known as the donut chart , which has the same structure but a blank center, creating a ring shape. Presenters can add extra information, and the ring shape helps to declutter the graph.
Pie charts are used in business to show percentage distribution, compare relative sizes of categories, or present straightforward data sets where visualizing ratios is essential.
Real-Life Application of Pie Charts
Consider a scenario where you want to represent the distribution of the data. Each slice of the pie chart would represent a different category, and the size of each slice would indicate the percentage of the total portion allocated to that category.
Step 1: Define Your Data Structure
Imagine you are presenting the distribution of a project budget among different expense categories.
- Column A: Expense Categories (Personnel, Equipment, Marketing, Miscellaneous)
- Column B: Budget Amounts ($40,000, $30,000, $20,000, $10,000) Column B represents the values of your categories in Column A.
Step 2: Insert a Pie Chart
Using any of the accessible tools, you can create a pie chart. The most convenient tools for forming a pie chart in a presentation are presentation tools such as PowerPoint or Google Slides. You will notice that the pie chart assigns each expense category a percentage of the total budget by dividing it by the total budget.
For instance:
- Personnel: $40,000 / ($40,000 + $30,000 + $20,000 + $10,000) = 40%
- Equipment: $30,000 / ($40,000 + $30,000 + $20,000 + $10,000) = 30%
- Marketing: $20,000 / ($40,000 + $30,000 + $20,000 + $10,000) = 20%
- Miscellaneous: $10,000 / ($40,000 + $30,000 + $20,000 + $10,000) = 10%
You can make a chart out of this or just pull out the pie chart from the data.

3D pie charts and 3D donut charts are quite popular among the audience. They stand out as visual elements in any presentation slide, so let’s take a look at how our pie chart example would look in 3D pie chart format.

Step 03: Results Interpretation
The pie chart visually illustrates the distribution of the project budget among different expense categories. Personnel constitutes the largest portion at 40%, followed by equipment at 30%, marketing at 20%, and miscellaneous at 10%. This breakdown provides a clear overview of where the project funds are allocated, which helps in informed decision-making and resource management. It is evident that personnel are a significant investment, emphasizing their importance in the overall project budget.
Pie charts provide a straightforward way to represent proportions and percentages. They are easy to understand, even for individuals with limited data analysis experience. These charts work well for small datasets with a limited number of categories.
However, a pie chart can become cluttered and less effective in situations with many categories. Accurate interpretation may be challenging, especially when dealing with slight differences in slice sizes. In addition, these charts are static and do not effectively convey trends over time.
For more information, check our collection of pie chart templates for PowerPoint .
Histograms present the distribution of numerical variables. Unlike a bar chart that records each unique response separately, histograms organize numeric responses into bins and show the frequency of reactions within each bin [10] . The x-axis of a histogram shows the range of values for a numeric variable. At the same time, the y-axis indicates the relative frequencies (percentage of the total counts) for that range of values.
Whenever you want to understand the distribution of your data, check which values are more common, or identify outliers, histograms are your go-to. Think of them as a spotlight on the story your data is telling. A histogram can provide a quick and insightful overview if you’re curious about exam scores, sales figures, or any numerical data distribution.
Real-Life Application of a Histogram
In the histogram data analysis presentation example, imagine an instructor analyzing a class’s grades to identify the most common score range. A histogram could effectively display the distribution. It will show whether most students scored in the average range or if there are significant outliers.
Step 1: Gather Data
He begins by gathering the data. The scores of each student in class are gathered to analyze exam scores.
| Names | Score |
|---|---|
| Alice | 78 |
| Bob | 85 |
| Clara | 92 |
| David | 65 |
| Emma | 72 |
| Frank | 88 |
| Grace | 76 |
| Henry | 95 |
| Isabel | 81 |
| Jack | 70 |
| Kate | 60 |
| Liam | 89 |
| Mia | 75 |
| Noah | 84 |
| Olivia | 92 |
After arranging the scores in ascending order, bin ranges are set.
Step 2: Define Bins
Bins are like categories that group similar values. Think of them as buckets that organize your data. The presenter decides how wide each bin should be based on the range of the values. For instance, the instructor sets the bin ranges based on score intervals: 60-69, 70-79, 80-89, and 90-100.
Step 3: Count Frequency
Now, he counts how many data points fall into each bin. This step is crucial because it tells you how often specific ranges of values occur. The result is the frequency distribution, showing the occurrences of each group.
Here, the instructor counts the number of students in each category.
- 60-69: 1 student (Kate)
- 70-79: 4 students (David, Emma, Grace, Jack)
- 80-89: 7 students (Alice, Bob, Frank, Isabel, Liam, Mia, Noah)
- 90-100: 3 students (Clara, Henry, Olivia)
Step 4: Create the Histogram
It’s time to turn the data into a visual representation. Draw a bar for each bin on a graph. The width of the bar should correspond to the range of the bin, and the height should correspond to the frequency. To make your histogram understandable, label the X and Y axes.
In this case, the X-axis should represent the bins (e.g., test score ranges), and the Y-axis represents the frequency.

The histogram of the class grades reveals insightful patterns in the distribution. Most students, with seven students, fall within the 80-89 score range. The histogram provides a clear visualization of the class’s performance. It showcases a concentration of grades in the upper-middle range with few outliers at both ends. This analysis helps in understanding the overall academic standing of the class. It also identifies the areas for potential improvement or recognition.
Thus, histograms provide a clear visual representation of data distribution. They are easy to interpret, even for those without a statistical background. They apply to various types of data, including continuous and discrete variables. One weak point is that histograms do not capture detailed patterns in students’ data, with seven compared to other visualization methods.
A scatter plot is a graphical representation of the relationship between two variables. It consists of individual data points on a two-dimensional plane. This plane plots one variable on the x-axis and the other on the y-axis. Each point represents a unique observation. It visualizes patterns, trends, or correlations between the two variables.
Scatter plots are also effective in revealing the strength and direction of relationships. They identify outliers and assess the overall distribution of data points. The points’ dispersion and clustering reflect the relationship’s nature, whether it is positive, negative, or lacks a discernible pattern. In business, scatter plots assess relationships between variables such as marketing cost and sales revenue. They help present data correlations and decision-making.
Real-Life Application of Scatter Plot
A group of scientists is conducting a study on the relationship between daily hours of screen time and sleep quality. After reviewing the data, they managed to create this table to help them build a scatter plot graph:
| Participant ID | Daily Hours of Screen Time | Sleep Quality Rating |
|---|---|---|
| 1 | 9 | 3 |
| 2 | 2 | 8 |
| 3 | 1 | 9 |
| 4 | 0 | 10 |
| 5 | 1 | 9 |
| 6 | 3 | 7 |
| 7 | 4 | 7 |
| 8 | 5 | 6 |
| 9 | 5 | 6 |
| 10 | 7 | 3 |
| 11 | 10 | 1 |
| 12 | 6 | 5 |
| 13 | 7 | 3 |
| 14 | 8 | 2 |
| 15 | 9 | 2 |
| 16 | 4 | 7 |
| 17 | 5 | 6 |
| 18 | 4 | 7 |
| 19 | 9 | 2 |
| 20 | 6 | 4 |
| 21 | 3 | 7 |
| 22 | 10 | 1 |
| 23 | 2 | 8 |
| 24 | 5 | 6 |
| 25 | 3 | 7 |
| 26 | 1 | 9 |
| 27 | 8 | 2 |
| 28 | 4 | 6 |
| 29 | 7 | 3 |
| 30 | 2 | 8 |
| 31 | 7 | 4 |
| 32 | 9 | 2 |
| 33 | 10 | 1 |
| 34 | 10 | 1 |
| 35 | 10 | 1 |
In the provided example, the x-axis represents Daily Hours of Screen Time, and the y-axis represents the Sleep Quality Rating.

The scientists observe a negative correlation between the amount of screen time and the quality of sleep. This is consistent with their hypothesis that blue light, especially before bedtime, has a significant impact on sleep quality and metabolic processes.
There are a few things to remember when using a scatter plot. Even when a scatter diagram indicates a relationship, it doesn’t mean one variable affects the other. A third factor can influence both variables. The more the plot resembles a straight line, the stronger the relationship is perceived [11] . If it suggests no ties, the observed pattern might be due to random fluctuations in data. When the scatter diagram depicts no correlation, whether the data might be stratified is worth considering.
Choosing the appropriate data presentation type is crucial when making a presentation . Understanding the nature of your data and the message you intend to convey will guide this selection process. For instance, when showcasing quantitative relationships, scatter plots become instrumental in revealing correlations between variables. If the focus is on emphasizing parts of a whole, pie charts offer a concise display of proportions. Histograms, on the other hand, prove valuable for illustrating distributions and frequency patterns.
Bar charts provide a clear visual comparison of different categories. Likewise, line charts excel in showcasing trends over time, while tables are ideal for detailed data examination. Starting a presentation on data presentation types involves evaluating the specific information you want to communicate and selecting the format that aligns with your message. This ensures clarity and resonance with your audience from the beginning of your presentation.
1. Fact Sheet Dashboard for Data Presentation
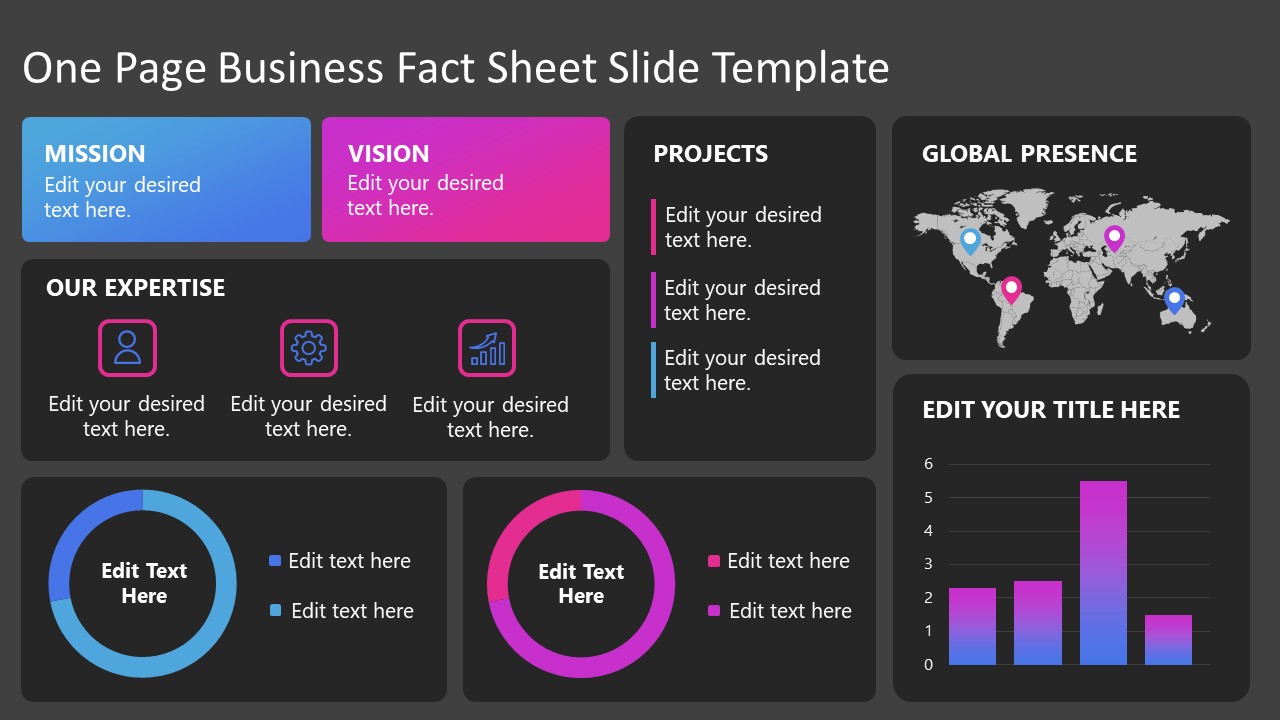
Convey all the data you need to present in this one-pager format, an ideal solution tailored for users looking for presentation aids. Global maps, donut chats, column graphs, and text neatly arranged in a clean layout presented in light and dark themes.
Use This Template
2. 3D Column Chart Infographic PPT Template
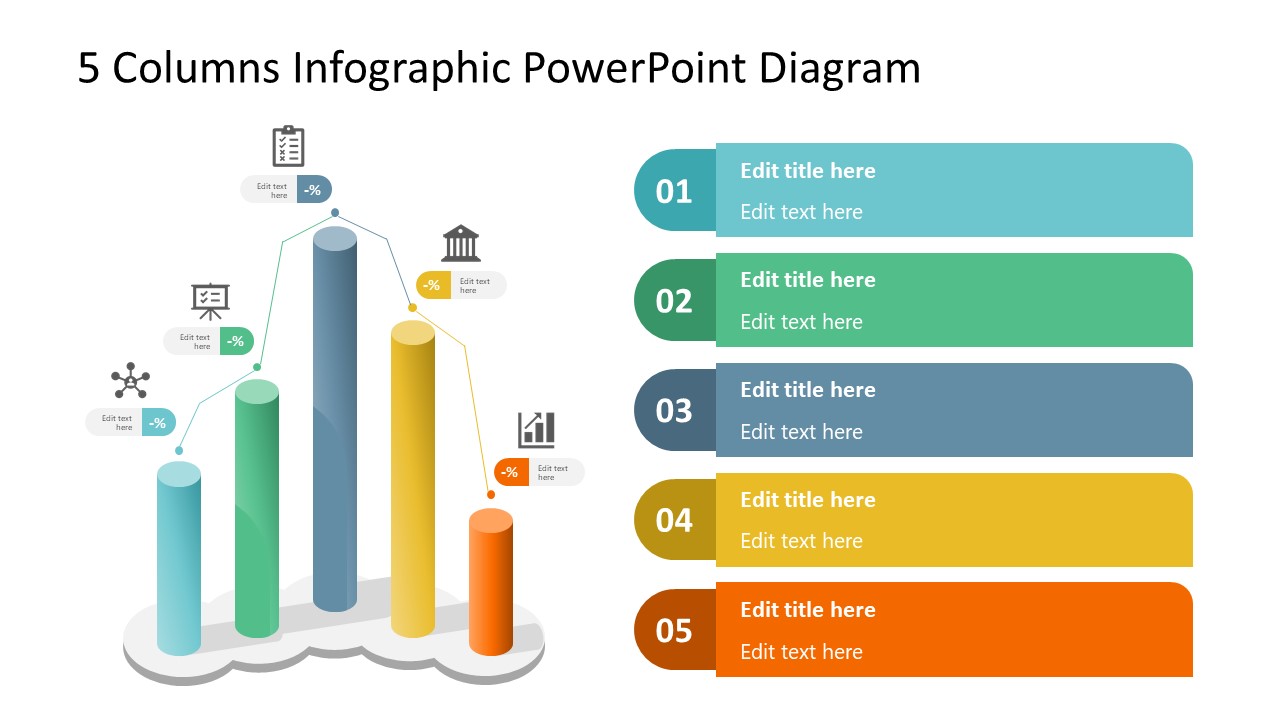
Represent column charts in a highly visual 3D format with this PPT template. A creative way to present data, this template is entirely editable, and we can craft either a one-page infographic or a series of slides explaining what we intend to disclose point by point.
3. Data Circles Infographic PowerPoint Template
An alternative to the pie chart and donut chart diagrams, this template features a series of curved shapes with bubble callouts as ways of presenting data. Expand the information for each arch in the text placeholder areas.
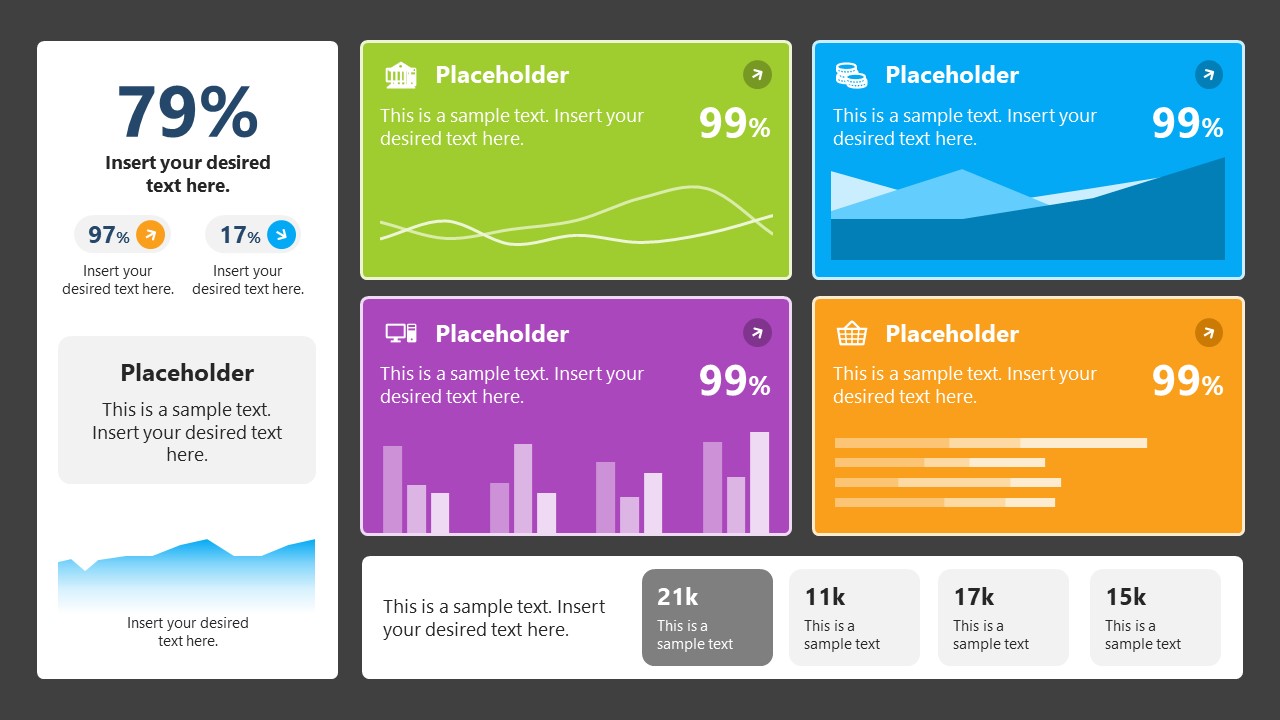
4. Colorful Metrics Dashboard for Data Presentation
This versatile dashboard template helps us in the presentation of the data by offering several graphs and methods to convert numbers into graphics. Implement it for e-commerce projects, financial projections, project development, and more.
5. Animated Data Presentation Tools for PowerPoint & Google Slides

A slide deck filled with most of the tools mentioned in this article, from bar charts, column charts, treemap graphs, pie charts, histogram, etc. Animated effects make each slide look dynamic when sharing data with stakeholders.
6. Statistics Waffle Charts PPT Template for Data Presentations
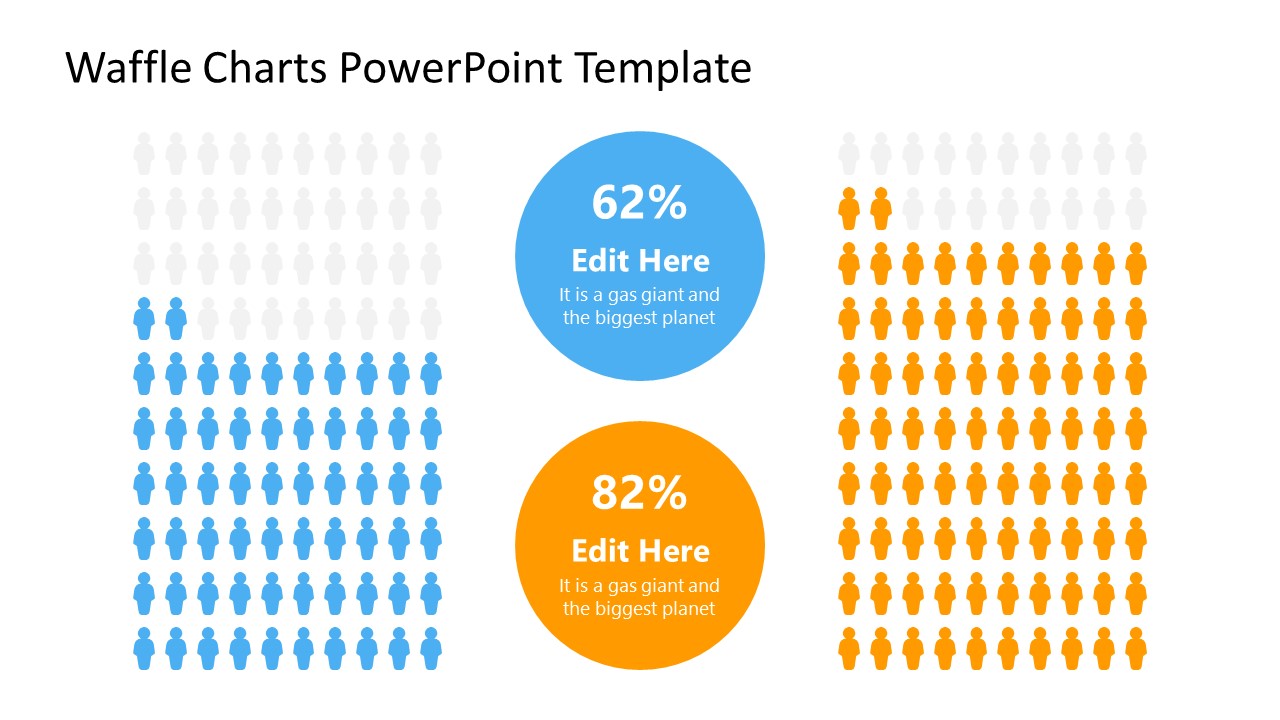
This PPT template helps us how to present data beyond the typical pie chart representation. It is widely used for demographics, so it’s a great fit for marketing teams, data science professionals, HR personnel, and more.
7. Data Presentation Dashboard Template for Google Slides
A compendium of tools in dashboard format featuring line graphs, bar charts, column charts, and neatly arranged placeholder text areas.
8. Weather Dashboard for Data Presentation
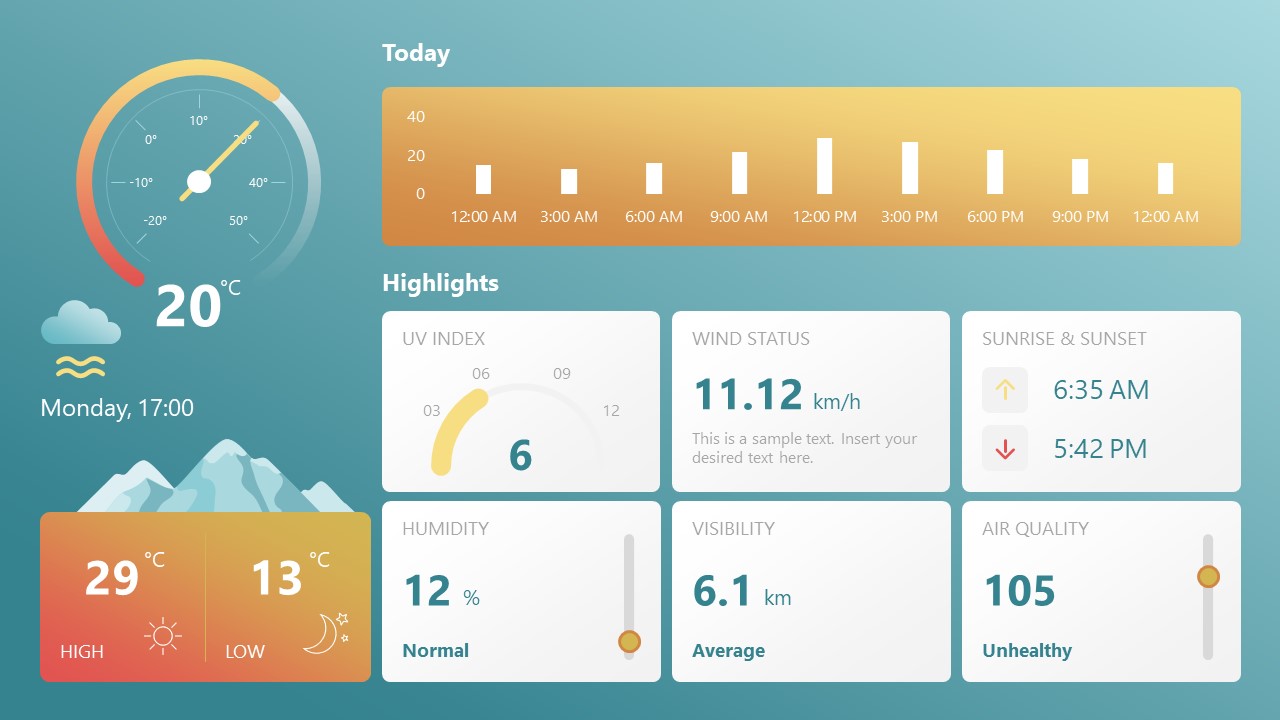
Share weather data for agricultural presentation topics, environmental studies, or any kind of presentation that requires a highly visual layout for weather forecasting on a single day. Two color themes are available.
9. Social Media Marketing Dashboard Data Presentation Template
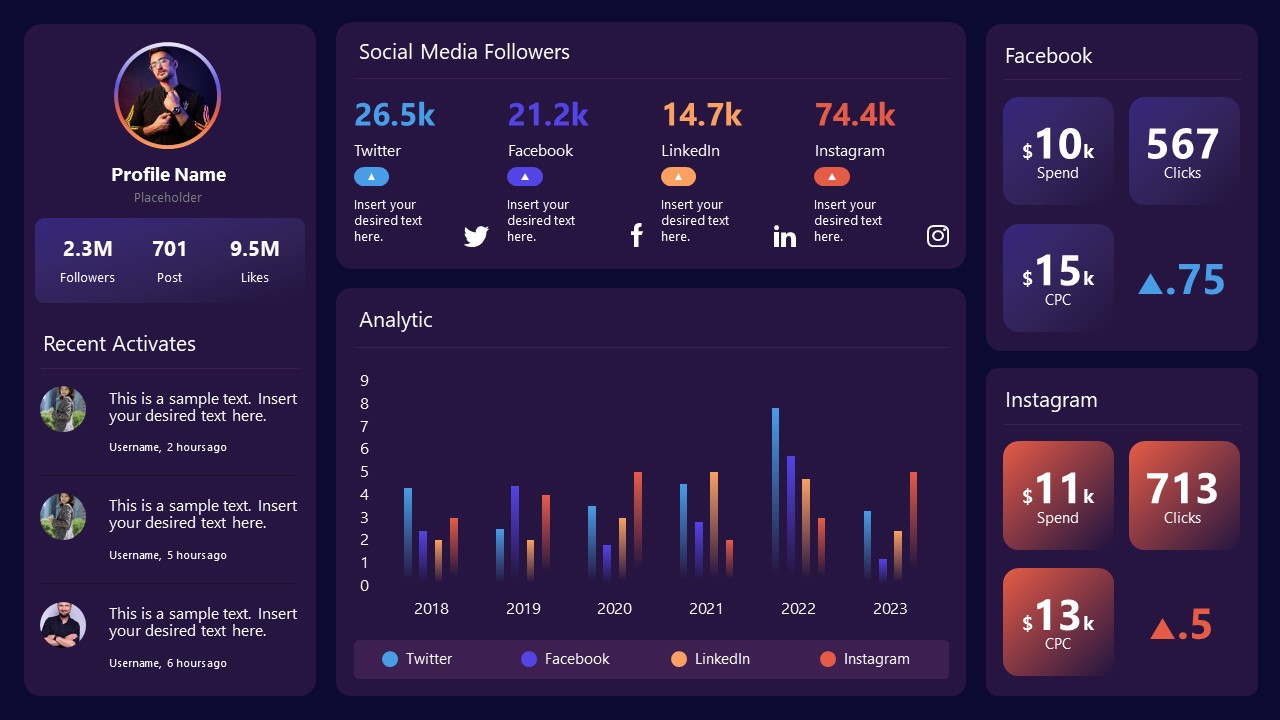
Intended for marketing professionals, this dashboard template for data presentation is a tool for presenting data analytics from social media channels. Two slide layouts featuring line graphs and column charts.
10. Project Management Summary Dashboard Template
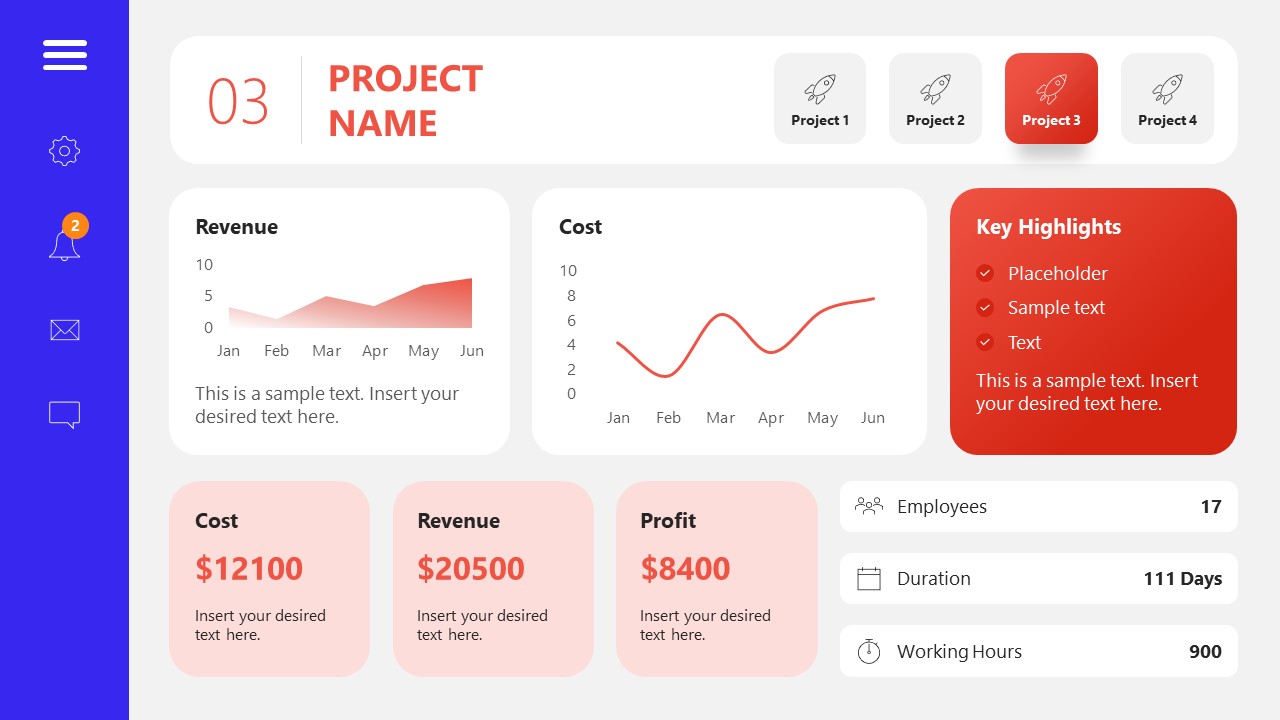
A tool crafted for project managers to deliver highly visual reports on a project’s completion, the profits it delivered for the company, and expenses/time required to execute it. 4 different color layouts are available.
11. Profit & Loss Dashboard for PowerPoint and Google Slides
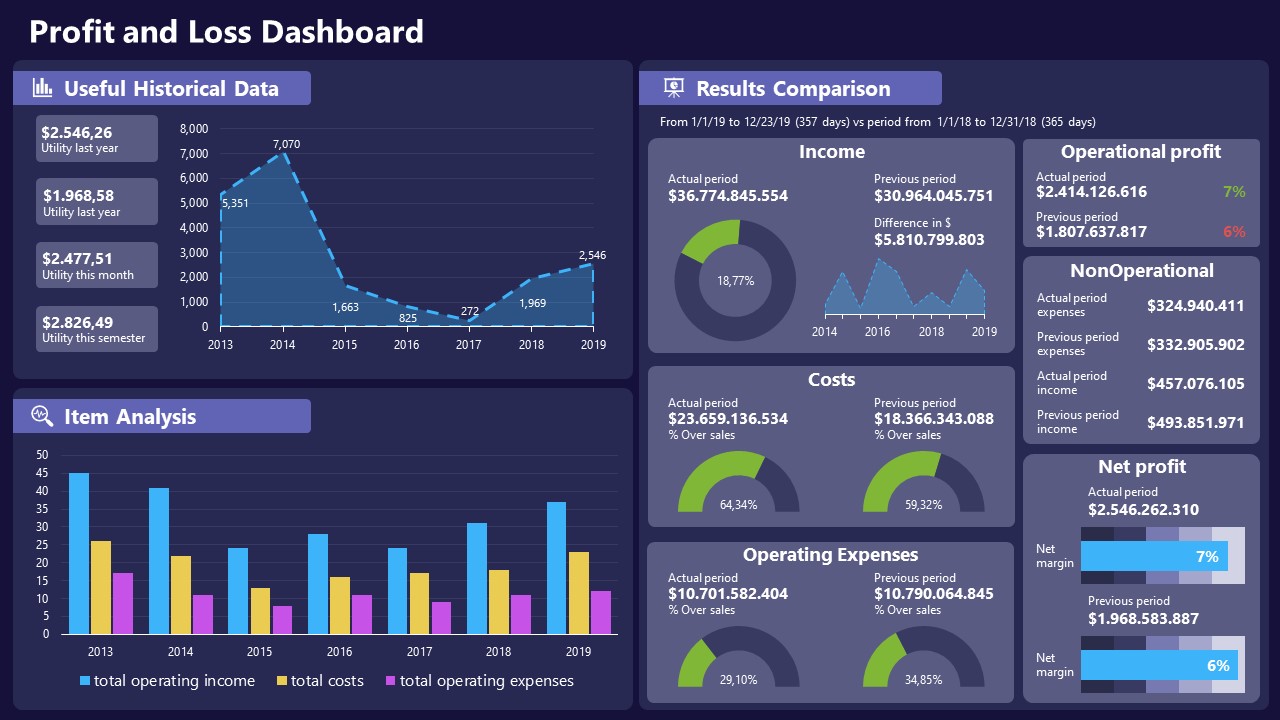
A must-have for finance professionals. This typical profit & loss dashboard includes progress bars, donut charts, column charts, line graphs, and everything that’s required to deliver a comprehensive report about a company’s financial situation.
Overwhelming visuals
One of the mistakes related to using data-presenting methods is including too much data or using overly complex visualizations. They can confuse the audience and dilute the key message.
Inappropriate chart types
Choosing the wrong type of chart for the data at hand can lead to misinterpretation. For example, using a pie chart for data that doesn’t represent parts of a whole is not right.
Lack of context
Failing to provide context or sufficient labeling can make it challenging for the audience to understand the significance of the presented data.
Inconsistency in design
Using inconsistent design elements and color schemes across different visualizations can create confusion and visual disarray.
Failure to provide details
Simply presenting raw data without offering clear insights or takeaways can leave the audience without a meaningful conclusion.
Lack of focus
Not having a clear focus on the key message or main takeaway can result in a presentation that lacks a central theme.
Visual accessibility issues
Overlooking the visual accessibility of charts and graphs can exclude certain audience members who may have difficulty interpreting visual information.
In order to avoid these mistakes in data presentation, presenters can benefit from using presentation templates . These templates provide a structured framework. They ensure consistency, clarity, and an aesthetically pleasing design, enhancing data communication’s overall impact.
Understanding and choosing data presentation types are pivotal in effective communication. Each method serves a unique purpose, so selecting the appropriate one depends on the nature of the data and the message to be conveyed. The diverse array of presentation types offers versatility in visually representing information, from bar charts showing values to pie charts illustrating proportions.
Using the proper method enhances clarity, engages the audience, and ensures that data sets are not just presented but comprehensively understood. By appreciating the strengths and limitations of different presentation types, communicators can tailor their approach to convey information accurately, developing a deeper connection between data and audience understanding.
[1] Government of Canada, S.C. (2021) 5 Data Visualization 5.2 Bar Chart , 5.2 Bar chart . https://www150.statcan.gc.ca/n1/edu/power-pouvoir/ch9/bargraph-diagrammeabarres/5214818-eng.htm
[2] Kosslyn, S.M., 1989. Understanding charts and graphs. Applied cognitive psychology, 3(3), pp.185-225. https://apps.dtic.mil/sti/pdfs/ADA183409.pdf
[3] Creating a Dashboard . https://it.tufts.edu/book/export/html/1870
[4] https://www.goldenwestcollege.edu/research/data-and-more/data-dashboards/index.html
[5] https://www.mit.edu/course/21/21.guide/grf-line.htm
[6] Jadeja, M. and Shah, K., 2015, January. Tree-Map: A Visualization Tool for Large Data. In GSB@ SIGIR (pp. 9-13). https://ceur-ws.org/Vol-1393/gsb15proceedings.pdf#page=15
[7] Heat Maps and Quilt Plots. https://www.publichealth.columbia.edu/research/population-health-methods/heat-maps-and-quilt-plots
[8] EIU QGIS WORKSHOP. https://www.eiu.edu/qgisworkshop/heatmaps.php
[9] About Pie Charts. https://www.mit.edu/~mbarker/formula1/f1help/11-ch-c8.htm
[10] Histograms. https://sites.utexas.edu/sos/guided/descriptive/numericaldd/descriptiven2/histogram/ [11] https://asq.org/quality-resources/scatter-diagram
Like this article? Please share
Data Analysis, Data Science, Data Visualization Filed under Design
Related Articles

Filed under Google Slides Tutorials • June 3rd, 2024
How To Make a Graph on Google Slides
Creating quality graphics is an essential aspect of designing data presentations. Learn how to make a graph in Google Slides with this guide.

Filed under Design • March 27th, 2024
How to Make a Presentation Graph
Detailed step-by-step instructions to master the art of how to make a presentation graph in PowerPoint and Google Slides. Check it out!

Filed under Presentation Ideas • January 6th, 2024
All About Using Harvey Balls
Among the many tools in the arsenal of the modern presenter, Harvey Balls have a special place. In this article we will tell you all about using Harvey Balls.
Leave a Reply
We use essential cookies to make Venngage work. By clicking “Accept All Cookies”, you agree to the storing of cookies on your device to enhance site navigation, analyze site usage, and assist in our marketing efforts.
Manage Cookies
Cookies and similar technologies collect certain information about how you’re using our website. Some of them are essential, and without them you wouldn’t be able to use Venngage. But others are optional, and you get to choose whether we use them or not.
Strictly Necessary Cookies
These cookies are always on, as they’re essential for making Venngage work, and making it safe. Without these cookies, services you’ve asked for can’t be provided.
Show cookie providers
- Google Login
Functionality Cookies
These cookies help us provide enhanced functionality and personalisation, and remember your settings. They may be set by us or by third party providers.
Performance Cookies
These cookies help us analyze how many people are using Venngage, where they come from and how they're using it. If you opt out of these cookies, we can’t get feedback to make Venngage better for you and all our users.
- Google Analytics
Targeting Cookies
These cookies are set by our advertising partners to track your activity and show you relevant Venngage ads on other sites as you browse the internet.
- Google Tag Manager
- Infographics
- Daily Infographics
- Popular Templates
- Accessibility
- Graphic Design
- Graphs and Charts
- Data Visualization
- Human Resources
- Beginner Guides
Blog Data Visualization 10 Data Presentation Examples For Strategic Communication
10 Data Presentation Examples For Strategic Communication
Written by: Krystle Wong Sep 28, 2023

Knowing how to present data is like having a superpower.
Data presentation today is no longer just about numbers on a screen; it’s storytelling with a purpose. It’s about captivating your audience, making complex stuff look simple and inspiring action.
To help turn your data into stories that stick, influence decisions and make an impact, check out Venngage’s free chart maker or follow me on a tour into the world of data storytelling along with data presentation templates that work across different fields, from business boardrooms to the classroom and beyond. Keep scrolling to learn more!
Click to jump ahead:
10 Essential data presentation examples + methods you should know
What should be included in a data presentation, what are some common mistakes to avoid when presenting data, faqs on data presentation examples, transform your message with impactful data storytelling.
Data presentation is a vital skill in today’s information-driven world. Whether you’re in business, academia, or simply want to convey information effectively, knowing the different ways of presenting data is crucial. For impactful data storytelling, consider these essential data presentation methods:
1. Bar graph
Ideal for comparing data across categories or showing trends over time.
Bar graphs, also known as bar charts are workhorses of data presentation. They’re like the Swiss Army knives of visualization methods because they can be used to compare data in different categories or display data changes over time.
In a bar chart, categories are displayed on the x-axis and the corresponding values are represented by the height of the bars on the y-axis.

It’s a straightforward and effective way to showcase raw data, making it a staple in business reports, academic presentations and beyond.
Make sure your bar charts are concise with easy-to-read labels. Whether your bars go up or sideways, keep it simple by not overloading with too many categories.

2. Line graph
Great for displaying trends and variations in data points over time or continuous variables.
Line charts or line graphs are your go-to when you want to visualize trends and variations in data sets over time.
One of the best quantitative data presentation examples, they work exceptionally well for showing continuous data, such as sales projections over the last couple of years or supply and demand fluctuations.

The x-axis represents time or a continuous variable and the y-axis represents the data values. By connecting the data points with lines, you can easily spot trends and fluctuations.
A tip when presenting data with line charts is to minimize the lines and not make it too crowded. Highlight the big changes, put on some labels and give it a catchy title.

3. Pie chart
Useful for illustrating parts of a whole, such as percentages or proportions.
Pie charts are perfect for showing how a whole is divided into parts. They’re commonly used to represent percentages or proportions and are great for presenting survey results that involve demographic data.
Each “slice” of the pie represents a portion of the whole and the size of each slice corresponds to its share of the total.

While pie charts are handy for illustrating simple distributions, they can become confusing when dealing with too many categories or when the differences in proportions are subtle.
Don’t get too carried away with slices — label those slices with percentages or values so people know what’s what and consider using a legend for more categories.

4. Scatter plot
Effective for showing the relationship between two variables and identifying correlations.
Scatter plots are all about exploring relationships between two variables. They’re great for uncovering correlations, trends or patterns in data.
In a scatter plot, every data point appears as a dot on the chart, with one variable marked on the horizontal x-axis and the other on the vertical y-axis.

By examining the scatter of points, you can discern the nature of the relationship between the variables, whether it’s positive, negative or no correlation at all.
If you’re using scatter plots to reveal relationships between two variables, be sure to add trendlines or regression analysis when appropriate to clarify patterns. Label data points selectively or provide tooltips for detailed information.

5. Histogram
Best for visualizing the distribution and frequency of a single variable.
Histograms are your choice when you want to understand the distribution and frequency of a single variable.
They divide the data into “bins” or intervals and the height of each bar represents the frequency or count of data points falling into that interval.

Histograms are excellent for helping to identify trends in data distributions, such as peaks, gaps or skewness.
Here’s something to take note of — ensure that your histogram bins are appropriately sized to capture meaningful data patterns. Using clear axis labels and titles can also help explain the distribution of the data effectively.

6. Stacked bar chart
Useful for showing how different components contribute to a whole over multiple categories.
Stacked bar charts are a handy choice when you want to illustrate how different components contribute to a whole across multiple categories.
Each bar represents a category and the bars are divided into segments to show the contribution of various components within each category.

This method is ideal for highlighting both the individual and collective significance of each component, making it a valuable tool for comparative analysis.
Stacked bar charts are like data sandwiches—label each layer so people know what’s what. Keep the order logical and don’t forget the paintbrush for snazzy colors. Here’s a data analysis presentation example on writers’ productivity using stacked bar charts:

7. Area chart
Similar to line charts but with the area below the lines filled, making them suitable for showing cumulative data.
Area charts are close cousins of line charts but come with a twist.
Imagine plotting the sales of a product over several months. In an area chart, the space between the line and the x-axis is filled, providing a visual representation of the cumulative total.

This makes it easy to see how values stack up over time, making area charts a valuable tool for tracking trends in data.
For area charts, use them to visualize cumulative data and trends, but avoid overcrowding the chart. Add labels, especially at significant points and make sure the area under the lines is filled with a visually appealing color gradient.

8. Tabular presentation
Presenting data in rows and columns, often used for precise data values and comparisons.
Tabular data presentation is all about clarity and precision. Think of it as presenting numerical data in a structured grid, with rows and columns clearly displaying individual data points.
A table is invaluable for showcasing detailed data, facilitating comparisons and presenting numerical information that needs to be exact. They’re commonly used in reports, spreadsheets and academic papers.

When presenting tabular data, organize it neatly with clear headers and appropriate column widths. Highlight important data points or patterns using shading or font formatting for better readability.
9. Textual data
Utilizing written or descriptive content to explain or complement data, such as annotations or explanatory text.
Textual data presentation may not involve charts or graphs, but it’s one of the most used qualitative data presentation examples.
It involves using written content to provide context, explanations or annotations alongside data visuals. Think of it as the narrative that guides your audience through the data.
Well-crafted textual data can make complex information more accessible and help your audience understand the significance of the numbers and visuals.
Textual data is your chance to tell a story. Break down complex information into bullet points or short paragraphs and use headings to guide the reader’s attention.
10. Pictogram
Using simple icons or images to represent data is especially useful for conveying information in a visually intuitive manner.
Pictograms are all about harnessing the power of images to convey data in an easy-to-understand way.
Instead of using numbers or complex graphs, you use simple icons or images to represent data points.
For instance, you could use a thumbs up emoji to illustrate customer satisfaction levels, where each face represents a different level of satisfaction.

Pictograms are great for conveying data visually, so choose symbols that are easy to interpret and relevant to the data. Use consistent scaling and a legend to explain the symbols’ meanings, ensuring clarity in your presentation.

Looking for more data presentation ideas? Use the Venngage graph maker or browse through our gallery of chart templates to pick a template and get started!
A comprehensive data presentation should include several key elements to effectively convey information and insights to your audience. Here’s a list of what should be included in a data presentation:
1. Title and objective
- Begin with a clear and informative title that sets the context for your presentation.
- State the primary objective or purpose of the presentation to provide a clear focus.

2. Key data points
- Present the most essential data points or findings that align with your objective.
- Use charts, graphical presentations or visuals to illustrate these key points for better comprehension.

3. Context and significance
- Provide a brief overview of the context in which the data was collected and why it’s significant.
- Explain how the data relates to the larger picture or the problem you’re addressing.
4. Key takeaways
- Summarize the main insights or conclusions that can be drawn from the data.
- Highlight the key takeaways that the audience should remember.
5. Visuals and charts
- Use clear and appropriate visual aids to complement the data.
- Ensure that visuals are easy to understand and support your narrative.

6. Implications or actions
- Discuss the practical implications of the data or any recommended actions.
- If applicable, outline next steps or decisions that should be taken based on the data.

7. Q&A and discussion
- Allocate time for questions and open discussion to engage the audience.
- Address queries and provide additional insights or context as needed.
Presenting data is a crucial skill in various professional fields, from business to academia and beyond. To ensure your data presentations hit the mark, here are some common mistakes that you should steer clear of:
Overloading with data
Presenting too much data at once can overwhelm your audience. Focus on the key points and relevant information to keep the presentation concise and focused. Here are some free data visualization tools you can use to convey data in an engaging and impactful way.
Assuming everyone’s on the same page
It’s easy to assume that your audience understands as much about the topic as you do. But this can lead to either dumbing things down too much or diving into a bunch of jargon that leaves folks scratching their heads. Take a beat to figure out where your audience is coming from and tailor your presentation accordingly.
Misleading visuals
Using misleading visuals, such as distorted scales or inappropriate chart types can distort the data’s meaning. Pick the right data infographics and understandable charts to ensure that your visual representations accurately reflect the data.
Not providing context
Data without context is like a puzzle piece with no picture on it. Without proper context, data may be meaningless or misinterpreted. Explain the background, methodology and significance of the data.
Not citing sources properly
Neglecting to cite sources and provide citations for your data can erode its credibility. Always attribute data to its source and utilize reliable sources for your presentation.
Not telling a story
Avoid simply presenting numbers. If your presentation lacks a clear, engaging story that takes your audience on a journey from the beginning (setting the scene) through the middle (data analysis) to the end (the big insights and recommendations), you’re likely to lose their interest.
Infographics are great for storytelling because they mix cool visuals with short and sweet text to explain complicated stuff in a fun and easy way. Create one with Venngage’s free infographic maker to create a memorable story that your audience will remember.
Ignoring data quality
Presenting data without first checking its quality and accuracy can lead to misinformation. Validate and clean your data before presenting it.
Simplify your visuals
Fancy charts might look cool, but if they confuse people, what’s the point? Go for the simplest visual that gets your message across. Having a dilemma between presenting data with infographics v.s data design? This article on the difference between data design and infographics might help you out.
Missing the emotional connection
Data isn’t just about numbers; it’s about people and real-life situations. Don’t forget to sprinkle in some human touch, whether it’s through relatable stories, examples or showing how the data impacts real lives.
Skipping the actionable insights
At the end of the day, your audience wants to know what they should do with all the data. If you don’t wrap up with clear, actionable insights or recommendations, you’re leaving them hanging. Always finish up with practical takeaways and the next steps.
Can you provide some data presentation examples for business reports?
Business reports often benefit from data presentation through bar charts showing sales trends over time, pie charts displaying market share,or tables presenting financial performance metrics like revenue and profit margins.
What are some creative data presentation examples for academic presentations?
Creative data presentation ideas for academic presentations include using statistical infographics to illustrate research findings and statistical data, incorporating storytelling techniques to engage the audience or utilizing heat maps to visualize data patterns.
What are the key considerations when choosing the right data presentation format?
When choosing a chart format , consider factors like data complexity, audience expertise and the message you want to convey. Options include charts (e.g., bar, line, pie), tables, heat maps, data visualization infographics and interactive dashboards.
Knowing the type of data visualization that best serves your data is just half the battle. Here are some best practices for data visualization to make sure that the final output is optimized.
How can I choose the right data presentation method for my data?
To select the right data presentation method, start by defining your presentation’s purpose and audience. Then, match your data type (e.g., quantitative, qualitative) with suitable visualization techniques (e.g., histograms, word clouds) and choose an appropriate presentation format (e.g., slide deck, report, live demo).
For more presentation ideas , check out this guide on how to make a good presentation or use a presentation software to simplify the process.
How can I make my data presentations more engaging and informative?
To enhance data presentations, use compelling narratives, relatable examples and fun data infographics that simplify complex data. Encourage audience interaction, offer actionable insights and incorporate storytelling elements to engage and inform effectively.
The opening of your presentation holds immense power in setting the stage for your audience. To design a presentation and convey your data in an engaging and informative, try out Venngage’s free presentation maker to pick the right presentation design for your audience and topic.
What is the difference between data visualization and data presentation?
Data presentation typically involves conveying data reports and insights to an audience, often using visuals like charts and graphs. Data visualization , on the other hand, focuses on creating those visual representations of data to facilitate understanding and analysis.
Now that you’ve learned a thing or two about how to use these methods of data presentation to tell a compelling data story , it’s time to take these strategies and make them your own.
But here’s the deal: these aren’t just one-size-fits-all solutions. Remember that each example we’ve uncovered here is not a rigid template but a source of inspiration. It’s all about making your audience go, “Wow, I get it now!”
Think of your data presentations as your canvas – it’s where you paint your story, convey meaningful insights and make real change happen.
So, go forth, present your data with confidence and purpose and watch as your strategic influence grows, one compelling presentation at a time.
Discover popular designs

Infographic maker

Brochure maker

White paper online

Newsletter creator

Flyer maker

Timeline maker

Letterhead maker

Mind map maker

Ebook maker
- Business Essentials
- Leadership & Management
- Credential of Leadership, Impact, and Management in Business (CLIMB)
- Entrepreneurship & Innovation
- Digital Transformation
- Finance & Accounting
- Business in Society
- For Organizations
- Support Portal
- Media Coverage
- Founding Donors
- Leadership Team

- Harvard Business School →
- HBS Online →
- Business Insights →
Business Insights
Harvard Business School Online's Business Insights Blog provides the career insights you need to achieve your goals and gain confidence in your business skills.
- Career Development
- Communication
- Decision-Making
- Earning Your MBA
- Negotiation
- News & Events
- Productivity
- Staff Spotlight
- Student Profiles
- Work-Life Balance
- AI Essentials for Business
- Alternative Investments
- Business Analytics
- Business Strategy
- Business and Climate Change
- Creating Brand Value
- Design Thinking and Innovation
- Digital Marketing Strategy
- Disruptive Strategy
- Economics for Managers
- Entrepreneurship Essentials
- Financial Accounting
- Global Business
- Launching Tech Ventures
- Leadership Principles
- Leadership, Ethics, and Corporate Accountability
- Leading Change and Organizational Renewal
- Leading with Finance
- Management Essentials
- Negotiation Mastery
- Organizational Leadership
- Power and Influence for Positive Impact
- Strategy Execution
- Sustainable Business Strategy
- Sustainable Investing
- Winning with Digital Platforms
17 Data Visualization Techniques All Professionals Should Know

- 17 Sep 2019
There’s a growing demand for business analytics and data expertise in the workforce. But you don’t need to be a professional analyst to benefit from data-related skills.
Becoming skilled at common data visualization techniques can help you reap the rewards of data-driven decision-making , including increased confidence and potential cost savings. Learning how to effectively visualize data could be the first step toward using data analytics and data science to your advantage to add value to your organization.
Several data visualization techniques can help you become more effective in your role. Here are 17 essential data visualization techniques all professionals should know, as well as tips to help you effectively present your data.
Access your free e-book today.
What Is Data Visualization?
Data visualization is the process of creating graphical representations of information. This process helps the presenter communicate data in a way that’s easy for the viewer to interpret and draw conclusions.
There are many different techniques and tools you can leverage to visualize data, so you want to know which ones to use and when. Here are some of the most important data visualization techniques all professionals should know.
Data Visualization Techniques
The type of data visualization technique you leverage will vary based on the type of data you’re working with, in addition to the story you’re telling with your data .
Here are some important data visualization techniques to know:
- Gantt Chart
- Box and Whisker Plot
- Waterfall Chart
- Scatter Plot
- Pictogram Chart
- Highlight Table
- Bullet Graph
- Choropleth Map
- Network Diagram
- Correlation Matrices
1. Pie Chart

Pie charts are one of the most common and basic data visualization techniques, used across a wide range of applications. Pie charts are ideal for illustrating proportions, or part-to-whole comparisons.
Because pie charts are relatively simple and easy to read, they’re best suited for audiences who might be unfamiliar with the information or are only interested in the key takeaways. For viewers who require a more thorough explanation of the data, pie charts fall short in their ability to display complex information.
2. Bar Chart

The classic bar chart , or bar graph, is another common and easy-to-use method of data visualization. In this type of visualization, one axis of the chart shows the categories being compared, and the other, a measured value. The length of the bar indicates how each group measures according to the value.
One drawback is that labeling and clarity can become problematic when there are too many categories included. Like pie charts, they can also be too simple for more complex data sets.
3. Histogram

Unlike bar charts, histograms illustrate the distribution of data over a continuous interval or defined period. These visualizations are helpful in identifying where values are concentrated, as well as where there are gaps or unusual values.
Histograms are especially useful for showing the frequency of a particular occurrence. For instance, if you’d like to show how many clicks your website received each day over the last week, you can use a histogram. From this visualization, you can quickly determine which days your website saw the greatest and fewest number of clicks.
4. Gantt Chart

Gantt charts are particularly common in project management, as they’re useful in illustrating a project timeline or progression of tasks. In this type of chart, tasks to be performed are listed on the vertical axis and time intervals on the horizontal axis. Horizontal bars in the body of the chart represent the duration of each activity.
Utilizing Gantt charts to display timelines can be incredibly helpful, and enable team members to keep track of every aspect of a project. Even if you’re not a project management professional, familiarizing yourself with Gantt charts can help you stay organized.
5. Heat Map

A heat map is a type of visualization used to show differences in data through variations in color. These charts use color to communicate values in a way that makes it easy for the viewer to quickly identify trends. Having a clear legend is necessary in order for a user to successfully read and interpret a heatmap.
There are many possible applications of heat maps. For example, if you want to analyze which time of day a retail store makes the most sales, you can use a heat map that shows the day of the week on the vertical axis and time of day on the horizontal axis. Then, by shading in the matrix with colors that correspond to the number of sales at each time of day, you can identify trends in the data that allow you to determine the exact times your store experiences the most sales.
6. A Box and Whisker Plot

A box and whisker plot , or box plot, provides a visual summary of data through its quartiles. First, a box is drawn from the first quartile to the third of the data set. A line within the box represents the median. “Whiskers,” or lines, are then drawn extending from the box to the minimum (lower extreme) and maximum (upper extreme). Outliers are represented by individual points that are in-line with the whiskers.
This type of chart is helpful in quickly identifying whether or not the data is symmetrical or skewed, as well as providing a visual summary of the data set that can be easily interpreted.
7. Waterfall Chart

A waterfall chart is a visual representation that illustrates how a value changes as it’s influenced by different factors, such as time. The main goal of this chart is to show the viewer how a value has grown or declined over a defined period. For example, waterfall charts are popular for showing spending or earnings over time.
8. Area Chart

An area chart , or area graph, is a variation on a basic line graph in which the area underneath the line is shaded to represent the total value of each data point. When several data series must be compared on the same graph, stacked area charts are used.
This method of data visualization is useful for showing changes in one or more quantities over time, as well as showing how each quantity combines to make up the whole. Stacked area charts are effective in showing part-to-whole comparisons.
9. Scatter Plot

Another technique commonly used to display data is a scatter plot . A scatter plot displays data for two variables as represented by points plotted against the horizontal and vertical axis. This type of data visualization is useful in illustrating the relationships that exist between variables and can be used to identify trends or correlations in data.
Scatter plots are most effective for fairly large data sets, since it’s often easier to identify trends when there are more data points present. Additionally, the closer the data points are grouped together, the stronger the correlation or trend tends to be.
10. Pictogram Chart

Pictogram charts , or pictograph charts, are particularly useful for presenting simple data in a more visual and engaging way. These charts use icons to visualize data, with each icon representing a different value or category. For example, data about time might be represented by icons of clocks or watches. Each icon can correspond to either a single unit or a set number of units (for example, each icon represents 100 units).
In addition to making the data more engaging, pictogram charts are helpful in situations where language or cultural differences might be a barrier to the audience’s understanding of the data.
11. Timeline

Timelines are the most effective way to visualize a sequence of events in chronological order. They’re typically linear, with key events outlined along the axis. Timelines are used to communicate time-related information and display historical data.
Timelines allow you to highlight the most important events that occurred, or need to occur in the future, and make it easy for the viewer to identify any patterns appearing within the selected time period. While timelines are often relatively simple linear visualizations, they can be made more visually appealing by adding images, colors, fonts, and decorative shapes.
12. Highlight Table

A highlight table is a more engaging alternative to traditional tables. By highlighting cells in the table with color, you can make it easier for viewers to quickly spot trends and patterns in the data. These visualizations are useful for comparing categorical data.
Depending on the data visualization tool you’re using, you may be able to add conditional formatting rules to the table that automatically color cells that meet specified conditions. For instance, when using a highlight table to visualize a company’s sales data, you may color cells red if the sales data is below the goal, or green if sales were above the goal. Unlike a heat map, the colors in a highlight table are discrete and represent a single meaning or value.
13. Bullet Graph

A bullet graph is a variation of a bar graph that can act as an alternative to dashboard gauges to represent performance data. The main use for a bullet graph is to inform the viewer of how a business is performing in comparison to benchmarks that are in place for key business metrics.
In a bullet graph, the darker horizontal bar in the middle of the chart represents the actual value, while the vertical line represents a comparative value, or target. If the horizontal bar passes the vertical line, the target for that metric has been surpassed. Additionally, the segmented colored sections behind the horizontal bar represent range scores, such as “poor,” “fair,” or “good.”
14. Choropleth Maps

A choropleth map uses color, shading, and other patterns to visualize numerical values across geographic regions. These visualizations use a progression of color (or shading) on a spectrum to distinguish high values from low.
Choropleth maps allow viewers to see how a variable changes from one region to the next. A potential downside to this type of visualization is that the exact numerical values aren’t easily accessible because the colors represent a range of values. Some data visualization tools, however, allow you to add interactivity to your map so the exact values are accessible.
15. Word Cloud

A word cloud , or tag cloud, is a visual representation of text data in which the size of the word is proportional to its frequency. The more often a specific word appears in a dataset, the larger it appears in the visualization. In addition to size, words often appear bolder or follow a specific color scheme depending on their frequency.
Word clouds are often used on websites and blogs to identify significant keywords and compare differences in textual data between two sources. They are also useful when analyzing qualitative datasets, such as the specific words consumers used to describe a product.
16. Network Diagram

Network diagrams are a type of data visualization that represent relationships between qualitative data points. These visualizations are composed of nodes and links, also called edges. Nodes are singular data points that are connected to other nodes through edges, which show the relationship between multiple nodes.
There are many use cases for network diagrams, including depicting social networks, highlighting the relationships between employees at an organization, or visualizing product sales across geographic regions.
17. Correlation Matrix

A correlation matrix is a table that shows correlation coefficients between variables. Each cell represents the relationship between two variables, and a color scale is used to communicate whether the variables are correlated and to what extent.
Correlation matrices are useful to summarize and find patterns in large data sets. In business, a correlation matrix might be used to analyze how different data points about a specific product might be related, such as price, advertising spend, launch date, etc.
Other Data Visualization Options
While the examples listed above are some of the most commonly used techniques, there are many other ways you can visualize data to become a more effective communicator. Some other data visualization options include:
- Bubble clouds
- Circle views
- Dendrograms
- Dot distribution maps
- Open-high-low-close charts
- Polar areas
- Radial trees
- Ring Charts
- Sankey diagram
- Span charts
- Streamgraphs
- Wedge stack graphs
- Violin plots

Tips For Creating Effective Visualizations
Creating effective data visualizations requires more than just knowing how to choose the best technique for your needs. There are several considerations you should take into account to maximize your effectiveness when it comes to presenting data.
Related : What to Keep in Mind When Creating Data Visualizations in Excel
One of the most important steps is to evaluate your audience. For example, if you’re presenting financial data to a team that works in an unrelated department, you’ll want to choose a fairly simple illustration. On the other hand, if you’re presenting financial data to a team of finance experts, it’s likely you can safely include more complex information.
Another helpful tip is to avoid unnecessary distractions. Although visual elements like animation can be a great way to add interest, they can also distract from the key points the illustration is trying to convey and hinder the viewer’s ability to quickly understand the information.
Finally, be mindful of the colors you utilize, as well as your overall design. While it’s important that your graphs or charts are visually appealing, there are more practical reasons you might choose one color palette over another. For instance, using low contrast colors can make it difficult for your audience to discern differences between data points. Using colors that are too bold, however, can make the illustration overwhelming or distracting for the viewer.
Related : Bad Data Visualization: 5 Examples of Misleading Data
Visuals to Interpret and Share Information
No matter your role or title within an organization, data visualization is a skill that’s important for all professionals. Being able to effectively present complex data through easy-to-understand visual representations is invaluable when it comes to communicating information with members both inside and outside your business.
There’s no shortage in how data visualization can be applied in the real world. Data is playing an increasingly important role in the marketplace today, and data literacy is the first step in understanding how analytics can be used in business.
Are you interested in improving your analytical skills? Learn more about Business Analytics , our eight-week online course that can help you use data to generate insights and tackle business decisions.
This post was updated on January 20, 2022. It was originally published on September 17, 2019.

About the Author
User Preferences
Content preview.
Arcu felis bibendum ut tristique et egestas quis:
- Ut enim ad minim veniam, quis nostrud exercitation ullamco laboris
- Duis aute irure dolor in reprehenderit in voluptate
- Excepteur sint occaecat cupidatat non proident
Keyboard Shortcuts
Non-graphical exploratory data analysis.
Nongraphical exploratory data analysis is the first step when beginning to analyze your data as part of the general data analysis approach.
This preliminary data analysis step focuses on four points, i.e. for mechanisms that you will want to examine. These include:
- measures of central tendency , i.e. the mean, the media and mode,
- measures of spread , i.e. variability, variants and standard deviation,
- the shape of the distribution , and
- the existence of outliers .
The following pages in this overview review these topics.
Nongraphical exploratory data analysis may be followed by, or be engaged in concurrently with graphical exploratory data analysis . Graphical EDA involves visual exploratory analysis of the data.
Call Us Today! +91 99907 48956 | [email protected]
It is the simplest form of data Presentation often used in schools or universities to provide a clearer picture to students, who are better able to capture the concepts effectively through a pictorial Presentation of simple data.
2. Column chart

It is a simplified version of the pictorial Presentation which involves the management of a larger amount of data being shared during the presentations and providing suitable clarity to the insights of the data.
3. Pie Charts

Pie charts provide a very descriptive & a 2D depiction of the data pertaining to comparisons or resemblance of data in two separate fields.
4. Bar charts

A bar chart that shows the accumulation of data with cuboid bars with different dimensions & lengths which are directly proportionate to the values they represent. The bars can be placed either vertically or horizontally depending on the data being represented.
5. Histograms
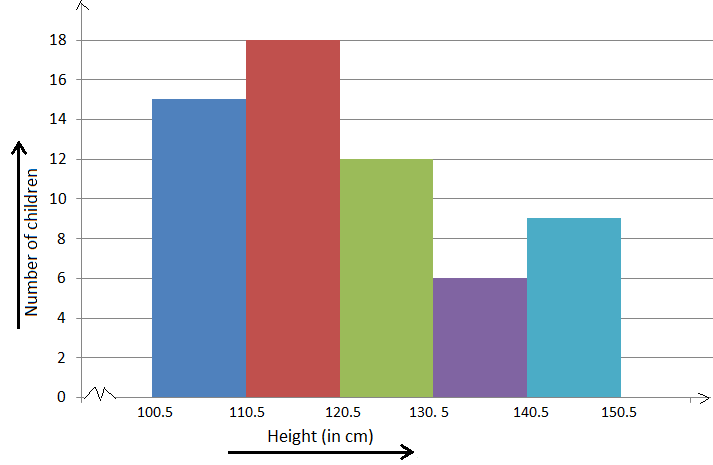
It is a perfect Presentation of the spread of numerical data. The main differentiation that separates data graphs and histograms are the gaps in the data graphs.
6. Box plots

Box plot or Box-plot is a way of representing groups of numerical data through quartiles. Data Presentation is easier with this style of graph dealing with the extraction of data to the minutes of difference.

Map Data graphs help you with data Presentation over an area to display the areas of concern. Map graphs are useful to make an exact depiction of data over a vast case scenario.
All these visual presentations share a common goal of creating meaningful insights and a platform to understand and manage the data in relation to the growth and expansion of one’s in-depth understanding of data & details to plan or execute future decisions or actions.
Importance of Data Presentation
Data Presentation could be both can be a deal maker or deal breaker based on the delivery of the content in the context of visual depiction.
Data Presentation tools are powerful communication tools that can simplify the data by making it easily understandable & readable at the same time while attracting & keeping the interest of its readers and effectively showcase large amounts of complex data in a simplified manner.
If the user can create an insightful presentation of the data in hand with the same sets of facts and figures, then the results promise to be impressive.
There have been situations where the user has had a great amount of data and vision for expansion but the presentation drowned his/her vision.
To impress the higher management and top brass of a firm, effective presentation of data is needed.
Data Presentation helps the clients or the audience to not spend time grasping the concept and the future alternatives of the business and to convince them to invest in the company & turn it profitable both for the investors & the company.
Although data presentation has a lot to offer, the following are some of the major reason behind the essence of an effective presentation:-
- Many consumers or higher authorities are interested in the interpretation of data, not the raw data itself. Therefore, after the analysis of the data, users should represent the data with a visual aspect for better understanding and knowledge.
- The user should not overwhelm the audience with a number of slides of the presentation and inject an ample amount of texts as pictures that will speak for themselves.
- Data presentation often happens in a nutshell with each department showcasing their achievements towards company growth through a graph or a histogram.
- Providing a brief description would help the user to attain attention in a small amount of time while informing the audience about the context of the presentation
- The inclusion of pictures, charts, graphs and tables in the presentation help for better understanding the potential outcomes.
- An effective presentation would allow the organization to determine the difference with the fellow organization and acknowledge its flaws. Comparison of data would assist them in decision making.
Recommended Courses

Data Visualization
Using powerbi &tableau.

Tableau for Data Analysis

MySQL Certification Program
The PowerBI Masterclass
Need help call our support team 7:00 am to 10:00 pm (ist) at (+91 999-074-8956 | 9650-308-956), keep in touch, email: [email protected].
WhatsApp us
Mastering the Art of Presenting Data in PowerPoint

Presenting data in PowerPoint is easy. However, making it visually appealing and effective takes more time and effort. It’s not hard to bore your audience with the same old data presentation formats. So, there is one simple golden rule: Make it not boring.
When used correctly, data can add weight, authority, and punch to your message. It should support and highlight your ideas, making a concept come to life. But this begs the question: How to present data in PowerPoint?
After talking to our 200+ expert presentation designers, I compiled information about their best-kept secrets to presenting data in PowerPoint.
Below, I’ll show our designers ' favorite ways to add data visualization for global customers and their expert tips for making your data shine. Read ahead and master the art of data visualization in PowerPoint!

Feel free to explore sections to find what's most useful!
How to present data in PowePoint: a step-by-step guide
Creative ways to present data in powerpoint.
- Tips for data visualization
Seeking to optimize your presentations? – 24Slides designers have got you covered!
How you present your data can make or break your presentation. It can make it stand out and stick with your audience, or make it fall flat from the go.
It’s not enough to just copy and paste your data into a presentation slide. Luckily, PowerPoint has many smart data visualization tools! You only need to put in your numbers, and PowerPoint will work it up for you.
Follow these steps, and I guarantee your presentations will level up!
1. Collect your data
First things first, and that is to have all your information ready. Especially for long business presentations, there can be a lot of information to consider when working on your slides. Having it all organized and ready to use will make the whole process much easier to go through.
Consider where your data comes from, whether from research, surveys, or databases. Make sure your data is accurate, up-to-date, and relevant to your presentation topic.
Your goal will be to create clear conclusions based on your data and highlight trends.

2. Know your audience
Knowing who your audience is and the one thing you want them to get from your data is vital. If you don’t have any idea where to start, you can begin with these key questions:
- What impact do you want your data to make on them?
- Is the subject of your presentation familiar to them?
- Are they fellow sales professionals?
- Are they interested in the relationships in the data you’re presenting?
By answering these, you'll be able to clearly understand the purpose of your data. As a storyteller, you want to capture your audience’s attention.
3. Choose a data visualization option
One key to data visualization in PowerPoint is being aware of your choices and picking the best one for your needs. This depends on the type of data you’re trying to showcase and your story.
When showcasing growth over time, you won’t use a spider chart but a line chart. If you show percentages, a circle graph will probably work better than a timeline. As you can see, knowing how to work with charts, graphs, and tables can level up your presentation.
Later, we’ll review some of the most common tools for data visualization in PowerPoint. This will include what these graphs and charts are best for and how to make the most of each. So read ahead for more information about how to present data in PowerPoint!

4. Be creative!
PowerPoint can assist with creating graphs and charts, but it's up to you to perfect them. Take into account that PowerPoint has many options. So, don't be afraid to think outside the box when presenting your data.
To enhance your presentation design, try out different color schemes, fonts, and layouts. Add images, icons, and visual elements to highlight your ideas.
If this sounds complicated to you, there's no need to worry. At the end of this article, you’ll find some easy tips for upgrading your data visualization design!
At this point, you might wonder: what is the best way to present data in PowerPoint? Well, let me tell you: it's all about charts. To accomplish a polished presentation, you must use charts instead of words. When visualizing quantitative data, a picture is worth a thousand words.
Based on +10 years of expertise, we've identified key chart types and creative ways to work with them. Let's delve into each one!
Line Charts
Line charts are a classic, which can make them boring. However, if done correctly, they can be striking and effective. But where does their popularity come from? Here's the answer: Line charts work great to show changes over time.
Another critical difference is that line charts are accumulative. For example, you can join them to a column chart to show different data at a glance. They allow data visualization effectively, making it easier to figure out.
To make the most of them, mastering how to work with line charts is essential. But there is good news: you will have a lot of freedom to customize them!

Download our Free Line Chart Template here .
Bar and column charts
Bar and column charts are another classic choice. Again, they are simple and great for comparing different categories. They organize them around two axes: one shows numbers, and the other shows what we want to compare.
But when should you use a bar chart or a column chart? A bar chart is better when comparing different categories and having long labels. A column chart, on the other hand, is better if you have a few categories and want to show changes over time.
You also have the waterfall option, which is perfect for highlighting the difference between gains and losses. It also adds a dynamic touch to your presentation!
Unsure how to implement these charts? Here's how to add a bar or a column chart in PowerPoint.

Download our Bar and Column Chart Template here .
Venn diagram
Venn diagrams are definitely something to consider when discussing data visualization—even if its focus is not quantitative data! Venn diagrams are best for showcasing similarities and differences between two (or more) categories or products.
By using overlapping circles, you can quickly and easily see common features between separate ideas. The shared space of the circles shows what is the same between the groups. However, items in the outer parts of each circle show what isn’t a common trait.
They make complex relationships easy to understand. Now, you only need to know how to create a Venn diagram in PowerPoint —quite simple!

Download our Free Venn Diagram Template here .
Pie charts are a great way to show different percentages of a whole. They immediately identify the largest and smallest values. This means that they are great options for drawing attention to differences between one group and another.
However, many people misuse pie charts by overpacking them. As a rule, keep the chart to six or fewer sections. That way, the data is striking, not confusing. Then, make the pie chart your own with small, individual details and designs.
Once again, the powerful presentation of data is in simplicity.
Are you considering incorporating it into your presentation? Here’s how to easily add a pie chart in PowerPoint.

Download our Free Pie Chart Template here .
Bubble Charts
Bubble charts playfully present data in an incredibly visual way. But, what makes them so unique? It's easy: they show different values through varying circle sizes.
Squeezed together, the circles also show a holistic viewpoint. Bigger bubbles catch the eye, while small bubbles illustrate how the data breaks down into smaller values. ¿The result? A presentation of data in a visual form.
It can be one of the most graphic ways to represent the spending distribution. For example, you can instantly see your biggest costs or notice how important finances are getting lost in a sea of bubbles. This quick analysis can be incredibly handy.

Download our Free Bubble Chart Template here .
Maps are the go-to solution for presenting geographic information . They help put data in a real-world context. You usually take a blank map and use color for the important areas.
Blocks, circles, or shading represent value. Knowing where certain data is can be crucial. A consistent color scheme makes it easy to show how valuable each section is.
They also work great when paired with other forms of data visualization. For example, you can use pie charts to provide information about offices in different cities around the world or bar charts to compare revenue in different locations.

Download our Free World Map Template here .
If you want to display chronological data, you must use a timeline. It’s the most effective and space-efficient way to show time passage.
They make it easy for your audience to understand the sequence of events with clear and concise visuals.
You can use timelines to show your company’s history or significant events that impacted your business. Like maps, you can easily mix them with other types of data visuals. This characteristic allows you to create engaging presentations that tell a comprehensive story.
At this point, it's a matter of understanding how to add a timeline correctly in PowerPoint . Spoiler: it's incredibly easy.

Download our Free Timeline Chart Template here .
Flowcharts, like timelines, represent a succession of events. The main difference is that timelines have determined start and finish points and specific dates. Flowcharts, on the other hand, show the passing from one step to the next.
They are great for showing processes and info that need to be in a specific order. They can also help you communicate cause-and-effect information in a visually engaging way.
Their best feature is that (unlike timelines) they can also be circular, meaning this is a recurrent process. All you need now is to become familiar with creating a flowchart in PowerPoint .

Download our Free Flowchart Template here .
5 Tips for data visualization in PowerPoint
Knowing how to present data in PowerPoint presentations is not hard, but it takes time to master it. After all, practice makes perfect!
I've gathered insights from our 200+ expert designers , and here are the top five tips they suggest for enhancing your data presentations!
1. Keep it simple
Don’t overload your audience with information. Let the data speak for itself. If you write text below a chart, keep it minimalist and highlight the key figures. The important thing in a presentation is displaying data in a clear and digestible way.
Put all the heavy facts and figures in a report, but never on a PowerPoint slide.
You can even avoid charts altogether to keep it as simple as possible. And don't get me wrong. We've already covered that charts are the way to go for presenting data in PowerPoint, but there are a few exceptions.
This begs the question: when shouldn't you use charts in PowerPoint? The answer is quite short. If your data is simple or doesn't add much value to your presentation, you might want to skip using charts.
2. Be original
One of the best ways to make your data impactful is originality. Take time to think about how you could present information uniquely. Think of a whole new concept and play around with it. Even if it’s not yet perfect, people will appreciate the effort to be original.
Experiment with creative ways to present your data, adding storytelling techniques , unique design elements, or interactive features. This approach can make the data more appealing and captivating for your audience.
You can even mix up how to present data in PowerPoint. Instead of just one format, consider using two different types of data presentation on a single slide. For instance, try placing a bar chart on the left and a pie chart showcasing different data on the right.
3. Focus on your brand
Keeping your presentation on-brand can genuinely make you stand out from the crowd! Even if you just focus on your brand’s color scheme, it will make your presentation look more polished and professional.
Have fun experimenting with data visualization tools to ensure they match your company’s products and services. What makes you different from others?
Add your brand's style into your visualization to ensure brand consistency and recognition. Use colors, fonts, and logos aligned with your company's image.
You can even make a presentation that more subtly reflects your brand. Think of what values you want to associate with your company and how you can display these in your presentation design.

4. Highlight key information
Not distracting your audience nicely brings us to our third point: Highlight key information. Being detailed and informative is important, but grabbing and keeping the audience's attention is crucial.
Presenting numbers in PowerPoint can be difficult, but it doesn’t must be. Make your audience listen to the bigger message of your words, not just the exact details. All the smaller particulars can be confirmed later.
Your listeners don’t want to know the facts and figures to the nearest decimal. They want the whole number, which is easy to spot and understand.
The meaning of the number is more important than its numerical value. Is it high or low? Positive or negative? Good or bad for business? These are the questions to which you want the answers to be clear.
Using colors is an excellent way to work with this. Colors are also a great visual tool to showcase contrast. For example, when you're working on a graph to display your revenue, you can showcase expenses in red and earnings in green. This kind of color-coding will make your data visualization clear from first sight!
5. Use Templates!
Presentation templates can be your best friend when you want to present data effectively in PowerPoint.
They offer pre-designed layouts and styles that can ensure consistency throughout your presentation. Templates allow you to adjust colors, fonts, and layouts to match your branding or personal preferences.
Microsoft Office has its own library of templates, but you can also find some pretty amazing ones online. Take some extra time to search and pick one that truly fits your needs and brand.
¿The good news? Our Templates by 24Slides platform has hundreds of PowerPoint chart templates, all completely free for you to use . You can even download different templates and mix and match slides to make the perfect deck. All are entirely editable, so you can add your own data and forget about design.
If you liked the look of some examples in this article, you might be in luck! Most are part of these, and you can also find them on our Templates platform.
In this article, I've shown why knowing how to present data efficiently in PowerPoint is crucial. Data visualization tools are a must to ensure your message is clear and that it sticks with your audience.
However, achieving results that really stand out could be a huge challenge for beginners. So, If you want to save time and effort on the learning curve of presenting data in PowerPoint, you can always trust professionals!
With 10+ years of experience and more than 200 designers worldwide, we are the world’s largest presentation design company across the globe.
24Slides' professional PowerPoint designers work with businesses worldwide, helping them transform their presentations from ‘okay’ to ‘spectacular.’ With each presentation, we're crafting a powerful tool to captivate audiences and convey messages effectively!

Looking to boost your PowerPoint game? Check out this content:
- PowerPoint 101: The Ultimate Guide for Beginners
- How to Create the Perfect B2B Sales Presentation
- The Ultimate Brand Identity Presentation Guide [FREE PPT Template]
- 7 Essential Storytelling Techniques for your Business Presentation
- The Cost of PowerPoint Presentations: Discover the hidden expenses you might overlook!
Create professional presentations online
Other people also read

How To Write Effective Emails That Will Improve Your Communi...
How to Make a Marketing Plan Presentation in PowerPoint

Alternative presentation styles: Takahashi


An official website of the United States government
The .gov means it’s official. Federal government websites often end in .gov or .mil. Before sharing sensitive information, make sure you’re on a federal government site.
The site is secure. The https:// ensures that you are connecting to the official website and that any information you provide is encrypted and transmitted securely.
- Publications
- Account settings
Preview improvements coming to the PMC website in October 2024. Learn More or Try it out now .
- Advanced Search
- Journal List
- Patterns (N Y)
- v.1(9); 2020 Dec 11
Principles of Effective Data Visualization
Stephen r. midway.
1 Department of Oceanography and Coastal Sciences, Louisiana State University, Baton Rouge, LA 70803, USA
We live in a contemporary society surrounded by visuals, which, along with software options and electronic distribution, has created an increased importance on effective scientific visuals. Unfortunately, across scientific disciplines, many figures incorrectly present information or, when not incorrect, still use suboptimal data visualization practices. Presented here are ten principles that serve as guidance for authors who seek to improve their visual message. Some principles are less technical, such as determining the message before starting the visual, while other principles are more technical, such as how different color combinations imply different information. Because figure making is often not formally taught and figure standards are not readily enforced in science, it is incumbent upon scientists to be aware of best practices in order to most effectively tell the story of their data.
The Bigger Picture
Visuals are an increasingly important form of science communication, yet many scientists are not well trained in design principles for effective messaging. Despite challenges, many visuals can be improved by taking some simple steps before, during, and after their creation. This article presents some sequential principles that are designed to improve visual messages created by scientists.
Many scientific visuals are not as effective as they could be because scientists often lack basic design principles. This article reviews the importance of effective data visualization and presents ten principles that scientists can use as guidance in developing effective visual messages.
Introduction
Visual learning is one of the primary forms of interpreting information, which has historically combined images such as charts and graphs (see Box 1 ) with reading text. 1 However, developments on learning styles have suggested splitting up the visual learning modality in order to recognize the distinction between text and images. 2 Technology has also enhanced visual presentation, in terms of the ability to quickly create complex visual information while also cheaply distributing it via digital means (compared with paper, ink, and physical distribution). Visual information has also increased in scientific literature. In addition to the fact that figures are commonplace in scientific publications, many journals now require graphical abstracts 3 or might tweet figures to advertise an article. Dating back to the 1970s when computer-generated graphics began, 4 papers represented by an image on the journal cover have been cited more frequently than papers without a cover image. 5
Regarding terminology, the terms graph , plot , chart , image , figure , and data visual(ization) are often used interchangeably, although they may have different meanings in different instances. Graph , plot , and chart often refer to the display of data, data summaries, and models, while image suggests a picture. Figure is a general term but is commonly used to refer to visual elements, such as plots, in a scientific work. A visual , or data visualization , is a newer and ostensibly more inclusive term to describe everything from figures to infographics. Here, I adopt common terminology, such as bar plot, while also attempting to use the terms figure and data visualization for general reference.
There are numerous advantages to quickly and effectively conveying scientific information; however, scientists often lack the design principles or technical skills to generate effective visuals. Going back several decades, Cleveland 6 found that 30% of graphs in the journal Science had at least one type of error. Several other studies have documented widespread errors or inefficiencies in scientific figures. 7 , 8 , 9 In fact, the increasing menu of visualization options can sometimes lead to poor fits between information and its presentation. These poor fits can even have the unintended consequence of confusing the readers and setting them back in their understanding of the material. While objective errors in graphs are hopefully in the minority of scientific works, what might be more common is suboptimal figure design, which takes place when a design element may not be objectively wrong but is ineffective to the point of limiting information transfer.
Effective figures suggest an understanding and interpretation of data; ineffective figures suggest the opposite. Although the field of data visualization has grown in recent years, the process of displaying information cannot—and perhaps should not—be fully mechanized. Much like statistical analyses often require expert opinions on top of best practices, figures also require choice despite well-documented recommendations. In other words, there may not be a singular best version of a given figure. Rather, there may be multiple effective versions of displaying a single piece of information, and it is the figure maker's job to weigh the advantages and disadvantages of each. Fortunately, there are numerous principles from which decisions can be made, and ultimately design is choice. 7
The data visualization literature includes many great resources. While several resources are targeted at developing design proficiency, such as the series of columns run by Nature Communications , 10 Wilkinson's The Grammar of Graphics 11 presents a unique technical interpretation of the structure of graphics. Wilkinson breaks down the notion of a graphic into its constituent parts—e.g., the data, scales, coordinates, geometries, aesthetics—much like conventional grammar breaks down a sentence into nouns, verbs, punctuation, and other elements of writing. The popularity and utility of this approach has been implemented in a number of software packages, including the popular ggplot2 package 12 currently available in R. 13 (Although the grammar of graphics approach is not explicitly adopted here, the term geometry is used consistently with Wilkinson to refer to different geometrical representations, whereas the term aesthetics is not used consistently with the grammar of graphics and is used simply to describe something that is visually appealing and effective.) By understanding basic visual design principles and their implementation, many figure authors may find new ways to emphasize and convey their information.
The Ten Principles
Principle #1 diagram first.
The first principle is perhaps the least technical but very important: before you make a visual, prioritize the information you want to share, envision it, and design it. Although this seems obvious, the larger point here is to focus on the information and message first, before you engage with software that in some way starts to limit or bias your visual tools. In other words, don't necessarily think of the geometries (dots, lines) you will eventually use, but think about the core information that needs to be conveyed and what about that information is going to make your point(s). Is your visual objective to show a comparison? A ranking? A composition? This step can be done mentally, or with a pen and paper for maximum freedom of thought. In parallel to this approach, it can be a good idea to save figures you come across in scientific literature that you identify as particularly effective. These are not just inspiration and evidence of what is possible, but will help you develop an eye for detail and technical skills that can be applied to your own figures.
Principle #2 Use the Right Software
Effective visuals typically require good command of one or more software. In other words, it might be unrealistic to expect complex, technical, and effective figures if you are using a simple spreadsheet program or some other software that is not designed to make complex, technical, and effective figures. Recognize that you might need to learn a new software—or expand your knowledge of a software you already know. While highly effective and aesthetically pleasing figures can be made quickly and simply, this may still represent a challenge to some. However, figure making is a method like anything else, and in order to do it, new methodologies may need to be learned. You would not expect to improve a field or lab method without changing something or learning something new. Data visualization is the same, with the added benefit that most software is readily available, inexpensive, or free, and many come with large online help resources. This article does not promote any specific software, and readers are encouraged to reference other work 14 for an overview of software resources.
Principle #3 Use an Effective Geometry and Show Data
Geometries are the shapes and features that are often synonymous with a type of figure; for example, the bar geometry creates a bar plot. While geometries might be the defining visual element of a figure, it can be tempting to jump directly from a dataset to pairing it with one of a small number of well-known geometries. Some of this thinking is likely to naturally happen. However, geometries are representations of the data in different forms, and often there may be more than one geometry to consider. Underlying all your decisions about geometries should be the data-ink ratio, 7 which is the ratio of ink used on data compared with overall ink used in a figure. High data-ink ratios are the best, and you might be surprised to find how much non-data-ink you use and how much of that can be removed.
Most geometries fall into categories: amounts (or comparisons), compositions (or proportions), distributions , or relationships . Although seemingly straightforward, one geometry may work in more than one category, in addition to the fact that one dataset may be visualized with more than one geometry (sometimes even in the same figure). Excellent resources exist on detailed approaches to selecting your geometry, 15 and this article only highlights some of the more common geometries and their applications.
Amounts or comparisons are often displayed with a bar plot ( Figure 1 A), although numerous other options exist, including Cleveland dot plots and even heatmaps ( Figure 1 F). Bar plots are among the most common geometry, along with lines, 9 although bar plots are noted for their very low data density 16 (i.e., low data-ink ratio). Geometries for amounts should only be used when the data do not have distributional information or uncertainty associated with them. A good use of a bar plot might be to show counts of something, while poor use of a bar plot might be to show group means. Numerous studies have discussed inappropriate uses of bar plots, 9 , 17 noting that “because the bars always start at zero, they can be misleading: for example, part of the range covered by the bar might have never been observed in the sample.” 17 Despite the numerous reports on incorrect usage, bar plots remain one of the most common problems in data visualization.

Examples of Visual Designs
(A) Clustered bar plots are effective at showing units within a group (A–C) when the data are amounts.
(B) Histograms are effective at showing the distribution of data, which in this case is a random draw of values from a Poisson distribution and which use a sequential color scheme that emphasizes the mean as red and values farther from the mean as yellow.
(C) Scatterplot where the black circles represent the data.
(D) Logistic regression where the blue line represents the fitted model, the gray shaded region represents the confidence interval for the fitted model, and the dark-gray dots represent the jittered data.
(E) Box plot showing (simulated) ages of respondents grouped by their answer to a question, with gray dots representing the raw data used in the box plot. The divergent colors emphasize the differences in values. For each box plot, the box represents the interquartile range (IQR), the thick black line represents the median value, and the whiskers extend to 1.5 times the IQR. Outliers are represented by the data.
(F) Heatmap of simulated visibility readings in four lakes over 5 months. The green colors represent lower visibility and the blue colors represent greater visibility. The white numbers in the cells are the average visibility measures (in meters).
(G) Density plot of simulated temperatures by season, where each season is presented as a small multiple within the larger figure.
For all figures the data were simulated, and any examples are fictitious.
Compositions or proportions may take a wide range of geometries. Although the traditional pie chart is one option, the pie geometry has fallen out of favor among some 18 due to the inherent difficulties in making visual comparisons. Although there may be some applications for a pie chart, stacked or clustered bar plots ( Figure 1 A), stacked density plots, mosaic plots, and treemaps offer alternatives.
Geometries for distributions are an often underused class of visuals that demonstrate high data density. The most common geometry for distributional information is the box plot 19 ( Figure 1 E), which shows five types of information in one object. Although more common in exploratory analyses than in final reports, the histogram ( Figure 1 B) is another robust geometry that can reveal information about data. Violin plots and density plots ( Figure 1 G) are other common distributional geometries, although many less-common options exist.
Relationships are the final category of visuals covered here, and they are often the workhorse of geometries because they include the popular scatterplot ( Figures 1 C and 1D) and other presentations of x - and y -coordinate data. The basic scatterplot remains very effective, and layering information by modifying point symbols, size, and color are good ways to highlight additional messages without taking away from the scatterplot. It is worth mentioning here that scatterplots often develop into line geometries ( Figure 1 D), and while this can be a good thing, presenting raw data and inferential statistical models are two different messages that need to be distinguished (see Data and Models Are Different Things ).
Finally, it is almost always recommended to show the data. 7 Even if a geometry might be the focus of the figure, data can usually be added and displayed in a way that does not detract from the geometry but instead provides the context for the geometry (e.g., Figures 1 D and 1E). The data are often at the core of the message, yet in figures the data are often ignored on account of their simplicity.
Principle #4 Colors Always Mean Something
The use of color in visualization can be incredibly powerful, and there is rarely a reason not to use color. Even if authors do not wish to pay for color figures in print, most journals still permit free color figures in digital formats. In a large study 20 of what makes visualizations memorable, colorful visualizations were reported as having a higher memorability score, and that seven or more colors are best. Although some of the visuals in this study were photographs, other studies 21 also document the effectiveness of colors.
In today's digital environment, color is cheap. This is overwhelmingly a good thing, but also comes with the risk of colors being applied without intention. Black-and-white visuals were more accepted decades ago when hard copies of papers were more common and color printing represented a large cost. Now, however, the vast majority of readers view scientific papers on an electronic screen where color is free. For those who still print documents, color printing can be done relatively cheaply in comparison with some years ago.
Color represents information, whether in a direct and obvious way, or in an indirect and subtle way. A direct example of using color may be in maps where water is blue and land is green or brown. However, the vast majority of (non-mapping) visualizations use color in one of three schemes: sequential , diverging , or qualitative . Sequential color schemes are those that range from light to dark typically in one or two (related) hues and are often applied to convey increasing values for increasing darkness ( Figures 1 B and 1F). Diverging color schemes are those that have two sequential schemes that represent two extremes, often with a white or neutral color in the middle ( Figure 1 E). A classic example of a diverging color scheme is the red to blue hues applied to jurisdictions in order to show voting preference in a two-party political system. Finally, qualitative color schemes are found when the intensity of the color is not of primary importance, but rather the objective is to use different and otherwise unrelated colors to convey qualitative group differences ( Figures 1 A and 1G).
While it is recommended to use color and capture the power that colors convey, there exist some technical recommendations. First, it is always recommended to design color figures that work effectively in both color and black-and-white formats ( Figures 1 B and 1F). In other words, whenever possible, use color that can be converted to an effective grayscale such that no information is lost in the conversion. Along with this approach, colors can be combined with symbols, line types, and other design elements to share the same information that the color was sharing. It is also good practice to use color schemes that are effective for colorblind readers ( Figures 1 A and 1E). Excellent resources, such as ColorBrewer, 22 exist to help in selecting color schemes based on colorblind criteria. Finally, color transparency is another powerful tool, much like a volume knob for color ( Figures 1 D and 1E). Not all colors have to be used at full value, and when not part of a sequential or diverging color scheme—and especially when a figure has more than one colored geometry—it can be very effective to increase the transparency such that the information of the color is retained but it is not visually overwhelming or outcompeting other design elements. Color will often be the first visual information a reader gets, and with this knowledge color should be strategically used to amplify your visual message.
Principle #5 Include Uncertainty
Not only is uncertainty an inherent part of understanding most systems, failure to include uncertainty in a visual can be misleading. There exist two primary challenges with including uncertainty in visuals: failure to include uncertainty and misrepresentation (or misinterpretation) of uncertainty.
Uncertainty is often not included in figures and, therefore, part of the statistical message is left out—possibly calling into question other parts of the statistical message, such as inference on the mean. Including uncertainty is typically easy in most software programs, and can take the form of common geometries such as error bars and shaded intervals (polygons), among other features. 15 Another way to approach visualizing uncertainty is whether it is included implicitly into the existing geometries, such as in a box plot ( Figure 1 E) or distribution ( Figures 1 B and 1G), or whether it is included explicitly as an additional geometry, such as an error bar or shaded region ( Figure 1 D).
Representing uncertainty is often a challenge. 23 Standard deviation, standard error, confidence intervals, and credible intervals are all common metrics of uncertainty, but each represents a different measure. Expressing uncertainty requires that readers be familiar with metrics of uncertainty and their interpretation; however, it is also the responsibility of the figure author to adopt the most appropriate measure of uncertainty. For instance, standard deviation is based on the spread of the data and therefore shares information about the entire population, including the range in which we might expect new values. On the other hand, standard error is a measure of the uncertainty in the mean (or some other estimate) and is strongly influenced by sample size—namely, standard error decreases with increasing sample size. Confidence intervals are primarily for displaying the reliability of a measurement. Credible intervals, almost exclusively associated with Bayesian methods, are typically built off distributions and have probabilistic interpretations.
Expressing uncertainty is important, but it is also important to interpret the correct message. Krzywinski and Altman 23 directly address a common misconception: “a gap between (error) bars does not ensure significance, nor does overlap rule it out—it depends on the type of bar.” This is a good reminder to be very clear not only in stating what type of uncertainty you are sharing, but what the interpretation is. Others 16 even go so far as to recommend that standard error not be used because it does not provide clear information about standard errors of differences among means. One recommendation to go along with expressing uncertainty is, if possible, to show the data (see Use an Effective Geometry and Show Data ). Particularly when the sample size is low, showing a reader where the data occur can help avoid misinterpretations of uncertainty.
Principle #6 Panel, when Possible (Small Multiples)
A particularly effective visual approach is to repeat a figure to highlight differences. This approach is often called small multiples , 7 and the technique may be referred to as paneling or faceting ( Figure 1 G). The strategy behind small multiples is that because many of the design elements are the same—for example, the axes, axes scales, and geometry are often the same—the differences in the data are easier to show. In other words, each panel represents a change in one variable, which is commonly a time step, a group, or some other factor. The objective of small multiples is to make the data inevitably comparable, 7 and effective small multiples always accomplish these comparisons.
Principle #7 Data and Models Are Different Things
Plotted information typically takes the form of raw data (e.g., scatterplot), summarized data (e.g., box plot), or an inferential statistic (e.g., fitted regression line; Figure 1 D). Raw data and summarized data are often relatively straightforward; however, a plotted model may require more explanation for a reader to be able to fully reproduce the work. Certainly any model in a study should be reported in a complete way that ensures reproducibility. However, any visual of a model should be explained in the figure caption or referenced elsewhere in the document so that a reader can find the complete details on what the model visual is representing. Although it happens, it is not acceptable practice to show a fitted model or other model results in a figure if the reader cannot backtrack the model details. Simply because a model geometry can be added to a figure does not mean that it should be.
Principle #8 Simple Visuals, Detailed Captions
As important as it is to use high data-ink ratios, it is equally important to have detailed captions that fully explain everything in the figure. A study of figures in the Journal of American Medicine 8 found that more than one-third of graphs were not self-explanatory. Captions should be standalone, which means that if the figure and caption were looked at independent from the rest of the study, the major point(s) could still be understood. Obviously not all figures can be completely standalone, as some statistical models and other procedures require more than a caption as explanation. However, the principle remains that captions should do all they can to explain the visualization and representations used. Captions should explain any geometries used; for instance, even in a simple scatterplot it should be stated that the black dots represent the data ( Figures 1 C–1E). Box plots also require descriptions of their geometry—it might be assumed what the features of a box plot are, yet not all box plot symbols are universal.
Principle #9 Consider an Infographic
It is unclear where a figure ends and an infographic begins; however, it is fair to say that figures tend to be focused on representing data and models, whereas infographics typically incorporate text, images, and other diagrammatic elements. Although it is not recommended to convert all figures to infographics, infographics were found 20 to have the highest memorability score and that diagrams outperformed points, bars, lines, and tables in terms of memorability. Scientists might improve their overall information transfer if they consider an infographic where blending different pieces of information could be effective. Also, an infographic of a study might be more effective outside of a peer-reviewed publication and in an oral or poster presentation where a visual needs to include more elements of the study but with less technical information.
Even if infographics are not adopted in most cases, technical visuals often still benefit from some text or other annotations. 16 Tufte's works 7 , 24 provide great examples of bringing together textual, visual, and quantitative information into effective visualizations. However, as figures move in the direction of infographics, it remains important to keep chart junk and other non-essential visual elements out of the design.
Principle #10 Get an Opinion
Although there may be principles and theories about effective data visualization, the reality is that the most effective visuals are the ones with which readers connect. Therefore, figure authors are encouraged to seek external reviews of their figures. So often when writing a study, the figures are quickly made, and even if thoughtfully made they are not subject to objective, outside review. Having one or more colleagues or people external to the study review figures will often provide useful feedback on what readers perceive, and therefore what is effective or ineffective in a visual. It is also recommended to have outside colleagues review only the figures. Not only might this please your colleague reviewers (because figure reviews require substantially less time than full document reviews), but it also allows them to provide feedback purely on the figures as they will not have the document text to fill in any uncertainties left by the visuals.
What About Tables?
Although often not included as data visualization, tables can be a powerful and effective way to show data. Like other visuals, tables are a type of hybrid visual—they typically only include alphanumeric information and no geometries (or other visual elements), so they are not classically a visual. However, tables are also not text in the same way a paragraph or description is text. Rather, tables are often summarized values or information, and are effective if the goal is to reference exact numbers. However, the interest in numerical results in the form of a study typically lies in comparisons and not absolute numbers. Gelman et al. 25 suggested that well-designed graphs were superior to tables. Similarly, Spence and Lewandowsky 26 compared pie charts, bar graphs, and tables and found a clear advantage for graphical displays over tabulations. Because tables are best suited for looking up specific information while graphs are better for perceiving trends and making comparisons and predictions, it is recommended that visuals are used before tables. Despite the reluctance to recommend tables, tables may benefit from digital formats. In other words, while tables may be less effective than figures in many cases, this does not mean tables are ineffective or do not share specific information that cannot always be displayed in a visual. Therefore, it is recommended to consider creating tables as supplementary or appendix information that does not go into the main document (alongside the figures), but which is still very easily accessed electronically for those interested in numerical specifics.
Conclusions
While many of the elements of peer-reviewed literature have remained constant over time, some elements are changing. For example, most articles now have more authors than in previous decades, and a much larger menu of journals creates a diversity of article lengths and other requirements. Despite these changes, the demand for visual representations of data and results remains high, as exemplified by graphical abstracts, overview figures, and infographics. Similarly, we now operate with more software than ever before, creating many choices and opportunities to customize scientific visualizations. However, as the demand for, and software to create, visualizations have both increased, there is not always adequate training among scientists and authors in terms of optimizing the visual for the message.
Figures are not just a scientific side dish but can be a critical point along the scientific process—a point at which the figure maker demonstrates their knowledge and communication of the data and results, and often one of the first stopping points for new readers of the information. The reality for the vast majority of figures is that you need to make your point in a few seconds. The longer someone looks at a figure and doesn't understand the message, the more likely they are to gain nothing from the figure and possibly even lose some understanding of your larger work. Following a set of guidelines and recommendations—summarized here and building on others—can help to build robust visuals that avoid many common pitfalls of ineffective figures ( Figure 2 ).

Overview of the Principles Presented in This Article
The two principles in yellow (bottom) are those that occur first, during the figure design phase. The six principles in green (middle) are generally considerations and decisions while making a figure. The two principles in blue (top) are final steps often considered after a figure has been drafted. While the general flow of the principles follows from bottom to top, there is no specific or required order, and the development of individual figures may require more or less consideration of different principles in a unique order.
All scientists seek to share their message as effectively as possible, and a better understanding of figure design and representation is undoubtedly a step toward better information dissemination and fewer errors in interpretation. Right now, much of the responsibility for effective figures lies with the authors, and learning best practices from literature, workshops, and other resources should be undertaken. Along with authors, journals play a gatekeeper role in figure quality. Journal editorial teams are in a position to adopt recommendations for more effective figures (and reject ineffective figures) and then translate those recommendations into submission requirements. However, due to the qualitative nature of design elements, it is difficult to imagine strict visual guidelines being enforced across scientific sectors. In the absence of such guidelines and with seemingly endless design choices available to figure authors, it remains important that a set of aesthetic criteria emerge to guide the efficient conveyance of visual information.
Acknowledgments
Thanks go to the numerous students with whom I have had fun, creative, and productive conversations about displaying information. Danielle DiIullo was extremely helpful in technical advice on software. Finally, Ron McKernan provided guidance on several principles.
Author Contributions
S.R.M. conceived the review topic, conducted the review, developed the principles, and wrote the manuscript.
Steve Midway is an assistant professor in the Department of Oceanography and Coastal Sciences at Louisiana State University. His work broadly lies in fisheries ecology and how sound science can be applied to management and conservation issues. He teaches a number of quantitative courses in ecology, all of which include data visualization.
Data Presentation
Josée Dupuis, PhD, Professor of Biostatistics, Boston University School of Public Health
Wayne LaMorte, MD, PhD, MPH, Professor of Epidemiology, Boston University School of Public Health
Introduction
| "Modern data graphics can do much more than simply substitute for small statistical tables. At their best, graphics are instruments for reasoning about quantitative information. Often the most effective was to describe, explore, and summarize a set of numbers - even a very large set - is to look at pictures of those numbers. Furthermore, of all methods for analyzing and communicating statistical information, well-designed data graphics are usually the simplest and at the same time the most powerful." Edward R. Tufte in the introduction to "The Visual Display of Quantitative Information" |
While graphical summaries of data can certainly be powerful ways of communicating results clearly and unambiguously in a way that facilitates our ability to think about the information, poorly designed graphical displays can be ambiguous, confusing, and downright misleading. The keys to excellence in graphical design and communication are much like the keys to good writing. Adhere to fundamental principles of style and communicate as logically, accurately, and clearly as possible. Excellence in writing is generally achieved by avoiding unnecessary words and paragraphs; it is efficient. In a similar fashion, excellence in graphical presentation is generally achieved by efficient designs that avoid unnecessary ink.
Excellence in graphical presentation depends on:
- Choosing the best medium for presenting the information
- Designing the components of the graph in a way that communicates the information as clearly and accurately as possible.
Table or Graph?
- Tables are generally best if you want to be able to look up specific information or if the values must be reported precisely.
- Graphics are best for illustrating trends and making comparisons
The side by side illustrations below show the same information, first in table form and then in graphical form. While the information in the table is precise, the real goal is to compare a series of clinical outcomes in subjects taking either a drug or a placebo. The graphical presentation on the right makes it possible to quickly see that for each of the outcomes evaluated, the drug produced relief in a great proportion of subjects. Moreover, the viewer gets a clear sense of the magnitude of improvement, and the error bars provided a sense of the uncertainty in the data.
|
Source: Connor JT. Statistical Graphics in AJG: Save the Ink for the Information. Am J of Gastroenterology. 2009; 104:1624-1630. |
|
Principles for Table Display
- Sort table rows in a meaningful way
- Avoid alphabetical listing!
- Use rates, proportions or ratios in addition (or instead of) totals
- Show more than two time points if available
- Multiple time points may be better presented in a Figure
- Similar data should go down columns
- Highlight important comparisons
- Show the source of the data
Consider the data in the table below from http://www.cancer.gov/cancertopics/types/commoncancers
|
| Incidence | Proportion |
|---|---|---|
| Bladder | 72,570 | 5.7% |
| Breast | 232,340 | 18.2% |
| Colon | 142,820 | 11.2% |
| Kidney | 59,938 | 4.7% |
| Leukemia | 48,610 | 3.8% |
| Lung | 228,190 | 17.9% |
| Melanoma | 76,690 | 6.0% |
| Lymphoma | 69,740 | 5.5% |
| Pancreas | 45,220 | 3.5% |
| Prostate | 238,590 | 18.7% |
| Thyroid | 60,220 | 4.7% |
Our ability to quickly understand the relative frequency of these cancers is hampered by presenting them in alphabetical order. It is much easier for the reader to grasp the relative frequency by listing them from most frequent to least frequent as in the next table.
| Type | Incidence | Proportion |
|---|---|---|
| Prostate | 238,590 | 18.7% |
| Breast | 232,340 | 18.2% |
| Lung | 228,340 | 17.9% |
| Colon | 142,820 | 11.2% |
| Melanoma | 76,690 | 6.0% |
| Bladder | 72,570 | 5.7% |
| Lymphoma | 69,740 | 5.5% |
| Thyroid | 60,220 | 4.7% |
| Kidney | 59,938 | 4.7% |
| Leukemia | 48,610 | 3.8% |
| Pancreas | 45,220 | 3.5% |
However, the same information might be presented more effectively with a dot plot, as shown below.

Data from http://www.cancer.gov/cancertopics/types/commoncancers
Principles of Graphical Excellence from E.R. Tufte
|
From E. R. Tufte. The Visual Display of Quantitative Information, 2nd Edition. Graphics Press, Cheshire, Connecticut, 2001.
|
Pattern Perception
Pattern perception is done by
- Detection: recognition of geometry encoding physical values
- Assembly: grouping of detected symbol elements; discerning overall patterns in data
- Estimation: assessment of relative magnitudes of two physical values
Geographic Variation in Cancer
As an example, Tufte offers a series of maps that summarize the age-adjusted mortality rates for various types of cancer in the 3,056 counties in the United States. The maps showing the geographic variation in stomach cancer are shown below.
|
|
Adapted from Atlas of Cancer Mortality for U.S. Counties: 1950-1969, TJ Mason et al, PHS, NIH, 1975
|
These maps summarize an enormous amount of information and present it efficiently, coherently, and effectively.in a way that invites the viewer to make comparisons and to think about the substance of the findings. Consider, for example, that the region to the west of the Great Lakes was settled largely by immigrants from Germany and Scand anavia, where traditional methods of preserving food included pickling and curing of fish by smoking. Could these methods be associated with an increased risk of stomach cancer?
John Snow's Spot Map of Cholera Cases
Consider also the spot map that John Snow presented after the cholera outbreak in the Broad Street section of London in September 1854. Snow ascertained the place of residence or work of the victims and represented them on a map of the area using a small black disk to represent each victim and stacking them when more than one occurred at a particular location. Snow reasoned that cholera was probably caused by something that was ingested, because of the intense diarrhea and vomiting of the victims, and he noted that the vast majority of cholera deaths occurred in people who lived or worked in the immediate vicinity of the broad street pump (shown with a red dot that we added for clarity). He further ascertained that most of the victims drank water from the Broad Street pump, and it was this evidence that persuaded the authorities to remove the handle from the pump in order to prevent more deaths.

Humans can readily perceive differences like this when presented effectively as in the two previous examples. However, humans are not good at estimating differences without directly seeing them (especially for steep curves), and we are particularly bad at perceiving relative angles (the principal perception task used in a pie chart).
The use of pie charts is generally discouraged. Consider the pie chart on the left below. It is difficult to accurately assess the relative size of the components in the pie chart, because the human eye has difficulty judging angles. The dot plot on the right shows the same data, but it is much easier to quickly assess the relative size of the components and how they changed from Fiscal Year 2000 to Fiscal Year 2007.
|
|
Adapted from Wainer H.:Improving data displays: Ours and the media's. Chance, 2007;20:8-15. Data from http://www.taxpolicycenter.org/taxfacts/displayafact.cfm?Docid=203 |
Consider the information in the two pie charts below (showing the same information).The 3-dimensional pie chart on the left distorts the relative proportions. In contrast the 2-dimensional pie chart on the right makes it much easier to compare the relative size of the varies components..
|
Adapted from Cawley S, et al. (2004) Unbiased mapping of transcription factor binding sites along human chromosomes 21 and 22 points to widespread regulation of noncoding RNAs. Cell 116:499-509, Figure 1 |
|
|
More Principles of Graphical Excellence
|
Adapted from Frank E. Harrell Jr. on graphics: http://biostat.mc.vanderbilt.edu/twiki/pub/Main/StatGraphCourse/graphscourse.pdf ] |
Exclude Unneeded Dimensions
|
Source: Cotter DJ, et al. (2004) Hematocrit was not validated as a surrogate endpoint for survival among epoetin-treated hemodialysis patients. Journal of Clinical Epidemiology 57:1086-1095, Figure 2. |
Source: Roeder K (1994) DNA fingerprinting: A review of the controversy (with discussion). Statistical Science 9:222-278, Figure 4. |
These 3-dimensional techniques distort the data and actually interfere with our ability to make accurate comparisons. The distortion caused by 3-dimensional elements can be particularly severe when the graphic is slanted at an angle or when the viewer tends to compare ends up unwittingly comparing the areas of the ink rather than the heights of the bars.
It is much easier to make comparisons with a chart like the one below.

Source: Huang, C, Guo C, Nichols C, Chen S, Martorell R. Elevated levels of protein in urine in adulthood after exposure to
the Chinese famine of 1959–61 during gestation and the early postnatal period. Int. J. Epidemiol. (2014) 43 (6): 1806-1814 .
Omit "Chart Junk"
Consider these two examples.
| Hash lines are what E.R. Tufte refers to as "chart junk."
This graphic uses unnecessary bar graphs, pointless and annoying cross-hatching, and labels with incomplete abbreviations. The cluttered legend expands the inadequate bar labels, but it is difficult to go back and forth from the legend to the bar graph, and the use of all uppercase letters is visually unappealing. This presentation would have been greatly enhanced by simply using a horizontal dot plot that rank ordered the categories in a logical way. This approach could have been cleared and would have completely avoided the need for a legend. | This grey background is a waste of ink, and it actually detracts from the readability of the graph by reducing contrast between the data points and other elements of the graph. Also, the axis labels are too small to be read easily. |
|
Source: Miller AH, Goldenberg EN, Erbring L. (1979) Type-Set Politics: Impact of Newspapers on Public Confidence. American Political Science Review, 73:67-84. |
Source: Jorgenson E, et al. (2005) Ethnicity and human genetic linkage maps. 76:276-290, Figure 2 |
Here is a simple enumeration of the number of pets in a neighborhood. There is absolutely no reason to connect these counts with lines. This is, in fact, confusing and inappropriate and nothing more than "chart junk."

Source: http://www.go-education.com/free-graph-maker.html
Moiré Vibration
Moiré effects are sometimes used in modern art to produce the appearance of vibration and movement. However, when these effects are applied to statistical presentations, they are distracting and add clutter because the visual noise interferes with the interpretation of the data.
Tufte presents the example shown below from Instituto de Expansao Commercial, Brasil, Graphicos Estatisticas (Rio de Janeiro, 1929, p. 15).
While the intention is to present quantitative information about the textile industry, the moiré effects do not add anything, and they are distracting, if not visually annoying.
Present Data to Facilitate Comparisons
| Tips
|
Here is an attempt to compare catches of cod fish and crab across regions and to relate the variation to changes in water temperature. The problem here is that the Y-axes are vastly different, making it hard to sort out what's really going on. Even the Y-axes for temperature are vastly different.

http://seananderson.ca/courses/11-multipanel/multipanel.pdf1
The ability to make comparisons is greatly facilitated by using the same scales for axes, as illustrated below.

Data source: Dawber TR, Meadors GF, Moore FE Jr. Epidemiological approaches to heart disease:
the Framingham Study. Am J Public Health Nations Health. 1951;41(3):279-81. PMID: 14819398
It is also important to avoid distorting the X-axis. Note in the example below that the space between 0.05 to 0.1 is the same as space between 0.1 and 0.2.

Source: Park JH, Gail MH, Weinberg CR, et al. Distribution of allele frequencies and effect sizes and
their interrelationships for common genetic susceptibility variants. Proc Natl Acad Sci U S A. 2011; 108:18026-31.
Consider the range of the Y-axis. In the examples below there is no relevant information below $40,000, so it is not necessary to begin the Y-axis at 0. The graph on the right makes more sense.
|
|
|
| Data from http://www.myplan.com/careers/registered-nurses/salary-29-1111.00.html | |
Also, consider using a log scale. this can be particularly useful when presenting ratios as in the example below.

Source: Broman KW, Murray JC, Sheffield VC, White RL, Weber JL (1998) Comprehensive human genetic maps:
Individual and sex-specific variation in recombination. American Journal of Human Genetics 63:861-869, Figure 1
We noted earlier that pie charts make it difficult to see differences within a single pie chart, but this is particularly difficult when data is presented with multiple pie charts, as in the example below.

Source: Bell ML, et al. (2007) Spatial and temporal variation in PM2.5 chemical composition in the United States
for health effects studies. Environmental Health Perspectives 115:989-995, Figure 3
When multiple comparisons are being made, it is essential to use colors and symbols in a consistent way, as in this example.

Source: Manning AK, LaValley M, Liu CT, et al. Meta-Analysis of Gene-Environment Interaction:
Joint Estimation of SNP and SNP x Environment Regression Coefficients. Genet Epidemiol 2011, 35(1):11-8.
Avoid putting too many lines on the same chart. In the example below, the only thing that is readily apparent is that 1980 was a very hot summer.

Data from National Weather Service Weather Forecast Office at
http://www.srh.noaa.gov/tsa/?n=climo_tulyeartemp
Make Efficient Use of Space
|
More Tips: |
Reduce the Ratio of Ink to Information
This isn't efficient, because this graphic is totally uninformative.

Source: Mykland P, Tierney L, Yu B (1995) Regeneration in Markov chain samplers. Journal of the American Statistical Association 90:233-241, Figure 1
| Bar charts are not appropriate for indicating means ± SEs. The only important information is the mean and the variation about the mean. Consider the figure to the right. By representing a mean with a number and a bar that has width, the information is representing one number over and over with:
|
|
Bar graphs add ink without conveying any additional information, and they are distracting. The graph below on the left inappropriately uses bars which clutter the graph without adding anything. The graph on the right displays the same data, by does so more clearly and with less clutter.
|
Source: Conford EM, Huot ME. Glucose transfer from male to female schistosomes. Science. 1981 213:1269-71 |
|
| "Just as a good editor of prose ruthlessly prunes unnecessary words, so a designer of statistical graphics should prune out ink that fails to present fresh data-information. Although nothing can replace a good graphical idea applied to an interesting set of numbers, editing and revision are as essential to sound graphical design work as they are to writing." Edward R. Tufte, "The Visual Display of Quantitative Information" |
Multiple Types of Information on the Same Figure
|
|
|
Choosing the Best Graph Type
| Adapted from Frank E Harrell, Jr: on Graphics: http://biostat.mc.vanderbilt.edu/twiki/pub/Main/StatGraphCourse/graphscourse.pdf
|
Bar Charts, Error Bars and Dot Plots
As noted previously, bar charts can be problematic. Here is another one presenting means and error bars, but the error bars are misleading because they only extend in one direction. A better alternative would have been to to use full error bars with a scatter plot, as illustrated previously (right).
|
Source: Hummer BT, Li XL, Hassel BA (2001) Role for p53 in gene induction by double-stranded RNA. J Virol 75:7774-7777, Figure 4 |
|
Consider the four graphs below presenting the incidence of cancer by type. The upper left graph unnecessary uses bars, which take up a lot of ink. This layout also ends up making the fonts for the types of cancer too small. Small font is also a problem for the dot plot at the upper right, and this one also has unnecessary grid lines across the entire width.
The graph at the lower left has more readable labels and uses a simple dot plot, but the rank order is difficult to figure out.
The graph at the lower right is clearly the best, since the labels are readable, the magnitude of incidence is shown clearly by the dot plots, and the cancers are sorted by frequency.
| ************************* + |
|
|
|
|
Single Continuous Numeric Variable
In this situation a cumulative distribution function conveys the most information and requires no grouping of the variable. A box plot will show selected quantiles effectively, and box plots are especially useful when stratifying by multiple categories of another variable.
Histograms are also possible. Consider the examples below.
| Density Plot | Histogram | Box Plot |
|
|
|
|
Two Variables
| Adapted from Frank E. Harrell Jr. on graphics: http://biostat.mc.vanderbiltedu/twiki/pub/Main/StatGraphCourse/graphscourse.pdf |
The two graphs below summarize BMI (Body Mass Index) measurements in four categories, i.e., younger and older men and women. The graph on the left shows the means and 95% confidence interval for the mean in each of the four groups. This is easy to interpret, but the viewer cannot see that the data is actually quite skewed. The graph on the right shows the same information presented as a box plot. With this presentation method one gets a better understanding of the skewed distribution and how the groups compare.
The next example is a scatter plot with a superimposed smoothed line of prediction. The shaded region embracing the blue line is a representation of the 95% confidence limits for the estimated prediction. This was created using "ggplot" in the R programming language.

Source: Frank E. Harrell Jr. on graphics: http://biostat.mc.vanderbilt.edu/twiki/pub/Main/StatGraphCourse/graphscourse.pdf (page 121)
Multivariate Data
The example below shows the use of multiple panels.

Source: Cleveland S. The Elements of Graphing Data. Hobart Press, Summit, NJ, 1994.
Displaying Uncertainty
- Error bars showing confidence limits
- Confidence bands drawn using two lines
- Shaded confidence bands
- Bayesian credible intervals
- Bayesian posterior densities
Confidence Limits
Shaded Confidence Bands

Source: Frank E. Harrell Jr. on graphics: http://biostat.mc.vanderbilt.edu/twiki/pub/Main/StatGraphCourse/graphscourse.pdf

Source: Tweedie RL and Mengersen KL. (1992) Br. J. Cancer 66: 700-705
Forest Plot
This is a Forest plot summarizing 26 studies of cigarette smoke exposure on risk of lung cancer. The sizes of the black boxes indicating the estimated odds ratio are proportional to the sample size in each study.

Data from Tweedie RL and Mengersen KL. (1992) Br. J. Cancer 66: 700-705
Summary Recommendations
- In general, avoid bar plots
- Avoid chart junk and the use of too much ink relative to the information you are displaying. Keep it simple and clear.
- Avoid pie charts, because humans have difficulty perceiving relative angles.
- Pay attention to scale, and make scales consistent.
- Explore several ways to display the data!
12 Tips on How to Display Data Badly
Adapted from Wainer H. How to Display Data Badly. The American Statistician 1984; 38: 137-147.
- Show as few data as possible
- Hide what data you do show; minimize the data-ink ratio
- Ignore the visual metaphor altogether
- Only order matters
- Graph data out of context
- Change scales in mid-axis
- Emphasize the trivial; ignore the important
- Jiggle the baseline
- Alphabetize everything.
- Make your labels illegible, incomplete, incorrect, and ambiguous.
- More is murkier: use a lot of decimal places and make your graphs three dimensional whenever possible.
- If it has been done well in the past, think of another way to do it
Additional Resources
- Stephen Few: Designing Effective Tables and Graphs. http://www.perceptualedge.com/images/Effective_Chart_Design.pdf
- Gary Klaas: Presenting Data: Tabular and graphic display of social indicators. Illinois State University, 2002. http://lilt.ilstu.edu/gmklass/pos138/datadisplay/sections/goodcharts.htm (Note: The web site will be discontinued to be replaced by the Just Plain Data Analysis site).
Statistical data presentation
- Korean Journal of Anesthesiology 70(3):267

- Dongguk Unversity Ilsan Hospital, Goyang, Republic of Korea

- Inje University, Sanggye Paik Hospital
Abstract and Figures

Discover the world's research
- 25+ million members
- 160+ million publication pages
- 2.3+ billion citations

- Heru Junanto
- Galih Zahrohtul
- Daffa Triyawan
- Farah Sukmawati Wahidah
- Istiningsih Istiningsih
- Thomas Unruh
- Sutrisno Sutrisno
- Urip Meilina Kurniawati

- Hulya Ertaş-Kılıç
- Melihan Unlu
- Betul Keray-Dinçel

- Jitendra S Bhawalkar

- Miriam D. Weisberg
- Rushabh M. Vakharia

- Saba Nashir
- Ahmad Seddiq Seddiqi
- Ai-Hong Chen
- Muhamad Syukri Mohamad Rafiuddin
- Chan Woo Lee

- Yushi Adachi
- Helen Ki Shinn
- Youngyoen Hwang
- Byung-Gun Kim
- Hyun Kyoung Lim
- Tae Kyun Kim
- Sung-Hwan Cho
- Mi-Soon Lee
- Yong-Ik Kim
- Sung Kwan Choi
- Myung Ha Yoon
- Jung Il Choi

- Jung-Hee Ryu

- Woojun Jung
- Minho Hwang

- Jun Haeng Lee
- Recruit researchers
- Join for free
- Login Email Tip: Most researchers use their institutional email address as their ResearchGate login Password Forgot password? Keep me logged in Log in or Continue with Google Welcome back! Please log in. Email · Hint Tip: Most researchers use their institutional email address as their ResearchGate login Password Forgot password? Keep me logged in Log in or Continue with Google No account? Sign up
Presentation And Display Of Quantitative Data: Graphs, Tables, Scatter Grams And Bar Charts
March 8, 2021 - paper 2 psychology in context | research methods.
Many people find it easier to understand quantitative data when it is presented in pictorial form. The specification requires that you look at 3 types of pictorial presentations of data.

Graph example taken from Wiki Educator.org

These are mainly used to present frequency distributions of interval data. The horizontal axis is a continuous scale, (e.g. time in seconds). On a histogram, there are no spaces between bars, because the bars are not considered separate categories. In the example of the graph to the right, the data shows how many students have achieved between a score of 20-30, 30-40, 40-50 etc marks on a test. The data is interval (i.e. between 20-30 marks) and is continuous.

A line chart or line graph is a type of chart which displays information as a series of data points called ‘markers’ connected by straight line segments. It is similar to a scatter graph except that the measurement points are ordered and joined with straight line segments (showing that the data is continuous).
We're not around right now. But you can send us an email and we'll get back to you, asap.
Graphical summaries of data #
Many powerful approaches to data analysis communicate their findings via graphs. These are an important counterpart to data analysis approaches that communicate their findings via numbers or tabless.
Here we will illustrate some of the most common approaches for graphical data analysis. Throughout this discussion, it is important to remember that graphical data analysis methods are subject to the same principles as non-graphical methods. A graph can be either informative or misleading, just like any other type of statistical result. To understand whether a graph is informative, we should consider the following:
Every graph should provide insight into the specific research question that is the overall goal of the data analysis.
The graph is constructed using a sample of data, but the purpose of the graph is to learn about the population that the sample represents.
What statistical principal or concept is the graph based on?
What are the theoretical properties of any numerical summaries that are shown in the graph?
Almost every statistical graphic conveys a statistical concept that can be defined in a non-graphical manner. Graphs may show associations, location, dispersion, tails, conditioning, or almost any other statistical feature of the data or population. Graphs make it easier for the viewer to digest such information, but when interpreting a graph it is always important to keep in mind the specific statistical concept on which the graph is based.
Statistical graphics have an aesthetic dimension that is usually not evident when presenting findings through, say, tables. Our goal here is to focus on the content of graphs, not their aesthetic properties. Very crude graphs that have deep content are much more informative than beautiful graphs that convey only superficial content. In recent years, the field of infographics has grown rapidly. There is no sharp line dividing infographics from statistical graphs, however in general, the former tend to convey relatively simple insights in an aesthetically engaging way, while the latter aim to convey deeper and more subtle insight, with less focus on presentation.
Challenges and limitations of graphs #
One of the main challenges in statistical graphics is to fit the greatest amount of useful information into a single graph, while allowing the graph to remain interpretable. More complex graphs can suffer from overplotting , in which the plot elements are so crowded on the page that they fall on top of each other. This can limit the legibility of plots formed from large datasets unless a great deal of preliminary summarization of the data is performed.
Another challenge that arises in graphing complex datasets is that most graphs are two-dimensional, so that they can be viewed on a screen (or printed on paper). Some graphing techniques extend to three dimensions, but many datasets have a natural dimensionality that is much greater than 2 or 3. A few methods for graphing work around this, but require more effort from the person viewing the graph.
Boxplots are a graphical representation of the distribution of a single quantitative variable. A boxplot is based on a set of quantiles calculated using a sample of data. Below is an example of a single boxplot, drawn horizontally, showing the distribution of income values based on a sample of 100 individuals.
The “box” in a boxplot (shaded blue above) spans from the 25th to the 75th percentiles of the data, with an additional line drawn cross-wise through the box at the median. “Whiskers” extend from either end of the box, and are intended to cover the range of the data, excluding “outliers”.
The concept of an outlier is extremely problematic and no generically useful definition of outliers has been proposed. For the purpose of drawing a boxplot, the most common convention is to plot the upper (right-most) whisker at the 75th percentile plus 1.5 times the IQR, or to the greatest data value less than this quantity. Analogously, the lower (left-most) whisker is drawn at the 25th percentile minus 1.5 times the IQR, or to the least data value greater than this quantity. Finally, individual points sometimes called “fliers” are drawn corresponding to any value that falls outside the range spanned by the whiskers. A single box-plot, as above, is often drawn horizontally, but may also be drawn vertically.
There are many alternative ways of defining the locations of the whiskers in a boxplot. The approach described above is most common, and is chosen so that with “light tailed” distributions, well under 1% of the data will fall outside of of the whiskers.
The boxplot above shows a right-skewed distribution. This is evident because the upper whisker is further from the box than the lower whisker. Also, within the box, the median is closer to the lower side of the box than to the upper side of the box. Overall, the lower quantiles are more compressed, and the upper quantiles are more spread out, which is a feature of right-skewed distributions.
Side-by-side boxplots #
Boxplots are commonly used to compare distributions. A “side-by-side” or “grouped” boxplot is a collection of boxplots drawn for different subsets of data, plotted on the same axes. These subsets usually result from a stratification of the data, according to some stratifying factor that partially accounts for the heterogeneity within the population of interest. For example, below we consider boxplots showing the distribution of income, stratified by sex.
Histograms #
A histogram is a very familiar way to visualize quantitative data. A histogram is constructed by breaking the range of the values into bins and counting the number (or proportion) of observations that fall into each bin. The shape of a histogram shows visually how likely we are to observe data value in each part of the range. We are more likely to observe values where the histogram bars are higher, and less likely to observe values where the histogram bars are lower.
Histograms closely resemble “bar charts”, but with the added statistical aspect that the goal is to capture the density at each possible point in the population. “Density” is a measure of how commonly we observe data “near”, rather than “at” a point. For example, the density of household incomes at 45,000 USD would not be the exact number or frequency of households with this income. Instead, it reflects the frequency of households that have an income near 45,000 USD.
A histogram can be used to assess almost any property of a distribution. The common measures of location and dispersion can be judged from visual inspection of the histogram. As always, we should remember that features of the histogram may not always reflect features of the population from which the data were sampled. For example, a histogram may show two modes (i.e. is bimodal ) even when the underlying distribution only has one mode (i.e. is unimodal ). Moreover, the number of modes in a histogram can change as the bin width is varied.
Histograms are easy to communicate about, but may not be effective when working with small samples, where they can accentuate non-generalizable features of the sample (i.e. characteristics of the sample that are not present in the population). This is reflected in the following mathematical fact. For many statistics, if we wish to reduce the error relative to the population value of the statistic by a factor of two, we need to increase the sample size by a factor of four. In the case where we are aiming to estimate a density, in order to reduce the error by a factor of two, we need to increase the sample size by a factor of eight.
With a sufficiently large collection of representative data, the histogram should closely match the population’s probability density function (PDF). The PDF is usually a smooth curve, rather than a series of steps as in a histogram. This fact inspired the development of a modified version of a histogram that presents us with a smooth curve instead of a series of steps. This technique is called kernel density estimation ( KDE ). It produces graphs such as shown below.
Kernel density estimates may provide a somewhat more accurate estimation of the underlying density function compared to a histogram. But like a histogram, they can be unstable and produce artifacts. For example, the KDE above shows positive density for negative income values, even though all of the income values used to fit the KDE were positive (in some cases, income can take a negative value, but in this case no such values were present). More advanced KDE methods not used here can mitigate this issue.
One advantage of using a KDE rather than a histogram is that it is easier to overlay multiple KDEs on the same axes for comparison without too much overplotting. This might allow us to compare, say, the distributions of female and male incomes as follows.
Quantile plots #
A quantile plot is a plot of the pairs \((p, q_p)\) , where \(q_p\) is the p’th quantile of a collection of quantitative values. Since \(p\) can be any real number between 0 and 1, the graph of these pairs constitutes a function. By construction, this must be a non-decreasing function. A quantile plot contains essentially the same information as a histogram, but is represented in a very different way. Note that unlike the histogram, for which the bin width is a parameter that must be selected, there is no such parameter in the quantile plot. Arguably, the quantile plot is a more stable and informative summary of a sample, especially if the sample size is moderate. However most people are more comfortable interpreting histograms than quantile functions.
As an example, the following plot shows simulated systolic blood pressure values for a sample of females and a sample of males. In this case, at every probability point \(p\) , the blood pressure quantile for males is greater than the blood pressure quantile for females, indicating that male blood pressure is “stochastically greater” than female blood pressure.
Below is another example that shows two quantile functions, but in this case the quantile functions cross. As a result, there is no “stochastic ordering” between the data for females and for males. Also note that the quantile curve for females is steeper than the curve for males, indicating that the female blood pressure values are more dispersed than those for the males.
Quantile-quantile plots #
A quantile-quantile plot , or QQ plot , is a plot based on quantiles that is used to compare two distributions. Recall that a quantile plot plots the pairs \((p, q_p)\) for one sample. A QQ plot plots the pairs \((q^{(1)}_p, q^{(2)}_p)\) , where \(q^{(1)}_p\) are the quantiles for the first sample, and \(q^{(2)}_p\) are the quantiles for the second sample. In a QQ-plot, the value of p is “implicit” – each point on the graph corresponds to a specific value of p, but you cannot see what this value is by inspecting the graph.
As an example, suppose we are comparing the number of minutes of sleep during one night for teenagers and adults. This might give us the following QQ-plot:
The above QQ-plot shows us that teenagers tend to sleep longer than adults, and this is especially true at the upper end of the range. The QQ-plot approximately passes through the point (600, 800), meaning that for some probability p, 600 is the p’th quantile for adults and 800 is the p’th quantile for teenagers.
The slope of the curve in the QQ-plot reflects the relative levels of dispersion in the two distributions being compared. Since the slope of the curve in the above QQ-plot is greater than that of the diagonal reference line, it follows that the values plotted on the vertical axis (teenager’s values) are more dispersed than the values plotted on the horizontal axis (adult’s values).
An important property of a QQ-plot is that if the plot shows a linear relationship between the quantiles, then the two distributions are related via a location/scale transformation . That is, there is a linear function \(a + bx\) that maps one distribution to the other. In the example above, there is a substantial amount of curvature in the graph, so it does not seem to be the case that the sleep durations for adults and teenagers are related via a location/scale transformation.
Dot plots #
Dot plots display quantitative data that are stratified into groups. One axis of the plot is used to display the quantitative measure, and the other axis is used to separate the results for different groups. A series of parallel “guide lines” are used to show which points belong to each group. Dot plots are often used to display a collection of numerical summary statistics in visual form. Sometimes people say that dot plots are used to “convert tables into graphs”. Due to overplotting, dot plots are less commonly used to show raw data. The example below shows how dot plots can be used to display the median age stratified by sex, for people living in each of eleven countries.
The plot above shows that the median age for females is greater than the median age for males in every country. This is mainly due to females having longer life expectancies than males. We also see that some countries have much lower median ages for both sexes compared to other countries. Countries that have recently had high birth rates, such as Ethiopia and Nigeria, tend to have much lower median ages than countries with lower birth rates, such as Japan.
Scatterplots #
A scatterplot is a very widely-used method for visualizing bivariate data. They have many uses, but the most relevant for us is to plot the joint (empirical) distribution of two quantitative values. As an example, suppose that we observe paired data values giving the annual minimum and annual maximum temperature at a location. We could view these data with a scatterplot, placing, say, the minimum temperature value on the horizontal (x) axis, and the maximum temperature value on the vertical (y) axis. The number of points is the sample size, here being the number of locations for which temperature data are available. A possible graph of this type is shown below.
Several characteristics of the relationship between minimum and maximum temperature are evident from the plot above. The maximum temperature at each location is at least as large as the minimum temperature. There is a positive association in which locations with a lower minimum temperature tend to have a lower maximum temperature compared to places with a higher maximum temperature, but there is a lot of scatter around this trend. Warmer places tend to have a smaller range between their minimum and maximum temperatures. Concretely, locations on the equator and at low elevation, such as Singapore, have relatively constant temperature throughout the year. Locations near the center of large continents, like Winnipeg, Canada, can have extremely cold winters and also rather hot summers. Coastal regions that are far from the equator, such as Dublin, Ireland, have mild winters and cool summers.
To aid in interpreting a scatterplot, it is useful to plot a smooth curve that runs through the center of the data. This is called scatterplot smoothing , and can be accomplished with several algorithms, one of which is known as lowess . The population analogue of a scatterplot smooth is the conditional mean , or conditional expectation , denoted \(E[Y|X=x]\) , for the conditional mean of \(Y\) given \(X\) . The conditional mean is a function of \(x\) , and can be evaluated at any point \(x\) in the domain of \(X\) . The conditional mean is (roughly speaking), the average of all values of \(Y\) whose corresponding value of \(X\) is near \(x\) .
The plot below adds the estimated conditional mean (orange curve) to the scatterplot of temperature data discussed above. The conditional mean curve is increasing, showing that, as noted above, a location with lower annual minimum temperature tends on average to have a lower annual maximum temperature (relative to other locations).
Time series plots #
Some data have a serial structure, meaning that the values are observed with an ordering. Very often, such observations are made over time, which gives us time series or longitudinal data. Sometimes we observe a single time series over a long period of time, such as the value of a commodity in a market recorded every day over many years. Other times, we observe many short time series recorded irregularly. We may plot these time series together, leading to what is sometimes called a “spaghetti plot”. For example, in a study of human growth, we may observe measurements of the body weight of research subjects at various ages, giving us the spaghetti plot below:
Parallel coordinate plots #
Scatterplots in the plane are limited to two dimensions. Various techniques have been developed to overcome this limitation, one of which is the parallel coordinate plot . A parallel coordinate plot places the coordinate axes for the multiple dimensions as parallel lines, rather than as perpendicular lines. Using parallel lines means that data for far more than two or three variables can be placed on a single page.
Below is an example of a parallel coordinates plot, showing four attributes of a set of ten countries. A scatterplot of these points would live in four-dimensional space, which is quite challenging to visualize directly. Note that the attributes are converted to Z-scores, which is common in a parallel coordinates plot when the variables being plotted fall in very different ranges. The plot shows us that the life expectancies for females and for males are quite similar – the country with the highest life expectancy for females also has the highest life expectancy for males, and the country with the lowest life expectancy for females also has the lowest life expectancy for males. There is also a substantial positive relationship between the economic status of a country, as measured by its gross domestic product (GDP) and life expectancy. However no relationship is evident between GDP and population, or between either of the life expectancy variables and population.
Mosaic plots #
The graphs above primarily use quantitative data. A mosaic plot is a plot that is used with nominal data. Specifically mosaic plots are used when the units of analysis are cross-classified according to two nominal factors. In the example below, people with cancer are cross-classified by their biological sex, and by the type of cancer that they have:
The width of each box in the mosaic plot corresponds to the relative overall prevalence of the corresponding cancer type. The heights of the boxes correspond to the sex-specific prevalences. Based on this graph, we see that digestive, lung, and breast cancers are much more common than, say, oral and endocrine cancers. The mosaic plot also shows us that while breast and endocrine cancers are more common in females, the other cancer types are more common in males.
An important property of a mosaic plot is that the area of each box is proportional to the number of units that fall into the box. Thus, we can see that the area of the female breast cancer box is larger than the the combined areas of the female and male lung cancer boxes. Thus, there are more cases of breast cancer in females than the combined cases of lung cancer for both sexes.
- Accountancy
- Business Studies
- Organisational Behaviour
- Human Resource Management
- Entrepreneurship
Diagrammatic and Graphic Presentation of Data
Diagrammatic and graphic presentation of data means visual representation of the data. It shows a comparison between two or more sets of data and helps in the presentation of highly complex data in its simplest form. Diagrams and graphs are clear and easy to read and understand. In the diagrammatic presentation of data, bar charts, rectangles, sub-divided rectangles, pie charts, or circle diagrams are used. In the graphic presentation of data, graphs like histograms, frequency polygon, frequency curves, cumulative frequency polygon, and graphs of time series are used.
General Rules for Construction of Diagrammatic and Graphic Presentations:
1. Chronic Number: Each outline or chart should have a chronic number. It is important to recognize one from the other.
2. Title: A title should be given to each outline or chart. From the title, one can understand what the graph or diagram is. The title ought to be brief and simple. It is normally positioned at the top.
3. Legitimate size and scale: An outline or chart ought to be of ordinary size and drawn with an appropriate scale. The scale in a chart indicates the size of the unit.
4. Neatness: Outlines should be pretty much as straightforward as could be expected. Further, they should be very perfect and clean. They ought to likewise be dropped to check out.
5. File: Each outline or chart should be joined by a record. This outlines various sorts of lines, shades or tones utilized in the graph.
6. Commentary: Commentaries might be given at the lower part of an outline. It explains specific focuses in the chart.
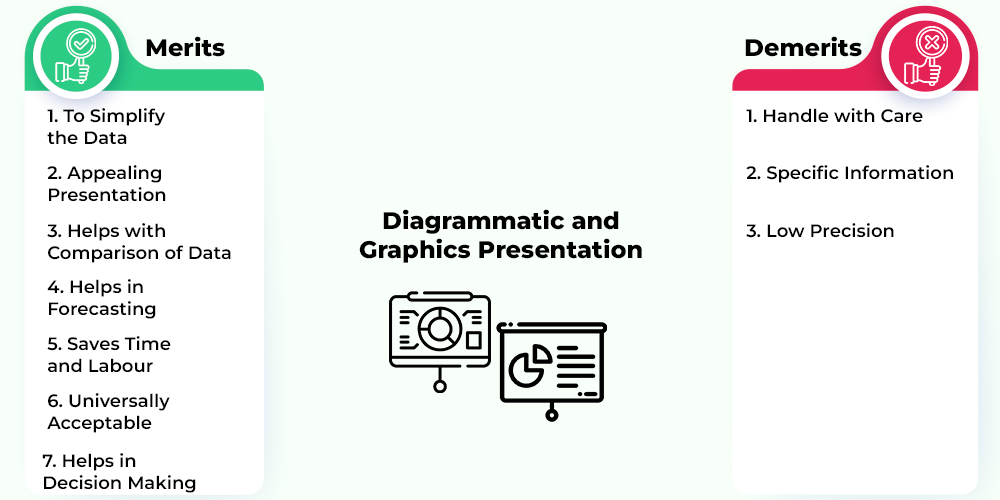
Merits of Diagrammatic and Graphics Presentation:
The fundamental benefits or merits of a diagrammatic and graphical representation of data are as follows:
1. To simplify the data: Outlines and charts present information in a simple manner that can be perceived by anyone without any problem. Huge volume of data can be easily presented using graphs and diagrams.
2. Appealing presentation: Outlines and charts present complex information and data in an understandable and engaging manner and leave a great visual effect. In this way, the diagrammatic and graphical representation of information effectively draws the attention of users.
3. Helps with comparison of data: With the help of outlines and charts, comparison and examination data between various arrangements of information is possible.
4. Helps in forecasting: The diagrammatic and graphical representation of information has past patterns, which helps in forecasting and making various policies for the future.
5. Saves time and labour: Charts and graphs make the complex data into a simple form, which can be easily understood by anyone without having prior knowledge of the data. It gives ready to use information, and the user can use it accordingly. In this way, it saves a lot of time and labour.
6. Universally acceptable: Graphs and diagrams are used in every field and can be easily understood by anyone. Hence they are universally acceptable.
7. Helps in decision making: Diagrams and graphs give the real data about the past patterns, trends, outcomes, etc., which helps in future preparation.
Demerits of Diagrammatic and Graphics Presentation:
The demerits of diagrammatic and graphics presentation of data are as follows:
1. Handle with care: Drawing, surmising and understanding from graphs and diagrams needs proper insight and care. A person with little knowledge of statistics cannot analyze or use the data properly.
2. Specific information: Graphs and diagrams do not depict true or precise information. They are generally founded on approximations. The information provided is limited and specific.
3. Low precision: Graphs and diagrams can give misleading results, as they are mostly based on approximation of data. Personal judgement is used to study or analyze the data, which can make the information biased. Also, data can easily be manipulated.
Please Login to comment...
Similar reads.
- Statistics for Economics
Improve your Coding Skills with Practice
What kind of Experience do you want to share?
Presentation of Data

Statistics deals with the collection, presentation and analysis of the data, as well as drawing meaningful conclusions from the given data. Generally, the data can be classified into two different types, namely primary data and secondary data. If the information is collected by the investigator with a definite objective in their mind, then the data obtained is called the primary data. If the information is gathered from a source, which already had the information stored, then the data obtained is called secondary data. Once the data is collected, the presentation of data plays a major role in concluding the result. Here, we will discuss how to present the data with many solved examples.
What is Meant by Presentation of Data?
As soon as the data collection is over, the investigator needs to find a way of presenting the data in a meaningful, efficient and easily understood way to identify the main features of the data at a glance using a suitable presentation method. Generally, the data in the statistics can be presented in three different forms, such as textual method, tabular method and graphical method.
Presentation of Data Examples
Now, let us discuss how to present the data in a meaningful way with the help of examples.
Consider the marks given below, which are obtained by 10 students in Mathematics:
36, 55, 73, 95, 42, 60, 78, 25, 62, 75.
Find the range for the given data.
Given Data: 36, 55, 73, 95, 42, 60, 78, 25, 62, 75.
The data given is called the raw data.
First, arrange the data in the ascending order : 25, 36, 42, 55, 60, 62, 73, 75, 78, 95.
Therefore, the lowest mark is 25 and the highest mark is 95.
We know that the range of the data is the difference between the highest and the lowest value in the dataset.
Therefore, Range = 95-25 = 70.
Note: Presentation of data in ascending or descending order can be time-consuming if we have a larger number of observations in an experiment.
Now, let us discuss how to present the data if we have a comparatively more number of observations in an experiment.
Consider the marks obtained by 30 students in Mathematics subject (out of 100 marks)
10, 20, 36, 92, 95, 40, 50, 56, 60, 70, 92, 88, 80, 70, 72, 70, 36, 40, 36, 40, 92, 40, 50, 50, 56, 60, 70, 60, 60, 88.
In this example, the number of observations is larger compared to example 1. So, the presentation of data in ascending or descending order is a bit time-consuming. Hence, we can go for the method called ungrouped frequency distribution table or simply frequency distribution table . In this method, we can arrange the data in tabular form in terms of frequency.
For example, 3 students scored 50 marks. Hence, the frequency of 50 marks is 3. Now, let us construct the frequency distribution table for the given data.
Therefore, the presentation of data is given as below:
|
| |
|---|---|
| 10 | 1 |
| 20 | 1 |
| 36 | 3 |
| 40 | 4 |
| 50 | 3 |
| 56 | 2 |
| 60 | 4 |
| 70 | 4 |
| 72 | 1 |
| 80 | 1 |
| 88 | 2 |
| 92 | 3 |
| 95 | 1 |
|
|
|
The following example shows the presentation of data for the larger number of observations in an experiment.
Consider the marks obtained by 100 students in a Mathematics subject (out of 100 marks)
95, 67, 28, 32, 65, 65, 69, 33, 98, 96,76, 42, 32, 38, 42, 40, 40, 69, 95, 92, 75, 83, 76, 83, 85, 62, 37, 65, 63, 42, 89, 65, 73, 81, 49, 52, 64, 76, 83, 92, 93, 68, 52, 79, 81, 83, 59, 82, 75, 82, 86, 90, 44, 62, 31, 36, 38, 42, 39, 83, 87, 56, 58, 23, 35, 76, 83, 85, 30, 68, 69, 83, 86, 43, 45, 39, 83, 75, 66, 83, 92, 75, 89, 66, 91, 27, 88, 89, 93, 42, 53, 69, 90, 55, 66, 49, 52, 83, 34, 36.
Now, we have 100 observations to present the data. In this case, we have more data when compared to example 1 and example 2. So, these data can be arranged in the tabular form called the grouped frequency table. Hence, we group the given data like 20-29, 30-39, 40-49, ….,90-99 (As our data is from 23 to 98). The grouping of data is called the “class interval” or “classes”, and the size of the class is called “class-size” or “class-width”.
In this case, the class size is 10. In each class, we have a lower-class limit and an upper-class limit. For example, if the class interval is 30-39, the lower-class limit is 30, and the upper-class limit is 39. Therefore, the least number in the class interval is called the lower-class limit and the greatest limit in the class interval is called upper-class limit.
Hence, the presentation of data in the grouped frequency table is given below:
|
| |
|---|---|
| 20 – 29 | 3 |
| 30 – 39 | 14 |
| 40 – 49 | 12 |
| 50 – 59 | 8 |
| 60 – 69 | 18 |
| 70 – 79 | 10 |
| 80 – 89 | 23 |
| 90 – 99 | 12 |
|
|
|
Hence, the presentation of data in this form simplifies the data and it helps to enable the observer to understand the main feature of data at a glance.
Practice Problems
- The heights of 50 students (in cms) are given below. Present the data using the grouped frequency table by taking the class intervals as 160 -165, 165 -170, and so on. Data: 161, 150, 154, 165, 168, 161, 154, 162, 150, 151, 162, 164, 171, 165, 158, 154, 156, 172, 160, 170, 153, 159, 161, 170, 162, 165, 166, 168, 165, 164, 154, 152, 153, 156, 158, 162, 160, 161, 173, 166, 161, 159, 162, 167, 168, 159, 158, 153, 154, 159.
- Three coins are tossed simultaneously and each time the number of heads occurring is noted and it is given below. Present the data using the frequency distribution table. Data: 0, 1, 2, 2, 1, 2, 3, 1, 3, 0, 1, 3, 1, 1, 2, 2, 0, 1, 2, 1, 3, 0, 0, 1, 1, 2, 3, 2, 2, 0.
To learn more Maths-related concepts, stay tuned with BYJU’S – The Learning App and download the app today!
| MATHS Related Links | |
Leave a Comment Cancel reply
Your Mobile number and Email id will not be published. Required fields are marked *
Request OTP on Voice Call
Post My Comment
Register with BYJU'S & Download Free PDFs
Register with byju's & watch live videos.
IMAGES
COMMENTS
Among various types of data presentation, tabular is the most fundamental method, with data presented in rows and columns. Excel or Google Sheets would qualify for the job. Nothing fancy. This is an example of a tabular presentation of data on Google Sheets.
The selection of the most suitable data presentation method hinges on the specific dataset and the presentation's objectives. For instance, when comparing sales figures of different products, a bar chart shines in its simplicity and clarity. ... Comparison: Highlight comparisons and trends in your data. Graphical methods: Choose the right chart ...
Give them the best chance of comprehending your data by using simple, clear, and complete language to identify X and Y axes, pie pieces, bars, and other diagrammatic elements.
The Power of Good Data Visualization. Data visualization involves the use of graphical representations of data, such as graphs, charts, and maps. Compared to descriptive statistics or tables, visuals provide a more effective way to analyze data, including identifying patterns, distributions, and correlations and spotting outliers in complex ...
Step 1: Define Your Data Hierarchy. While presenting data on the budget allocation, start by outlining the hierarchical structure. The sequence will be like the overall budget at the top, followed by departments, projects within each department, and finally, individual cost categories for each project. Example:
1. Bar graph. Ideal for comparing data across categories or showing trends over time. Bar graphs, also known as bar charts are workhorses of data presentation. They're like the Swiss Army knives of visualization methods because they can be used to compare data in different categories or display data changes over time.
Here are some important data visualization techniques to know: 1. Pie Chart. Pie charts are one of the most common and basic data visualization techniques, used across a wide range of applications. Pie charts are ideal for illustrating proportions, or part-to-whole comparisons.
Non-Graphical Exploratory Data Analysis. Nongraphical exploratory data analysis is the first step when beginning to analyze your data as part of the general data analysis approach. This preliminary data analysis step focuses on four points, i.e. for mechanisms that you will want to examine. These include: the existence of outliers.
5. Histograms. It is a perfect Presentation of the spread of numerical data. The main differentiation that separates data graphs and histograms are the gaps in the data graphs. 6. Box plots. Box plot or Box-plot is a way of representing groups of numerical data through quartiles. Data Presentation is easier with this style of graph dealing with ...
Make sure your data is accurate, up-to-date, and relevant to your presentation topic. Your goal will be to create clear conclusions based on your data and highlight trends. 2. Know your audience. Knowing who your audience is and the one thing you want them to get from your data is vital.
In this article, the techniques of data and information presentation in textual, tabular, and graphical forms are introduced. Text is the principal method for explaining findings, outlining trends, and providing contextual information. A table is best suited for representing individual information and represents both quantitative and ...
Introduction. Visual learning is one of the primary forms of interpreting information, which has historically combined images such as charts and graphs (see Box 1) with reading text. 1 However, developments on learning styles have suggested splitting up the visual learning modality in order to recognize the distinction between text and images. 2 Technology has also enhanced visual presentation ...
Encourage the eye to compare different pieces of data. Reveal the data at several levels of detail, from a broad overview to the fine structure. Serve a clear purpose: description, exploration, tabulation, or decoration. Be closely integrated with the statistical and verbal descriptions of the data set. From E. R. Tufte.
In this article, the techniques of data and information presentation in textual, tabular, and graphical forms are introduced. Text is the principal method for explaining findings, outlining trends ...
A simple and effective way of presenting and comparing data, particularly nominal data. This is because each bar represents a different category of data, and this is denoted by the spaces between them (it is important to leave a gap/space between each bar on the graph in order to indicate that the bars represent 'separate' data rather than 'continuous' data.
Here we will illustrate some of the most common approaches for graphical data analysis. Throughout this discussion, it is important to remember that graphical data analysis methods are subject to the same principles as non-graphical methods. A graph can be either informative or misleading, just like any other type of statistical result.
Graphical methods for presenting data 2.1 Introduction We have lookedatways of collectingdataand thencollatingthem intotables. Frequency tables are useful methods of presenting data; they do, however, have their limitations. With large amounts of data graphical presentation methods are often clearer to understand. Here, we look
The fundamental benefits or merits of a diagrammatic and graphical representation of data are as follows: 1. To simplify the data: Outlines and charts present information in a simple manner that can be perceived by anyone without any problem. Huge volume of data can be easily presented using graphs and diagrams. 2.
Oral Presentations. • Only include important results. • One report table might need to be broken down into as many as 8‐10 slides. • Don't paste huge tables onto slides and then say "sorry you can't read this"!! • Use large fonts and clear formatting. Table 1.
Generally, the data in the statistics can be presented in three different forms, such as textual method, tabular method and graphical method. Presentation of Data Examples. Now, let us discuss how to present the data in a meaningful way with the help of examples. Example 1: