PowerPoint Recorder
Record your PowerPoint presentations online
319 reviews

Powerful Online PowerPoint Recorder
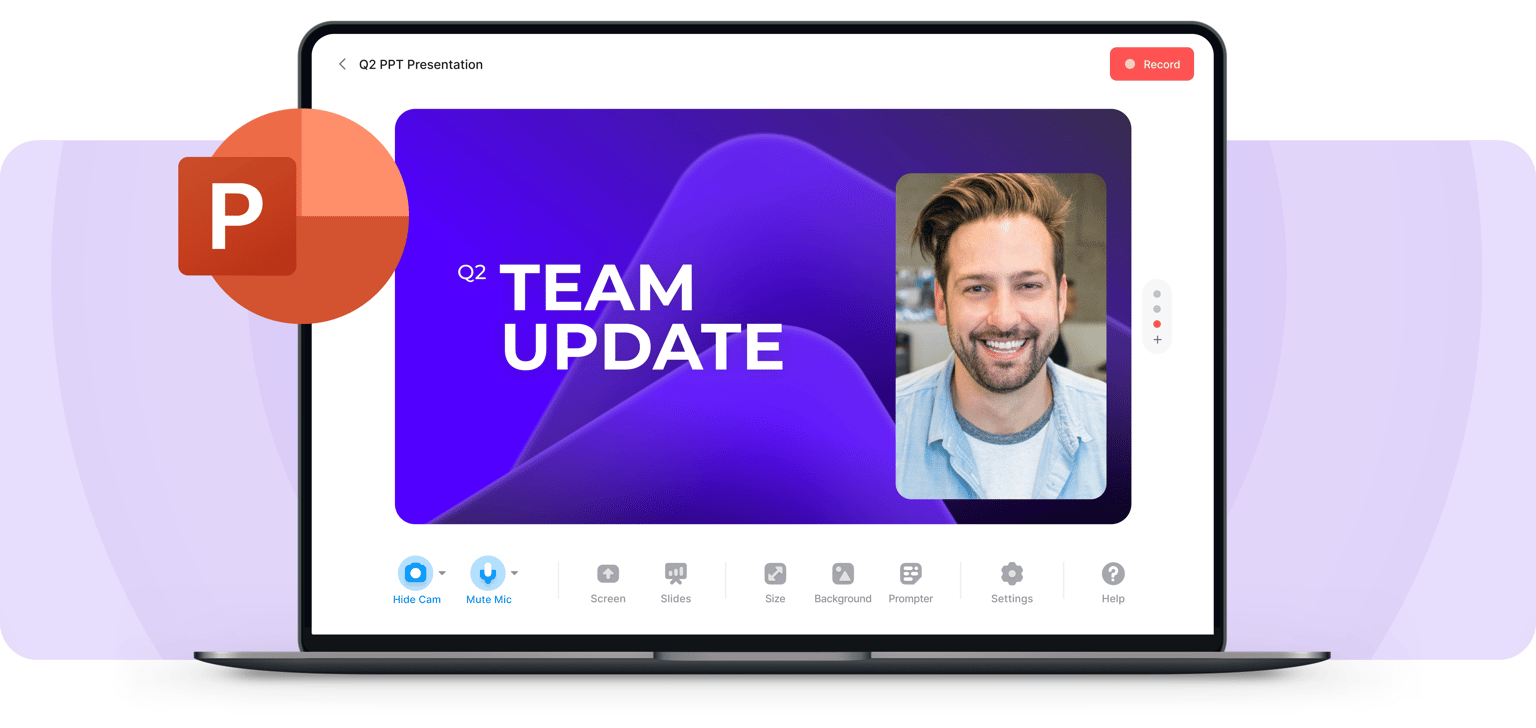
Make your presentations look professional using VEED’s online PowerPoint recorder. It’s fast, easy to use, and gives you access to video editing tools to make your presentation stand out. You can upload your slides or record your screen while you are presenting. Add yourself to the scene by recording your webcam and audio as well.
No need to install software. Open your browser and start recording! Choose from different layouts and customize your video after you record. You can also edit your recording using our professional video editor.
How to Record Your PowerPoint Presentation:
Upload slides and select a layout
Select from our list of layouts (you may need to click to ‘Allow’ permission to access your screen, camera, or microphone). You can record just your screen, your webcam, or both at the same time! You can either upload your slides or record while you’re presenting.
Start recording
Click the red button to start recording! You'll see a countdown before the recording starts. Don't worry if you mess up. You have unlimited time and unlimited retakes. You can navigate to other pages, and don't worry, you are still recording.
Review, edit, and export
You can playback your recording to review it, click ‘Share’ to share with friends and colleagues, or ‘Edit’ to edit your video (perfect for adding text, subtitles, and professional touches to your screen recording)
‘PowerPoint Recorder’ Tutorial

Highly customizable PPT recording software
VEED lets you easily customize your Microsoft PowerPoint presentation recordings. Select from different layouts and backgrounds. You can record your screen, webcam, audio, and upload your PowerPoint slides to present while recording. If you choose to record your entire desktop, you can easily switch the view between your presentation slides and other windows. When you’re finished, edit your video using our free video editor, where you can also add royalty-free music from our Stock Library.
All the things you need in a screen recorder
Our video capture software is packed with features that will help you create professional-looking recordings. When you press record, the countdown timer will appear to prompt you when your recording starts. To make sure that your audio is being picked up, check the little microphone icon on the bottom of your screen. It should be animated to indicate that your audio is being recorded. It only takes a few clicks. It’s the best app to record your Microsoft PowerPoint presentations.
Fast, free, and easy-to-use screen recorder software
Our screen recorder and video editor are free to use and beginner-friendly. However, if you need to record longer videos, you may need to subscribe to our premium plans. Check out our Pricing Page to see which plan suits your needs. It is super easy to use. It only takes a few clicks!
Does PowerPoint have a recording feature?
Microsoft does allow you to record your presentation as well as your voice or audio. But you might be limited because you can’t switch screens. Use VEED to record your entire desktop and switch between windows.
Is there a way to record audio on PowerPoint?
With VEED, you can record your audio, webcam, screen, and presentation slides all at the same time!
How do you record yourself while presenting a PowerPoint?
To add yourself or your camera to the recording, select the layout that includes “webcam.” Choose the size and positioning of your camera feed and start recording!
What is the best video recorder for PC?
Although there are many screen recorders out there, VEED is your best choice when it comes to recording your PC screen! It’s free and online. No need to install software. Plus you can use our free video editor to enhance your recording even more.
Loved by creators.
Loved by the Fortune 500
VEED has been game-changing. It's allowed us to create gorgeous content for social promotion and ad units with ease.

Max Alter Director of Audience Development, NBCUniversal
I love using VEED. The subtitles are the most accurate I've seen on the market. It's helped take my content to the next level.

Laura Haleydt Brand Marketing Manager, Carlsberg Importers
I used Loom to record, Rev for captions, Google for storing and Youtube to get a share link. I can now do this all in one spot with VEED.

Cedric Gustavo Ravache Enterprise Account Executive, Cloud Software Group
VEED is my one-stop video editing shop! It's cut my editing time by around 60% , freeing me to focus on my online career coaching business.

Nadeem L Entrepreneur and Owner, TheCareerCEO.com

When it comes to amazing videos, all you need is VEED
Start Recording
No credit card required
More than a PowerPoint recorder
VEED is a complete browser-based tool that lets you do so much more than just record and share your Microsoft PowerPoint presentations. You can annotate your videos to make your presentation more informative. Edit your recording to add images, subtitles, and more. It is a professional all-in-one video-creation and editing software that’s great for beginners and pros alike. Create professional-looking videos in just a few clicks. You don’t need any video editing experience. Create stunning videos that you can share on social media in just minutes. Try VEED to create professional PowerPoint recordings today!

- Presentations
- Most Recent
- Infographics
- Data Visualizations
- Forms and Surveys
- Video & Animation
- Case Studies
- Design for Business
- Digital Marketing
- Design Inspiration
- Visual Thinking
- Product Updates
- Visme Webinars
- Artificial Intelligence
Top 12 Best Video Presentation Software of 2024 [Including Free Presentation Makers]
![Top 12 Best Video Presentation Software of 2024 [Including Free Presentation Makers]](https://visme.co/blog/wp-content/uploads/2020/02/Header-8.jpg "presentation recording tools")
Written by: Orana Velarde
Are you in search of the best video presentation software for your project? With so many options out there, it can be difficult to choose the right one!
In this post, we’ve rounded up the 12 best video presentation software out there and given you an overview of their features for creating video presentations. Some are completely free video presentation makers, while others let you test drive their tool with a free trial.
Thankfully with Visme, you can create pretty amazing video presentations, from animated explainer videos to informational webinars.
And while there are some pretty powerful presentation makers out there apart from Visme, we think you’ll like the fact that we aren’t JUST a video presentation maker. We’re a lot more than that.
Alternatively, if you want to know more about animated presentation makers, you can check out this list .
Below are 12 of the best video presentation makers and PowerPoint alternatives .
First up, Visme, of course.
Table of Contents
Video presentation faqs.
Visme allows users to create, download and share video presentations as easily as any other type of content. You can upload your own video footage and clips as well as use any of the video clips in our extensive stock video gallery.
Even if you don’t add any special animated features or video footage, all your slides have integrated slide transitions that you can turn on and off at will.
Visme is a cloud-based, completely free video presentation software and an excellent alternative for PowerPoint.

Create your own video presentation today! Try It For Free
Library of Customizable Templates
Visme has hundreds of video presentation templates and thousands of animated presentation slides. There are three main styles — simple, creative and modern.
In the presentation section, there are three presentation themes — simple, creative and modern. Each style has hundreds of slides to choose from, with options by purpose, layout and function. Furthermore, there are thousands of templates for different industries with a number of beautiful slides.
There are also special animated templates to help you make creative video presentations with professional animations and effects.
Visme templates—for video and other content types—have a long list of benefits for your business content creation. Here are some of our favorites features in the Visme template editor:
- Dynamic fields: When creating lots of repurposed content or many versions of the same project, dynamic fields will save you tons of time and effort. They update information throughout your projects quickly.
- Shortcuts: Designing visual content takes time. We’ve incorporated features into the editor that save you precious minutes. With the shortcut feature , you can access all the basic design options and search for what you need just by clicking on the forward slash /.
- Draw Freehand: Can’t find the ideal shape or line? Draw it freehand ! Do you want to annotate easily while presenting? Use the freehand drawing tool and add personality to your Visme content.
- AI-generated graphics: Add AI-generated backgrounds, graphics and shapes to your videos. Use the prompt window to create unique design elements for your content.
- AI Image Edit Tools: Enhance and refine your visuals effortlessly with Visme's AI image edit tools . Unblur and upscale blurry or small images, remove or add objects or seamlessly remove backgrounds from your images. Elevate the quality of your graphics with ease and add a professional touch to your presentations.
- AI Writer: Tired of spending hours crafting content? Visme's AI writer has you covered. It helps you quickly generate texts for your slides, simplify complex ideas or concepts, maintain a cohesive and uniform tone throughout your presentation, proofread your content and more.
Video Capabilities
Video creation with Visme is easy and intuitive. We don’t believe in reinventing the wheel. Instead, we create solutions that you recognize but are more effective than you think. Our video editor is a great example with a smart undo and redo feature.
These are the video features you’ll get to know and love in no time:
- Video editing timeline: Easily edit slide transitions, the order of animated objects in each slide, the duration of the individual or grouped animated objects in each slide, add or record narration and other audio, as well as adjust the timing of all of these elements.
- Trim videos: Trim the beginning and end sections of a video in your slide by dragging the yellow bar in the timeline.
- Video settings: Choose how an added or uploaded video plays inside the project. The options are loop, mute, autoplay and show control bar.
- Video uploads: Depending on your subscription plan, you can upload your own videos to add to a video project. Please always ensure you have the right license for each video you upload.
- Adding video with a URL or from a video provider: Easily add videos from YouTube, Vimeo, Wistia and more. Either use the app integration or add the video URL.
- Animated characters and graphics: Add interactive visuals with Visme’s exclusive animated elements; you won’t find them anywhere else. Control their basic features like color and movement repetition.
- Animation controls : Add creative animations to any elements on the slide and adjust them to fit your timeline. Choose animation effects like bounce and zoom.
- Video creation on mobile: You can create and download videos with the Visme iOS app. All the projects on your computer are available in the app on your phone.
Vast Library of Visuals & Video

The visuals that are available in Visme are numerous and varied. And they’re always available for your video presentations.

Create videos for social media with 3D visuals animated characters, put together report videos with animated data widgets, or design explainer videos with your own footage, photos and voice overs .

Visme has a large gallery with millions of images and hundreds of hand-selected video clips. You can use these as both backgrounds or elements in your video composition. Make your images look better with frames and interesting shape cutouts.

You can also embed third-party content from other apps into your Visme video presentations.
Hey marketers! Need to create scroll-stopping visual content fast?
- Transform your visual content with Visme’s easy-to-use content creation platform
- Produce beautiful, effective marketing content quickly even without an extensive design skillset
- Inspire your sales team to create their own content with branded templates for easy customization
Sign up. It’s free.

Data Visualization
Visme has a ton of data visualization capabilities. From data widgets to charts and graphs that can visualize up to 50 columns of data. All charts and graphs are automatically animated and you can also edit the way they enter and exit the slides.

Visualizing data is one of the best features in the Visme editor. You can make any type of data look amazing by simply importing an Excel sheet, or you can create a report dashboard with live data from Google Sheets.

Instant Branding
Video presentations in Visme can be branded easily.
The Visme Brand Wizard uses AI to generate a vast collection of branded templates, including videos. Teams can also create branded templates from scratch using the workspace Brand Kit and assign them to colleagues for review .
With a team plan, all the users can create content while staying on brand no matter what format they use apart from video presentations.
Audio Capabilities

Add audio to your video presentation from the Visme audio library. There are a huge repository songs you can use or upload your own clips. Additionally, you can record a voiceover straight into the software.
Trim the audio length for each individual clip using the audio editing timeline. Adjust it to the video using the video timeline. Add a background clip to play across all slides and customize when it starts, fades or stops.
With Visme's Presenter Studio, you can even record your entire presentation ahead of time and share it with your audience via a shareable link. This is a great way to give asynchronous presentations, feedback, sales pitches, etc., especially if you’re working across time zones.
Length Limit
Videos can be a few minutes long but with upcoming updates, there will be a longer length limit.
Video Output Options
Your video presentation can be embedded on a website , or downloaded as an MP4 or GIF file to share offline. Here are some video output essentials you need to know about Visme:
Apart from downloading to your PC, you can also send the video directly to your Dropbox, Google Drive, OneDrive and Hubspot accounts.
Your video continues to render even if you close your browser. Keep an eye out for an email letting you know that your video is ready for download.
Your video presentations can also be shared with a public or private Visme link without the need to download them. They also can be sent directly to social media.
Easily share to Facebook, LinkedIn, Tumblr, Twitter and email right within the Visme editor to enhance your content marketing efforts.
When you share a video as a link or embed it into a site or digital document, you can get analytics about who has opened and viewed your content. Hardly any other video presentation app has this feature. That’s why Visme is better at helping you create content with a purpose.
Finally, videos made with Visme can also be exported in SCORM and xAPI formats. You can easily create engaging corporate video presentations or virtual courses. Help your learning and development team create better e-learning content with Visme.
Learn how to download and present your video presentation below.
Your video presentations can also be shared with a public or private link, plus they can be sent directly to social media. Easily share to Facebook, LinkedIn, Tumblr, Twitter and email directly.
Share video presentations with a public or private link or embed your presentation to receive analytics about who has opened and viewed your content. Hardly any other video presentation tools have this feature. That’s why Visme is better at helping you create content with a purpose.

Pricing tiers in Visme are monthly and annual. The annual option has a great discount in comparison to the monthly and is as follows:
- Basic: Free
- Starter: $12.25 / month
- Pro: $24.75 / month
- Teams/Enterprise: Upon request
Who is Visme For
Visme is for the busy professional who wants to create stunning visual content but doesn’t have the time or desire to spend hours perfecting the design. With thousands of templates and millions of design assets, Visme makes it quick and easy to create content that will wow your audience.
Watch this quick video to learn more.
Making a video presentation with Lumen5 is a bit different from the other software we mention here.
The original idea with Lumen5 when it started was to import the URL of a blog post and the AI software created a video for you. A few years after inception Lumen5 is now a stronger software with more features to support their original idea.
Lumen5 is a cloud-based video presentation software.
The Interface

The Lumen5 interface is simple and easy to grasp. There are two very similar interfaces, one that has a content tab for when you upload a blog post or long text and the interface to use with templates. The only difference is the content tab.
Text layouts have limited customizations for placement and animation. All animations are automatic but can be personalized to some extent.
Video proportions can be changed into all social media sizes easily and all the content rearranges itself automatically. There are no undo-redo controls.
Available Templates

The Lumen5 software offers a number of templates to start with. There aren’t a ton of options, but enough to get you started. Every template has various size versions so the complete template gallery looks bigger than it really is.
Available Visuals
The visuals available in Lumen5 consist of stock images and video clips. Depending on your subscription level, you can access up to 330M stock photos from Getty and Shutterstock. You can upload images, video and audio from the desktop or straight from your phone.
There are no data visualization capabilities in Lumen5.
All paid plans have branding options like fonts, music and a branded outro.
There are many music audio clips available in the software and you can upload your own audio clips too. Users can also add their own voiceover to their presentation.
Lumen5 videos cannot be any longer than 10 minutes, regardless of your plan.
Video Output
All videos are downloaded as MP4, in horizontal, vertical or square formats. They can be embedded or shared to Facebook.
The quality of the video depends on your subscription plan.

Apart from their free plan, Lumen5 has four paid plans. Pricing is as follows:
- Basic: $19/month
- Starter: $59/month
- Professional: $149
- Enterprise: Upon request
Who is Lumen5 For
Lumen5 is perfect for content creators that want to create videos from their blog posts. Also for those who post a lot of content on Facebook, the integration is quite seamless.
This video presentation software is also for people who don’t want to be fussing with too many tools and want things done fast.

Biteable markets their video creation software as a marketing video maker. Nevertheless, the horizontal format on Biteable also works well as a video presentation.
Biteable is a cloud-based video presentation software.

Using the Biteable 3.0 editor is easy and straightforward. The tools for editing fonts are simple with the ability to change the font, size and color. The animation of the text is done per slide so you can’t animate one piece of text one way and another in a different way.
The video editor is separated into text, footage and music tracks. You can edit the footage by trimming.
There are no undo and redo controls.

Biteable offers hundreds of pre-designed video templates to start with. Additionally, from inside the editor, you can access a library of video slides. We’re big fans of the claymation explainer animated slides.
The image and footage library has thousands of ready to use photos and clips. Most are from Unsplash —the same photo library you already get access to with Visme .
There are no data visualization tools available in Biteable.
Easily add a watermark, upload fonts and use hex codes for colors. However, there isn’t a set Brand Kit.
The Biteable software offers stock audio and you can upload your own.
Biteable has a maximum video length limit of 10 minutes.
Videos can be shared online or downloaded as Mp4 HD and full HD. Both are available on paid plans.
The free plan only lets you create videos. In order to download, you’ll have to upgrade to one of the plans. Their pricing is as follows:
- Pro: $49/month
- Teams: $99/month

Who is Biteable For
Biteable is for content creators that work mostly with social media.
The Animaker video presentation software has lots of tools and resources to make complex videos of any type. Choose between animated videos and live-action videos.
The video editing controls are more elaborate than on other programs and the character animation options are extensive.

Animaker has two interface options, a full and a lite version. The full version has all the tools on hand to create scenes, animated character options, frame editing and more.
The lite version is a simplified editor window for users who don’t need to have all the tools available at all times. Switching from one to the other is easy.
There are no undo-redo options.

Animaker has millions of templates in both animation and live-action formats. Before starting a video creation, select from the template sizes.
Once inside the editor, all the other templates in the same size are also available through the magic box tab.
There are millions of images and video clips, shapes, icons, designed text layouts, plus animated video clips, customizable characters and animated scene effects.
There are no data visualization tools available.
The software has a simple brand kit in the user dashboard. Animaker brand kits include an animated character, and an intro/outro set. Assets are available in the editor.
Videos can have music or voice-overs recorded with the user’s computer microphone. The media library has many audio files to choose from, organized by category and style. Audio files can also be uploaded.
Free plans can create videos up to 2 minutes in length. Some paid plans can create videos of up to 30 minutes.
Finished videos can be downloaded as MP4 in varying qualities. Shapes can be horizontal, vertical or square. GIFs can be downloaded at a limit of 30 seconds. Videos can also be shared directly to Facebook, YouTube and Twitter.
Additionally, videos can be downloaded for specific social outlets like Slack and Flickr. The software suggests optimization for each channel.
The free plan lets you download as many videos as you want—but with a watermark. Some other options are available in the free plan but are limited. The Starter and Pro plans have a limited amount of downloads with an extra price for additional downloads.
Plan pricing is as follows:
- Basic: $12.5/month
- Starter: $25/month
- Pro: $39/month
Who is Animaker For
Animaker is for any kind of content creator. Highly geared at creators looking for explainer videos but now expanded to more options. The learning curve is not very high but it still needs some getting used to, especially in the timeline editor tools.
Powtoon has long been a favorite for creating video presentations, especially explainer videos. Their animated and whiteboard explainers have been around for a while.
Now the software has a lot more creative options for making video presentations in five main styles with lots of templates in each.
The main size is horizontal presentation but you can also switch to square and vertical.
Powtoon is a cloud-based video presentation software.

The editor interface on Powtoon has two options. Editor and Creator. When you choose a template, the editor interface opens on Edit, with options to customize the content in the template.
By switching to Create, then many more options show up and you can add lots of things to a video presentation.

Powtoon has thousands of templates in five categories; modern edge, whiteboard, cartoon, infographic and real. All the templates are available before starting a project and also once inside the editor.
You can also import PowerPoint presentations as a beta feature.
The visuals available are varied and extensive. There are thousands of different animated characters, which is what Powtoon is known for. Additionally, there are icons, shapes, design elements, images and video clips.
There are charts but they are not editable. Apart from those, there are no data visualization tools available.
There is no practical brand kit available but since the editing options are extensive, videos can be branded to some extent. The ability to upload fonts is only available in the highest subscription.
Also, resell right and white label rights are available in the Agency Plan.
Corporate and Enterprise plans have a brand toolkit. These plans are upon request.
Users can record voice-overs or music directly into the software. The music upload feature has an integration with Fiverr to hire a professional music creator. Additionally, there are hundreds of tracks to choose from right inside the app.
The maximum video length on Powtoon is 30 minutes.
Videos can be downloaded, published to social channels, or shared directly. Downloads can be MP4, PPT or PDF.
Publishing goes straight to Facebook, YouTube, Vimeo, Slideshare, Wistia and Hubspot. Shares go to Twitter, email and Linkedin. There is also an embed option.

Annual pricing for the annual plans are as follows:
- Lite: $15/month
- Professional: $40/month
- Business: $125/month
Who is Powtoon For
Powtoon is for anyone interested in creating elaborate video presentations for all sorts of purposes. The free and low tier options are fine for social media marketers, while the higher tiers are good for corporate or education longer type video presentations.
Create a stunning presentation in less time
- Hundreds of premade slides available
- Add animation and interactivity to your slides
- Choose from various presentation options

6 PowerPoint

The classic PowerPoint software, and powerful Google Slide alternative , can also be used as a video presentation software.
Any presentation created with PowerPoint can be saved as a video in MP4 or MOV file. You simply create a presentation how you would normally, add animations and audio, then export or save as an MP4 or MOV file.
Don’t forget that you can also import a PPTX presentation to Visme and add all of our visual features to make an even better video presentation.

The PowerPoint interface has a toolbar on top just like all Microsoft software. There are many options for creating video presentations, from animated titles, images and graphics to creative transitions between slides.
The slides are organized on the left hand tab and slide templates are added easily with different layouts to choose from.
You can use any of the classic templates that PowerPoint has to offer to create a video presentation. Additionally you can use any PowerPoint template from sites online or specialized PowerPoint slide creators.
You can also start a video presentation quickly with the help of QuickStarter. Simply add a topic to start with a PowerPoint outline and start your presentation from there.
There are plenty of standard visuals in PowerPoint for video presentations. You can select shapes, images, animation effects for text and other visual elements like tables, graphs and 3D models.
There is also a section called smart design that offers premade templates of visuals like flowcharts, cycles and other types of layouts.
PowerPoint has a variety of charts and graphs for your video presentations. Data can be imported from Excel or entered manually.
Create branded video presentations by selecting color palettes, using your brand fonts and adding your logo. Branded templates can be saved for future use to stay on brand.
Import any audio files from your computer to your video presentation. PowerPoint doesn’t offer an audio library inside the program. You can also record voice overs straight into the platform.
There is no real limit to how long a video presentation made with PowerPoint can be. GIFs don’t have a length limit either. But for optimization purposes they shouldn’t really be longer than 30 seconds.
Video presentations can be downloaded as MP4 or MOV files. There are no sharing capabilities to social media or email. If you aren’t fully happy with your video presentation, save it as a PPTX file and upload it to Visme to finish off with better tools.
PowerPoint can be purchased on its own for a one-time fee of $159.99, or users can choose to sign up for the full Microsoft 365 subscription starting at $6.99/month.

Keynote is the Apple version of PowerPoint. It comes included with all Apple computers and is relatively easy to use. The tools are not as varied as PowerPoint but it’s still pretty useful.
The highest pro to Keynote is that it’s free with all Mac computers. Apart from that it’s just a simple video presentation maker.
The Keynote interface is simple and no-frills. The tools are organized in small tabs that don’t take up too much space on the dashboard and editor. Slides are listed on the left, tools are on top and settings are on the right.
Undo and redo options are controlled with keyboard shortcuts ctrl+Z and ctrl+Y.

Keynote has a number of available templates to start designing. There haven’t been any new ones added to the program lately. You can import any templates from third party sites like Envato.
The only available visuals in Keynote are icons and charts. Images and videos can be uploaded from your computer easily but there aren’t any available inside the software. The visuals that are available in the software can all be animated
Keynote offers a number of charts and graphs in three different styles, flat, 3D and interactive. Input the data in a sheet inside the program manually.
Branded video presentations are created easily by using a brand’s color palette but Keynote will only let you use Apple fonts.
Upload audio clips are uploaded into a video presentation directly for your computer. There are no available audio files inside the program. You can record a voiceover with your microphone.
There is no length limit to download video presentations. You can also download animated GIFs.
You can download video presentations from Keynote as mp4 or animated GIFs. They can’t be shared to social media straight from the program.
Keynote is free with all Mac computers. Windows users can get Keynote with an Apple iCloud account.
Who is Keynote For
Anyone can use Keynote, especially since it’s free. Even if it doesn’t have the greatest of features, it can create any sort of simple video presentations for any industry. Keynote is a great choice for students who always need to create presentations for class .
Vyond is the new name for GoAnimate, a recognized video presentation software. The new rebrand has also come along with a new look and more features. Vyond video presentations are all about the characters and the number of ways they can be customized is pretty extensive.
Apart from that, all other features are pretty standard, there are backgrounds and sets for the characters to interact in.
Vyond is a cloud-based video presentation software.

The Vyond editor is called Vyond Studio. The tools are all hiding behind a menu of tabs so the editor is generally empty of clutter for easy editing. Tutorial bubbles help when you’re new so you can get used to all the tools and where they are.
The bottom of the screen is taken up by an extendable timeline editor that lists scenes, frames and all objects in order of animated settings.
There are undo and redo controls.

All the templates in Vyond are separated into three categories: contemporary, business-friendly and whiteboard animation. There are no complete templates to start with.
When you choose one, the Vyond Studio opens up with one starting scene and all the continuing slides are created with different backgrounds, props and characters.
The main visuals in the Vyond Studio are the characters, props and backgrounds. The characters are highly customizable, to the point of face angle and animated actions.
There are hundreds of props that can be arranged with the characters and backgrounds to create infinite combinations.
All the visuals can be animated with different movements and styles. All these animations are controlled in the bottom bar to a granular level. Additionally, you can add camera movements.
There are some customizable charts that can be added to the Vyond video presentation. Data can be entered into the editor and the charts can be color-coded. The available charts are pie charts, line charts and percentages.
Vyond doesn’t offer a brand kit but colors can be customized with hex numbers . In high pricing tiers, companies can create a unique character and import fonts.
The best aspect of audio in Vyond is that voice overs are synced to the character’s mouth movements. Apart from that, you can add background music.
Videos can be downloaded as videos of GIFs but only with paid subscriptions. Higher subscriptions offer higher quality video output. Videos are only available in horizontal format.

Annual Pricing is as follows:
- Essential: $25/month
- Premium: $54/month
- Professional: $92/month
Who is Vyond For
The video presentations made with Vyond are good for people that need to create explainer videos in one place and like to have complete control over the animations. The learning curve for the animations can be a bit high so the people creating it need to know what they’re doing.

Wideo is an easy-to-use video presentation software. The tools are just what you need to create a video presentation fast. What’s surprising about Wideo is the granular control of the animations and transitions.
Wideo is a cloud-based video presentation software.

The Wideo editor interface is clean looking and with plenty of space to work in. The bottom section is the timeline editor which controls one scene at a time. There are options to preview one scene or the entire video.
On the left is the toolbar for adding elements to the scenes and the right bar is the controls for adding and organizing scenes.
Wideo has undo and redo controls.

Before starting a video presentation with Wideo you have the choice of around a hundred templates. Every template is available as landscape, square or vertical. You can still add more slides inside the template you chose.
The elements available in Wideo are backgrounds, images, videos, text effects and animated text scenes.
There are no data visualization options in Wideo.
There aren’t any specific branding tools apart from being able to choose the right colors. You can have white label rights on the higher plans.
You can add music audio files from the Wideo library or upload your own.
The video length limit depends on the subscription plan, from one minute to ten minutes to 30 minutes.
Videos can be downloaded as horizontal, square, or vertical orientation as mp.4. They can also be uploaded to YouTube or shared to Twitter or Facebook. They can also be embedded.
There are three plans for Wideo. The subscriptions are as follows:
- Pro +: $79/month

Who is Wideo For
The Wideo video presentation software is great for content creators that need to make videos or social media posts, ads and simple explainers.

Promo (formerly known as Slidely) is a cloud-based visual content creation program that offers video presentation slide designs. You can create videos with a horizontal format that can work as presentations.
They don’t call their creations video presentations but rather video ads and marketing videos . This makes sense since the available text area is limited and there are nonexistent data visualization capabilities.

The Promo editing interface is simple and to the point. They’ve set up a simple video editor with clips and tracks to separately edit the text, visuals and audio The controls are simple but effective.

Promo has over 2M pre-designed templates to choose from in a variety of categories. The first time you log in, an onboarding wizard takes you through the choices to show you the templates that suit your needs.
All the templates are easy to customize but have limited capabilities when it comes to text length. You can only add 100 characters to each text block.
That being said, all the text options are nice but can’t be changed too much apart from the font and color and alignment.
The Promo video presentation maker has millions of stock images and video clips from Getty Images and Shutterstock. Upload your own images or short .mp4 videos. Uploaded videos can be trimmed to fit the overall composition.
There are no data visualization tools in Promo.
In paid plans, you can upload a watermark logo, use hex colors and upload fonts. There is no set Brand Kit, but in higher tiers, videos are white-labeled so that companies can apply their branding.
The program offers some song tracks. You can upload your own songs and recordings.
The longest video you can make with Promo is five minutes.
Videos in all pricing plans are downloaded as mp.4 in HD. Higher plans offer Full HD. The available sizes are square, horizontal, vertical and banner.
The Free plan only lets you create videos, not download any. To be able to actually download or share videos, you need to get a subscription.
The pricing options are as follows:
- Basic: $29/month
- Standard: $59/month
- Pro: $199/month

Who is Slidely For
Promo by Slidely is for content creators that need to make simple but eye-catching video presentations. These videos are best suited for social media.
11 Premiere Rush

Premiere Rush is more of a video editing software than a video presentation software but it still works for the same purpose. Especially if the presentation needs detailed video editing.
This software is part of the Adobe Cloud and is like an easy version of Adobe Premiere, one of the best video editors in the industry. You’ll need footage to create a video presentation with Premiere Rush. It can be images or video clips.
Premiere Rush has a desktop and mobile app, they communicate with each other. These are both downloadable programs.

The Premiere Rush interface is like a classic video editing software. The timeline and tracks are at the bottom of the screen, the media is organized on the left and the tools are on the right. All the video editing tools are on the bottom left of the menu.
Premiere Rush might need a bit of getting used to and another tool to work with alongside it. Visme is a great option where you can create a perfect video presentation and then import it to Premiere Rush to make longer and more elaborate videos.
Both desktop and mobile versions have undo-redo controls.
There aren’t any templates to choose from when starting a project, but there are motion graphics title templates that can be added to a video in the editor. The same applies to creative transition templates between clips.
Apart from titles and transitions, the software has all the editing features you need for a professional video.
There are no data visualization integrations in Premiere Rush but you can import any media from another software as long as it’s an image or a video clip.
When it comes to branding, you can apply any font in your computer to the titles you use. But titles can’t be customized, they come as they are.
You can upload any audio or voice over you’d like to add. There are no available clips in the software.
There is no limit to how long your video can be, but keep in mind that the more resources you add to a timeline, the heavier its file will be.
Videos are downloaded as MP4. They can also be shared directly to Facebook, YouTube, Instagram and Behance.
Premiere Rush and Premiere Pro are two tools within the Adobe Creative Cloud. You can get both for $20.99/month, or get access to the full creative suite for $54.99/month.

Who is Premiere Rush For
This video presentation software is good for content creators that want to create content on the go. Premiere Rush is not your regular presentation software so it’s more for a different kind of presentation.
It’s more about the footage than the info, but that doesn’t mean that you can’t create presentations.
12 FlexClip

FlexClip is a web-based video maker that allows users to create professional-quality videos for various purposes such as business, education, personal, and more.
One of the most useful tools on FlexClip is the AI text-to-speech feature. This feature allows users to add voice overs to their videos without the need for expensive equipment or professional voice actors.

The FlexClip interface is user-friendly and intuitive, making it easy for beginners to create high-quality videos. The editor features drag-and-drop functionality, a timeline, and a variety of editing tools, such as text overlays, transitions, and filters.

FlexClip offers a wide selection of templates for different video types, including social media videos, business videos, and personal videos. These 5000+ templates are customizable and can be used as a starting point for creating a video.
The FlexClip library includes millions of stock photos, videos, and music tracks that users can use in their videos. Users can also upload their own media files to use in their videos.
Currently, there are no tools for visualizing data.
Users can add their own logos, watermarks, and brand colors to their videos to create a cohesive brand identity.
FlexClip offers a wide selection of music tracks and sound effects that users can use in their videos. Users can also upload their own audio files or record voiceovers directly within the editor.
The length of the videos permitted is determined by the subscription plan, ranging from one minute to an unrestricted video duration.
FlexClip videos can be downloaded in MP4 format in resolutions ranging from 480p to 1080p. Videos can also be shared directly to social media platforms or embedded on websites.
FlexClip offers a free plan with limited features, as well as two paid plans:
Plus: $9.99/month
Business: $19.99/month

Who is FlexClip For
FlexClip's user-friendly interface and extensive library of templates, stock footage, and music make it an ideal choice for individuals, small businesses, and marketers who want to create video presentations that stand out. With FlexClip, users can easily customize their videos by adding their own logos, images, and text, without having to learn complex video editing software.
The AI text-to-speech and auto subtitle features take video editing to the next level by making it more accessible and efficient for creators of all levels.
Q. What Is a Video Presentation?
A video presentation is a dynamic and engaging method of delivering information to an audience. It involves using moving visuals and sound to explain concepts, promote ideas or convey messages.
Unlike traditional text-based presentations, it uses graphics, animations, voiceover, music and video clips to create an interactive and engaging experience.
Q. How Do You Make a Presentation Video?
Making a video presentation involves several steps. Initially, you should clearly define your topic and objectives, then create a storyboard or script detailing what you plan to say and show. Use this as a guide when filming or recording the video.
Choose a reliable video editing software from the list we provided in this article. These tools will help combine your visuals, add audio or voiceover, include transition effects and arrange the video clips in a logical sequence.
Remember to review thoroughly and edit where necessary. Once you're satisfied with your video presentation, export it into an appropriate format that suits your distribution channel.
Q. Why Make a Video Presentation?
Video presentations are especially effective for capturing and retaining the audience's attention. They make complex topics more digestible by breaking information into chunks, accompanied by appropriate visuals.
Also, you can access them remotely, reaching a wider, potentially global audience. Video presentations can effectively communicate emotions, making your message more persuasive and impactful.
Q. What Should Be Included in a Video Presentation?
A successful video presentation should always be thoughtful, engaging and impactful. Here are some of the critical components of a good video presentation:
- Clear Objective: Outline your core message from the start. It sets the course of your entire presentation.
- Engaging Script: Craft a script that's clear, concise and appealing to your audience.
- Relevant Visuals: Use relatable images, graphics or videos to support your message and help your content attract viewers.
- Quality Audio: Ensure your audio (voiceover, dialogue, or music) is clear. Poor-quality audio can ruin the viewing experience.
- Smooth Transitions: Connections between segments or slides should be logical and seamless to avoid disrupting the flow.
- Call to Action: Include a call to action to guide your audience to their next step, like visiting your site, attending an event or buying a product.
Create Your Own Video Presentation With Visme’s Video Presentation Software
As you can see, there are many options to help you create a video presentation . But none of them have the quantity and quality of tools that Visme has.
Other tools have more animated characters but no data visualizations. Others have 3D visuals but no audio files or brand kits. Only Visme has it all, making it the perfect tool for anyone.
Visme is both a video presentation creation tool and video presenter software. No need to download videos or even share them when you have to present them in a Zoom meeting. Simply present directly from Visme and show the best version of your content.
Register for a Visme subscription and give your team the tools to create better content every day.
Create captivaing video presentations with Visme

Trusted by leading brands
Recommended content for you:

Create Stunning Content!
Design visual brand experiences for your business whether you are a seasoned designer or a total novice.
About the Author
Orana is a multi-faceted creative. She is a content writer, artist, and designer. She travels the world with her family and is currently in Istanbul. Find out more about her work at oranavelarde.com
Unsupported browser
This site was designed for modern browsers and tested with Internet Explorer version 10 and later.
It may not look or work correctly on your browser.
- Production & Recording
7 Best Video Presentation Maker & Recording Software for 2023
Video presentations are a great tool for communication, education, and marketing. If you’re a presenter, educator, business owner, or a content creator, then having access to a great video presentation maker or presentation recording software, can be essential. We've got you covered. In this article, we'll take a look at some of the best platforms to record a presentation, for 2023.
7 Best Video Presentation Maker & Recording Software for 2023
1. microsoft powerpoint.

Before the multitude of options we have now, PowerPoint was the king of presentation makers. It’s evolved with technology to include the ability to make video presentations, with a range of templates and customisable assets like charts and graphs. You can make something that looks pretty great without needing a lot of design or video skills.
|
|
|
| Trial | Try it for free for 1 month |
| Microsoft 365 Personal | £59.99 per year (for one person) |
| Microsoft 365 Family | £79.99 per year (for up to six people) |
Pros and Cons
|
| Most of us are familiar with Microsoft products and so PowerPoint will always feel intuitive to many. The animations and transitions are plentiful and easy to use. It’s part of Office 365 so if you already have that then you won’t need to spend more money. |
|
| Its video capabilities are limited, so if you’re looking for something more advanced in your editing, PowerPoint probably won’t do it. Compatibility issues when moving around software – things like missing fonts – can be a frustrating issue. |
2. iSpring Suite

iSpring prides itself on looking and feeling like PowerPoint, so one plus for this software is it’s really going to feel intuitive if you’ve used Microsoft programs before. iSpring will let you convert your PowerPoint presentation to online courses, combine videos with slides easily, and edit your videos right in the suite. There are 14 interactive templates to choose from for eLearning, too.
|
|
|
| Trial | A free trial |
| iSpring Suite | £685 per year – eLearning authoring toolkit plus tech support |
| iSpring Suite Max | £863 per year – as above, with text to speech, content library, and the online collaboration tool |
| iSpring Suite Premium | £1870 per year – as above, with a video course to help you design content, plus VIP tech support |
|
| A lot of eLearning features which make it ideal for educational and training presentations. It integrates with PowerPoint, and looks and feels like it too. |
|
| It’s expensive! If you want to collaborate online that comes with a heftier price tag. If you have specific needs when it comes to branding then you might find customisation more limited than other offerings. |

Present remotely, in person, or send out your presentation with Prezi, who’ve been making virtual video presentation tools since 2009. Prezi’s cloud-based and their basic license is free (with limits), so it’s a pretty good place to start. Prezi is non-linear and so it offers a different approach to other video presentation makers. You can begin wherever you like, and sort of… dot around the presentation in any order you want which can be creatively freeing!
The pricing is a little overly complicated…
|
|
|
| Basic | Split into Basic and Plus. Basic lets you make 5 presentations for free, Plus is £15 per month for unlimited projects. |
| Individual | Split into Standard which is £7 per month, Plus at £15 per month and Premium at £19 per month, with increasing access to tools as the scale goes up. |
| Students & Educators | Split into EDU Plus at £3 per month, EDU Pro at £5 per month, and EDU Teams where you’ll need to contact them for a quote. |
| Business | Split into Plus at £15 per month, Premium at £19 per month and Teams which again requires you to contact Prezi. |
|
| The dynamic and engaging style of creation is nice, with an emphasis on storytelling, which will be appealing to those in education. You can collaborate and co-author easily. |
|
| The first pro is also the con – it’s a new way of working for many of us, so it’ll take some getting used to. The pricing structure is annoyingly complicated. While you can download, most functionality will require an internet connection. |
4. Camtasia

Camtasia is an all-in-one video presentation recording software. You can record your screen, add voice-overs, notes, plus customise your video with pre-made templates. Camtasia pitches itself at people making video presentations for educators, trainers, and marketers.
|
|
|
| Individual | £295.91 buy outright licence plus one year of support |
| Business | £295.91 (per user) buy outright licence plus one year of support and site licences. There’s volume discounting too, so if you buy more business licences you’ll get an overall reduction in price. |
| Education | £295.91 (per user) buy outright licence but currently discounted to £210. As above but is tax-exempt (if ordering in the US) |
| Government & Non-Profit | £265.34 buy outright license (per user), as above and also comes with volume discounting. |
|
| It does everything in one place. A buy outright license is less usual but definitely a pro factor for those who can’t do a monthly fee. There’s multi-track timeline editing to give you better control over your editing. If screen recording is your biggest priority then Camtasia will work well for you. |
|
| It’ll take time to learn all the features. It’s more expensive outright, but obviously you have to weigh that with how long you’re likely to use it, plus a free update to a newer version is included. It has limited collaboration features, and it’s not the best at animation and visual effects. |

Lumen5 is an AI-powered video presentation software that can analyse your written content – blogs for example - and turn it to video by suggesting relevant visuals. There are hundreds of customisable template designs too, so you can get started with video presentations really quickly.
The prices here are based on being billed yearly, or it’s 25% more expensive.
|
|
|
| Community | Free forever but videos are watermarked with Lumen5 and limited to 720p resolution. |
| Basic | $19 per month. Everything in Community but no watermark and access to stock images, videos, and icons. |
| Starter | $59 per month. Everything in Basic but 1080p resolution and more customisation options. |
| Professional | $149 per month. Everything in Starter but some extra features like adding your own watermark and fonts. |
| Enterprise | Call for a quote. Everything in Professional but greater access to more features, plus translations. |
|
| With AI text conversion it opens up a lot of options that will save you a lot of time. Editors need very little in the way of experience to use it. You can create videos tailored for specific social media sites. |
|
| The tiers are expensive to get even some basic functionality. Lumen5 doesn’t seem to offer a quality above 1080p which might be a deal-breaker for some. |
5 Steps to Amazing Mini Presentations | How to Make Short 5-Minute Presentations
Creating a mini-slideshow? Let's explore how to make a successful short presentation. In this video, we'll discuss five-minute presentation topics, look at some five-minute presentation ideas, and explore some essential tips for 3-5-minute presentations.

6. Animaker

Another AI-driven video presentation maker featuring a drag-and-drop system meaning it’s easy to use. You can build and animate your own characters and there’s an auto lip-sync feature so you can add voice-overs without having to do too much animation work.
The prices are based on paying annually which saves 50%.
|
|
|
| Starter | $300 per year. 15 minute video length, limited premium downloads and full HD quality videos |
| Pro | $468 per year. Everything in Starter but increased allowances and quality. |
| Enterprise | Contact for a quote. Everything in Pro but unlimited allowance plus 4K quality videos. |
|
| Some nicely made but simple character animations. Text-to-speech and voiceover integration. You get more for your money than some similarly priced video presentation makers. |
|
| Customisation is limited. It’s an online tool so you’re relying on the internet. Limited export options. |
7. OBS Studio

OBS (Open Broadcaster Software) Studio is one of the best video presentation recording software options out there. It’s free and open source, with advanced features like overlays, screen recording, and easy sharing options.
|
|
|
| Free | That’s it. It’s free! Yes, all of it. |
|
| It’s free, and constantly being updated and improved by a community of developers. It has multiple platform support, and a lot of advanced features and customisation options. |
|
| If you’re a video newbie, its vast number of options might be a steep learning curve. It doesn’t look visually appealing and creative like some other options. It doesn’t have a built-in video editor. |
Summary: Which is the Best Platform to Record a Presentation?

Like most choices, you need to know exactly what you want before you can make a decision like ‘which is the best platform to record a presentation,’ so as a little summary, here are some of the main considerations when it comes to presentation recording software.
OBS Studio . Let’s face it, cost often matters most to us. You can rarely beat free, so if it purely comes down to cost when you’re thinking of your video presentations, then this is a fantastic piece of software. Ideally, you either need some prior knowledge of streaming and recording programmes like this, or be prepared for a steep learning curve. You’d also need a separate video editing suite. If you’re screen recording or live presenting (and perhaps even recording that presentation) then OBS Studio is perfect.
Familiarity
PowerPoint . So many of us are used to a particular type of software and it can be hard to start again. If you’re looking to get started quickly with something that feels intuitive to you, then PowerPoint might be for you. If you already have 365 then PowerPoint is included, so this might also be a cost consideration.
Creativity and Storytelling
Prezi . The non-linear arrangement might take some getting used to, but the canvas-like interface means you can get all of your visual ideas down in whatever order you like, making for a more creative process.
E-Learning and Course Content
iSpring . It’s made for this type of video presentation and so it incudes everything you might need: quizzes, multimedia, narration, and so on. It comes with a hefty price tag in comparison to some, but if you’re a heavy user then the benefit of its many features will probably outweigh that.
AI or Automated Video Creation
Lumen5 and Animaker . Lumen5 is great if you’re looking to turn a lot of text into engaging visual presentations, and Animaker will let you make characters and animations really easily. Both will let you automate large parts of your creation process.
Video presentations are an essential and accessible tool for communication and content creation, and are particularly valuable when it comes to learning and education. The availability of feature-rich video presentation recording software means it’s easier than ever to create engaging and professional-quality video presentations.
When it comes to choosing which is the best platform to record a presentation, we hope that you’ve found some great options to look at in this article. Each offers a range of functionalities that cover a wealth of different needs and skill levels. Whether you’re an educator, business professional, or a content creator, these presentation recording software choices – whichever you pick! - will help you captivate your audience and deliver fantastic video presentations in 2023.
More Great Free Presentation Resources

About This Page
This page was written by Marie Gardiner . Marie is a writer, author, and photographer. It was edited by Gonzalo Angulo . Gonzalo is an editor, writer and illustrator.


Integrations
Inspiration
Consideration

Go hybrid with Prezi
It’s a new world. Are you ready? Here’s how Prezi helps your team thrive in today’s hybrid workplace.

Prezi Video explained
We’ve compiled these quick, easy-to-follow tutorials to make you a Prezi Video master in no time.

The science
Learn to grab their attention and keep it with presentation advice from the pros.
Create moving, zooming presentations that grab attention and keep it.
Appear right alongside your content while presenting to your audience.
Make stunning interactive charts, reports, maps, infographics, and more.
Record video that captures and keeps audience attention
Prezi helps you create more personalized and engaging videos that you can share with the click of a button – perfect for staying in touch with hybrid and virtual teams asynchronously. Instantly record video messages, narrate presentations, and create product demos for free using Prezi Video. With brand kits and professionally-designed templates to help get you started, it’s never been easier to record video.
1-844-773-9449 8:30 am–5 pm PST

Trusted by business both large and small

Nowadays, more people are connecting with teams and customers asynchronously through email and collaboration tools. This saves everyone a lot of time out of meetings, but lacks a sense of community and teamwork that people get when they work together. Next time, instead of sending another email update to your team, create and record a video in Prezi, then share it with your team through email or messaging apps like Microsoft Teams and Slack. Not only will it give them a better sense of your personality, your video will be more attention-grabbing and memorable than an email.
With Prezi Video, you have the unique ability to show your content next to you on screen, helping you to maintain a human connection with your audience, even when you’re discussing dense material. Use visual cues, like graphs, images, text, and even video-in-video to help your audience pick up on more information.
There’s a lot that goes into your brand, and it can be difficult to keep everyone on the same page — until now. Create a brand kit in Prezi by uploading your logo, fonts and colors, and rest easy knowing your team will have everything they need to record videos quickly and easily.
- Create a Prezi account and open Prezi Video in your dashboard.
- Choose from our library of professionally-designed templates .
- Upload images, GIFs, and videos or select visuals from our Unsplash and Giphy integrations.
- Add your text and make the final adjustments to your content.
- Practice and record your video.
- Share with a link, embed on another site, or download the video and share the file.
Record your video in Prezi
Find the perfect video template
Record a video that’s eye-catching and engaging by getting started with a pre-designed template. Choose from a professionally-designed presentation template or select a video template, then simply customize the content to fit your brand and your promotion.

Check out more video templates
Even more reasons to choose Prezi for your team

You’re in the driver’s seat
License management Add or remove team members, and transfer licenses with ease.
Content ownership Keep control of your team’s content, even when someone leaves.
Privacy control Publishing settings and overviews let you manage who sees what.
MSI Installation Remote software deployment gets everyone the latest versions fast.

We’re your biggest supporters
Phone and chat support Our customer support experts are standing by to help.
Dedicated success manager Let your personal guide get your team up and running.
Branded templates Get your own template with your fonts, logo, and colors.
Advanced training* Get personalized trainings and webinars, plus the option to get Prezi-certified. *Available with software commitment minimum

Your security is our priority
SOC2 compliance We stay compliant and constantly up-to-date with SOC2 requirements.
Continuous monitoring We constantly scan and test our infrastructure and application.
Cross-team integration Our security, engineering, and product teams partner with each other closely. Learn more about our security measures
Frequently asked questions
How do i record a video of a presentation.
Select any presentation in your Prezi library to open it in the editor and click “Record video.” Record yourself delivering the presentation. You can pause the recording at any time and trim the beginning and end after you’re done. Save your video and choose how to share it.
Can I use my existing PowerPoint or Google Slides?
Yes! Upload an existing presentation from PowerPoint or Google Slides to Prezi to convert it to a Prezi presentation. In order to use a Keynote presentation, you’ll need to export it as a PDF and import that.
Do I need a separate camera or microphone to record?
Nope. All you need is your desktop’s built-in camera and microphone to record a video on Prezi. However, you can always use your own equipment to improve the quality of your video. Check out our article on setting up a home studio for tips.
Discover more on our blog

Put Prezi to work in your business
Get a demo, try out cool features, and learn how Prezi can make your hybrid team more efficient.
Best screen recorders of 2024
We've tested out the best screen recorders
- 1. Best overall
- 2. Best for Mac
- 3. Best free
- 4. Best for business
- 5. Best for photos
- 6. Best on a budget
- 7. Best for basics
- 8. Best easy-use
- 9. Best browser extension
- How to choose
- How we test

1. Best overall 2. Best for Mac 3. Best free 4. Best for small business 5. Best for photos 6. Best on a budget 7. Best for basics 8. Best easy-use 9. Best browser extension 10. FAQs 11. How to choose 12. How we test
The best screen recorders help you capture videos and images straight from your computer monitor. We put the top apps and software to the test to see which is best for recording your screen.
From capturing the entire desktop to grabbing an image from a single window, a screen recorder is a great way to let your audience see what you see. Whether you're presenting, streaming, gaming, or creating videos, they're a really useful tool, letting you add professional post-production polish to any stream. And there are loads of them around. That can make it difficult to know what's best for your uses.
We've tested the best free screen recorders and the best screenshot tools for Mac . Now, we're looking at the top paid options for capturing your display. As part of our review, we've compared performance and usability, explored support for webcam capture, picture-in-picture modes. For extra post-production polish, we tried out any video editing options and titling tools, as well as checking platform compatibility across Windows and Mac.
Best screen recorder of 2024 in full:
Why you can trust TechRadar We spend hours testing every product or service we review, so you can be sure you’re buying the best. Find out more about how we test.
Best screen recorder overall

1. Camtasia
Our expert review:
Specifications
Reasons to buy, reasons to avoid.
TechSmith’s Camtasia is one of the best screen recording tools we’ve reviewed. It is as easy to set up as the developers could make it, the recording is flawless, the editing capabilities are incredibly powerful, and truly set it apart from most of the competition. The fact it works on both Macs and Windows is just icing on the cake.
As well as capturing what's on screen, this fully fledged video editing solution features plenty of extras and edits on top too. Whatever you want to record, from PowerPoint presentations to games, Camtasia performs well. You're given a huge amount of control over what's recorded. For example, you can strip out or include audio, or add a webcam feed. Annotations, extra media files, transitions, titles and more can then all be dropped in with your footage. And for all that, the top screen recorder never feels too overwhelming.
However, the best tools come with premium price tags. Camtasia is no exception, with a one-off lifetime license fee, and the option to subscribe for annual updates. Alongside the next major revision of the software, it also includes support and access to training videos. So, best for power-users and professional organizations.
This might indeed sound like a lot, but if you’re serious about screen recording, you should definitely give this one a try, and take advantage of its generous 60-day free trial (you only need to register a free account in order to download it and check it out). Read our full Camtasia review .
- ^ Back to the top
Best screen recorder for Mac

2. ScreenFlow
Apple macOS actually comes with some of the best screen recorder tools built in – but ScreenFlow is a serious upgrade on what Apple's screen recording software can do on its own. Plus, it adds plenty of features and extra video editing tools.
With ScreenFlow, you can crop, pan, and zoom around different parts of your video recording. You're free to add annotations and callouts on top of the captured footage. It's a fully featured and intuitive video editor, as well as a comprehensive screen recording app.
As for the actual capturing part, it couldn't be any easier to use. Select your video and audio sources, and away you go. Footage from your webcam can be easily added into your main video, and the whole process is slick and streamlined throughout. A free trial is available.
Read our full ScreenFlow review .
Best free screen recorder

3. OBS Studio
OBS Studio is our pick for best screen recorder that's free and open-source - and with good reason: available on Windows, Linux, and Mac, the screen recording and streaming software lets you effortlessly blend different sources and audio tracks together, packing in professional-grade features typically only found in expensive, premium capture tools.
Built with gamers in mind, live streaming options feature prominently, but you can just as easily save your recordings to disk. On top of that you get advanced features like noise reduction (for your voiceovers) and the ability to set transitions between your scenes.
All of this is overkill if you just want to record a quick clip – and to the complete beginner, OBS Studio perhaps isn't the best screen recorder for you.
When we tested out the product recently, we thought it was a great tool, though hampered by frustrating design choices and minor glitches. We also felt the user interface could overwhelm newcomers to the software.
During our review, we wrote: "It’s a bit like you have to wrestle with its way of working, until you capitulate and have to work on its terms. It feels like there’s always one too many clicks to get the work done."
So, it's not as intuitive to set up or use as some rivals. But OBS Studio is free, open-source, and has just about every tool you need to make capture, stream, and create content. You just need to get used to the interface.
Read our full OBS Studio review .
Best screen recorder for small businesses

4. EaseUS RecExperts
EaseUS RecExperts offers one of the best screen recorders for Windows and Mac.
Packed with useful features, including a scheduler and GIF creator, the software can capture footage at up to 4K /60fps. That makes it a good screen capture tool for delivering presentations, webinars, gaming or just quickly showing how to perform a specific task on a computer.
When we tested out the screen recorder, we highly rated how easy it was to set-up and use. In addition to capturing your screen (or an area of it) and system sounds (if you select it), RecExperts auto-detects any connected webcams and microphones.
Because of this, you shouldn’t need to fiddle around in the settings to capture everything you need. It’s very straightforward, with an interface built for seamless navigation.
Unfortunately, like FlashBack Express, RecExperts offers no meaningful post-production editing tools (you can trim, watermark, and add intros and outros, but not much else).
The free version of the tool is also little more than a trial - with a severe one-minute recording restriction. However, monthly and annual subscription plans offers unlimited screen capturing and all other tools.
Read our full EaseUS RecExperts review .
Best screen recorder for photos

5. TechSmith Snagit
Techsmith’s Snagit is a versatile multi-platform screenshot tool with an extensive range of post production annotation capabilities.
You can also record your screen, including your webcam, and this is where the bulk of the improvements come in Snagit 2024.
The new features include being able to stitch clips together, giving you a form of rudimentary video editing, and alleviating the need to create the perfect video in a single take. There’s also a way to visually highlight your cursor, including a nice animation when you click on something, making it much easier for viewers to see and follow it. It’s also now possible to connect to Screencast, Techsmith’s online collaborative service.
It’s an excellent tool, well implemented, and brilliant. The screen capture side is improving nicely, if gradually, and might be more than enough in its current state if your needs are simple.
You can try Snagit for free for 15 days, and you can purchase it for $63, which includes a year of support and upgrades (further upgrades are $35).
Read our full TechSmith Snagit review .
Best screen recorder on a budget

6. Ashampoo Snap
Ashampoo’s Snap is a PC-only screen capture tool that aims to let you take images and videos of your desktop, and any software you might choose to run on it.
The image capturing side of things is great, with numerous options both before and after taking the shot, and the editor is filled with tools to let you customize your photo as much as you’d like.
By contrast, the video section feels more like a work in progress, with limited tools, and few options. Even the toolbar works in a different way here (it disappears when taking an image, but remains on the screen during video capture), making both sides of this software feel like two separate entities bolted together against their will.
Still, it is good value at $13 per year for three computers, or a one-off fee of $40 for a single device.
Read our full Ashampoo Snap 14 review .
Best basic screen recorder

7. Icecream Screen Recorder
Icecream Screen Recorder is ideal when you don't need the the hefty feature sets of the likes of Camtasia or OBS Studio. This screen capture software, available on Windows and Mac, is a more compact and friendly alternative - especially for those searching for the best screen recorder for low-end PCs. .
Fire it up, click the record button, select the part of the screen to record, and you're off.
Choosing your recording area and saving your footage couldn't really be any easier, though frankly, it's not the most precise tool. The screen recording software lets you draw on your footage, add a webcam feed, zoom during captures, and select final video quality.
The free version has limits - including a five-minute time restriction. Upgrade to the Pro version to end this, and access more output formats, convert between formats, add watermarks, and schedule screen recordings. All features that can come in handy.
Best screen recorder for ease of use

8. TinyTake
TinyTake is a really simple screen recorder for Windows and macOS. It has all the features you're likely to need, none of the fluff you don't, and it's one of the best screen recorders when it comes to sharing videos and photos with others.
As for the main capturing process itself, once you've created an account (which isn't optional), you can be recording your computer screen in a couple of clicks. Map the area you want to capture, click the start button, and TinyTake effortlessly handles the rest.
And that really is all there is to it. Like Icecream Screen Recorder, it's a great if you're capturing on a low-end PC or laptop.
if you want to add annotations, or record anything longer than five minutes, you'll need to upgrade to the paid-for version of TinyTake. For simple screen recording and easy sharing to places like YouTube , though, it's ideal.
Best screen recorder browser extension

9. Screencastify
Screencastify is a screen recording browser extension for Chrome - the perfect capture tool if you're running a low-end PC or don't want to install software on your computer.
Just because Screencastify is a Chrome add-on doesn't mean you're restricted to recording browser windows, although you can do that if you want. The tool is able to record in full-screen mode as well, and supports audio from your system or a microphone.
The extension is even smart enough to embed a feed from your webcam as well. On-screen drawings and annotations are supported, too.
So you've got lots of flexibility, even if you don't get quite as many bells and whistles as you do with other programs. To use the screen recorder without a watermark and for more than 10 minutes at a time, a paid upgrade is required.
We've also listed the best video editing software for beginners .
Best screen recorders: FAQs
What is screen recording.
Screen recording lets you capture the action happening in individual windows, the whole desktop, or selected area of your computer using software, an app, or a browser add-on. There are plenty of reasons you may need to capture your screen - they’re essential tools for content creators and live-streamers, but just as useful for sharing projects with colleagues, creating tutorials, or just grabbing content from a website for later use.
How do I record my screen on a PC or laptop?
There are two main methods for screen recording on a PC or laptop: dedicated software or a browser extension. Browser extensions are lightweight, and typically have limited options beyond which window or area you want to capture. As a browser-based tool, they work best when you’re connected to the internet. Screen recording software tends to offer a lot more options, tools, and control over your screengrabs. Many offer useful features like highlighting screengrabbed images and editing videos.
How do I screen record on my Android or iPhone?
Most modern phones have screen recording and screen capture tools built in. For example, on the latest Android phones, pressing and holding the power button lets you take a quick screenshot, with a screen recorder option tucked in the notification area. With it being this easy, casual users may not need a screen recorder app for their mobile device. Regular users, however, will find several great options in the App Store and Google Play Store - just make sure you trust the developer and check what data the apps capture.
How to choose the best screen recorder for you
When choosing which screen recorder is best for you, there are five main areas you’ll need to explore.
+ Use Identify what you need to capture. Some of the best screen recorders are ideal for a specific purpose - for example, OBS Studio is the best for recording games, but might not fit in the workplace.
+ Platform Decide which device is capturing footage. While most desktop options have screen recorders for Windows 10 and Mac available, you’ll need to find separate alternatives for iOS and Android.
+ Budget Work out how much your budget is. Top-end screen capture tools like Camtasia offer professional-grade recording and features, but those perks come at a premium.
+ Extras Many of the best screen recording software tools let you annotate, add text and cursor actions. Others come loaded with video editors. Find which has the tools you need included. Always check which parts of the screen can be recorded, and the output resolution and format.
+ Experience The best screen recorder is the one you enjoy using most - and that’s entirely subjective. Look for the capture app that best fits your workflow, needs, and experience level.
How we test the best screen recorders
Testing the best screen recorders, we start by assessing how well the software performs. During operation, we expect to see the very best screen capture tools running smoothly on the device it’s intended for; exported videos should play perfectly and stutter-free.
We evaluate how closely the screen recording software meets the needs of its target user-base. Those looking to record meetings have different requirements to Let’s Play-ers, and the software should be designed with those users in mind.
User experience, and the interface, is important. It’s about finding a balance between powerful features and intuitive use.
More complex recording software, like OBS Studio, should be accessible, even if the learning curve is steep, while streamlined tools like Screencastify and TinyTake should still properly record footage, even if the interface is simple or sparse.
The best apps also pack in plenty of features, to help craft professional-looking videos. We’re not simply looking for the largest toolset - users expect the largest useful toolset, with features that help them achieve their goals. Again, these should be clear and accessible to all users, and function above and beyond what’s expected.
Get in touch
- Want to find out about commercial or marketing opportunities? Click here
- Out of date info, errors, complaints or broken links? Give us a nudge
- Got a suggestion for a product or service provider? Message us directly
- You've reached the end of the page. Jump back up to the top ^
Are you a pro? Subscribe to our newsletter
Sign up to the TechRadar Pro newsletter to get all the top news, opinion, features and guidance your business needs to succeed!
Steve is TechRadar Pro’s B2B Editor for Creative & Hardware. He explores the apps and devices for individuals and organizations that thrive on design and innovation. A former journalist at Web User magazine, he's covered software and hardware news, reviews, features, and guides. He's previously worked on content for Microsoft, Sony, and countless SaaS & product design firms. Once upon a time, he wrote commercials and movie trailers. Relentless champion of the Oxford comma.
- Luke Hughes Staff Writer
- John Loeffler Components Editor
Sage is off 75% for six months if you grab it today
Xodo PDF editor review
'AMD should bite the bullet and buy them out' — Intel reveals game-changing technology for enterprise, but with its share price at its lowest in a decade, is it too little too late?
Most Popular
- 2 US rolls out more tech export restrictions on China, Russia, Iran
- 3 Serve your country through cyber, White House says
- 4 New TCL 50 Pro NXTPAPER could be the perfect cheap smart/dumb phone hybrid
- 5 VPN demand is on the rise worldwide – the US calls on Big Tech to step in
B2B Marketing Blog | Webbiquity
The B2B Marketing Blog
The 15 Best Screencasting and Online Presentation Tools
April 18, 2017 by Tom Pick
Revised June 29, 2022 Revised September 1, 2021 Revised August 12, 2020
Screencasting tools are great for explaining how a software application works; demonstrating how to use it; or illustrating any online process. Combined with presentation tools, they’re also ideal for enhancing online meetings, as well as broadcasting and recording presentations.

Which tool is “best” depends upon your specific needs. Some are designed primarily for creating software demos and tutorial videos, while others offer more sophisticated functionality for developing graphically rich marketing content.
Whatever your objectives, here are 15 of the best tools for recording onscreen actions, editing the screen video, adding text and other graphical elements, converting among screen capture video formats, and sharing the final output with your target audience.
Screencasting Tools
1) CamStudio Google Review Count: 206
CamStudio can record screen and audio activity on your computer as AVI or SWF video files. You can add screen captions to recordings, use custom cursors, and record your whole screen or just a portion of it.
Sample review: “CamStudio is a free software solution for creating on screen tutorials and other types of screencasts. CamStudio allows you to generate optimized streaming Flash videos — SWF files — of your recordings.” — Web Marketing Today
Pricing: free
Showcase reviews: Web Marketing Today
2) Screencast.com Google Review Count: 200
A screencast storage and sharing site. Upload and store high-quality screen capture video, share via link / widget / RSS feed, host in any format (Flash, WMV, Quicktime, etc.). Owned by TechSmith, works well with Jing and Camtasia (see below) as well as SnagIt .
Sample review: “Screencast.com is a resource for sharing your tutorials and demonstrations once completed. A free account allows for 2 gigabytes of storage, and 2 gigabytes of monthly bandwidth transfer.” — Web Marketing Today
Pricing: free or $10 per month
3) Jing Google Review Count: 196
Jing has been eliminated as a standalone product and absorbed in to TechSmit’s SnagIt screen capture tool .
4) Camtasia Google Review Count: 192
Record your screen actions or import camera footage then edit with the drag-and-drop video editor. Add titles, animations, music, animated backgrounds, icons, and transitions.
Sample review: “A really powerful and intuitive video screen capture platform that allows you to easily edit your videos to zoom in on certain areas of the screen, add annotation, callouts, and voice over, among other options.” — SnapApp
Pricing: $199 per license; discounts for volume purchases
Showcase reviews: BuzzBlogger, RazorSocial (Online), SnappApp
5) ScreenFlow Google Review Count: 182

Sample review: “Screenflow (is a) powerful video editing tool…best for a Mac…When you record, you can easily add in an introduction slide at the start and the end, add in music, cut out clips, combine clips and much more.” — RazorSocial (Online)
Pricing: $99
Showcase reviews: RazorSocial (Online), RazorSocial (Social)
6) Wink Google Review Count: 154
Wink is presentation creation software, primarily for creating tutorials on how to use software (like a tutor for desktop or web apps). You can capture screenshots, add explanations boxes, buttons, titles, etc., and generate a highly effective tutorial for your users. Exports in a variety of static graphic formats (e.g., BMP, JPG, GIF, PNG) but only Flash for motion video.
7) Screencast-O-Matic Google Review Count: 151
Record screen or webcam video up to 15 minutes long, and with the Pro version, edit video, draw and zoon, and publish to Google Drive, Vimeo, and/or Dropbox.
Pricing: free or $15 per year
8) Ezvid Google Review Count: 135
Free screen recorder software to capture, edit, and share on-screen action video.
9) Webinaria Google Review Count: 121
A tool to record software demonstrations and how-to tutorials, publish in Flash, and share and receive ratings. Add narration, save and edit recordings, and optionally add text.
10) Freeseer Google Review Count: 80
A free, open source, cross-platform application that captures or streams your desktop. Though originally designed for capturing presentations, it can also be used to capture demos, training materials, lectures, and other videos. It’s most useful for presenters at events, conference staff (for recording presenters), and instructors.
11) RecordIt Google Review Count: 62
Simple, downloadable, screencast recording tool. Record all of the action on your entire desktop or select just a specific area of your screen for recording.
Sample review: “Make your content stand out with animated screencasts. Record quick videos with Recordit and then turn them into animated gifs that you can put in your blog post. It’s a great way to make your article stand out from the rest. These also work well on Google Plus.” — BuzzBlogger
Pricing: free or $29 one-time
Showcase reviews: BuzzBlogger, HubSpot (Animated)
12) whatfix Google Review Count: 17
Create interactive guides for training programs to get employees or users up to speed more quickly on software workflow processes. Design your guide, insert pop-ups and instructions, and measure effectiveness with analytics.
Sample review: “WhatFix lets you create quick flows showing steps users should take. You can embed the widget on your web page or send your users to the “live” version of the link that will play all the steps on your actual web page…the process is so easy. Just click the links on your page and type in the instructions for each link. The extension will record everything and immediately put together a widget for you.” — HubSpot (Animated)
Pricing: contact vendor for pricing
Showcase reviews: HubSpot (Animated)
Presentation and Screen Sharing Tools
1) Prezi Google Review Count: 243
Deliver dynamic, engaging virtual presentations with Prezi Video by showing you and your content together on screen in live video conferences and recorded video. Start from an existing Prezi Present or PowerPoint presentation and interact with your content as if you were presenting in person. Easily create and add your own custom charts, images, infographics, and more with Prezi Design.
Sample review: “Prezi has become very popular as a way to visually enhance your presentations and make them more dynamic. While it can take some planning and creativity to create a truly effective Prezi presentation, this could be a great tool for re-purposing existing presentations into something more interesting.” — Online Marketing Institute
Pricing: individual version at $5/$13/$20 per month; business team version starting at $2,400
Showcase reviews: Online Marketing Institute
2) join.me Google Review Count: 194
Host meetings, share your screen, conduct webinars. join.me lets you present an interactive whiteboard, and integrates with popular tools for scheduling, productivity, sales and CRM.
Pricing: free, $20 or $25 per user per month
Showcase reviews: Johnny Lists, Siasat
3) Haiku Deck Google Review Count: 184
Create presentations on the web, iPad or iPhone. Choose from a large collection of predesigned templates, photos, fonts, and image filters.
Sample review: “If you’ve ever had to create a PowerPoint or SlideShare presentation in a pinch, you’ll wish you knew about Haiku Deck. This tool helps you quickly find simple layouts, beautiful images, and great fonts.” — HubSpot (Content)
Pricing: $10 or $30 per month for individuals; $500 per year for teams
Showcase reviews: HubSpot (Content), Kathryn Aragon Media, Quick Sprout
AnyMeeting Google Review Count: 208
A full-featured platform for hosting conferences of two to 30 people or webinars of 30 to 2,000 attendees. Functions include HD video broadcasting, video and screen sharing, slides, event registration, surveys, and recording. The company was acquired by Internmedia in September 2017.
Pricing: four levels from $78 to $298 per month
Xtensio Google Review Count: 136

Pricing: free; $15/$25 per month; enterprise pricing by quote
VideoSolo Google Review Count: 123
A suite of tools for converting video and audio files between different formats; capturing PC screen activities as video; converting DVD and Blu-ray discs to digital video files; cloning DVD discs; and burning DVDs from digital video files. All programs are available in free trial versions, so you can try them out before buying.
Pricing: tools pricing individually or bundled from $25 to $97
Digideck Google Review Count: 94
A cloud-based presentation platform that enables users to easily add rich multimedia such as video, motion graphics, animated GIFs and high resolution images to increase engagement, while enforcing brand design standards. For sales presentations, it alerts sellers the minute a prospect opens their sales presentation or proposal and can choose to engage in a chat, video conference, or co-browsing experience with them within minutes.
Pricing: contact vendor
My Screen Recorder Pro Google Review Count: 87

Pricing: $130 (one-time purchase)
StoryXpress Google Review Count: 42

Pricing: free; $8/$15/$45 per user per month
CloudApp Google Review Count: 40
Screen recording software that lets you record your screen as a video with your face and voice; capture and annotate a screen shot image; or record a GIF to instantly share. Add a human touch to your digital content by adding your face and voice to screen recordings. Create a video with your webcam to make any communication more personal. Easily upload and share large files.
Pricing: free; $10/month (individual); $8/user/month (teams); enterprise pricing by quote
RecordCast Google Review Count: 24
A free online screen recorder and video editor, with no watermarking and nothing to download. Capture your whole screen, an application window, or any browser tab. Record on-screen actions with audio. The built-in video editor lets you add titles, annotations, effects, and more.
Pricing: free
Simple Slides Google Review Count: 7
Get access to a large library of professionally designed infographics and slides, thousands of icons, plus world-class training. Slides and templates are optimized for use with PowerPoint, Google Slides, and Keynote, enabling you to quickly create professional-looking presentation decks. Templates and infographics can be easily edited to fit your brand and presentation.
Pricing: $15/$30/$40 per month
Fatcap Google Review Count: N/A
A mobile-native app (iOS and Android) that enables users to create visual slide decks in minutes. Presentations can be viewed on desktops or mobile devices and easily shared. Fatcap integrates with Slack and Dropbox, and can save presentations to PDF files.
Showcase Reviews
BuzzBlogger HubSpot (Animated) HubSpot (Content) Johnny Lists Kathryn Aragon Media Online Marketing Institute Quick Sprout RazorSocial (Online) RazorSocial (Social) Siasat SnapApp Web Marketing Today
This was the 41st post in the Best Online Business Tools series.
#1: Best Online Business Tools Series Kicks Off Today #2: The 12 Best Competitive Intelligence and Benchmarking Tools #3: The Nine Best Facebook Marketing Tools #4: The 14 Best Content Planning and Research Tools #5: The 23 Best Content Ideation Tools #6: The 24 Best Online Writing Tools and Apps #7: The Six Best Google+ Marketing Tools #8: The Four Best Online Education Tools For Business Pros #9: The 14 Best Marketing Automation Tools #10: The 17 Best Keyword Research Tools for SEO and SEM #11: The Seven Best File Sharing Tools #12: The Five Best Infographic Creation Tools and Services #13: The 28 Best Influencer Marketing Tools #14: The Five Best Pinterest and Instagram Marketing Tools #15: The 24 Best Visual Content Creation Tools #16: The Six Best Online HR, Payroll, and Employee Scheduling Tools #17: The 20 Best SEO Rank Tracker Tools #18: The Six Best Screen Capture Tools #19: The 15 Best Special-Purpose SEO Tools #20: The Four Best Online Survey Tools #21: The 26 Best All-in-One SEO Tool Suites #22: The 32 Best Twitter Marketing Tools #23: The 29 Best Web Analytics Tools #24: The 24 Best Email Marketing Tools #25: The 28 Best Web Design Tools #26: The 29 Best Social Media Monitoring Tools #27: The 17 Best Project Management Tools #28: The 21 Best Content Curation Tools #29: The 26 Best WordPress Plugins #30: The 14 Best Personal Productivity Tools #31: The 11 Best Social Media Campaign Builders and Ad Monitoring Tools #32: The 12 Best Landing Page and Form Builders for Conversion Rate Optimization #33: The 17 Best Photo Editing Tools #34: The Six Best Accounting and Finance Tools for Small Business #35: The 15 Best Content Distribution and Amplification Tools #36: The 17 Best Social Media Management Tools #37: The 23 Best Google Chrome Extensions for Digital Marketers #38: The 15 Best Audio and Video Editing Tools #39: The Eight Best Social CRM Tools #40: The Nine Best Reputation Management, RSS, and Social Search Tools #41: The 15 Best Screencasting and Online Presentation Tools

April 18, 2017 at 5:57 am
Just after downloading camstudio i captured one small video and it worked but in the next attempt the file was crashed and did not worked

April 18, 2017 at 7:49 am
Yikes, that’s not good! Sorry to hear that. Did you contact the vendor?
- Blog and Media Coverage
- Publications
- Team Building News
- My Posts Elsewhere
- Contact and Guest Posts
Recent Posts
- Are These Common Problems Making your Business Inefficient?
- Content Marketing Considerations for Business Success
- How to Build a Business of the Future
- Seven Steps to Improve Your Company’s Online Brand Reputation
How to Record a Presentation with Webcam, Narration, and More

Justin Simon

Table of contents
- Benefits of Recording a Presentation
How to record your presentation (with Snagit)
How to record a presentation from powerpoint with audio and webcam, how to turn your powerpoint presentation slides into a video.
- How to edit a presentation video (in Camtasia)
Recording a PowerPoint Presentation, the FAQs
Subscribe to techsmith’s newsletter.
Everyone has, at some point, put a load of time and effort into creating the perfect PowerPoint presentation, only to use it once or twice. But isn’t it a shame for all that hard work to be discarded so quickly? Is every slide deck destined for deletion after just a couple of uses?
Isn’t there a better way to make the most out of your presentations? Well, yes. Yes, there is.
Rather than simply creating and presenting your work once or twice, recording your presentations can give them a new lease of life. Whether it’s a data report or a self-recorded PowerPoint, you can record a presentation in real-time, or in advance to make it available on-demand.
In this guide, we’ll explore two distinct ways of recording your presentation. First, we’ll discuss how to record a presentation from PowerPoint with audio and webcam, and then we’ll look at how to turn your .ppt slides into a video.
Benefits of Recording a Presentation
As well as there being many different ways to record a presentation, there are also many benefits of recording them. So, before we show you the ‘how,’ let’s talk about the ‘why.’
- Encouraging asynchronous communication : One key benefit is fostering asynchronous communication . By recording presentations, you’re letting your audience engage with the content in their own time, breaking the constraints of time zones and scheduling conflicts. This also ensures your viewers can absorb information at their own pace, and revisit it as needed.
- Boosting SEO : You can use your presentation to create a YouTube video and share it on your website to increase your online visibility and attract prospective customers. This can be a great way to expand your audience, increase web traffic, and establish yourself as an expert in your field.
- Perfecting your presentation : Whether it’s in-person or over Zoom, you don’t get second chances with live presentations. However, a pre-recorded keynote lets you perfect the content and the narration before anyone sees it. This is a great way to combat stage fright while honing your presentation skills and building confidence.
With this in mind, turning your slides into a video is a no-brainer. It’s an easy way to grow your audience and make the information you’re sharing more accessible and easier to digest.
Video messages > meetings
Record your screen and camera with Snagit for quick updates and feedback.

Depending on your audience and the type of presentation you need to deliver, TechSmith’s Snagit could just be the perfect tool for recording your PowerPoint. With its user-friendly interface and advanced features, Snagit is ideal for capturing top-notch presentation videos, in just a few clicks.
Now, there’s no denying that presentations are better when you can see the presenter… Fortunately, Snagit lets you capture your screen and webcam at the same time to create a Picture-in-Picture video.
In this section, we’ll guide you through the steps to record your presentation and webcam with Snagit.
Step 1: Open video capture
First, open Snagit and navigate to the Capture window. Select the Video tab, and start by clicking the big red Capture button.
Step 2: Select a recording area
Next, you’ll be prompted to choose which parts of your screen you want to record. Use Snagit’s orange crosshairs to select a specific region, window, or your entire screen.
Step 3: Configure recording settings
With the Video Recording toolbar, you can set options like Cursor Capture and Effects, System Audio, and Webcam.
If your webcam isn’t showing, click on the webcam icon. If you have an external webcam, select the one you want to use by clicking the dropdown arrow next to the webcam icon.
Step 4: Adjust your webcam
Next, adjust your webcam options to ensure your Picture-in-Picture recording looks how you want it. Here you can change the Picture-in-Picture placement as well as the shape and size of your webcam recording. You can even toggle between Picture-in-Picture and fullscreen webcam modes as you like.
The best part? You can make these adjustments even while recording.
Step 5: Manage recording
When you’re ready to roll, hit the Record button and click the Stop button when you’re finished. It’s that simple!
And remember, if there’s an interruption (like an unexpected visit from the mailman), just hit Pause. It’s okay to take a break — your video won’t be ruined by a little interruption.
Step 6: Edit your video
Once you’ve finished recording, Snagit will automatically open your video in the Snagit Editor, which is super easy to use. From here, you can make light edits to the footage as needed.
For example, if you need to cut or trim your footage , you can! Here’s how:
- Set Start Point : Drag the Start handle (green) on the timeline to your desired starting point.
- Set End Point : Similarly, drag the End handle (red) to where you want to end the cut.
- Review the Segment : Before making any cuts, you can review the segment by dragging the Playhead (white) left and right across the timeline. This ensures you’re only cutting the footage you intend to.
- Make the Cut : Once you’re satisfied with the selection, click the Cut button, which will pop up once you’ve made a selection.
And that’s all there is to it! If you want to go the extra mile, you can also use Snagit to save individual frames of your video as images , which can be used to create a thumbnail for your video .
Record your screen with Snagit
Snagit makes it easy to share quick updates and how-to’s by capturing exactly what’s happening on your screen.

Now, Snagit is great for recording less formal videos in a flash, but if your presentation is intended for a particularly large or important audience, you might be looking to create something more polished. This is where TechSmith’s Camtasia comes in.
Camtasia is one of the smartest and most intuitive pieces of editing software out there, but it also makes for a pretty nifty screen recorder too. Camtasia is great for recording presentations when you need more control and editing powers over the final product.
But best of all, Camtasia streamlines the process by letting you record your presentation and voice over directly within PowerPoint.
Step 1: Set up your presentation video recording
If you’re a Windows user, you’ll have the option to include a PowerPoint Add-in Toolbar when you install Camtasia. While this feature isn’t currently available on MacOS, the Camtasia Add-in Toolbar allows you to start, stop, and control your recordings from within PowerPoint — so you don’t need to switch between applications.

Just open the presentation you want to record and locate the Add-in toolbar under the Add-ins tab.
Don’t see the add-in toolbar? Go to File > Options > Add-ins, to enable it. Click on the Manage drop-down, select Disabled Items, then click Go. If the Camtasia Add-in is listed, select it, and click Enable.
If you’re an Apple user, don’t panic! You can still record your screen (with audio) on a Mac using Camtasia, and it’s just as easy. Alternatively, you can skip ahead to the next section and import your slides directly into Camtasia.
Step 2: Customize your recording options
Now let’s walk through each of the options on the toolbar before we begin recording.

Record audio
The microphone button controls whether or not audio is recorded as part of your presentation. When you enable it, you’ll be able to record your narration using a microphone.
If you are planning to record audio, this is where you’ll select your microphone. If you want to record great audio , we suggest using an external microphone, rather than the one that’s built into your laptop.
Some of the best microphones for recording video are likely to be less expensive than you think. But, if you’re on a shoestring budget, even the mic that’s built into your headphones could produce better audio than your laptop.
Once you’re set up, be sure to test the mic and adjust the volume slider as needed. You’ll also need to decide whether or not to record your system audio, which is any sound that comes out of your speakers, such as email notifications.
Record webcam
If you have a webcam, you can also record your camera during the presentation to create a Picture-in-Picture clip — just as you can with Snagit!

To customize even more of the recording settings, click the Recording Options button. Here you’ll find settings that let you record with a watermark and adjust your video frame rate . There are a few more options too, but the default settings should work just fine.
When you’re ready, click OK to close this window and save any changes made.
Step 3: Record your presentation
The final step is as simple as clicking the Record button in the toolbar. This will launch your slides into the Presentation Mode and start recording.
When you exit Presentation Mode or reach the end of your slideshow, you can either continue recording your screen, or stop recording and save your file. Pretty easy right?
Before you get started, let us show you another way to turn your presentation into a video, without recording your desktop .
Another way to create a video from your presentation is to import your PowerPoint slides into Camtasia. This way you can adjust how long each slide appears on screen, as well as add Behaviors and Annotations to personalize your presentation and highlight important information.
By importing your slides into Camtasia, and recording your voice over separately, you get a lot more flexibility with the editing process, which means you have more control over the finished article.
If you do decide to record your audio separately, you might want to take a look at TechSmith’s Audiate . This advanced audio recorder will transcribe your voice over in real-time and let you edit the audio file as if it were a text-based document. We don’t want to brag, but it’s probably the best way to add a voice over to a PowerPoint .
Regardless of how you decide to narrate your PowerPoint, here’s how to turn your presentation into a video:
1. Import your PowerPoint slides
First, start by importing your PowerPoint slides directly into Camtasia. Once your media is imported, you can edit it by dragging your slides into the Editing Toolbar.

You can now add the images to the Timeline, and edit them like any other media in a Project.

If you drag your slides to the Timeline, the slides will be placed in the order of the presentation, each with a default 5-second duration.

With your presentation on the timeline, use Ripple Move to create space in between slides to adjust the timing of each one. To do this, hold shift, then click and drag.

Once you’ve imported your slides and adjusted the duration of each one to correlate with your voice over, it’s time to start editing.
How to edit a presentation video (in Camtasia)
Add behaviors.
Firstly, add some visual interest with Camtasia Behaviors . A Behavior is an animation that brings movement to your slides, making them stand out on screen. This is a great way to bring parts of your presentation to life and take it from ordinary to extraordinary — because nobody likes a boring presentation .
To add a Behavior, click and drag the Behavior you wish to use onto the slide you want to animate. Once added, you can adjust the Behavior using the Properties tab.
Add annotations
Another good way to grab and direct your audience’s attention is to add some Annotations, which are great for highlighting important information.
To insert an Annotation, click the Annotation tab on the left side of the screen and drag it into the designated slide. You can then re-position and edit the Annotation in the Properties tab as needed.
Absolutely! Both Snagit and Camtasia are excellent choices for recording a professional and polished presentation. Snagit is perfect for no-fuss recording and editing. If you require more sophisticated editing capabilities, Camtasia is the ideal choice, offering the added convenience of recording your slideshow and voice over directly within PowerPoint.
Click the Record button in the toolbar to launch your slides into the Presentation Mode and start recording. When you exit Presentation Mode or reach the end of your slideshow, you can either continue recording your screen or stop and save your file.
If you’re planning to record audio, select your microphone in the recording options. The microphone button controls whether or not audio is recorded as part of your presentation. If you have a webcam attached to your computer, you can also record your camera to create a Picture-in-Picture clip, perfect for showing the presenter during the presentation.
With Snagit, you can conveniently record your voice over as you go through your presentation, capturing both the audio and visuals in one go. If you’re looking for more advanced recording and editing options, you might also consider using Camtasia, which allows you to record your voice over while presenting. For even more control, use Audiate to record your audio separately and then import it into Camtasia for fine-tuning.
Additional Resources
Camtasia vs. clipchamp: which screen recorder is best, how to screen record on iphone: the ultimate guide, how to make money on youtube: 7 effective strategies.
Online Presentation Recorder
The intuitive and powerful presentation recorder.
Record presentations and edit them like a professional, all in a single browser tab! Flixier is a powerful presentation recording tool that lets you capture screens and speeches without having to download any third-party software. Choose from different recording layouts and record effortlessly. Make cuts, tweaks, and adjustments, and add annotations to your presentation without leaving your web browser. Explore hundreds of editing options and enhancement features.

The reliable and fast presentation recorder
You can easily record your presentation online, without having to download any third-party apps. Flixier is the all-in-one recording and editing solution trusted by professionals all over the world. Try out hundreds of presentation video editing tools with the fastest online video editor .
Save time and money
Flixier helps you record any presentation straight from your computer. There’s no need for expensive recording equipment or outsourced services with our user-friendly tool that can be used by virtually anyone. Say goodbye to big budgeting needs and automate your workflow.
Highlight key information
Insert visual elements or animated motion graphics to support your arguments. Use Flixier to add text to your presentation recording and emphasize key moments. Browse a rich library of animated titles and graphics or fully customize with your own font.
Enhance visual and audio quality
Record, edit, and share high-quality presentations straight from your browser. Our audio enhancer helps you fix volume levels and remove any unwanted background noise. Besides, our visual enhancement features help you auto-adjust brightness and contrast for better clarity.
How to record presentations:
Start recording your presentation:.
Power up Flixier, then tap the Record button and choose your preferred layout and recording time. You can choose to only record your screen or feature a webcam insert. Once you are done, import the recording into your library
Edit your presentation:
Flixier transforms from an intuitive presentation recording tool into a capable video editor. Trim your video, make annotations, and add supporting text. Enhance the quality of your sound and make any other necessary adjustments.
Save or share:
When you are done editing, click on Export and choose the Video format. You can now save your presentation recording to your device or safely store it into your organization’s directory through our Google Drive or DropBox integrations.

What people say about Flixier

I'm so relieved I found Flixier. I have a YouTube channel with over 700k subscribers and Flixier allows me to collaborate seamlessly with my team, they can work from any device at any time plus, renders are cloud powered and super super fast on any computer.

My main criteria for an editor was that the interface is familiar and most importantly that the renders were in the cloud and super fast. Flixier more than delivered in both. I've now been using it daily to edit Facebook videos for my 1M follower page.

I’ve been looking for a solution like Flixier for years. Now that my virtual team and I can edit projects together on the cloud with Flixier, it tripled my company’s video output! Super easy to use and unbelievably quick exports.
Frequently Asked Questions
1. what is the best way to record a presentation.
The best way to record a presentation is to open Flixier in your browser, then select Record , and let this online tool work its magic while you go about presenting. The best part is that you don’t have to download any apps or software, since it runs fully in your browser.
2. Which tool is used to record presentation?
The fastest online video editor, Flixier , is a popular tool that is used by academia, marketing, and creative professionals all over the world. Since it’s packed with hundreds of video editing tools, your workflow starts and ends in your browser, allowing you to save time and make quick progress.
3. What is the advantage of recording PPT?
By recording a PPT presentation, you can easily share knowledge through publishing content on YouTube or online courses platforms. Besides, adding voice overs and subtitles with online tools like Flixier empowers you to reach wider audiences through accessible content.
Need more than a presentation recorder?
Edit easily, publish in minutes, collaborate in real-time, articles, tools and tips, unlock the potential of your pc.
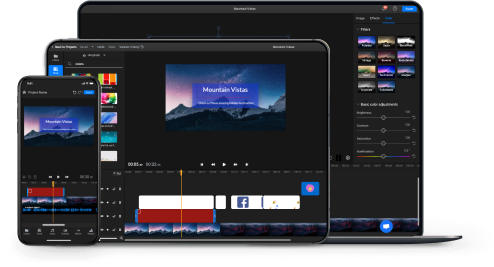
Guide Center
Presentation Recorder
Record online presentations instantly
Uploading...
Please wait while we upload your recording

- Effortlessly record presentations with our recorder
- Transcribe videos for accessibility and searching
- Save time with our video summarisation feature

Trusted and Supported by businesses across the world
How to Use Presentation Recorder
Step 1: launch the presentation recorder.
To use the Presentation Recorder feature in ScreenApp, first, launch the tool from the main dashboard. You can find it under the 'Record' tab.
Step 2: Select the Recording Area
Once the Presentation Recorder is open, select the area of your screen that you want to record. You can choose to record the entire screen or a specific window.
Step 3: Start Recording
After selecting the recording area, click on the 'Record' button to start the recording. You can pause or stop the recording at any time by clicking on the corresponding buttons.
Step 4: Add Audio and Annotations
While recording, you can add audio to your presentation by speaking into your microphone. You can also add annotations such as text, arrows, and shapes to highlight important points.
Step 5: Save and Share Your Presentation
Once you have finished recording, click on the 'Save' button to save your presentation. You can then share it with others by exporting it as a video file or by sharing the link to the video on ScreenApp.
Benefits of Presentation Recorder
Effortlessly record your presentations with screenapp.
Are you tired of struggling to record your presentations? ScreenApp is here to help! Our software tool offers a Presentation Recorder feature that allows you to easily record your presentations with just a few clicks. With ScreenApp, you can focus on delivering your presentation while we take care of the recording process. Plus, our Presentation Recorder feature is equipped with AI technology that automatically transcribes your presentation, making it easier for you to search and summarise your video content later on.
Revolutionise Your Video Content with ScreenApp
ScreenApp is more than just a video platform – it's a game-changer for your video content. Our software tool offers a range of features that can help you optimise and enhance your video content, including our Video Summarizer and AI Note-taker. With our Video Summarizer, you can quickly and easily summarise your video content, saving you time and effort. And with our AI Note-taker, you can automatically generate notes from your presentations, making it easier for you to review and share your content.
Save Time and Boost Your Productivity
At ScreenApp, we understand that time is precious – that's why we've designed our software tool to help you save time and boost your productivity. With our Presentation Recorder feature, you can effortlessly record your presentations, freeing up time for you to focus on other important tasks. And with our Video Summarizer and AI Note-taker, you can quickly and easily summarise and generate notes from your video content, saving you hours of manual work.
Improve Your Video Content with ScreenApp
Whether you're a content creator, marketer, or educator, ScreenApp can help you improve your video content. Our software tool offers a range of features that can help you optimise your video content for maximum impact, including our Video Summarizer and AI Note-taker. With ScreenApp, you can easily create engaging and informative video content that resonates with your audience. So why wait? Sign up for ScreenApp today and start revolutionising your video content!
.webp)
Record anything Instantly
Capture your screen and camera in a click without a watermark, including any Teams, Meet, Zoom, or Webex Call.
.webp)
Transcribe in a Flash
Transcribe any video or audio with AI and without lifting a finger with 99% accuracy and lightning speed.
.webp)
Summarize Recordings with AI
Save time and effort. Get an AI-generated summary automatically and focus on what matters.
.webp)
Automatic Notes with AI
Turn your videos and audio into skimmable notes. Click to the part you want to watch.
.webp)
Chat to Your Recordings
Instantly extract action items, decisions, and insights from your recordings. It's like talking to somebody who has watched the videos for you.
.webp)
Instantly Record Audio and Video
Record your audio and Video with 1 click directly from your browser.
.webp)
Translate Videos with AI
Translate Understand any video or audio in over 50 languages.
.webp)
Upload any Video or Audio
Upload any video or audio file for transcription, summaries and notes.
Who is Presentation Recorder for?
If you are looking for a comprehensive video platform that offers a range of features, then Presentation Recorder is perfect for you. This software tool is designed to cater to the needs of individuals and businesses alike, making it an ideal choice for anyone who wants to create, edit, and share videos.
For Educators and Trainers
If you are an educator or trainer, Presentation Recorder is the perfect tool for you. With its screen recording feature, you can easily create video tutorials, online courses, and training materials that are engaging and informative. You can also transcribe your videos, making it easier for your students to follow along and understand the content.
For Business Professionals
If you are a business professional, Presentation Recorder is an excellent tool for creating presentations, product demos, and marketing videos. With its search and summarisation feature, you can quickly find the information you need and create a summary of your video, making it easier for your audience to understand your message.
For Content Creators
If you are a content creator, Presentation Recorder is perfect for creating high-quality videos for your audience. With its screen recording feature, you can easily create tutorials, reviews, and other types of content that your viewers will love. You can also transcribe your videos, making it easier for your viewers to follow along and understand the content.
For Anyone Who Wants to Create Videos
Whether you are an educator, business professional, content creator, or just someone who wants to create videos, Presentation Recorder is the perfect tool for you. With its range of features, you can easily create, edit, and share videos that are informative, engaging, and entertaining.
Full ScreenApp Demo
ScreenApp's Presentation Recorder FAQ
What is a presentation recorder.
A Presentation Recorder is a software tool that allows you to record your screen while giving a presentation. It captures your voice, video, and screen movements, making it easy to share your presentation with others.
How does ScreenApp's Presentation Recorder work?
ScreenApp's Presentation Recorder is a video platform that allows you to record your screen while giving a presentation. It captures your voice, video, and screen movements, making it easy to share your presentation with others. You can also transcribe your presentation and search for specific keywords within the video.
What are the benefits of using ScreenApp's Presentation Recorder?
ScreenApp's Presentation Recorder offers several benefits, including the ability to record your presentation and share it with others, transcribe your presentation for easy reference, and search for specific keywords within the video. It also allows you to summarise your presentation, making it easy to review key points.
How can I get started with ScreenApp's Presentation Recorder?
To get started with ScreenApp's Presentation Recorder, simply sign up for an account on our website. Once you've created an account, you can start recording your presentations and using our other video tools, such as transcribing and summarising your videos.
Still have questions?
Try it for yourself
More Recorders
- Use Presenter View Video
- Add speaker notes Video
- Practice and time your presentation Video
- Record a presentation Video
- Print a presentation Video

Record a presentation

Record narration and timings for your presentation to give it a professional and polished feel.
Record narration and timings
Open the slide you want to start recording from.
Near the upper right corner of the PowerPoint window, select Record .
Choose from two options
When you're ready, select the round, red Record button, wait for the countdown, then start speaking. To record from a specific slide, go to it, and then select Record .
Note: Narration isn't recorded while the transition between slides happens, so pause during a transition, then resume speaking.
Manage narration and timings
There are different ways to manage recordings in your presentation:
Pause - to pause a recording
Stop - to end a recording
Replay - to replay a recording
Pen , Highlighter , or Eraser - use the pen, highlighter, or eraser tools to mark up your recording
Remove narration or timings
An audio icon appears on a slide when narration is available.
You can also remove narration or timings from your slide.
If you're in record mode, select Clear .
Choose from two options:
Clear Recording on Current Slide - to delete narration and timings on the current slide
Clear Recording on All Slides - to delete narration and timings from all slides at once
Save a recording
When you're done recording, save and share your presentation as a PowerPoint file or video.
Select File .
Choose an option like Save or Export . Your recording will automatically play when someone opens the presentation.
Record a slide show with narration and slide timings
PowerPoint training

Need more help?
Want more options.
Explore subscription benefits, browse training courses, learn how to secure your device, and more.

Microsoft 365 subscription benefits

Microsoft 365 training

Microsoft security

Accessibility center
Communities help you ask and answer questions, give feedback, and hear from experts with rich knowledge.

Ask the Microsoft Community

Microsoft Tech Community

Windows Insiders
Microsoft 365 Insiders
Was this information helpful?
Thank you for your feedback.
Target audience definition: Types, examples and how to find your own audience

18 companies destroyed by bad publicity and negative PR: The worst examples ever!

Famous fast food logos: Fast food restaurant logos and brands

Car logos with circles: The ultimate list of circular car logos

15 examples of companies that have repositioned themselves

How to measure brand loyalty: Metrics for business success

How to build a successful brand community (with examples)

Mastering the message: The best brand script example framework

How to build an online brand in 10 easy-to-follow steps
How to record a presentation: tips for presentation recording.
Do you know how to record a presentation capable of impressing any audience? With countless employees now working remotely, and distance learning on the rise, digital presentations are more common than ever. Even if you’re not using these resources now, with 52% of global employees working remotely once per week, you’re likely to need digital presentation skills in future. The good news is online presentations can be just as effective (if not more-so) than their in-person counterparts. You can reach […]

Do you know how to record a presentation capable of impressing any audience? With countless employees now working remotely, and distance learning on the rise, digital presentations are more common than ever.
Even if you’re not using these resources now, with 52% of global employees working remotely once per week, you’re likely to need digital presentation skills in future.
The good news is online presentations can be just as effective (if not more-so) than their in-person counterparts.
You can reach a wider audience with an online presentation because you’re not limited by who can turn up in-person. You’ll also have access to a wider range of tools to help you enhance the quality of your presentation, like slideshow apps and screen recorders.
All you need to do is learn how to use the tools available for online presentations to your advantage.
Here’s your all-access guide to how you can record a fantastic presentation for the digital world.
How to record a presentation
The tools you’ll need.
The first step in excellent presentation recording, is making sure you have access to the right tools. Fortunately, there are several different solutions to help you in today’s marketplace.
Here are just some of the most common products you’ll need…

Presentation recording hardware
Computers and cameras.
Let’s start with the hardware. You’re going to need at least a computer, tablet, or smartphone you can use to record your content on and store the following digital file.
A computer will give you more scope in terms of bandwidth and performance, but you can comfortably record on your smartphone too, provided it has a good enough camera and microphone.
If you’re using a computer or laptop as your presentation recording hardware, you’ll also need the following tools:
A high-quality microphone
The best presentations feature clear, concise audio. Make sure you have a decent quality microphone to capture your voice. A pop filter will help to eliminate distortion, while active noise cancellation should get rid of external distractions.
A webcam or camera
If you want to be present within your recording, you’re going to need a camera. A high-quality device capable of capturing 1080p video or above should be enough for most presentations. You may need more advanced cameras depending on the kind of presentation you’re producing.
Accessories
Additional accessories, like lighting tools to help improve the quality of your image can be very helpful for presentations. A ring light can brighten your video stream, while stands can ensure your microphone stays in the right position.
Remember to set all of your hardware up long before you plan on recording, so you can test the functionality and learn how everything works in advance.

Presentation recording software
The best presentation recording software for your needs will depend heavily on the kind of content you want to produce. Presentation recording software is usually split into a range of different categories.
For instance, you’ll have one piece of software for actually capturing your presentation, such as PowerPoint, or Zoom.
You’ll also need separate software for screen capturing and editing your subsequent presentation.
Here are just some of the software tools you’ll need to invest in before you start recording:
The best presentation recording software
There are various tools available to help you record your presentations. If you’re using a smartphone to record your content, the chances are the software you choose will be a little more simplistic or basic than the software available for a desktop.
If you’re comfortable with your existing video conferencing tool, you can learn how to record a presentation on Zoom here . Alternatively, you might prefer to learn how to record a presentation on PowerPoint if you’re confident with the Microsoft 365 productivity stack.
When choosing presentation software, make sure you look for features like:
- Multiple camera configurations (such as screen by screen).
- Resolution control.
- File saving options (for easier sharing).
- Ease of use (so you can comfortably use the app).
- Additional features like filters and in-built editing.
Screen recording software
Screen recording software is often an essential investment for presentation recording. With a screen recorder , you can capture what’s going on within your screen while you’re talking about it.
For instance, you might walk someone through a slideshow on your computer, highlighting various parts of the content as you go.
A screen recording tool is ideal for webinars, tutorials, and educational presentations, because it allows you to capture as much context as possible within your presentation.
When you’re choosing your screen recording service, make sure you look for:
- Support for capturing both audio and video.
- Access to control your recording parameters (the capture area).
- Abilities to edit the record and save the file in the right format.
- Extra capabilities like being able to draw on videos or create screenshots.
It’s also helpful to be able to capture your webcam output and your screen at the same time, so you can bring a human element to your presentation.
Editing software
Part of learning how to record an online presentation perfectly, is making sure you can edit your recording to make it look fantastic. There are a number of great tools out there which allow you to edit both video and audio, getting rid of things like background noise, or fuzz in an image.
The right editing tools will allow you to remove any unnecessary content from your presentation, while polishing the overall appearance of your video.
Make sure your editing software:
- Edits both audio and video.
- Can crop and remove sections of video easily.
- Has various filters and “touch-up” tools to improve video quality.
- Can save your files in the appropriate format for sharing.

How to record an online presentation
Step by step.
Once you have the right selection of tools for your presentation recording session, the next step is getting to work on your content. The exact steps you follow to record your presentation will depend heavily on the tools you’re using.
For example, you might need to use direct guidance from Microsoft to learn how to record PowerPoint with audio.
To get you started on the right track, here are some steps which can apply regardless of which software or hardware you’re using.
1. Create your “set”
First, find the right location for recording your presentation. If you’re capturing video and audio, you’ll need a quiet room, with plenty of light. It’s also important to have a strong internet connection, so you can upload your content easily when necessary.
Make your background as neutral as possible to avoid people focusing on anything but you and try to record at a time when there aren’t going to be a lot of extra distractions.
Use a stand for both your camera and microphone where possible, so you can keep the image steady, and avoid unnecessary distortions in your audio.
2. Plan your presentation
Next, plan your presentation from start to finish.
Ask yourself how you’re going to introduce the presentation, and what kind of content you’re going to be using. Are you going to be guiding viewers through an eye-catching slide deck using your screen recording software?
Do you need to have other resources available, like videos and graphs you can grab to illustrate your point?
It helps to have a basic script you can follow for your presentation, when possible, as this will stop you from going off on a tangent with your information.
3. Practice your presentation
Practice makes perfect. If you want to make the right impression with your online presentation, it’s worth walking through it a few times before you record the “official” product.
Recording an early version of your presentation and going through it with friends and family will help you to pinpoint areas where you can make your content more engaging or cut any details which might not be relevant to your accident.
Though it can be a little uncomfortable to go through your presentation at first, it’s much better for you to see any issues you might be having early on, so you can fix them before the final cut.
Remember to:
- Speak in a normal, clear, and consistent tone.
- Check the volume and image quality on your content regularly.
- Watch your body language (sit up straight and look directly at the camera).
- Time each section of the presentation correctly.
- Spend enough time on each slide or piece of content.
4. Record your presentation
Now it’s time to record your presentation.
During your practice sessions, you’ll have had opportunities to experiment with the technology you’re going to be using and learn how everything works. This should mean you can feel more confident when you start recording again.
Make sure you have your screen recording system and video recording tools set up correctly, and test the audio and video initially, so you don’t waste time on a poor recording.
During the recording:
- Control quality: Keep an eye on your content If your camera image suddenly loses quality, pause the presentation, and fix it. You can always edit the break out later.
- Stay calm: Focus on maintaining a calm, consistent tone of voice. Avoid rushing through the presentation and maintain “eye contact” with the camera.
- Have fun: Smile and try to put a friendly personality across to your viewers. This will make your presentation more engaging.
5. Polish your presentation
Finally, move your presentation file into your editing software and polish it off for a fantastic, finished look. Cut out any areas that don’t make sense and remove the parts of the video when you’re getting things set up or shutting your camera down.
Where possible, adjust the image quality to ensure both your content and your video stream looks clean and professional. You can also remove any background noise, like clicking or keyboard tapping to enhance your presentation too.
Some editing tools will allow you to add graphics, filters, and other unique “extras” to make the content even more exciting. Consider experimenting to see what works best.
Learning how to record a presentation the right way can seem like a daunting task. Fortunately, with the right presentation recording tools on hand, and plenty of practice, you can produce an amazing piece of content in no time.
Follow the tips above carefully and remember to take your time with your presentation. Content often suffers when nerves convince you to rush through each slide or point in your discussion. Don’t forget, you can always clean up any issues you might have with your content in the editing stage.
Good luck making the most of your presentation.
Fabrik: A branding agency for our times.
Now read these:

Sign up for updates
Sign up for your regular dose of brand fabrik and be the first to receive insights and inspiration..
- Your Email: (Required)
Related articles
- Brand Fabrik Topical articles relevant to anyone in branding.
- Logofile Paying homage to the world’s favourite logos.
We value your privacy
We use cookies to enhance your browsing experience, serve personalized ads or content, and analyze our traffic. By clicking "Accept All", you consent to our use of cookies.
How to Record A Presentation

Looking for our Text to Speech Reader ?
Featured In
Table of contents, looking to record a presentation 5 tools you'll need, step 1: picking a software, what to use to record audio, what to use to record video, how to record your screen, step 3: recording & tips for succeeding, tips to improve engagement, how do i record my screen and voice for a presentation, how do i record a powerpoint presentation as a video, what is the best way to record a presentation.
Presentations are a staple in the professional and academic world. They allow us to share our ideas, findings, and insights with others in a structured...
Presentations are a staple in the professional and academic world. They allow us to share our ideas, findings, and insights with others in a structured and engaging way. However, recording a presentation can be a daunting task, especially if you're new to it. This article will guide you through the process step-by-step, using tools like PowerPoint, Google Slides, and the best AI text-to-speech voice reader, Speechify.
Before you start recording, you'll need a few tools:
- Screen Recorder : This is software that captures what's happening on your screen. It's essential for recording your slide show and any live demonstrations during your presentation.
- Presentation Deck : This is the collection of slides that you'll be presenting. You can create this using software like PowerPoint or Google Slides.
- Speechify : This is an AI text-to-speech voice reader that can create high-quality voiceovers for your presentation.
- Webcam : If you want to record yourself presenting, you'll need a webcam. Most modern laptops come with one built-in.
- Microphone : To record audio, you'll need a microphone. Again, most modern laptops have one built-in, but you might want to consider a standalone microphone for better audio quality.
The first step in recording a presentation is choosing your software. The three most popular options are PowerPoint, Google Slides, and Zoom. Both are excellent choices, but they each have their pros and cons.
PowerPoint is a Microsoft product and is part of the Office suite. It's been around for a long time and is very feature-rich. No matter the version of Powerpoint, You can create complex PowerPoint Presentations presentations with a variety of transitions, animations, and multimedia elements. PowerPoint slides also have a built-in feature for recording presentations.
Google Slides , on the other hand, is a free, web-based tool. It's not as feature-rich as PowerPoint, but it's straightforward to use and great for collaboration. You can share your slide deck with others and work on it together in real-time.
Zoom is another excellent tool you can use to record a presentation. It's particularly useful if you're delivering a live presentation to an audience and want to record it for later use. Their screen capture and presentation recording features are easy to use and doesn't require any additional software. Plus, you can record both your presentation and yourself presenting, which can help to create a more engaging video.
Step 2: Recording Options
Once you've chosen your software and created your presentation, it's time to start thinking about how you're going to record it.
For recording audio, you have a couple of options. You can record narration live as you present, or you can create a voiceover using Speechify.
Use Speechify
Speechify is the leading AI text-to-speech app, with millions of downloads on Chrome, iOS, Android, and Mac. It can turn your text into a natural-sounding voice, making it perfect for creating voiceovers for your presentation. You can customize the speed, accent, and character of the voice to suit your needs. Here's how you can use Speechify to create voiceovers for your presentation:
- Input Your Script into Speechify : Once your script is ready, input it into Speechify. You can do this by copying and pasting your script into the Speechify app or by uploading a document with your script.
- Customize Your Voiceover : Speechify allows you to customize your voiceover to suit your needs. You can choose from a variety of voices, adjust the speed and pitch, and even add pauses for effect.
- Generate Your Voiceover : Once you're happy with your settings, click on the "Generate" button. Speechify will then turn your text into speech, creating a high-quality voiceover for your presentation.
- Add Your Voiceover to Your Presentation : The final step is to add your voiceover to your presentation. You can do this by importing the audio file into your presentation software and syncing it with your slides.
If you want to record yourself presenting, you'll need a webcam. Make sure your webcam is set up correctly and that you're in a well-lit area. You can record yourself in full screen or use a picture-in-picture format to keep the viewer’s attention on your slides.
To record your screen, you'll need a screen recorder. There are many free and paid screen recorders available for both Windows and Mac. These tools can capture your entire screen, a specific window, or a custom area. They can also record audio and webcam footage, making them perfect for recording presentations.
Now that you've got everything set up, it's time to start recording. Here are some tips to help you succeed:
- Practice : Before you hit the record button, practice your presentation a few times. This will help you feel more comfortable and ensure that your presentation flows smoothly.
- Clear Audio : Make sure your microphone is set up correctly and that there's no background noise. If you're using Speechify for voiceovers, ensure that the text is correctly inputted.
- Good Lighting : If you're recording yourself, make sure you're well-lit. This will make you more visible and create a more professional-looking video.
- Screen Settings : Check your screen settings before you start recording. Make sure you're recording the correct screen or window and that any notifications are turned off.
- Take Your Time : Don't rush through your presentation. Speak clearly and take your time with each slide. Remember, you can always edit the video later.
- Engage Your Audience : Use your voice and body language to engage your audience. Ask rhetorical questions, use gestures, and vary your tone and pace to keep your audience interested.
- Use Visuals : Visuals can help to illustrate your points and keep your audience engaged. Use images, graphs, and diagrams where appropriate.
- Keep It Simple : Don't overload your slides with information. Keep your slides simple and use them to support your speech, not replace it.
- Use Transitions : Transitions can help to guide your audience through your presentation. Use them to signal when you're moving on to a new point or topic.
- Interact with Your Slides : If you're recording your screen, you can use your mouse to highlight important points on your slides.
- Use Speechify : Speechify's high-quality AI voices can make your presentation more engaging and professional. You can even customize the voice to suit your presentation style.
Recording a presentation can seem like a daunting task, but with the right tools and a little practice, anyone can do it. Whether you're using PowerPoint or Google Slides, a screen recorder or a webcam, or creating voiceovers with Speechify, the key is to plan ahead, practice, and keep your audience in mind. With these tips, you'll be well on your way to creating engaging, high-quality presentations that you can share with the world.
Remember, the goal is not just to record a presentation but to create a video presentation that captures your audience's attention and communicates your message effectively. So, don't be afraid to experiment with different recording features, customization options, and presentation styles until you find what works best for you.
Whether you're recording a how-to video, a YouTube video, or a professional presentation, the most important thing is to be clear, engaging, and authentic. So, hit that record button and start sharing your ideas with the world!
You can use a screen recorder to capture your screen and a microphone to record your voice. Some screen recorders also have built-in webcam recording features, allowing you to record your screen, voice, and video all at once.
PowerPoint has a built-in feature that allows you to record your presentation as a video. Simply go to the "Slide Show" tab, click on "Record Slide Show", and then start recording. Once you're done, you can save your presentation as a video file.
The best way to record a presentation depends on your needs and resources. However, a combination of PowerPoint or Google Slides for creating your slide deck, a screen recorder for capturing your screen, and Speechify for creating high-quality voiceovers is a great place to start.
Preventing Sexual Harassment HR Video: Strategies, Consequences & Support
Read Aloud: Transforming the Way We Experience Text

Cliff Weitzman
Cliff Weitzman is a dyslexia advocate and the CEO and founder of Speechify, the #1 text-to-speech app in the world, totaling over 100,000 5-star reviews and ranking first place in the App Store for the News & Magazines category. In 2017, Weitzman was named to the Forbes 30 under 30 list for his work making the internet more accessible to people with learning disabilities. Cliff Weitzman has been featured in EdSurge, Inc., PC Mag, Entrepreneur, Mashable, among other leading outlets.
How to Record a PowerPoint Presentation

Knowing how to record a PowerPoint presentation with audio and video can provide viewers with an engaging experience. Whether you're creating a tutorial , a lecture, or a business presentation, combining visuals with narration helps convey your message more effectively.
In this guide, we will walk you through the step-by-step recording process in PowerPoint . From setting up your equipment and recording your screen to editing the final video, you'll learn everything you need to know about creating narrated PowerPoint presentations.
Prepare everything
- Presentation . Ensure your slides are complete and in the correct order. Update PowerPoint to the latest version for the best performance and features.
- Microphone . Use a good-quality microphone to record clear audio . A USB or headset microphone is recommended.
- Webcam (Optional) . If you want to include a video of yourself, use a built-in or external webcam.
- Script . Outline what you want to say for each slide. This will help you stay on track during the presentation recording.
How to record a PowerPoint presentation?
1. set up a screen recorder.
Download and install the free screen recording software for Windows from the official website. Launch the video recorder on your computer.
Easy to use free screen recorder for PC. Record desktop, take screenshots, upload the created content to the cloud for easy and fast sharing.

2. Configure settings
Go to " Settings " to set recording preferences .
- In " Video ", choose the desired output quality and format. Make sure the toggles next to " Record mouse movements " and " Animate mouse clicks " are enabled if needed.
- In the " Audio " tab, adjust the sound levels and select the desired input devices.

3. Record your presentation
Click the " Capture video " option in the side menu and select the mode. Choose the entire display if your presentation is in full-screen mode. You can also manually adjust the screen recording area to show the desired content.
Open your PowerPoint and press the F7 hotkey or click the " Rec " button to record the presentation with audio . Navigate through your slides while speaking clearly into the microphone.
Use drawing tools in the presentation recorder to highlight key points during your narration.
If you need to take a break, use the pause button to temporarily stop the recording. When you've completed your presentation, press the F8 hotkey or click " Stop ".

4. Editing the final video
Use the built-in video editor to trim any unwanted parts of the presentation recording. You can also adjust the playback speed, change the format, and resize the video.
If you need to make more changes, you can import your recorded clip into third-party video editing software . Add transitions, effects, background music, or other enhancements as needed.
Save your edited video in the desired location. It is also possible to upload the recording to the cloud and share it via a link .

FAQ on how to record a presentation
PowerPoint screen recording with audio and video is a powerful way to enhance your message and engage your audience. By following the steps outlined in this guide, you can create professional and polished videos that combine your slides with a voice-over .
Whether you're an educator, business professional, or content creator, knowing how to narrate a PowerPoint presentation recording can significantly boost your impact. Remember to practice your delivery and utilize editing tools to refine your final product.
Expert Tech Writer
Like the article? Share it!
Best 4 Screen Recorders for Windows 11 in 2024- Capture Every Moment in High Quality!
- August 29, 2024

Table of Contents
Whether you are a content creator, gamer, educator, or someone who needs to demonstrate software applications, having a reliable screen recorder for Windows is essential. Screen recording software allows you to capture your screen activities, create tutorials, record gameplay, or even conduct presentations with ease. The ability to record your screen in high quality with additional features like audio recording and annotation tools can significantly enhance your productivity and communication skills. In this blog post, we will explore the best screen recorders for Windows that cater to different needs and preferences.
What Can Screen Recorder for Windows Do?
1. Record Screen Activities: Screen recorders for Windows allow you to capture your screen in real-time, enabling you to create video tutorials, demonstrations, gameplay recordings, and more.
2. Audio Recording: Most screen recording software also supports recording system audio, microphone input, or both, giving you the flexibility to add voiceovers, commentary, or background music to your recordings.
3. Editing and Annotation Tools: Many screen recorders come with built-in editing features such as trimming, cutting, adding text, images, arrows, shapes, and highlights to enhance your videos before sharing them.
Best 4 Screen Recorder for Windows 11/10 Recommendations in 2024
1. aiseesoft screen recorder.
Aiseesoft Screen Recorder is a professional screen capture software designed for recording any screen activity on a computer. It allows users to capture both video and audio from their desktops, making it a versatile tool for creating tutorials, recording webinars, capturing streaming videos, and more. The software is known for its high-quality output and ease of use, providing a range of features that cater to both novice and advanced users. Here are some of its core features and benefits:

Aiseesoft Screen Recorder is engineered to capture screen activities in up to 4K resolution, ensuring that your videos are clear and detailed, making it ideal for professional presentations and high-definition content creation.

Editing Features : Aiseesoft Screen Recorder includes basic editing features, allowing users to trim recordings and add annotations (texts, arrows, highlights) during the recording process, enhancing the informative value of the videos.

Aiseesoft Screen Recorder is suitable for a wide range of applications, from educational content creators looking to make tutorials and online courses, to businesses aiming to record webinars and video conferences for later review. Gamers can also benefit from its high-quality video capture capabilities to record and share their gaming sessions. Moreover, its ability to record video calls makes it a great tool for preserving personal conversations or business meetings.
Core Features:
- High-Quality Recording : It captures the screen in high resolution, ensuring that the video output is clear and of high quality, which is particularly important for professional presentations and tutorials.
- Audio Recording : Besides video, Aiseesoft Screen Recorder can record audio from the computer system sound, microphone, or both simultaneously. This is useful for creating videos that require narration or want to capture sound from video streams.
- Flexible Screen Capture : Users can choose to record their entire screen, a specific window, or a custom-selected area, giving flexibility based on the recording needs.
- Various Output Formats : Recorded videos can be saved in multiple formats, including MP4, MOV, AVI, and more, offering compatibility with a wide range of devices and media players.
- Screenshot Tool : It also provides a convenient way to take quick screenshots of your desktop, which can be saved in various image formats.
2. TunesBro ScreenGeeker
TunesBro ScreenGeeker is a comprehensive and free screen recording software for Windows, designed to enhance communication by allowing users to capture various types of screen activities. It is particularly useful for creating recordings that include screen grabs, webcam recordings, desktop activity, and audio.
This software supports recording with both system sounds and microphone audio simultaneously, making it versatile for different use cases such as documenting web conference calls or creating tutorial videos. ScreenGeeker stands out for its ease of use and its ability to share captured content effectively through an intuitive interface.

It is capable of recording videos from any part of the Windows screen, whether it’s live streaming content, specific activities, screenshots, or webcam output. The tool is designed to be user-friendly, enabling the capture of specific areas or the full screen, and it supports the creation of high-resolution videos. This flexibility and range of features make TunesBro ScreenGeeker a suitable choice for users looking for a reliable screen recording solution on Windows.

The core features of TunesBro ScreenGeeker include:
- Versatile Screen Recording : Users can record any part of their screen, whether it’s the entire desktop, a specific window, or a manually selected area. This flexibility makes it suitable for various recording needs, from full-screen presentations to targeted tutorials focusing on specific applications.
- High-Quality Video Output : ScreenGeeker supports recording in high resolution, ensuring that the output videos are clear and of high quality, which is essential for tutorials, presentations, and professional-grade recordings.
- Audio Recording : The software can record audio from the system and microphone simultaneously. This dual recording capability is particularly useful for creating instructional videos, webinars, or recording video calls, where both the system sounds and the narrator’s voice are essential.
- Webcam Recording : Beyond screen and audio capture, ScreenGeeker also supports webcam recording. This feature is useful for adding a personal touch to recordings or creating picture-in-picture videos, where the speaker’s image appears overlaid on the screen content being discussed.
3. Bandicam
Bandicam is a highly regarded screen recording software that enables users to capture their computer screen, game, and webcam footage with high compression ratio and quality. It is designed to record a variety of activities on a PC screen, including applications, videos, and games that use DirectX/OpenGL/Vulkan graphics technologies. Bandicam is popular among gamers, educators, and professionals who need to create video content or tutorials. Its key features and benefits include:
Pros: Lightweight, high compression ratio, real-time drawing. Cons: Limited editing tools compared to other software.
4. Icecream Screen Recorder
Icecream Screen Recorder is a user-friendly software application designed for capturing screen activities and taking screenshots on your computer. It’s versatile and widely used for various purposes, such as recording webinars, live streams, tutorials, and video calls. Icecream Screen Recorder offers a balance between functionality and ease of use, making it accessible for both novice users and those with more experience in screen recording. Here are the key features and aspects of Icecream Screen Recorder:
Pros: User-friendly interface, audio recording, webcam overlay. Cons: Limited editing capabilities compared to other options.
In Conclusion
In conclusion, choosing the best screen recorder for Windows boils down to your specific needs, preferences, and budget. Whether you require advanced editing features, ease of use, or high-quality recording capabilities, there are plenty of options available to cater to different requirements. Make sure to explore the features, pros
You Might Also Like
How to bluetooth iphone to samsung smart tv, aiseesoft foneeraser review – the ultimate solution for protecting your personal data., nektony disk space analyzer review – analyze your hard drive, top 6 alternatives to 4ukey screen passcode unlocker for unlocking your iphone screen, the best 6 alternatives to free mp3 converter for converting audio files, a comprehensive review of aiseesoft fonelab iphone data recovery: recover lost data with ease, easeus cleangenius review – the ultimate solution for pc cleanup and optimization, review: create stunning visuals and diagrams with wondershare edrawinfo.
We Trust in Human Precision
20,000+ Professional Language Experts Ready to Help. Expertise in a variety of Niches.
API Solutions
- API Pricing
- Cost estimate
- Customer loyalty program
- Educational Discount
- Non-Profit Discount
- Green Initiative Discount1
Value-Driven Pricing
Unmatched expertise at affordable rates tailored for your needs. Our services empower you to boost your productivity.
- Special Discounts
- Enterprise transcription solutions
- Enterprise translation solutions
- Transcription/Caption API
- AI Transcription Proofreading API
Trusted by Global Leaders
GoTranscript is the chosen service for top media organizations, universities, and Fortune 50 companies.
GoTranscript
One of the Largest Online Transcription and Translation Agencies in the World. Founded in 2005.
Speaker 1: Good morning, afternoon or evening colleagues. Hi, my name is Brandt van de Gaast and I'm a temporary instructor at the philosophy department of Utrecht University. Now, in this quick video, I'd like to show you a few things on how you can record lectures or presentations for remote teaching. And I will especially go into the technical details, so the hardware and the software that you could use for this purpose. And hopefully some of you will find the information useful for your own teaching. Now, the things I'd like to cover are tools and software. Then I will first show and explain how to record a lecture in Microsoft Teams. Then how to do the same in OBS, which is open broadcaster software. Then I'll show you how to use an electronic whiteboard in OBS. And finally, I will combine a few of these applications together. For instance, I'll show you how you can stream your webcam together with a whiteboard into video conferencing software such as Microsoft Teams. Now, the level of tech savviness that these applications presuppose increase. So not everybody may be interested in all of them, but it's just to show you what can be done. All right, so let's first talk about some of the tools and the software. So for recording, what I like is OBS, open broadcaster software. This is open source and it's very versatile. You can download it at obsproject.com. For video conferencing and also for teaching, Utrecht University normally uses Microsoft Teams. So that's what I'll be using as well. For your presentations, you can use PowerPoint. But of course, you can also use a PDF viewer or Apple's Keynote or another bit of software. Now, the whiteboard application will require a drawing program. Lots of options there. The one I like is called SmoothDraw, which is a very minimalistic, free drawing program. The hardware that you'll need is a webcam, of course, a microphone, and usually that's built into the webcam. For the whiteboard application, a drawing tablet is useful. Now, Wacom has pretty much cornered this market. So any Wacom tablet will do the job. And of course, a desktop or a laptop computer. Okay, so let's look at the first application, recording a lecture in Microsoft Teams. And this is fairly straightforward. You go to the calendar in Teams and you click on Meet Now. You are now in a meeting with yourself and you can share the screen containing your presentation. Now, if you now hit record and give your lecture, your presentation will be recorded. If you then stop recording, stop sharing your screen and stop the meeting, then you have a video of your presentation. Now, you can find this video by going to web.microsoftstream.com. And on stream, you can edit the video. You can determine who can view it and who can delete it. You can also create a channel and you can assign the video to a channel. Now, this is useful because if you also teach inside Teams, you can simply combine the channel to your team and give the students access to that video. In your class in Teams, you can simply create a tab which contains all the videos of your channel. So, it's useful and it's worthwhile to use both Teams and Stream at the same time. It's very well integrated. Let me show you how to do this. So, let's record a lecture using only Microsoft Teams. You go to calendar and you click on Meet Now and you join the meeting. Now, you are in a meeting with yourself and you can start sharing the screen containing your presentation. So, I'm going to share this screen. Well, now I can go back to Teams and I can start recording my meeting by clicking on Start Recording. So, right now, my meeting with myself is being recorded. Now, at this point, I can simply go through my slides and give my lecture and then finish. And I will go to Teams. I will stop recording. I will stop sharing. And I will stop the meeting. Now, I can go to the website, web.microsoftstream.com, and I can look at the most recent video. And as you can see, my meeting has been recorded and here's the file. I can click on it. Well, it's not ready yet, but this is where I can set all the permissions. I can allow students to watch it. I can also add it to a channel and I can even do simple editing. So, this is the very simplest method of recording your lecture. So, the next thing I'll show you is how to record a lecture in open broadcaster software, OBS. So, first, you go to obsproject.com and download and install OBS. When you have installed it, make sure that the audio and video connections are working as they should. You then go to Sources and you add your webcam window and the window of your presentation. Now, there's a slight complication here because OBS and Microsoft PowerPoint, they don't play nice together. So, what I usually use is a PDF viewer. I convert my presentation into PDF and use that. You arrange them as desired, these windows, and you start recording. Now, let me show you how you can do this. Let's now try to record a lecture in OBS. So, first, you install OBS and this is what the main window looks like. Now, you can add sources to the Arrange window by going to Sources down here, clicking on Plus. And first, I will select Video Capture Device, which is my webcam. And I will make some adjustments. Usually, that's not necessary. And then I can resize my webcam because my face was too big just then. And I can make it like that. And now I can add another source. For instance, I can go to Window Capture and I can select my Presentation window. There it is. I can resize it and reposition it. Now, this window contains this unwanted border and I don't want that. So, I can use Alt-Left-Click to crop the window and show me only the part that I want to see. I put it in the top right, I make it bigger again and I send it to the back. So, now my webcam is on top. Now, I can just give my lecture and go to my PDF window and advance through the slides while giving my presentation. And then I can stop recording. Now, as I said, OBS does not play nice with PowerPoint, unfortunately. So, you'll have to use PDF Viewer or some other program. Now, this recording will end up on your hard drive and it will have a certain resolution and a certain file format. If you want to change that, go to File, Settings and go to the Output or the Video menu. And that's where you can adjust the resolution as well as the file format. So, that's fairly straightforward, I hope. So, the third thing I'd like to show you is how you can use a whiteboard in Open Broadcaster software. So, first you'll need a drawing program. So, start up your favorite drawing program. What I like is called Smooth Draw. Then you start OBS. And in the Arrange window, you add your webcam and the window of your drawing program. You arrange them the way you want and you start recording. Now, the whiteboard, for instance, is used by the Khan Academy. This is a well-known organization that creates math videos on the internet. Look up their channel to see how you can use a whiteboard in teaching to great effect. Okay, so let's now combine our webcam and a whiteboard in OBS. First, we add the video capture device as a source. And we have our webcam. Make adjustments if needed and then resize it. Now, then we add a new source, which will be a window capture. And we will select our drawing program. There it is. We will resize it with CTRL-left-click. Now, as you can see, this window also has unwanted edges. We can crop those by using ALT-left-click. So, there we go. And then we make it bigger. And we send it to the back. And now I can hit Record. And then I can start drawing. Which is basically the whiteboard application we were going to use. And, of course, you can assign a button to delete so that you can easily wipe the whiteboard and start from scratch. So, this is how to use OBS and a drawing program to create a lecture in which you use a whiteboard. Now, the fourth application I'd like to show you is how you can use your webcam together with a whiteboard inside a meeting in, for instance, Microsoft Teams or in other video conferencing software, for instance, Zoom. Now, to do this, you'll need a plugin for open broadcaster software, which is called VirtualCam. So, get this plugin and install it. Fire up OBS and arrange the webcam and the whiteboard window the way you want it to look. And then start running VirtualCam. So, what OBS will do is it'll take the output of the arrange window and present it to other software as if it's the webcam. So, for instance, in Teams, you can now select OBS camera as your webcam and the participants in your Teams meeting will see the output of OBS. This is one way where you can stream your webcam together with a whiteboard to other participants in a meeting in Teams. Now, of course, you can also do this in certain other ways. For instance, you could also share the window of your drawing program inside Microsoft Teams. But combining them in OBS is what I prefer. So, let me show you how to do that. All right, so let's try some other applications. Let's combine some of these. Suppose we would like to have our webcam and a whiteboard visible in a live meeting, for instance, in Teams. Well, that's possible. So, you go to OBS and you add your webcam and your drawing window as a source and you arrange them the way you want. Then you install a plugin for OBS called VirtualCam. And when you've installed it, it'll become visible in the Tools menu. So, you hit VirtualCam and then hit Start. What now happens is that OBS presents this output to other software as if it is your webcam. So, you can go to Teams, go to Calendar, start a meeting, join the meeting, and other participants in this meeting will see your webcam combined with a whiteboard and not just your webcam. And you can talk to the other participants. And meanwhile, you can draw on the screen. Draw in a live meeting. Now, this is useful for certain applications. I've been using it for question and answer sessions with my students where I would talk to them and draw on the screen using the whiteboard. Now, there are some downsides. One is that Teams sometimes crops your image unpredictably. Now, you can prevent that by asking other members of the meeting to right-click your image and to select Fit to Frame. If you select Fit to Frame, there's no cropping going on. And, of course, they can also pin your screen, which means that your screen will be more prominent on their screens. Now, of course, you could also achieve this in a slightly simpler setting. You can, of course, also have a meeting with others where you use your webcam and where you share the window of your drawing program in Teams by going to Share. So that's also a possibility. But I like this one a little bit better because you have more control over what others see. So hopefully this was also useful. All right, so that's it for today. Hopefully some of these tips were useful. If you have any questions, don't hesitate to send me an email. Take care.

10 Webcam Recording Software Tools to Make Sharing Ideas Easy
Senior Marketing Manager at Loom

Your new teammate just started on Monday, and they’re eager to dive in and get started in their role. But when you try to help them navigate your team’s tools and processes, you’re left scrambling for the right words to explain. You also tried to share positive feedback with them on Slack but couldn’t think of a way to convey that without loading your message with exclamation points and emojis.
Webcam recording software can turn struggles like these into wins. By capturing your face, voice, and tone, as well as expressions, a webcam recording makes it easier to explain complex topics. Plus, recording your webcam lets you personalize your message with a supportive, positive tone—or whatever vibe you want to share.
These are 10 of the best webcam and screen recorder tools to turn your camera into a powerful communication solution.
10 best webcam recording software apps for remote team communication
The following browser-based webcam recording tools and desktop apps offer unique features to support remote team communication and collaboration.
Loom ’s webcam recording software lets you create personalized training videos, team updates, product demos, and sales outreach messaging in just a few clicks. Along with capturing your face and voice, Loom also records your screen for an extra layer of helpful context that makes conversations clearer.
Combined with easy-to-use editing tools, background noise removal, and a built-in video trimmer , Loom doesn’t require video editing skills. Once you’re done recording, you can share your video with an instantly generated link. This makes it even easier to share timely feedback, walk coworkers through your thought process, and even record tutorials that can be revisited by anyone at a later date.

Recording enhancements: Embed CTA links to share resources with viewers or annotate your recordings to highlight information.
Video editing tools: Splice, stitch, and trim your recordings—Loom automatically takes care of background noise suppression and optimizes your lighting.
Loom AI : Use Loom AI to automatically add video titles, summaries, and chapters. It also removes filler words and pauses, and can even turn your webcam recordings into a document, message, or a Jira or Linear bug ticket.
Built-in feedback loops: Boost engagement with comments and emoji reactions, which viewers can leave directly on your shared webcam recordings.
Many of Loom’s editing features automatically optimize your recording for effortlessly high-quality videos.
Video links are instantly generated so you can share your recording right away without waiting for it to render.
You can select an area of your screen to record alongside your webcam or capture your full screen.
The free plan limits you to 25 recordings of up to five minutes each.
Pricing: Free, with paid plans starting at $12.50 per user per month when billed annually.
2. StoryXpress
A quick solution for anyone in a hurry, StoryXpress offers webcam and video capture directly in your browser.

Video player customization: Brand your videos by adjusting the video player color, logo, and controls visible to viewers.
Shareable links: Embed your video in an email or share it on social media with unique video links.
Built-in editing: Add an intro or outro to your video or crop and blur specific sections.
The StoryXpress browser extension lets you record offline.
There’s a free in-browser webcam recording solution.
Pricing rapidly increases for the Team and Business plans.
Pricing: Free webcam recorder, and paid plans start at $8 per month when billed annually.
Vidyard’s webcam and screen recording tool offers you the flexibility of recording within your Chrome browser or downloading a Mac or Windows app.

Features:
Automatic video transcripts: Instantly generate video transcripts, ensuring everyone can access and understand your recordings.
Viewer insights: Get real-time updates that tell you who’s watching your videos and how long they’ve been viewed so you can gauge whether your recorded training or feedback is helpful.
Embeddable videos: Embed your webcam recordings on your company site, knowledge base, or even an email so you can easily share your videos.
You can collect and share webcam recordings in one place within Vidyard video hubs.
Vidyard includes a script generator and avatars to help you scale training, sales outreach, and other projects.
The free plan limits the number of embeds to five and doesn’t allow in-video comments.
Pricing: Limited free plan, and paid plans start at $19 a month when billed annually.
4. Riverside
While it’s primarily a podcast recording tool, Riverside also offers a webcam recording tool.

Local recording: Don’t worry about a poor internet connection ruining your videos—Riverside uses local recording.
Phone-as-a-webcam: Don’t have a webcam on your device? Record videos with your cell phone as a webcam.
Advanced tools: Like to tinker in post-production? Riverside lets you separate video, audio, and screen recording tracks for each person in your videos.
You can simultaneously record audio and video for up to seven people.
AI editing tools automatically polish your audio and video.
Riverside works with any PC, Mac, Chrome, iPhone, or Android device.
Riverside may become overwhelming for those looking for a simple webcam recording solution.
Pricing: Limited free plan, and paid plans start at $15 a month when billed annually.
5. BombBomb
BombBomb’s webcam recording software is extremely flexible, letting you use it within Gmail, Outlook, Microsoft Edge, and many more apps.

Embeddable CTA buttons: Encourage viewers to take the next step during your product demo or tutorial with an in-video CTA button.
Built-in video editor: Trim your webcam recordings or add custom intros and outros with BombBomb’s easy-to-use editor.
Custom thumbnails for your BombBomb recordings help viewers understand the content.
You can use it with the tools you’re already familiar with, thanks to integrations with 67+ apps.
There’s no free plan, and paid plans may be too costly for small teams.
Pricing: Plans start at $33 a month when billed annually.
Another screen and webcam recording combo, Vimeo offers many extras that help you record the perfect video in one take.

Video customization: Enjoy multiple customization options, including a host of templates and a brand kit that lets you apply your company logo, colors, and imagery to your videos.
Video editor: Trim, stitch, and add music or text to your videos with Vimeo’s easy-to-use editor.
Record and watch with ease: Ensure you always record the clearest message possible with Vimeo’s auto transcription feature, teleprompter, and text editor.
Vimeo integrates with multiple workplace apps like Jira, Figma, and Zoom.
There’s a limited free plan for teams to test out features before paying for Vimeo.
All videos made with the free plan get a watermark.
Video viewing bandwidth maxes out at 2 TB per month—even on paid plans—which means your videos may be unwatchable until your bandwidth limit resets.
Pricing: Limited free plan, and paid plans start at $12 a month when billed annually.
7. Hippo Video
Hippo’s webcam recording software includes tools for easily creating, editing, and sharing high-quality videos.

Extensive collaboration tools: Draw and write on your recordings, click to focus your recordings on a specific area or your face, and highlights your cursor so viewers can easily follow along.
Document-to-video: Turn your PowerPoint training slides and PDFs into videos narrated by an AI avatar.
Intuitive video editor: Use Hippo Video’s built-in editor to trim and crop your recordings or add additional images, text, or callouts.
You can edit videos by editing the text transcription.
The free plan doesn’t add watermarks to videos.
Fees are higher on Hippo Video’s paid plans compared to competing software.
Pricing: Limited free plan, and paid plans start at $20 per user per month when billed annually.
Need help remembering what went down in your meetings? Notta’s screen and webcam recorder works with Microsoft Teams, Zoom, Google Meet, and Webex to help you capture every important detail.

Video call integrations: Capture meetings on Teams, Google Meet, Zoom, GoTo Meeting, and Webex.
Automatic transcription: Transcribe your recordings and export them in various file formats including PDF, DOCX, and XLSX.
Notta AI: Use Notta AI to transcribe, summarize, and translate your recordings into 58 languages.
Notta connects with numerous apps including Slack, HubSpot, and Dropbox.
An AI transcriber, summarizer, and translator improve accessibility.
You can customize your screen recording layout or record only your webcam.
The free plan limits transcription to three minutes per recording or 120 minutes per month.
Pricing: Limited free plan, and paid plans start at $9 per month when billed annually.
9. Switchboard
Switchboard combines screen and webcam recording with a virtual collaboration space for teams.

Flexible recording: Start recording within Switchboard or capture video of other apps.
Collaborative rooms: Replace meetings with rooms where you can share documents, videos, and notes, as well as record your webcam for walkthrough recordings.
Asynchronous feedback: Collect comments from teammates on any item shared in a Switchboard room to keep the conversation going.
Your videos benefit from collaborative features with webcam and screen recording tools.
Switchboard integrates with multiple apps like Figma, Asana, Notion, and Slack.
You can make real-time video calls alongside webcam recording and using asynchronous collaboration tools.
Recording features require access to Chrome or the desktop app.
Pricing: Limited free plan, and paid plans start at $10 per user per month when billed annually.
10. OBS Studio
An open-source, free software solution, OBS Studio records your external webcam and screen.

Video and audio editing suite: Polish and perfect your video footage in multiple ways with an extensive toolkit.
Live streaming support: Livestream community events and launches in addition to sharing gameplay using OBS Studio’s streamer-friendly tools.
The open-source software receives updates but won’t charge you a dime.
OBS Studio works on Windows, Mac, and Linux computers.
The sheer number of features might make it overwhelming for beginners to learn.
Pricing: Free.
When to use webcam recording software
A Loom video explaining how to use videos for internal communication
Webcam recording software is an ideal alternative to using video communication platforms like Zoom that require everyone to be present at the same time.
Webcam recordings allow remote and hybrid teams to use asynchronous communication . This helps reduce meeting fatigue , improves cross-functional collaboration , and builds connections through video .
Webcam recordings can benefit hybrid and remote teams in numerous ways, including:
Reducing the number of meetings
Adding clarity and context to asynchronous communication
Providing a personal touch to foster feelings of connection among remote teams
Accommodating flexible work schedules and distributed teams working across multiple time zones
Using webcam recording software is a great solution for creating training videos and step-by-step tutorials that coworkers can revisit whenever they need a refresher.
You can also use webcam recording software for internal communications, like project updates and sharing feedback. Teams can even use software like Loom to make knowledge sharing easier.
How to choose the right webcam recording software for your needs
Looking for a webcam recording tool that lets you create high-quality, engaging videos without costing an arm and a leg? Keep an eye out for these features:
Screen recording: Capturing both your webcam and screen at the same time adds context to explanations, tutorials, and presentations.
High-quality video: Look for recording software with at least 1080p resolution to create professional-looking videos.
Shareable links: Sharing your webcam videos via link lets you skip the potential headache of embedding your videos in an email or uploading them to apps like Slack.
Editing tools: Polish your videos with built-in trimming, splicing, and editing tools, as well as background noise removal, annotations, captions, and translations.
Integrations with other apps: Ensure your webcam recording software works with other productivity and communication tools like Zoom and Slack.
Multiple apps: Give your team flexibility by choosing software that lets your team record from their phone, Mac, PC, or browser.
Should you use built-in Windows or MacOS screen recording software? While Microsoft and Apple’s built-in tools lack advanced editing functionality and features like animated transitions or overlays, they’re great if you need a quick solution. Check out these guides to learn how to screen record on Windows 10 or 11 or how to screen record on your Mac .
5 tips for creating professional-looking webcam recording footage
Here are five ways you can polish your webcam footage to create high-quality recordings:
Avoid background distractions: If your recording software allows it, turn on background noise suppression and blur your webcam background to keep viewers focused on your message.
Record your intro, outro, and primary message separately: Keeping your webcam recordings to short clips makes it easier to do a clean take—and the smaller files are easier to edit. You can later stitch video clips together to create one cohesive recording.
Trim unnecessary footage: Remove any awkward starts, stops, or fumbled words. Some apps, like Loom, offer AI features that may remove filler words and silences automatically.
Customize your video preview: Make your video’s topic obvious by adding a custom thumbnail and updating the title, summary, and chapters, if applicable. Some webcam recording tools may help you write AI-generated video titles and summaries , which can speed up your editing process and get your video ready to share more quickly.
Add extras: Annotations and embedded call-to-action buttons are a great way to provide additional information that your video may not include. Annotating your screen lets you highlight certain areas or add quick notes, while CTA links help viewers easily find any related documents you might mention—or turn your webcam video into a conversion asset.
Use a screenshot as a custom thumbnail: Take a screen capture on Windows or make a Mac screen capture and use it to customize your video thumbnail.
How to render your webcam recording for easy sharing
Your best bet for easily sharing webcam recordings is to use software like Loom that hosts your video and creates a shareable link once you’ve finished recording.
But if you prefer to save a file on your device, here are some basic pointers for rendering your webcam videos:
Optimize resolution: Aim for 1080p resolution, as this provides the best balance of high-quality video with a manageable file size.
Compress video: Use a video bitrate of 8 to 10 Mbps to reduce the file size while maintaining quality.
Choose your frame rate: Recording your webcam with a frame rate of 30 FPS is standard.
Export in MP4 format: Choose MP4 as your video format for the best compatibility and an optimal balance between video quality and size. WebM and AVI may work as alternatives.
Cut unnecessary footage: Shrink your video file size by editing it to remove silences, irrelevant information, and mistakes.
If you’re unsatisfied with the quality of your compressed video, you can save two versions: a high-quality version for your archives and a compressed version to share with others.
It’s also a good idea to upload your webcam recording to a hosting site like YouTube or Google Drive so you can send a link instead of attaching the file to an email.
Create and share webcam videos easily with Loom
You shouldn’t have to jump through hoops just to record, edit, and share your webcam footage. Loom simplifies webcam recording with multiple features like automatic background noise removal, filler word removal, and the option to edit your video by editing your transcript.
Find out how Loom’s easy-to-use webcam and screen recorder can enhance your remote team communication today.
Sep 3, 2024
Featured In:
Share this article:.
Jeong Lee works in Marketing at Loom.
- Meeting Transcription
- Meeting Note Taker
- Meeting Recording
- Headphones and Devices
Audio Quality
- Tips and Best Practices
- Meeting Apps
- Meeting Templates
- Remote Work
- Contact Centers
- Accent Localization
- Engineering Blog
7+ Best Audio Recording Software (2024 List)
Play the article
Spread the word
The era of silent movies is long gone; in the modern world, sound is important, it breathes life into visuals, influences emotions, and forms the foundation of effective communication. Musicians, podcasters, bloggers, and content creators will ensure you the importance of sound, and audio in more convincing ways. High-quality audio depends on the recording software. We’ll explore the best audio recording software so you can find the one that perfectly meets your needs.
Key Factors to Consider When Choosing Audio Recording Software
Nowadays, it’s not easy to choose the best audio recording software, as there are many good ones. When choosing audio recording software, it’s essential to consider several important factors, which are listed below. These factors will guide your decision, but remember—what’s best for you is ultimately a subjective choice based on your unique needs and preferences.
The first factor will be the purpose : Are you recording music or podcasts, maybe voiceovers? For each purpose, there’s different audio recording software, as each activity has its requirements. For example, podcasters typically prefer easy-to-use software and don’t need the multi-track capabilities that music producers require. If you’re a content creator, you might only need something like Podcastle, which is intuitive and beginner-friendly.
Compatibility
This will be the next important factor: Before choosing you have to ensure that your chosen software is compatible with your operating system. Some software programs are designed for Windows or macOS, of course, there are cross-platform software as well. The next important step is checking if the software supports the hardware and plugins you want to use, for example, audio interfaces or VST(Virtual Studio Technology) plugins.
Features and Functionality
This is where thorough research comes into play. Evaluate every feature the software offers, review the pros and cons, and determine what aligns with your needs. Key features to consider include multi-track recording, editing tools, effects, and plugin support. If you require something specific, make sure the software includes it before making your choice.
Our goal is to produce the best audio possible, so audio quality is a critical factor. Your software should support high-resolution audio formats and offer professional sound processing, depending on your intended use.
When listing the key features of audio recording software, there’s another essential feature that deserves mention: noise cancellation. If you frequently record in noisy environments, you’re well aware of how unwanted background noise can ruin an otherwise perfect recording. This is where Krisp comes in. Krisp is a noise cancellation tool that seamlessly integrates with any recording app to eliminate background noise.
By recording with Krisp from the start, you can save time and effort by reducing the need for post-editing to remove noise and echoes.
Audacity – Best Free Audio recording software

Audacity never loses its popularity. It is a free and open-source digital audio editor and recording application software, available for Windows, macOS, Linux, and other Unix-like operating systems. It works great with Krisp , which allows you to have noise-free audio, even while recording. Audacity is every podcaster’s best friend, and we know why. It is really easy to use, has many features to manipulate audio and the most important thing is it’s free. Also, with Audacity, you can record live audio, digitize recordings, and edit various sound files. Now, let’s dig into its pros and cons.
- Live audio recording capabilities
- Multi-track editing and mixing
- Support for various audio effects and plugins
- Tools for precise spectral analysis
- Digitization tools for converting tapes and records
- It’s Free and Open-Source
- Cross-platform compatibility (available on Windows, macOS, and Linux)
- Wide range of editing tools
- Lightweight (has a low system resource requirement)
- Community support (you can find many tutorials, forums, and troubleshooting materials)
- Outdated UI
- Lack of guidance
- No Real-time effects
- Limited multi-track capabilities
- No native MIDI support
Podcastle – B est intuitive and beginner-friendly audio recording software

If you are looking for an all-in-one platform you should come down in favor of Podcastle. It’s one of the best audio recording software options available, and here’s why: you can record, edit, export, and even host your show without ever leaving the software, all while achieving the studio-quality sound everyone strives for.
Podcastle features a cutting-edge UI and user-friendly design that’s perfect for beginners. It enables podcasters, creators, interviewers, and more to work on their audio with professional studio quality. Additionally, it’s entirely web-based, so you can access it from anywhere with an Internet connection, without needing to download large files to your computer. One of its most valuable features is the text mode editing functionality, which lets you edit your audio simply by editing your script.
- All-in-one podcast creation platform
- AI-powered noise reduction
- Seamless remote recording
- Automated transcription and text-to-speech
- Great UI with drag-and-drop editing
- It offers a free plan
- Beginner-friendly and intuitive UI
- AI-powered features for a more efficient workflow
- AI audio enhancement tool
- Crystal clear sound and HD recording
- Hosting Hub to host your podcasts
- Collaborative features to work in teams
- Dependent on Internet connection
- Not available on Android
Adobe Audition – Best for Professional Audio Editing

Adobe is renowned for delivering top-notch software, and Adobe Audition is no exception. With its powerful editing tools and flawless performance, it’s the go-to audio recording software for professionals who need advanced audio editing, sound design, and mixing capabilities. Adobe Audition offers powerful tools, flexibility, and studio-quality audio, but this level of quality comes at a price.
Adobe Audition
- High-quality multitrack editing
- Sophisticated noise reduction tools
- Automatic Speech Alignment for syncing voiceovers or ADR
- Batch processing to apply effects to multiple files at once
- Loudness metering tools to ensure broadcast standards compliance
- Robust audio restoration capabilities
- Wide range of sound effects and presets
- Professional-level tools
- Integration with other Adobe products
- Supports high-resolution audio formats
- Real-time effects
- Expensive subscription
- Requires a powerful computer
- No MIDI support
- Not ideal for simple projects, a bit overwhelming
GarageBand – Best recording software for Mac

Are you searching for the best recording software for Mac? If so, you’re in the right place. This software is perfect for beginners who want to learn more with a user-friendly interface. It offers all the essential features that a beginner podcaster, musician, or content creator needs, including multitrack recording, built-in virtual instruments and loops, and intuitive functionality.
- Integration with iCloud
- Touch instruments for intuitive music creation
- Built-in guitar and voice effects
- Support for external audio interfaces and MIDI controllers
- Share projects directly to music streaming platforms
- Free for macOS Users
- User-Friendly Interface
- A wide variety of virtual instruments and loops
- Multi-Track Recording
- High-Quality Audio Output
- macOS Exclusive
- Limited Advanced Features
- No MIDI Out Support
- Basic Mixing Capabilities
Reaper – Best powerful audio recording software

Ask anyone in the industry—everyone knows Reaper. It’s a powerful and affordable digital audio workstation that offers incredible value for money. This software is also highly customizable, supporting a wide range of hardware and software plugins. With features like multitrack recording, extensive plugin support, and strong community backing, Reaper stands out as a top choice. If you’re looking for professional-grade quality without breaking the bank, this software is perfect for you.
- Customizable interface and workflow
- High-resolution audio support
- Extensive MIDI hardware and software support
- Flexible routing and processing capabilities
- Scripting and macro capabilities for advanced control
- It’s affordable
- Supports many plugins
- Lightweight
- Provides multi-track recording
- Regular updates from the developer
- No built-in virtual instruments
FL Studio – Best for beat-making and electronic music

Attention all electronic music enthusiasts: this audio recording software is tailor-made for you. Renowned for its user-friendly interface and ease of use, it’s the perfect companion for beginner music producers. Beat-making is a standout feature of this tool, but its capabilities extend beyond electronic music. With a diverse array of plugins and effects, it proves to be versatile across various music genres.
- Comprehensive MIDI composition and editing via piano roll
- Advanced audio stretching and pitch shifting capabilities
- Extensive automation support for complex productions
- Integrated multi-track mixer with per-track VST support
- Mobile version available for on-the-go music creation
- User-friendly interface
- Powerful beat-making tools
- A wide range of plugins and effects
- Lifetime free updates
- Focused on Windows
- Limited audio recording features
Pro Tools – Best industry standard for recording studios

Pro Tools is considered to be a gold standard for recording studios. It is released by Avid Technology and is used mostly for music creation and production. This powerful software handles the mastering process perfectly and ensures the best quality. Pro Tools is ideal for high-end audio projects.
- Seamless integration with hardware interfaces
- Highly efficient audio engine
- Support for extensive track counts
- Non-destructive editing capabilities
- Comprehensive MIDI sequencing and scoring tools
- Industry-standard
- Advanced editing tools
- Provides perfect sound quality
- Good plugin support
- Collaboration tools
- Not-easy for beginners
- Resource-intensive
- Less advanced MIDI support
Krisp – Best for meeting recordings

Clear audio is essential not only for podcasts, music, or video blogs but also for meetings. Nowadays, millions of people have remote jobs, which involve daily virtual meetings. People work from various locations, such as noisy cafes, coworking spaces, or home environments with children, making noise-cancellation tools a necessity. The exit from this chaotic routine offers Krisp, which is known for its noise-cancellation capabilities. Krisp integrates with many audio recording software as well as with almost every application, making it a perfect choice for beginners and professionals.
Real-time noise-cancellation feature is the most impressive one. This means that you can achieve noise-free audio from the moment you start recording, reducing the need for extensive post-production edits. This feature is especially beneficial for maintaining focus and clarity during discussions.
- AI-driven noise cancellation technology
- Real-time voice optimization
- Support for all communication platforms
- User-friendly interface for ease of use
- Privacy-focused processing of audio data
- Advanced AI noise cancellation for clear audio
- Real-time background noise separation
- Broad compatibility with communication apps
- Easy-to-use interface
- Local audio processing ensures privacy
- Suitable for individuals and teams
- Available in both free and premium versions
- Limited access with the free plan
Final thoughts
To the question “What is the best software for audio recording?” you can find many answers with different audio recording software names in them. That’s correct, as there are many excellent audio recording software options available, but finding the right one depends on your specific needs and experience level. Each software has its own strengths and weaknesses, so if you’re clear on what you require, choosing the best fit will be a quick and straightforward process.
Many audio recording software lack built-in noise cancellation, which can lead to audio being spoiled by background noise and echoes. To ensure crystal-clear sound, it’s a good idea to download Krisp , the best noise-cancellation tool.
Related Articles

- Video Editing
- Animation Tips
- Website Tips
The best AI animation generator in 2024
Renderforest Staff
30 Aug 2024
13 min read

Hear us out: you no longer need to hire an animator or spend hours struggling with animation software to bring your creative vision to life. Why? Because, like everywhere else, AI is taking over. If you have a great animation in mind and are not sure where to start, keep reading. To save you hours of research, we’ve put together a list of the best AI animation generators that can help you create professional animated videos in no time.
The best AI animation generator
- Renderforest for creating professional-quality videos
- Pictory for converting long-form content into short videos
- Lumen5 for transforming text into video content
- Offeo for creating short, attention-grabbing videos
- Synthesia for creating videos with virtual presenters
- InVideo for social media and marketing content
- Animoto for creating marketing videos and slideshows
- FlexClip for all-in-one video creation
- Magisto for creating polished videos from raw footage
- Veed.io for online content creation and editing
- Wave.video for video ads and promos
What makes the best AI animation software?
When it comes to the best AI animation software, a few key features can set a platform apart from others. Let’s take a look at what makes a top-notch AI video generator and why these factors are key to creating high-quality content.
AI-powered editing capabilities
Needless to say, the main thing to consider in an AI animation generator is its AI capabilities. Look for an AI technology that can analyze your footage, generate videos that match your brand’s tone of voice, suggest outlines for your videos, and so on.
Also, if the AI features are too complicated to work with, you may want to try something else. The best animation apps shouldn’t make you spend hours figuring out how to make an AI video . In fact, the whole point of AI is to make your life easier. You should be able to enjoy the benefits of the AI video generator without any hassle.
Template variety and customization
Next, we have template variety and customization options. Whether you’re making an explainer video, a social media clip, or a presentation, having a range of templates makes it easy to find a style that suits your needs. The best animated video maker will also let you tweak these templates to match your brand’s colors, fonts, and overall vibe. This level of personalization is key to making your videos feel unique and grabbing your audience’s attention right from the start.
Text-to-video conversion
Text-to-video conversion is proving to be a game-changer in video production. This feature allows you to turn written content into videos with just a few clicks. Imagine being able to turn your blog post into a dynamic video without needing to film anything. It’s perfect for anyone looking to repurpose content in minutes. This way, you can reach audiences who prefer watching over reading.
AI-generated voiceovers and avatars
AI-generated voiceovers and avatars add a fun twist to your animations. Look for an animation maker who can create realistic voiceovers in different languages and accents, making your videos accessible to a broader audience. Plus, customizable avatars can represent your brand or message in a unique way. This helps humanize your content and can make your videos more relatable.
Access to a stock media library
Finally, check whether or not your animation app gives you access to a stock media library. The best AI animation software should offer a rich collection of images, video clips, and music tracks that you can use for various animation styles. This saves time and money since you won’t have to search for or purchase external media. It also boosts the quality of your videos, making them more visually appealing.
How we evaluate different tools
We take our evaluations seriously, relying on reviews, ratings, and thorough research to assess each tool. Our approach is all about honesty and authenticity; we’re never paid for placements. Instead, we dive deep into user experiences and expert insights to bring you genuine recommendations. You can trust that our selections are based on what truly works, not on who’s paying us. Your trust matters, and we’re committed to earning it by providing real, unbiased evaluations.
Quick look at the best AI animation generators
| Producing high-quality, professional videos with ease | Free plan available, paid plans start at $9.99/month | |
| Turning long articles or scripts into engaging short videos | Free plan available, paid plans start at $19/month | |
| Converting written content into visually appealing videos | Free plan available, paid plans start at $29/month | |
| Crafting eye-catching short-form videos for social media | Free plan available, paid plans start at $19/month | |
| Generating videos featuring AI-powered virtual presenters | No free plan, paid plans start at $30/month | |
| Creating a wide range of video content for social platforms | Free plan available, paid plans start at $15/month | |
| Building marketing videos and slideshow presentations | Free plan available, paid plans start at $15/month | |
| A versatile tool for all your video creation needs | Free plan available, paid plans start at $5.99/month | |
| Editing and enhancing raw footage into polished, shareable videos | Free plan available, paid plans start at $4.99/month | |
| Comprehensive video editing and content creation for online use | Free plan available, paid plans start at $12/month | |
| Designing promotional videos and ads with ease | Free plan available, paid plans start at $16/month |
Best free AI animation generator for creating professional-quality videos
Renderforest.

Renderforest pros
- User-friendly interface that’s easy to navigate
- Powerful AI technology that generates a video from a simple idea input
- Wide variety of animated templates suitable for different types of projects
- High-quality exports available in various resolutions and formats
- Large library of music tracks and sound effects
- Customizable characters and scenes
- Cloud-based platform so you can work from anywhere
- Collaboration tools that make it easy to work with team members
- Affordable pricing options
Renderforest cons
- Advanced features require a premium subscription
- Higher-resolution exports may need a paid plan
If you want to have professional videos ready in no time without spending a fortune on them, Renderforest is possibly the best free AI animation generator you can find.
What’s best about Renderforest is the variety of templates it offers. Once you pick the template, you can choose to go with the AI flow, which gives you a professional animated video ready in just a couple of minutes. It does all the hard work by generating an outline, script, and, of course, the video itself, all of which you can customize and edit if necessary.
On top of it all, Renderforest has a very intuitive interface so that even those new to video creation can customize their projects. The video editor also includes a rich library of music and sound effects, helping you enhance your videos without needing to source audio elsewhere.
Renderforest pricing
Renderforest offers both free and premium plans. The free plan gives access to basic features, while premium plans start at $9.99 a month and unlock advanced functionalities, including higher-resolution exports and more customization options.
Best free AI animation generator for converting long-form content into short videos

Pictory pros
- User-friendly interface
- Great voice sync capabilities
- Simplifies video creation with quick and easy branding options
- Feature-rich
Pictory cons
- Limited ability to use multiple audio files and background music (BGM) for different scenes
- AI occasionally struggles with selecting appropriate stock content
- Inaccuracies in identifying specific objects or scenes within images
- Doesn’t support team collaboration
- Limited options for text-to-speech voices
Pictory is a viable option for those who want to break down their longer-form content into short animations. Using AI technology, Pictory takes the hassle out of editing by automatically creating short clips from lengthy text or videos. It also comes with great features for branding—like adding your custom logos, colors, and fonts—so your AI-powered animations always match your brand’s style.
Some of the standout features of Pictory include adding text to videos through audio and even providing automated transcription suggestions. You can use Pictory to quickly generate highlights from long webinars or other extended videos and save yourself hours of editing.
Pictory also supports bulk uploads, voice-overs, and subtitle management, making it a good choice for anyone looking to streamline their video creation process.
Pictory pricing
Pictory’s pricing starts at $25 a month for the Starter plan, $49 a month for the Professional plan, and $119 a month for the Teams plan. They also offer customized Enterprise plans and a free 14-day trial.
Best free AI animation generator for transforming text into video content

Lumen5 pros
- User-friendly, web-based platform
- Rapid text-to-video conversion
- Extensive collection of royalty-free media
- Various customization options
- Streamlined team collaboration
Lumen5 cons
- Basic editing capabilities
- Occasional glitches with beta features
- Premium plans can be pricey
- The free version includes watermarks
- Lacks color correction tools
Lumen5 is all about making video creation easy, especially if you’re not an editing expert. Just drop in your text or a URL, and Lumen5’s AI does the rest, turning your content into high-quality videos. It’s a great way to repurpose blog posts or other written content into videos with minimal effort.
What makes Lumen5 stand out as the best AI animation generator for storytellers is its simple drag-and-drop interface. You can quickly create videos that look professional without getting caught up in the details. And with access to a huge library of stock photos and videos and the ability to customize templates, it’s easy to keep your videos on-brand.
Lumen5 also offers AI-generated voiceovers in over 40 voices and multiple languages, helping your videos reach a wider audience.
Lumen pricing
Lumen5 offers pricing starting at $29 a month for basic features, increasing to $199 a month for advanced professional functionalities. A custom plan is also available for enterprise needs.
Best free AI animation generator for creating short, attention-grabbing videos

- User-friendly interface with plenty of features for the price
- High-quality templates and useful animation presets
- Integration with Shutterstock for stock media
- Background remover is currently disabled
- Some bugs can occur when working with heavy animations or scenes
- Video export and preview can be a bit buggy
- Download times tend to be slow
Offeo is the best AI animation video generator if you want to create quick yet attention-grabbing videos. This cloud-based video creation tool makes it easy to animate logos, create product videos, and prepare social media posts in different formats—square, vertical, or landscape. With a bunch of predefined templates at your fingertips, you can easily edit and personalize your designs to fit your marketing campaign.
What makes Offeo stand out is how easily it turns static projects into fun animations. You can control layers and timing, which is helpful for advertisers. The platform also allows graphic designers to mix images, remove backgrounds, and adjust colors, as well as add text, graphics, and even watermarks.
Offeo pricing
Offeo is priced at $19 a month for monthly payments and $14.08 a month when billed annually.
Best AI animation generator for creating videos with virtual presenters

Synthesia pros
- Huge library of realistic AI avatars
- Supports multilingual video creation with built-in translation
- Offers customizable templates and backgrounds
- Includes cloud-based storage for easy access to media assets
- Facilitates teamwork with collaboration features
Synthesia cons
- Limited customization of avatars beyond pre-set options
- Some users may find the AI-generated voices less natural
- Higher pricing compared to simpler video creation tools
- Dependence on AI means occasional limitations in creativity and flexibility
Synthesia is a solid choice if you’re on the hunt for the best AI animation maker to create videos with virtual presenters. Launched in 2017 by a group of AI researchers and entrepreneurs, Synthesia’s mission is to democratize video creation—by eliminating the need for costly equipment and professional skills. With Synthesia, all you need to do is type your text, and the platform’s advanced AI technology converts it into a polished video featuring virtual presenters.
In terms of features, Synthesia offers a user-friendly experience packed with tools that make video creation easier and more personalized. One of the standout features is its wide selection of AI avatars, which can deliver your content in various languages and accents.
The platform also lets you customize templates and backgrounds to match your brand’s look, guaranteeing consistency in every video. And if you’re working with a team, Synthesia’s collaboration features make it easy to share and edit projects together, streamlining the entire animation process.
Synthesia pricing Synthesia offers a Free plan with basic features, and paid plans range from $18 to $59 a month. Custom enterprise pricing is also available.
Best AI animation generator for social media and marketing content

InVideo pros
- No steep learning curve
- Effortless AI video generation from text
- Extensive stock media library with over 16 million assets
- Realistic, human-sounding voiceovers in multiple languages
- Real-time collaboration tools for team projects
InVideo cons
- Limited AI generation minutes in lower-tier plans
- Slower loading times on occasion
- Pricing may seem high to some users
InVideo is a user-friendly platform ideal for creating videos without the hassle of complicated editing. As one of the best AI animation generators , it takes your text and converts it into high-quality videos.
With its AI-driven capabilities, you can automatically generate scripts and add video clips, background music, subtitles, and transitions. The platform also features an intuitive editor, allowing you to tweak scenes or change voice accents with simple commands.
InVideo’s vast library of over 16 million stock photos and videos, combined with its realistic AI voiceovers, ensures that your videos look and sound top-notch. Plus, it supports real-time collaboration, so you and your team can work on projects together seamlessly.
InVideo pricing
InVideo offers a free plan with basic features and limited AI generation minutes. The paid plans start at $25 monthly for the Plus plan, which provides more minutes and storage. For more advanced needs, there’s the Max plan, which costs $60 a month and offers even greater access to features and resources. Both of the plans have discounts if you opt for the yearly packages.
Best AI animation generator for creating marketing videos and slideshows

Animoto pros
- Pre-built video templates tailored for various needs
- Simple drag-and-drop editor for quick video creation
- Large stock library with photos, videos, and music
- Easy sharing options on social media platforms
Animoto cons
- Limited editing features for more advanced users
- The premium version can be quite pricey
- Lacks deep customization options
Animoto is a user-friendly video creation tool that comes in handy for anyone looking to make quick videos without dealing with complicated editing processes. Its intuitive drag-and-drop editor lets you piece together a professional-looking marketing video in just minutes. The platform also comes with a large library of stock photos, videos, and music, making it easy to create high-quality animations for your social media channels.
Like many other AI animation tools on our list, it offers collaborative features that allow your team to work together on projects. In other words, it’s a solid pick if you’re searching for the best AI animation generator to streamline your video production process.
Animoto pricing
Animoto offers a free plan, with paid plans costing $16 a month, $29 a month, and $79 a month.
Best AI animation generator for all-in-one video creation

FlexClip pros
- Easy-to-use drag-and-drop interface
- Large library of royalty-free music and visuals
- Supports multiple video formats and resolutions
- Custom branding options with logos and watermarks
- Simple voice-over recording and editing tools
FlexClip cons
- It can be slow with larger files due to being cloud-based
- Template quality may not be as high as some competitors
FlexClip is among the best AI animation generators , especially for those needing a cloud-based video editing platform that can help create video content in minutes. With its drag-and-drop interface, this software lets you create videos and presentations without the need for editing experience. Its large library of royalty-free music, videos, and images lets you add a professional touch to your projects.
FlexClip supports different video formats and resolutions, so you can share your work on various platforms. You can also boost your brand visibility by adding custom logos and watermarks to your AI-powered animation videos.
FlexClip pricing
FlexClip offers a free plan to get started, while paid plans begin at $19.99 a month for monthly packages. With paid plans, you gain access to features like 1080p downloads, custom branding, and additional storage options.
Best AI animation generator for creating polished videos from raw footage

Magisto pros
- Smart editor that simplifies video creation
- Access to a vast library of stock footage
- Easy to use with templates for various occasions
- Compatible with iOS, Android, and web platforms
Magisto cons
- Occasional import glitches
- Subscription plans can be pricey
Magisto , brought to you by the well-known video-sharing platform Vimeo, is a user-friendly video editing app perfect for anyone looking to create quality content on the go. Designed for mobile devices and accessible on iOS, Android, and web platforms, it simplifies the video creation process with AI.
The platform also allows you to import clips from your device or Google Photos™ and even access licensed music tracks to set the mood for your videos. It offers templates for different occasions, like birthdays, anniversaries, and work updates, making video editing simple and fun.
Magisto pricing
Magisto’s pricing starts at $9.99 per month for the Professional plan.
Best AI animation generator for online content creation and editing

Veed.io pros
- User-friendly interface
- Quick video edits with simple tools
- Great for social media content creators
- Auto-subtitle and translation features
- Fully online, no downloads needed
Veed.io cons
- Limited advanced editing features
- Some features require a strong internet connection
Veed.io is an online video editing platform designed to simplify video creation. With its user-friendly interface, even those with little to no experience in video editing can dive right in and start creating. The platform is entirely web-based, so you can work from anywhere without downloading hefty programs and slowing down your computer.
What really sets Veed.io apart is its focus on speed and simplicity, making it perfect for social media content creators, marketers, and influencers. You can put together engaging videos in no time, thanks to features like auto-subtitles and easy editing tools for the animation creation process.
Plus, its efficient processing means that you won’t be waiting around for your projects to finish. If you’re in a rush and need a reliable tool to help you create professional-quality animations effortlessly, Veed.io is one of the best AI animation generators available.
Veed.io pricing
Veed.io offers plans starting at $19 a month for the Basic plan. Discounts for yearly payments apply.
Best AI animation generator for video ads and promos

Wave.video pros
- All-in-one platform for recording, editing, and hosting videos
- Supports live streaming with guest features
- Offers secure, password-protected video sharing
- Includes advanced tools like animated text generator and subtitler
- Easy-to-create, stylish video thumbnails
Wave.video cons
- Advanced editing features might feel overwhelming for beginners
- Limited customization options for some templates
- Pricier than some alternatives for full features
Wave.video is a versatile tool that does more than just basic video editing. It’s a comprehensive platform where you can record, edit, and even host videos, making it a great option in your search for the best AI animation video generator .
The platform has tools like an animated text generator, subtitler, and video collage maker, allowing you to transform rough cuts into polished, professional-looking clips. Plus, with its secure hosting and password-protected sharing, you can control who sees your videos. You can even create video thumbnails directly within the platform.
Wave.video pricing
Wave.video offers plans starting at $20 monthly for basic features, with more advanced packages available depending on your needs.

What is the best AI animation maker?
So, what is the best AI animation tool? While there’s no definite answer, Renderforest has the best and easiest-to-use AI technology out there. With a range of templates, access to stock footage, and various customization tools, the video maker offers everything you need to create the AI animations you have in mind. Try it out yourself, and let us know what you think.
Related reading:
- The best video editing software for YouTube in 2024
- The 9 best AI video generators of 2024
- The 16 best animation apps of 2024
Best AI animation generators FAQ
What is the best ai cartoon generator.
Renderforest is one of the best AI cartoon generators you can find. It offers a user-friendly platform for creating animated cartoons and videos with customizable templates. Users can adjust characters, scenes, and animations to bring their creative ideas to life. Renderforest’s versatility makes it a top choice for both beginners and professionals looking to create animations without advanced technical skills.
What is the most popular AI anime generator?
The most popular AI anime generator is arguably Waifu Labs. It allows users to create custom anime characters by adjusting various features such as hair, eyes, and clothing. You also have Artbreeder, which combines different artworks to create unique anime-style images, and DeepAI’s Anime Style Transfer, which can transform photos into anime art. For regular cartoons and animations, Renderforest offers a range of templates you can work with.
Dive into our Forestblog of exclusive interviews, handy tutorials and interesting articles published every week!

How to make an AI animation in 4 steps
13 min read
05 Sep 2024

11 best examples of product videos

13 great examples of corporate videos
IMAGES
VIDEO
COMMENTS
Step 1 Create your presentation, then click the dropdown icon next to Present and select Presenter Studio to get started. Step 2 If you choose to record video, you can move your talking head around the screen and adjust the size. Click Advanced Settings for more. Step 3 Input presenter notes to help keep you on track while recording.
Presentation Recorder - Record & Share Your Presentations
VEED is a complete browser-based tool that lets you do so much more than just record and share your Microsoft PowerPoint presentations. You can annotate your videos to make your presentation more informative. Edit your recording to add images, subtitles, and more. It is a professional all-in-one video-creation and editing software that's ...
5 Powtoon. Powtoon has long been a favorite for creating video presentations, especially explainer videos. Their animated and whiteboard explainers have been around for a while. Now the software has a lot more creative options for making video presentations in five main styles with lots of templates in each.
4. Camtasia. Camtasia - image via Camtasia. Camtasia is an all-in-one video presentation recording software. You can record your screen, add voice-overs, notes, plus customise your video with pre-made templates. Camtasia pitches itself at people making video presentations for educators, trainers, and marketers.
Instantly record video messages, narrate presentations, and create product demos for free using Prezi Video. With brand kits and professionally-designed templates to help get you started, it's never been easier to record video. Let's talk! 1-844-773-9449. 8:30 am-5 pm PST. Trusted by business both large and small.
Icecream Screen Recorder is ideal when you don't need the the hefty feature sets of the likes of Camtasia or OBS Studio. This screen capture software, available on Windows and Mac, is a more ...
Showcase reviews: BuzzBlogger, RazorSocial (Online), SnappApp. 5) ScreenFlow. Google Review Count: 182. Record any portion of your screen or a video camera, iOS device, microphone or computer audio. Edit the recording to add images, text, music, animations, and transitions.
Step 3: Configure recording settings. With the Video Recording toolbar, you can set options like Cursor Capture and Effects, System Audio, and Webcam. If your webcam isn't showing, click on the webcam icon. If you have an external webcam, select the one you want to use by clicking the dropdown arrow next to the webcam icon.
Flixier is a powerful presentation recording tool that lets you capture screens and speeches without having to download any third-party software. Choose from different recording layouts and record effortlessly. Make cuts, tweaks, and adjustments, and add annotations to your presentation without leaving your web browser.
How to record a presentation with Pitch. Creating a video presentation with Pitch is easy. Just sign up for free, and then click on Record to add a recording block to your slide. Press Start ...
Record your presentation
Microsoft offers basic tools to start recording your PowerPoint presentation. Here's a quick step-by-step guide to recording a simple presentation: Step 1: From PowerPoint, open the slide with which you want to start your presentation. Step 2: Select Record from the upper right hand corner of the PowerPoint window.
Loom: Free screen recorder for Mac and PC
Start Free. ScreenApp is a powerful video platform that enables you to record your presentations, transcribe your videos, and easily search and summarise your content. With ScreenApp, you can create engaging and informative presentations that are easy to share and collaborate on. Try ScreenApp today and take your presentations to the next level!
The Loom Free Screen Recorder
Instantly capture and narrate presentations, demonstrations, lectures, and how-tos for free using Panopto Express, your great and fast online video recorder. This powerful and user-friendly tool is designed to meet the needs of educators, professionals, and students alike, providing an efficient way to create and share high-quality video content.
Step 3: Open Your PowerPoint Slides and Capture the Screen. Open your PowerPoint presentation and put it in "Slide Show" mode. With Panopto Express, you'll have two options for recording your slides: You can either record your slides by recording your screen or by recording the slides within the PowerPoint application.
The Best Presentation Software
Near the upper right corner of the PowerPoint window, select Record. Choose from two options. When you're ready, select the round, red Record button, wait for the countdown, then start speaking. To record from a specific slide, go to it, and then select Record. Note: Narration isn't recorded while the transition between slides happens, so pause ...
How to record a presentation. Learning how to record a presentation the right way can seem like a daunting task. Fortunately, with the right presentation recording tools on hand, and plenty of practice, you can produce an amazing piece of content in no time. Follow the tips above carefully and remember to take your time with your presentation.
Recording a presentation can seem like a daunting task, but with the right tools and a little practice, anyone can do it. Whether you're using PowerPoint or Google Slides, a screen recorder or a webcam, or creating voiceovers with Speechify, the key is to plan ahead, practice, and keep your audience in mind.
2. Configure settings. Go to "Settings" to set recording preferences.In "Video", choose the desired output quality and format.Make sure the toggles next to "Record mouse movements" and "Animate mouse clicks" are enabled if needed.In the "Audio" tab, adjust the sound levels and select the desired input devices.3. Record your presentation. Click the "Capture video" option in the side menu and ...
Whether you are a content creator, gamer, educator, or someone who needs to demonstrate software applications, having a reliable screen recorder for Windows is essential. Screen recording software allows you to capture your screen activities, create tutorials, record gameplay, or even conduct presentations with ease. The ability to record your screen in high quality with […]
While the built-in tools in Windows 11 do a pretty solid job of screen recording for most people, there are a lot of third-party apps that take screen recording to new heights. One popular option ...
Now, in this quick video, I'd like to show you a few things on how you can record lectures or presentations for remote teaching. And I will especially go into the technical details, so the hardware and the software that you could use for this purpose. ... So, the next thing I'll show you is how to record a lecture in open broadcaster software ...
Learn more about the core of new Teams and distinct solutions "New Teams Productivity presented by Ease and Speed" presented by Kay Davis, Principal Design Manager, Chandra Chivukula, Partner Director of Engineering, and Aarthi Natarajan, Corporate Vice President of Engineering.In this session you'll learn all about new Teams, including the new simpler UI and greatly improved performance.
Screen recording: Capturing both your webcam and screen at the same time adds context to explanations, tutorials, and presentations. High-quality video: ... if applicable. Some webcam recording tools may help you write AI-generated video titles and summaries, which can speed up your editing process and get your video ready to share more quickly.
Podcastle - B est intuitive and beginner-friendly audio recording software. If you are looking for an all-in-one platform you should come down in favor of Podcastle. It's one of the best audio recording software options available, and here's why: you can record, edit, export, and even host your show without ever leaving the software, all while achieving the studio-quality sound everyone ...
Simple voice-over recording and editing tools . FlexClip cons. It can be slow with larger files due to being cloud-based; ... With its drag-and-drop interface, this software lets you create videos and presentations without the need for editing experience. Its large library of royalty-free music, videos, and images lets you add a professional ...